

|
|
|
|
 |

|
 |
BMW Garage | BMW Meets | Register | Today's Posts | Search |
 |

|
BMW 3-Series (E90 E92) Forum
>
DIY - E70 X5d DPF Delete (Good Reference for 335d)
|
 |
| 09-23-2016, 08:38 AM | #1 |
|
Captain
 329
Rep 984
Posts |
DIY - E70 X5d DPF Delete (Good Reference for 335d)
While there are a number of similarities between the 335d and the X5d when it comes to removing the DPF, they are different chassis' and the X5 is AWD which means a whole lot more going on up front. End result: DPF on the X5 is more of a pain. So here's a quick DIY detailing the steps to get it out. This can also be used as a reference on how to do it on the 335d as well!
1) Remove the front undershields (#1, #21, #6, and #9). Just a bunch of 8mm and 10mm nuts and bolts.  2) Remove the front bash plate (#3). Six 16mm? bolts. 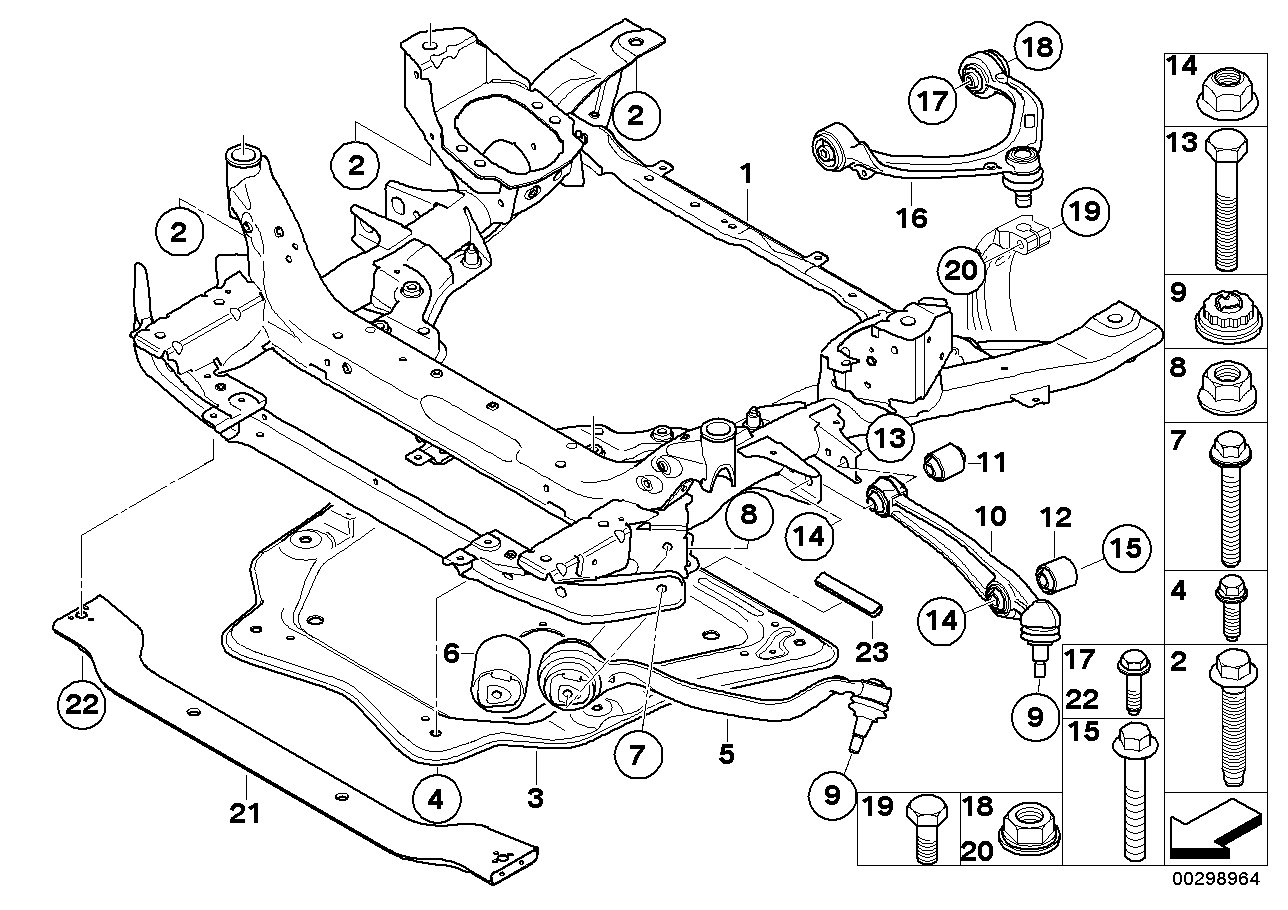 3) Remove the exhaust. Front Section: First you need to disconnect the exhaust clamp holding the exhaust onto the DPF (19mm?) (#3) Next, you need to disconnect the SCR Nozzle (5mm? Allen holding V-Band) (#14) At this point, I just unplugged the EGT sensor and the NOX Sensors. Finally, remove the two 13mm nuts holding the exhaust hanger on. (#9).  Rear Section: Pop off the exhaust hanger towards the front using a Pry bar or the like (#4) Pro Tip: Lubricate it with some glass cleaner. The rear exhaust hangers (#8) have 13mm nuts holding them on. 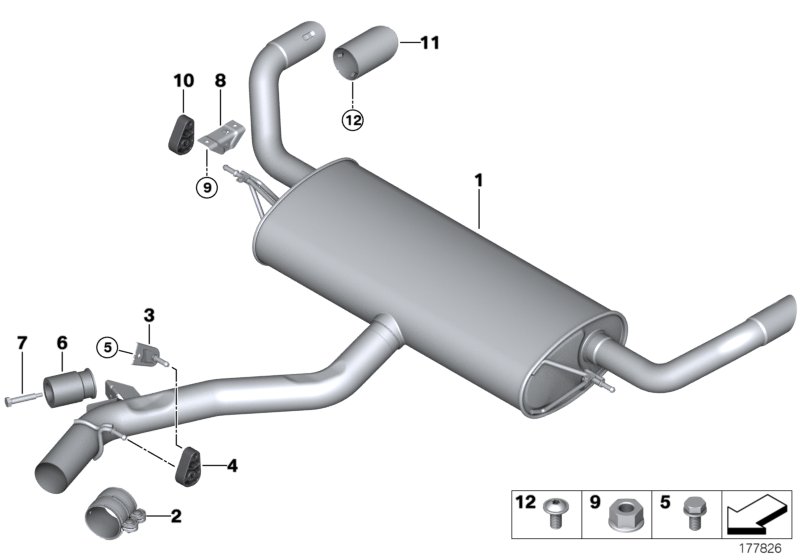 To actually drop the exhaust, you have to articulate the front section at a downward angle and then slide the whole exhaust forward and out. Much easier if you have two people. 4) At this point we can start working on the DPF. First, I recommend getting the two 13mm nuts holding the DPF in place off. Remove the two nuts (#7) and the bracket (#6). The front nut is easy to get at, the rear one requires a u-joint and some moving about. 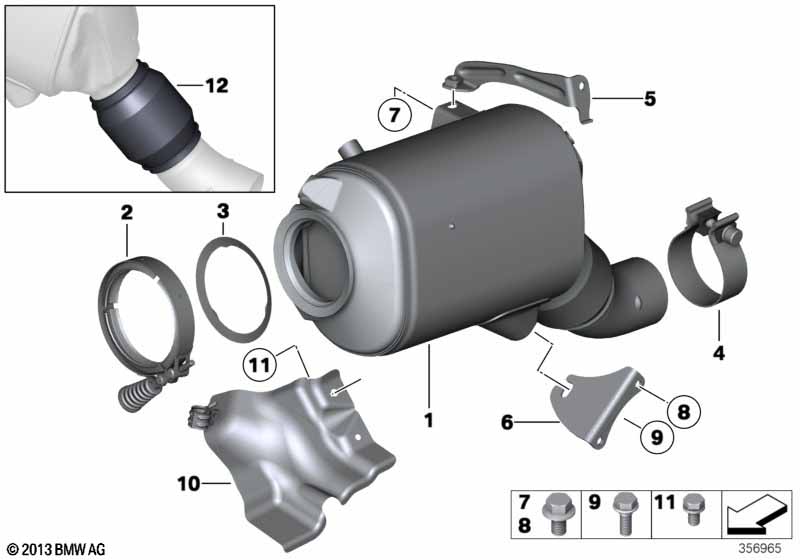 5) Next step I recommend removing the EGR Cooler from the DPF. It is held on by two E10 bolts, two 13mm bolts, and a V-Band (5mm Allen) (#16,#17, and #18). These can all be accessed from the bottom of the car except for the top 13mm bolt. 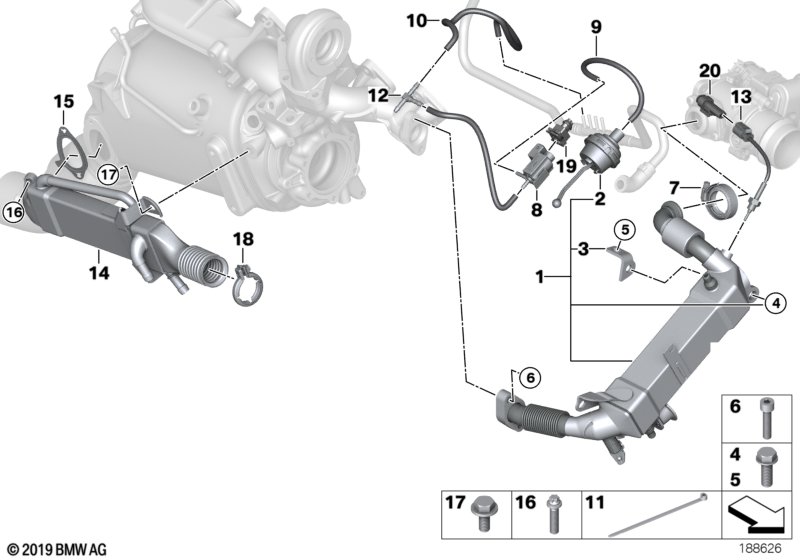 6) Now you have good access to the motor mount and the motor mount arm. The motor mount is held in by two E12 bolts on the sides of the top, and an 18mm nut on the top (#5 and #6). Also don't forget to remove the vacuum line off the bottom. The bottom bolts are easy to get at, the top one can be very difficult. That is why we removed the EGR cooler so you could have good access. Once it's loose, use a jack and a block of wood on the bottom of the oil pan/the right side axle assembly to push the motor up. You will have JUST enough room to articulate the motor mount out of the subframe. **You may need to drop the subframe and/or loosen the motor mount arm at this point to have enough room to get the motor mount itself out.** 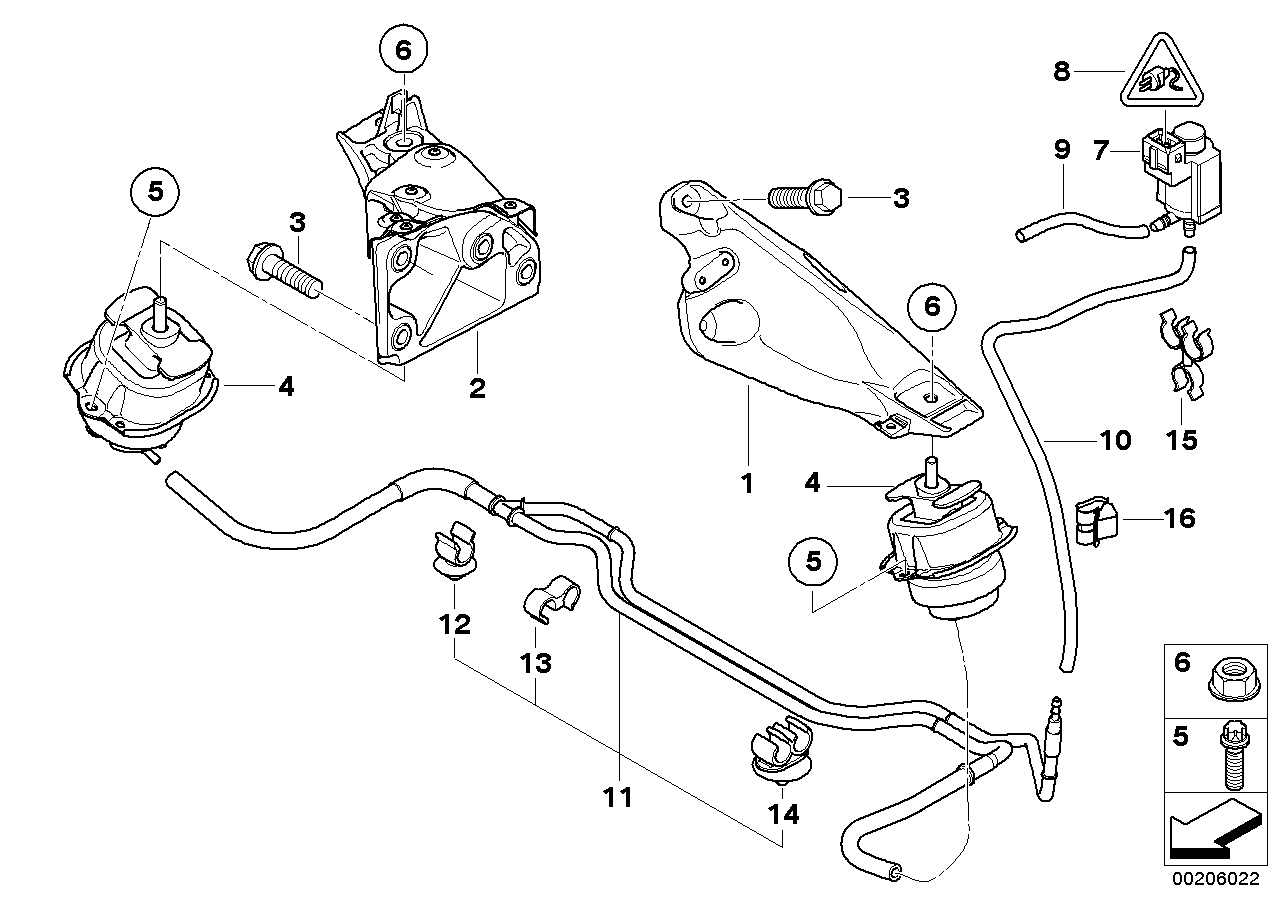 7) Next we need to remove the motor mount arm. It is held in by four 16mm bolts. The rear one is super easy to get at, the front two are fairly obvious. The one in the top middle section is a pain. You actually want to get that one from the side just above the axle. You will also want to remove the lower plastic subframe cover at this point for better access. #9 in the diagram. 8mm Bolts and some pop-rivet plastic nuts. 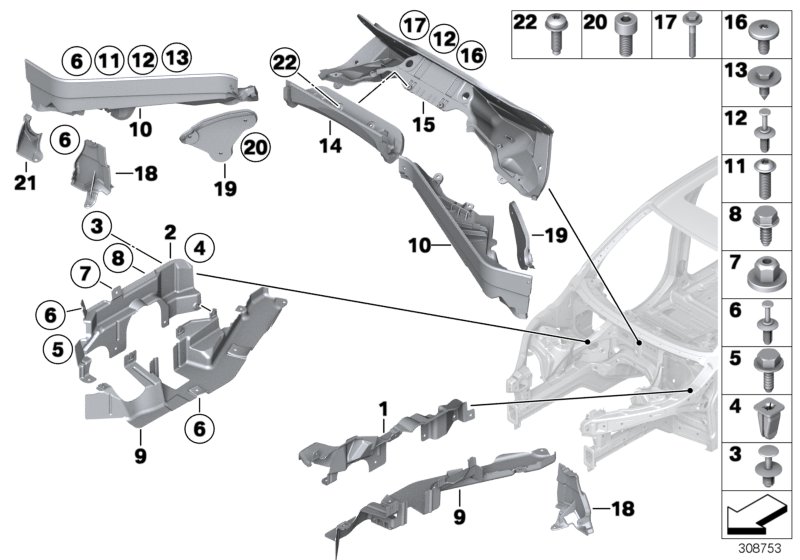 Once you wrestle these four bolts out, the rest is easy. Pull the motor mount out of the car. 10) Now you have ample space to work with and the DPF is almost ready to go. Next step is to loosen the V-Band clamp holding the DPF onto the Turbo (#3). It is an E10 nut that you just back right off. Don't worry if the gasket falls down (it probably will). 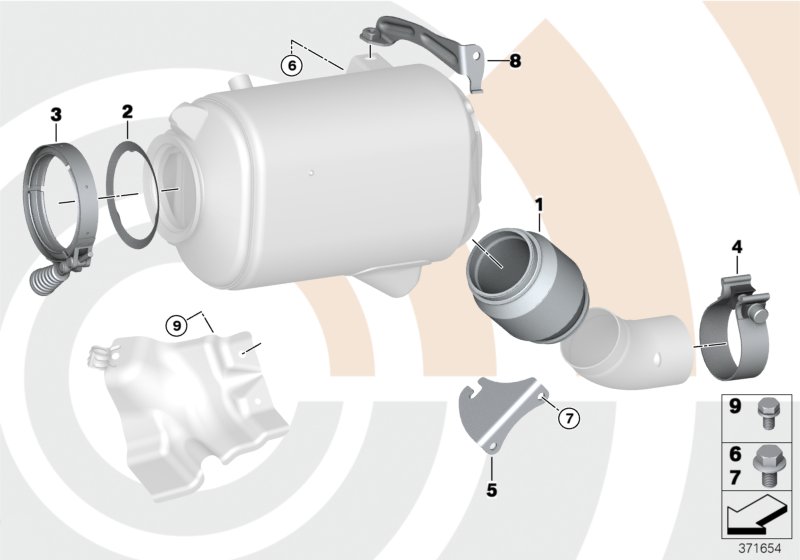 Last, remove the vacuum lines from the top of the DPF. Or just cut them off. 11) Finally, you can pull the DPF out. But first, you are going to want to drop the subframe a few inches (if you haven't already). Loosen the three bolts on the right side of the subframe (21mm) until they are holding on by 1/4 of the threads. Just don't drop the subframe on yourself please. For a little additional space, you can also loosen the subframe bolts on the left side a few turns (#2) It still isn't going to be easy. It won't drop out. You need to wrestle the thing out of there. Have fun! Once the old DPF is out, give yourself a pat on the back! Next, you want to save the Oxygen Sensor and the 1st EGT Sensor. Remove them from the DPF (22mm and 14mm) and install into your new DPF. 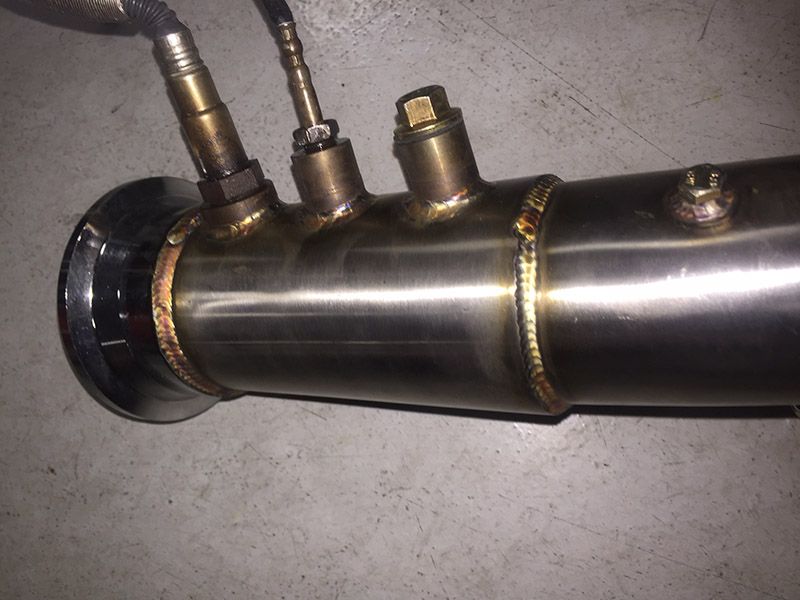 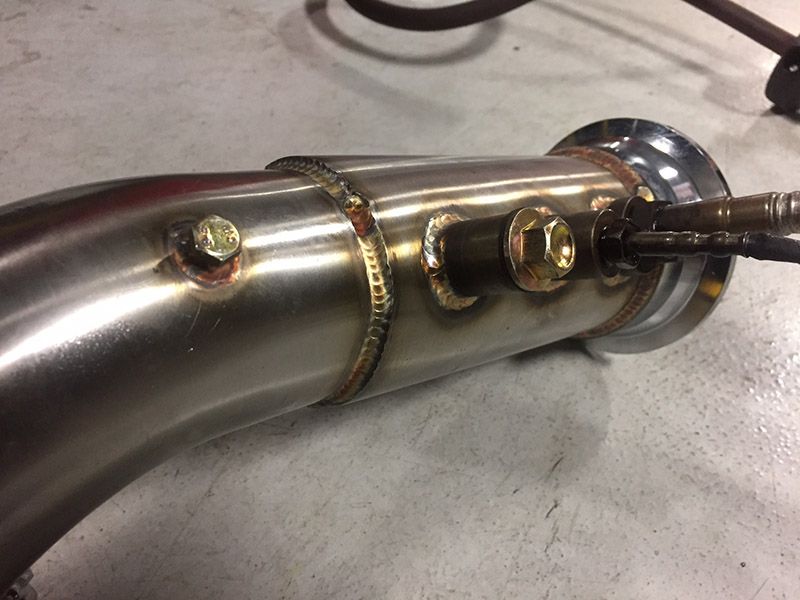 Next, you want to delete the EGR cooler that was attached to the DPF. This requires some modifications. First, you want to remove the coolant lines going to the EGR (be aware you really, really want to use vise grips or something to clamp these lines or all of your coolant will pour all over you). Then, I looped one of the lines to where the other line had come off of. 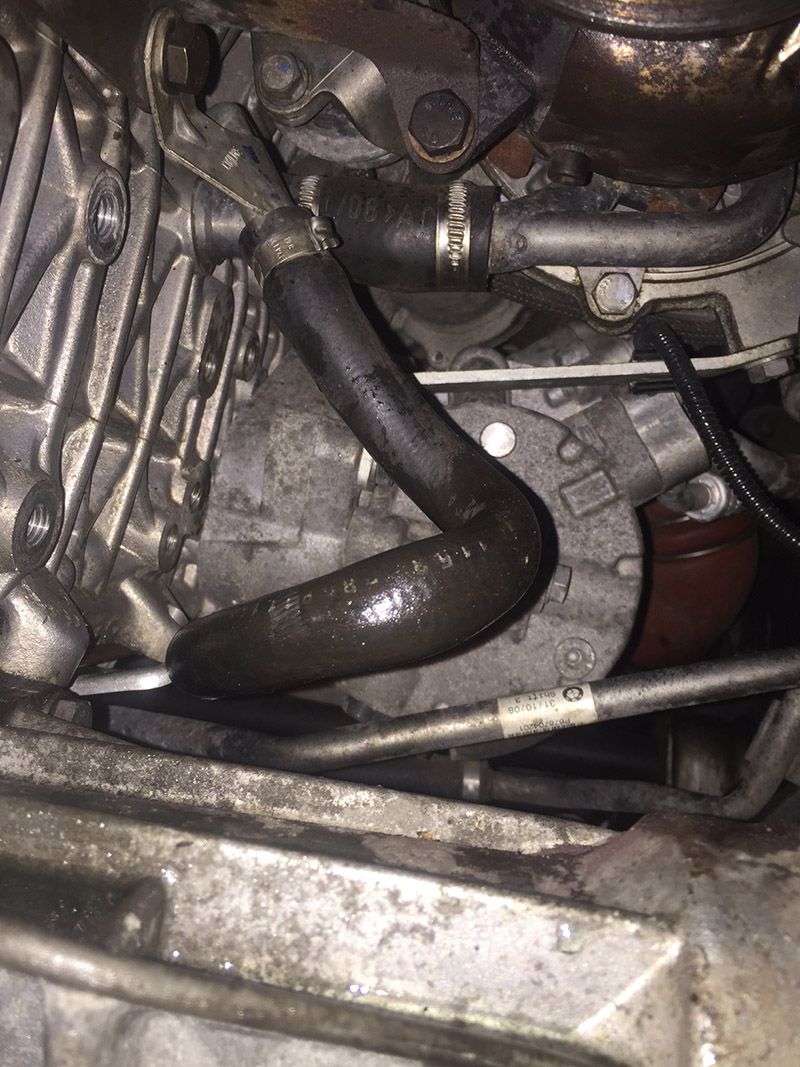 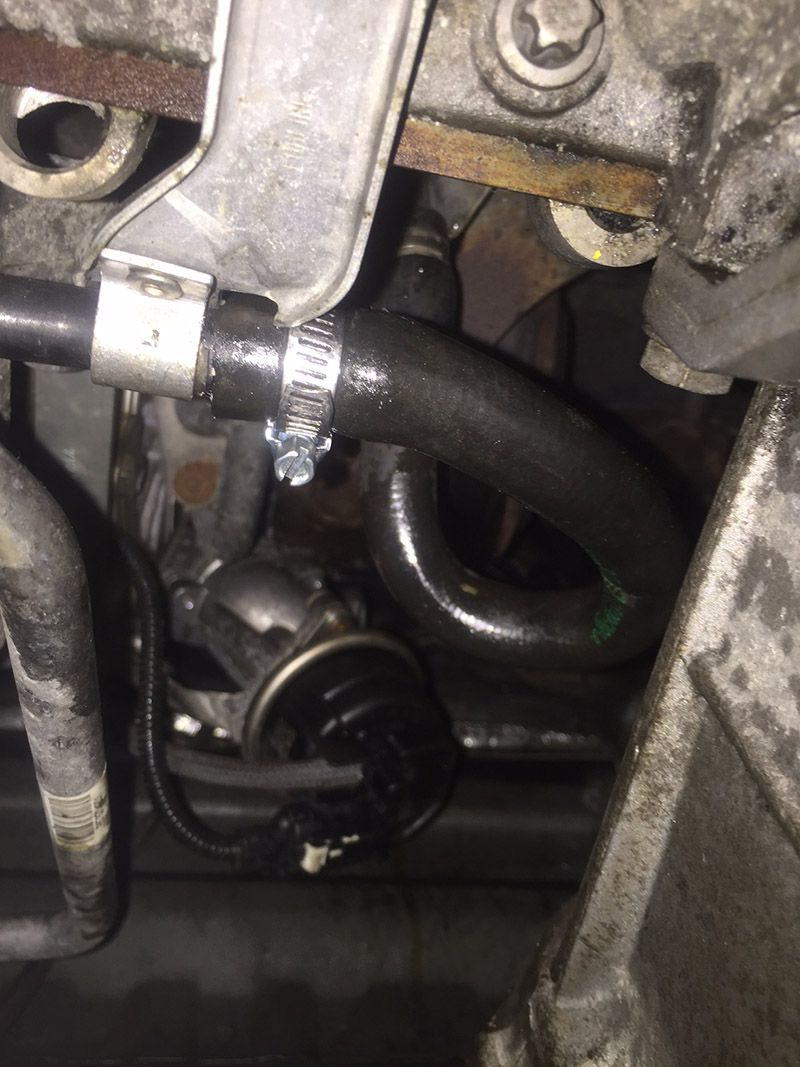 Finally, you want to create a block off plate from where the EGR connected to the Turbo. Bolt it on to PM me if you are interested in purchasing one, my friend made it from aluminum. 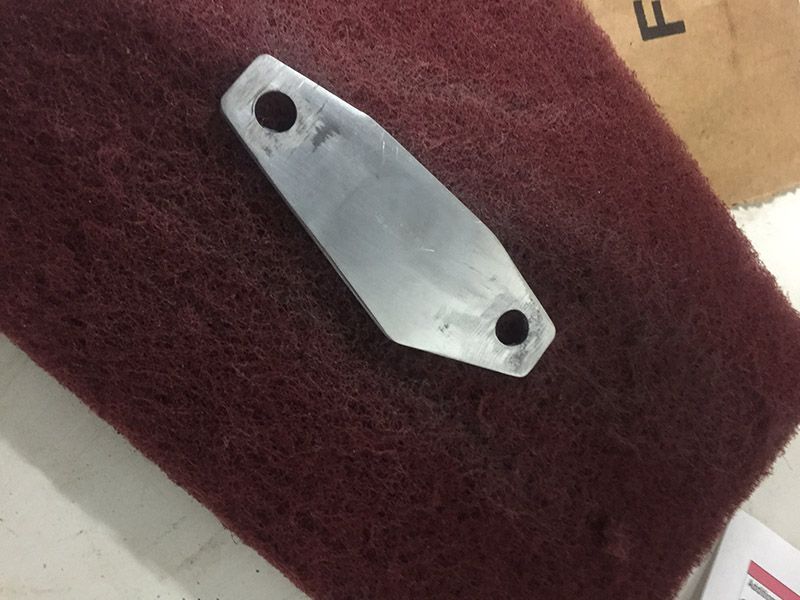 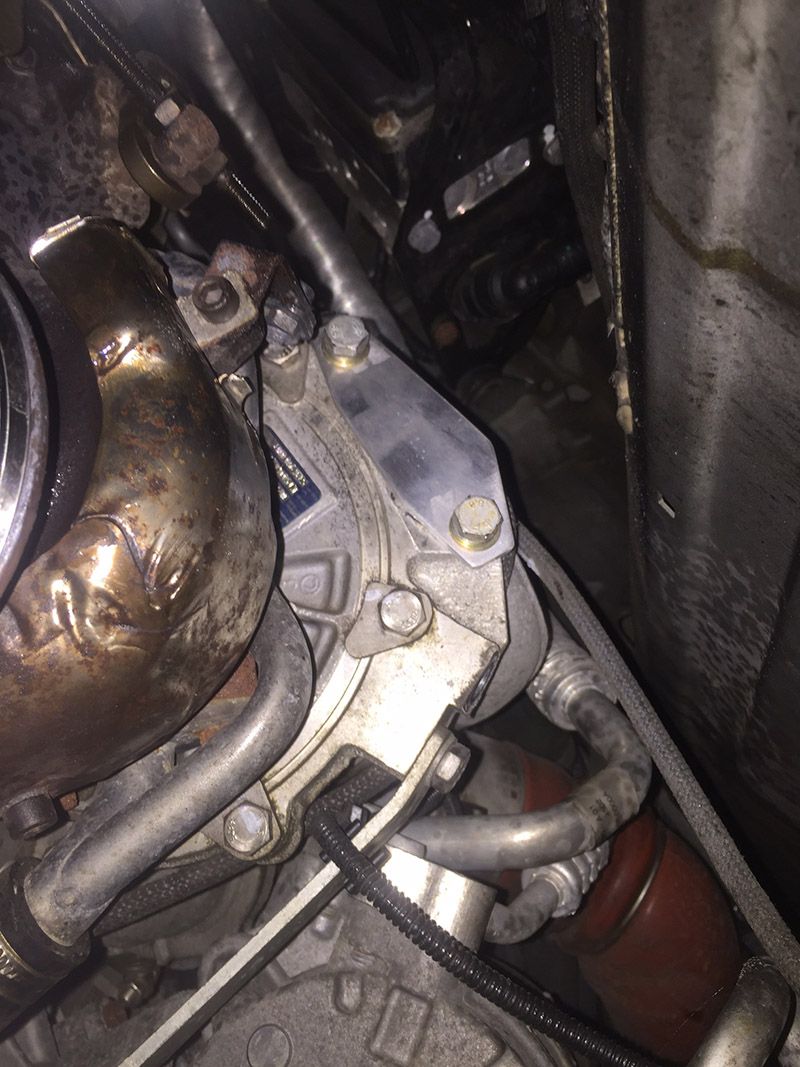 I did see in another thread that they recommend drilling out the wastegate outlet to a larger diameter hole to prevent "overboosting". I bought a 15mm drill bit to do this, but ultimately decided it wasn't worth potentially damaging the wastegate system in the process. Also, I was pretty tired at this point. So I forgoed doing for now. To install the new downpipe onto the car, you first want to install your new gasket. I used a copper anti-seize on the turbo outlet and pushed the gasket over onto the turbo. Then I put some anti-seize on the new DPF and pushed them together. You may want a friend to hold it while you articulate the V-Band over the turbo and put it back on. Tighten it down but leave it a little loose for now. If your downpipe has a bracket to attach to the stock DPF bracket location, re-install the bracket we removed earlier (two E10 bolts) and bolt the downpipe bracket on. At this point, you can fully tighten the V-Band clamp. I'll continue to update this as I go.
__________________
2009 X5d | 2007 E90 Track | 2002 M3 Track | 1991 535i Track
Last edited by MasterC17; 09-24-2016 at 09:10 AM.. |
| 09-23-2016, 11:29 AM | #2 | |
|
Banned
389
Rep 1,623
Posts |
Quote:
|
|
|
Appreciate
0
|
| 09-24-2016, 08:16 AM | #3 |
|
Captain
329
Rep 984
Posts |
Small update with some additional information.
__________________
2009 X5d | 2007 E90 Track | 2002 M3 Track | 1991 535i Track
|
|
Appreciate
0
|
| 09-24-2016, 03:03 PM | #4 |
|
Brigadier General
 764
Rep 3,556
Posts |
I believe popular wisdom is now NOT to open the waste gate bore larger. Also, take it from me. Do not use a twist drill bit to open up the waste gate. Only use straight flute reamers. I followed another guys advise and got 4 of them in 1/32 increments and ending at 9/16"(.5625"). 15 mm is ~.59". You would had a rough time jumping up that far and no increments. It's a job since the waste gate linkage has to be disconnected, floor of exit has to be ground to get waste gate to lay down far enough. And that's before you ream the bore. It was likely a blessing you skipped this.
Perhaps it's me but I put all the sensors back into down pipe after its in place but this is on 335d. Maybe access to install these is harder on the X5. |
|
Appreciate
0
|
| 09-24-2016, 08:45 PM | #7 | |
|
Enlisted Member
 6
Rep 46
Posts |
Quote:
|
|
|
Appreciate
0
|
| 09-24-2016, 09:29 PM | #8 | |
|
Brigadier General
764
Rep 3,556
Posts |
Quote:
|
|
|
Appreciate
0
|
| 09-24-2016, 11:14 PM | #10 | |
|
Banned
2123
Rep 3,368
Posts |
Quote:
|
|
|
Appreciate
0
|
| 09-26-2016, 10:32 AM | #12 | |
|
Colonel
 213
Rep 2,210
Posts |
Quote:
|
|
|
Appreciate
0
|
| 09-26-2016, 04:16 PM | #13 |
|
Brigadier General
764
Rep 3,556
Posts |
I've been in there twice. Both times I had to pull the engine bracket. I have techniques now that it's pretty straight forward. Wrenching on jack stands in a garage is a far cry from my college days in a gravel driveway. Never mind that it was a POS 75' VW scirocco. I learned a lot back then and it makes me appreciate good tools (and wisdom). Wisdom is my hair color now.
|
|
Appreciate
0
|
| 10-02-2016, 09:25 AM | #15 | |
|
Captain
329
Rep 984
Posts |
Quote:
__________________
2009 X5d | 2007 E90 Track | 2002 M3 Track | 1991 535i Track
|
|
|
Appreciate
0
|
| 12-08-2016, 04:31 PM | #16 |
|
New Member
0
Rep 12
Posts |
A greatly appreciate the how-to before I may embark on this modification myself. I was quoted almost 20 hours labor to replace a $40 turbo oil supply pipe and am investigating upgrades at the same time if I decide to perform the work myself.
By the sounds of it, this can be a DIY job in a garage with only jack stands and basic tools? If so, how many hours is it taking people who have decent mechanical inclination? ISTA+ mentions the use of various special BMW tools, I take these are not needed? Also, Has anyone incorporated this modification with a Stage 2 or 3 tune with new hybrid turbos? This last question may best belong in a separate thread.... |
|
Appreciate
0
|
| 12-08-2016, 09:16 PM | #17 | |
|
Major
 
321
Rep 1,157
Posts |
Quote:
|
|
|
Appreciate
0
|
| 10-15-2017, 10:35 AM | #18 |
|
Enlisted Member
24
Rep 33
Posts
Drives: 20 M2C, 12 X5d
Join Date: Jan 2013
Location: Oregon
iTrader: (0)
Garage List 2020 BMW M2 Competi ... [0.00]
2000 BMW M Roadster [0.00] 2015 Porsche 911 Ca ... [0.00] 2005 Porsche Cayenne [0.00] 2012 BMW X5d [0.00] 1987 Porsche 911 [0.00] |
4th motor mount bolt?
How exactly do you get to the 4th motor mount arm bolt? I can't even see it? Do I need to remove the heat shield between the DPF and the arm, and if so, how do I do that?
|
|
Appreciate
0
|
| 10-15-2017, 11:03 AM | #19 | |
|
Banned
389
Rep 1,623
Posts |
You just need to feel up there and put a socket on it.
Quote:
|
|
|
Appreciate
0
|
| 10-15-2017, 05:19 PM | #20 |
|
Enlisted Member
24
Rep 33
Posts
Drives: 20 M2C, 12 X5d
Join Date: Jan 2013
Location: Oregon
iTrader: (0)
Garage List 2020 BMW M2 Competi ... [0.00]
2000 BMW M Roadster [0.00] 2015 Porsche 911 Ca ... [0.00] 2005 Porsche Cayenne [0.00] 2012 BMW X5d [0.00] 1987 Porsche 911 [0.00] |
Nevermind. Standard 3/8 drive 16mm on a 3in extension, on a 1/5 inch extension and presto. Getting the DPF was still ridiculous. The subframe doesn't exactly drop. I was able to get about an inch with a pry bar. Had to spin the DPF upside down and sawzall off the stainless lines. Then removed the lower sensor and it came right out. If I had to plans to reuse the DPF, I would have been screwed.
|
|
Appreciate
0
|
| 10-25-2017, 07:54 AM | #21 | |
|
Captain
329
Rep 984
Posts |
Quote:
The 335d is much easier!
__________________
2009 X5d | 2007 E90 Track | 2002 M3 Track | 1991 535i Track
|
|
|
Appreciate
0
|
 |
| Bookmarks |
|
|


