|
|
|
|
 |

|
 |
BMW Garage | BMW Meets | Register | Today's Posts | Search |
 |

|
BMW 3-Series (E90 E92) Forum
>
It's under the knife!!.....I EXCITE!
|
 |
| 01-19-2010, 02:45 PM | #89 |
|
Major General
 2052
Rep 6,112
Posts |
What a project!
__________________
When you say impact instead of affect/effect, you are communicating that you don't understand the difference between the two words, and are too lazy to learn.
|
|
Appreciate
0
|
| 01-19-2010, 03:13 PM | #91 |
|
Former N54 Fanatic
84
Rep 1,927
Posts
Drives: Slow
Join Date: Nov 2009
Location: NoVA
|
This is Matt trying to install his new turbine.
 Eh, same thing. You forgot to share the best picture! 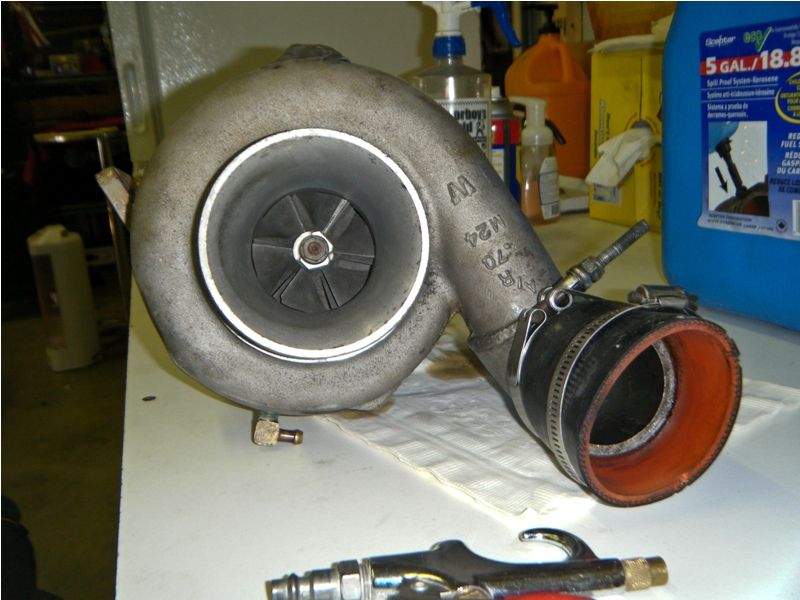
__________________
|
|
Appreciate
0
|
| 01-20-2010, 12:29 AM | #92 |
|
Lieutenant General
656
Rep 10,587
Posts |
got the head off tonight w Ryan's help. Not sure it would have happened w/ out him there!
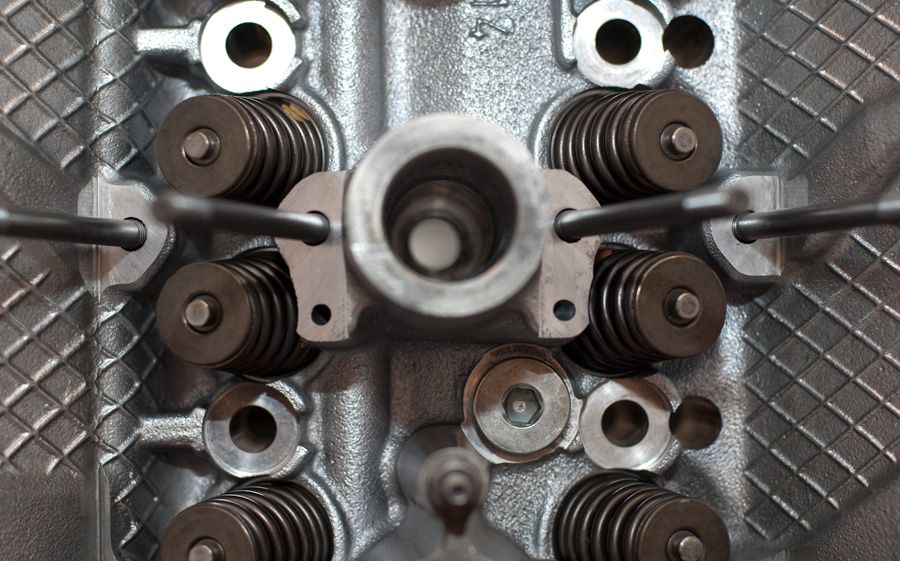
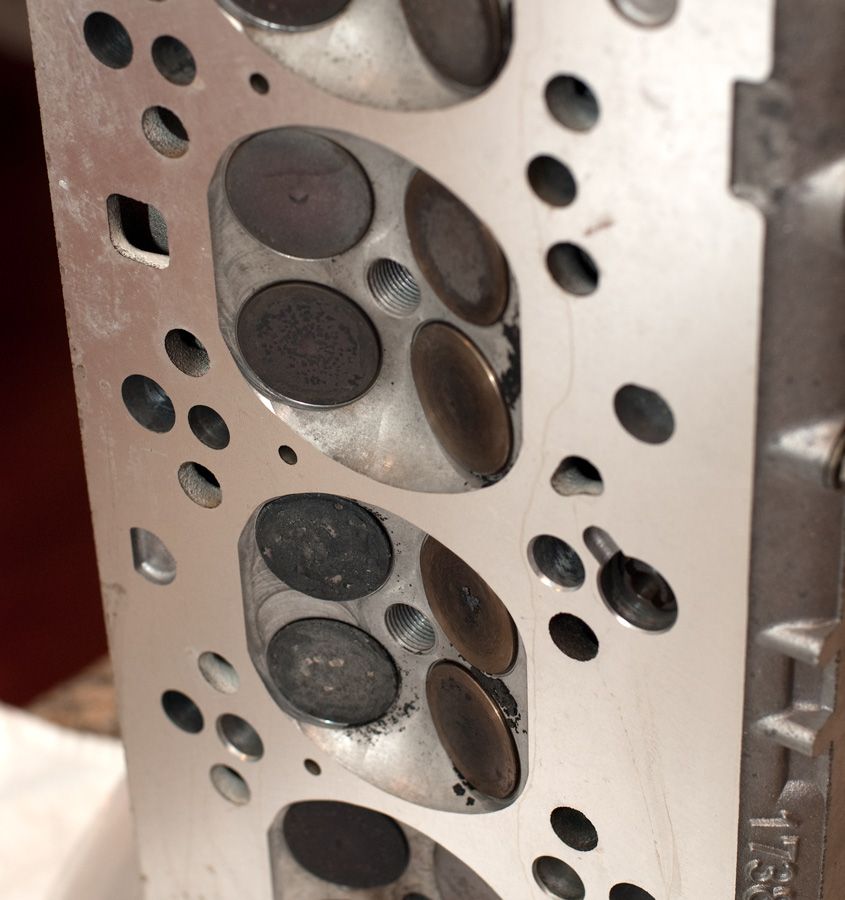
my impressions, not an easy job for sure, lot of little delicate parts that could be broken for sure. Need to keep all the bolts, nuts, etc organized during the job so you know where they go for reassembly. tranny is out, Ryan is taking it to work tomorrow to redo the shift pins...he rocks. clutch 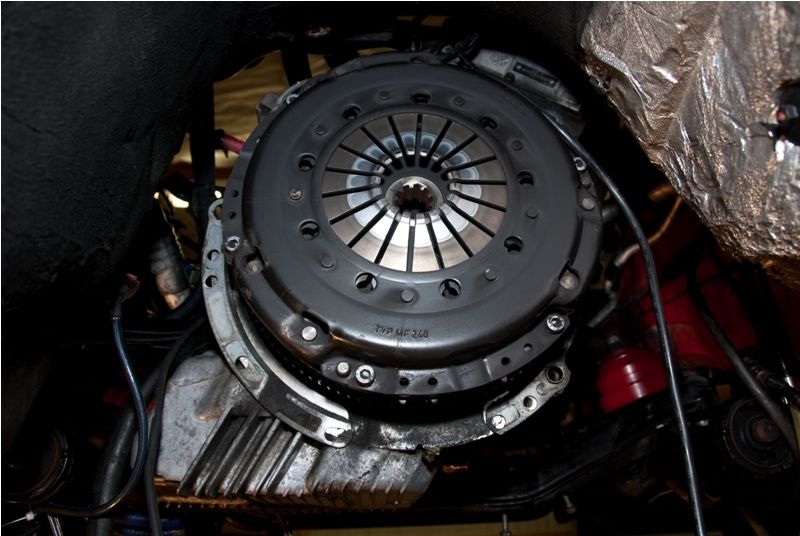 vanos cover coming off 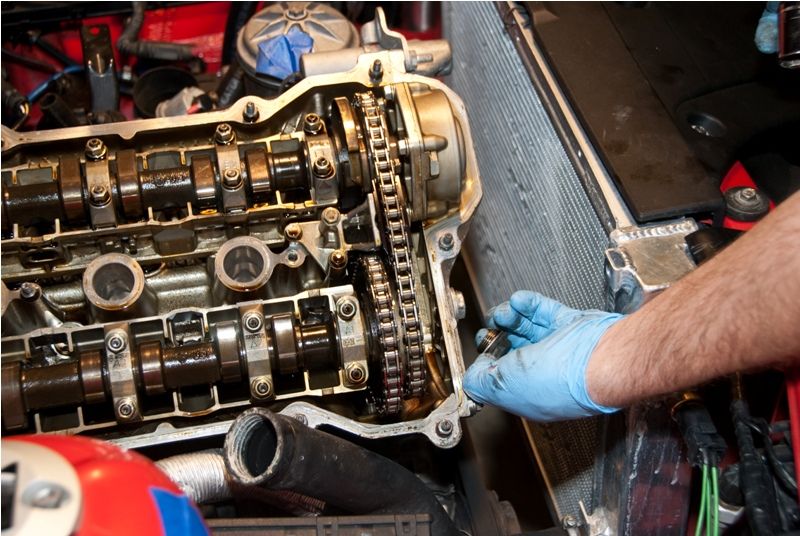 our BMW special tool part #029494nail 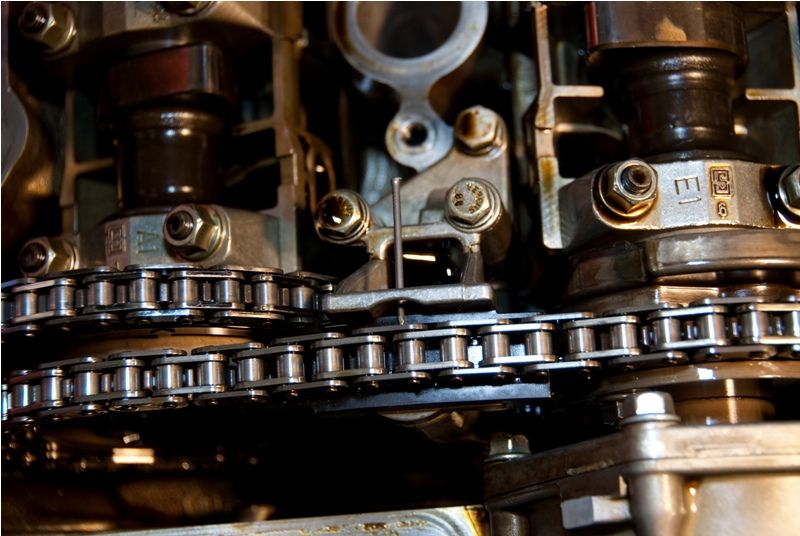 cam chains 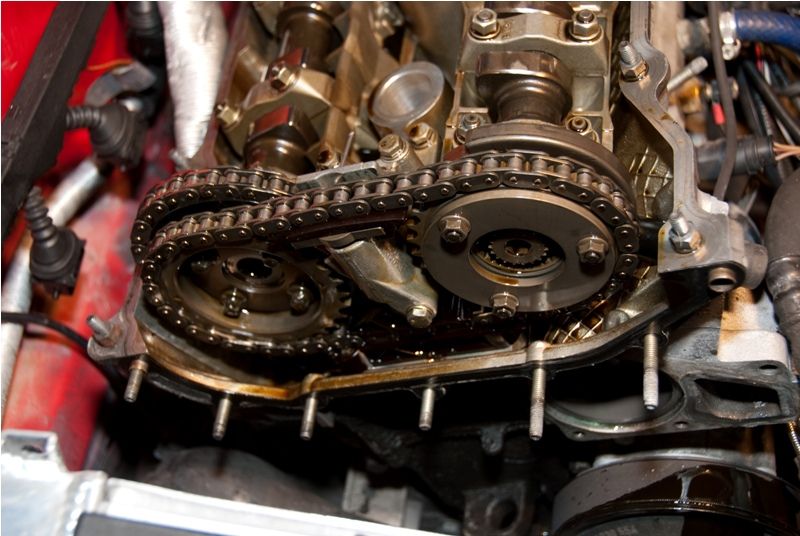 coming off 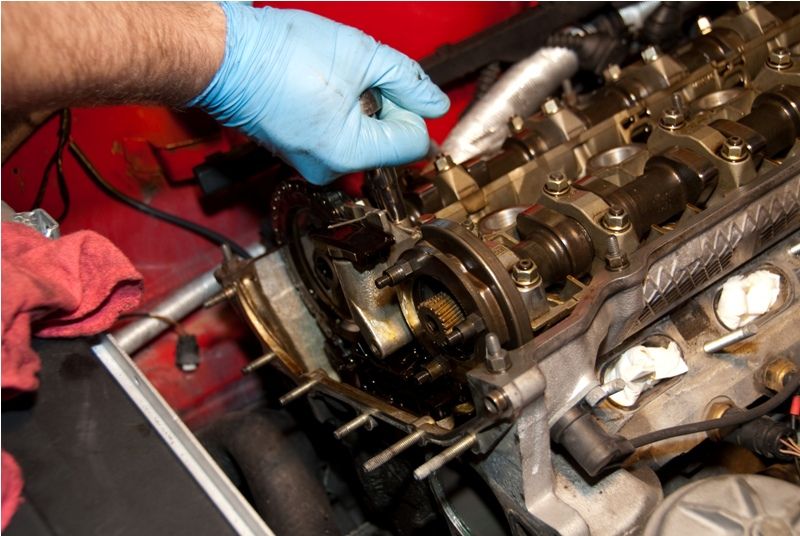 honestly the chains, sprockets, and tensioners were the only confusing part of removing the head, but you dont want to f them up! cams coming out 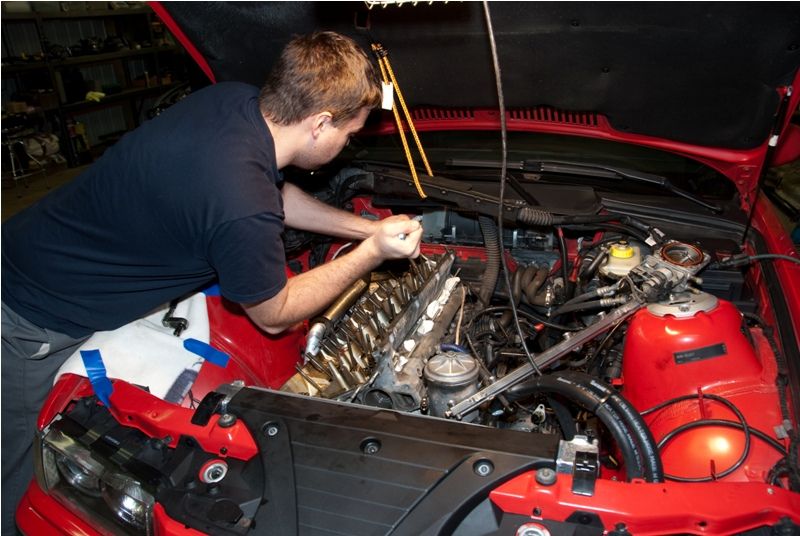 bare head 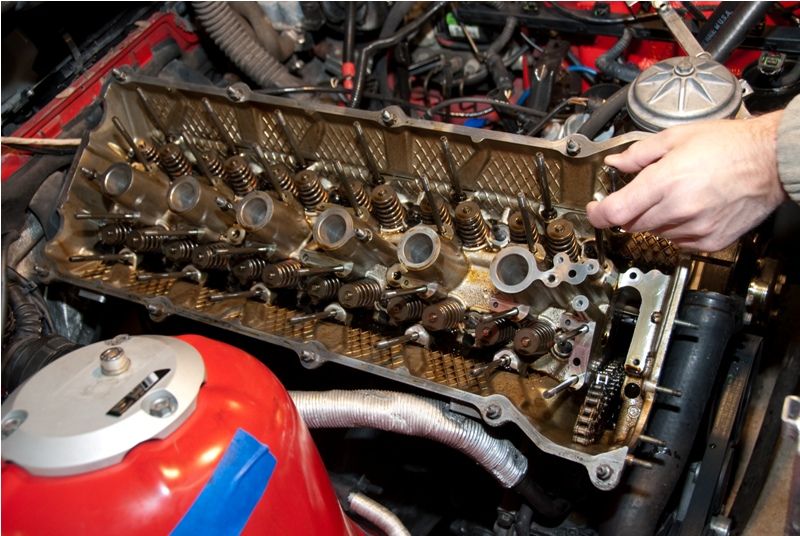 all cylinders how we found them 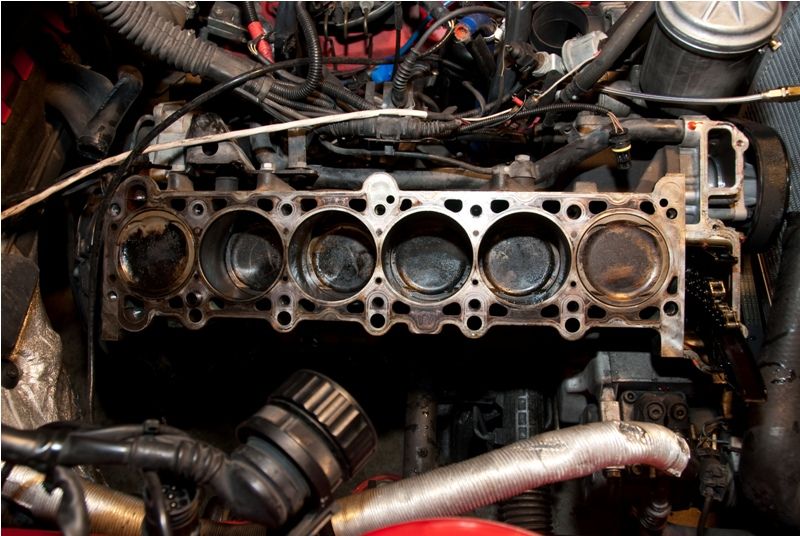 Cyl 1 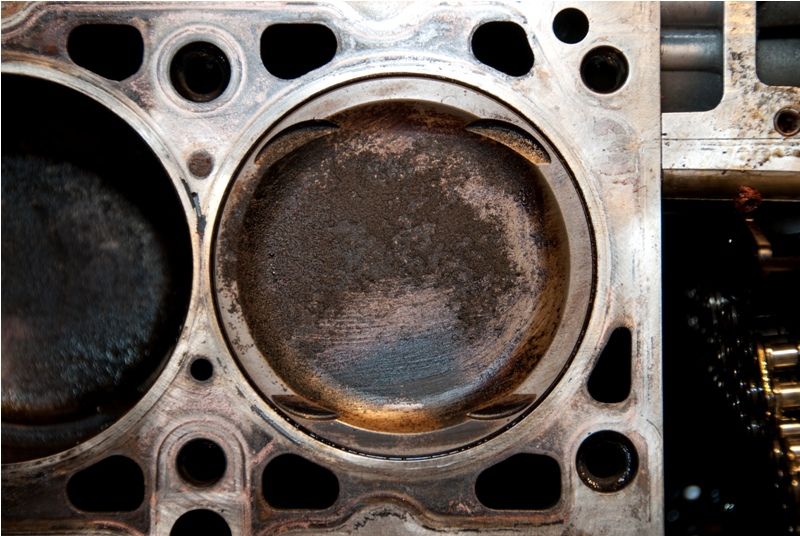 Cyl 2 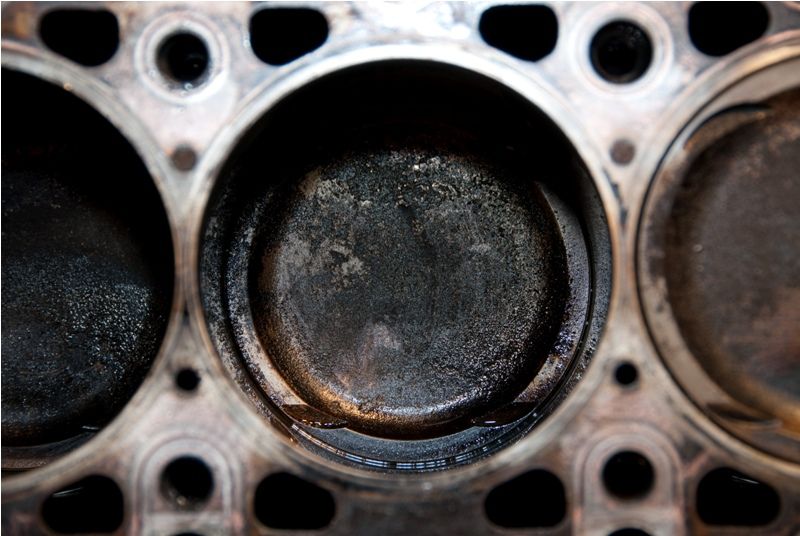 Cyl 3 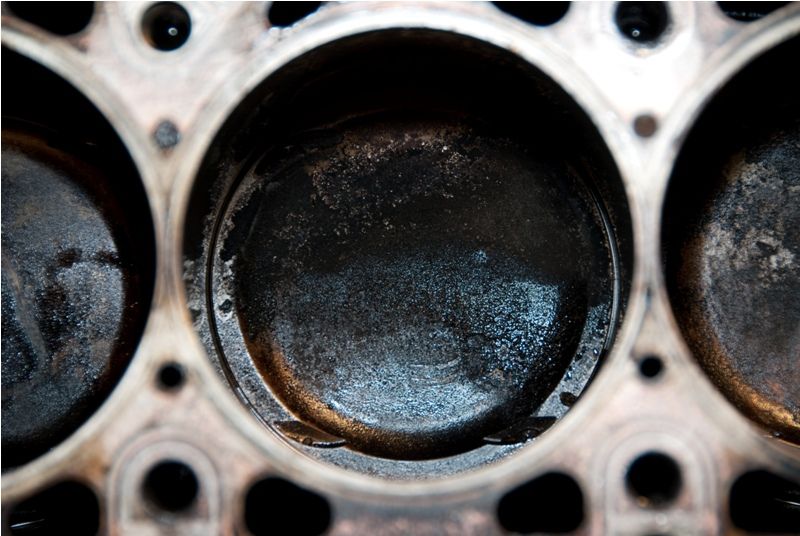 Cyl 4 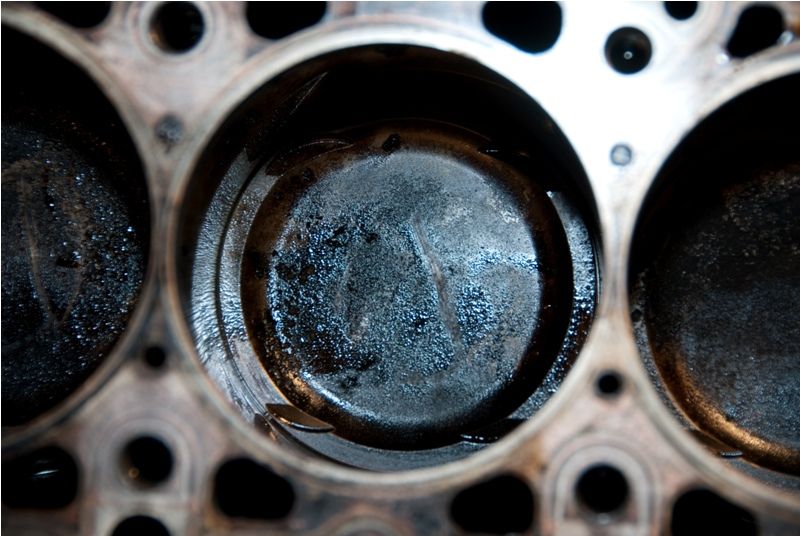 Cyl 5 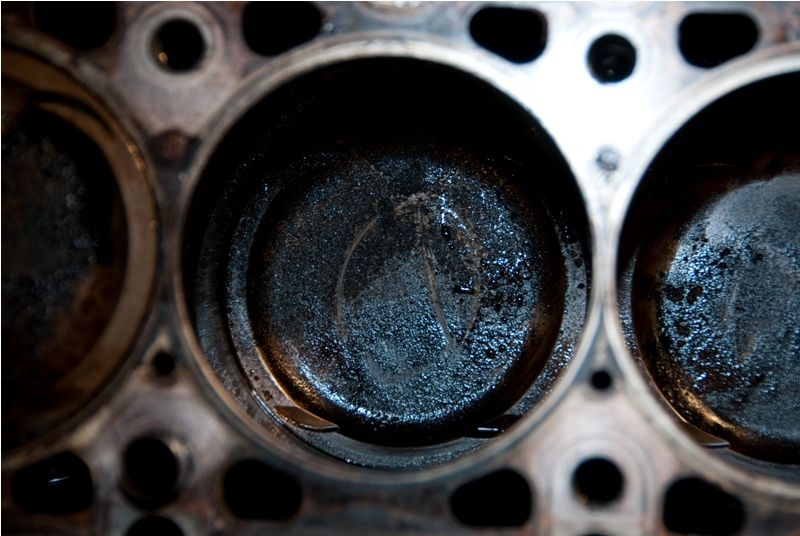 Cyl 6 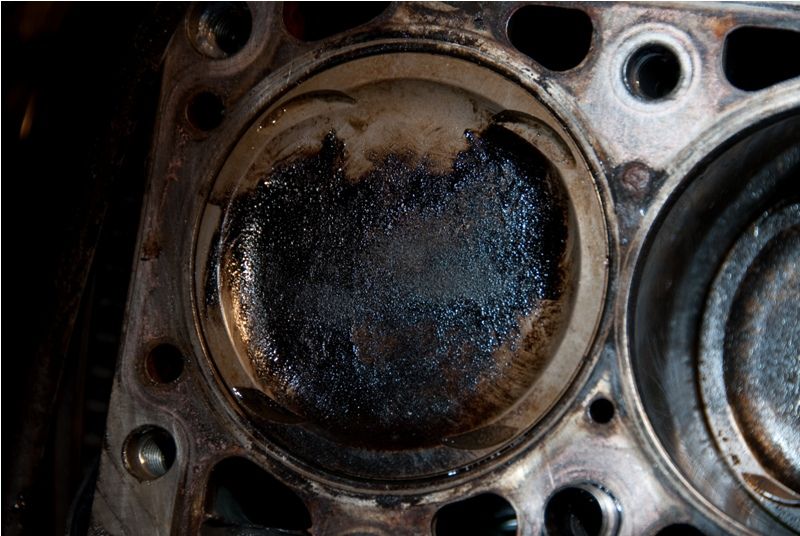 and here is the damaged MLS head gasket, it almost looks like something in the coolant damaged the gasket and lead to its destruction! 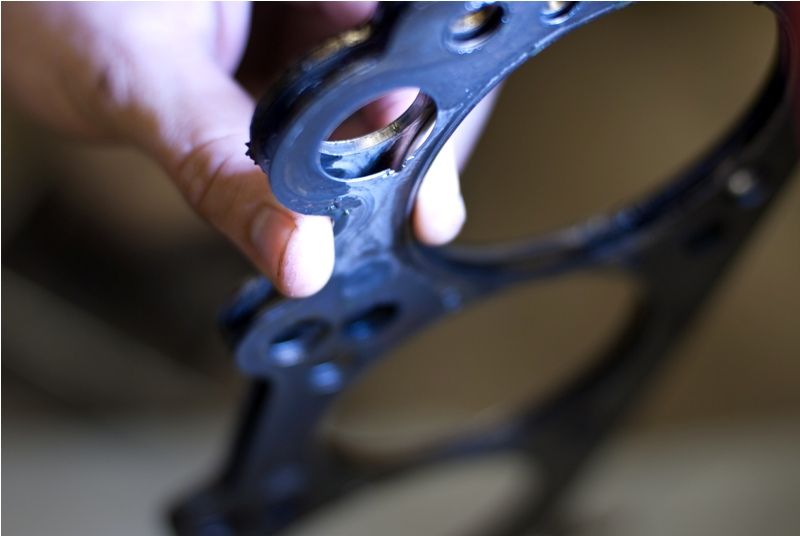 you can clearly see where the coolant was entering cylinders 5 and mainly 6 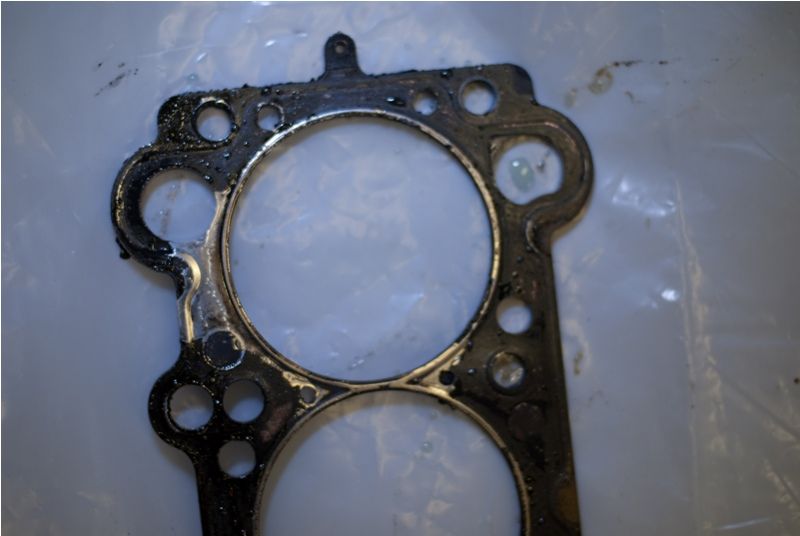 the good news is the motors appears to be very healthy still, no visible wear on the cylinders, you can even still see the cross hatched machine marks after 86k miles! 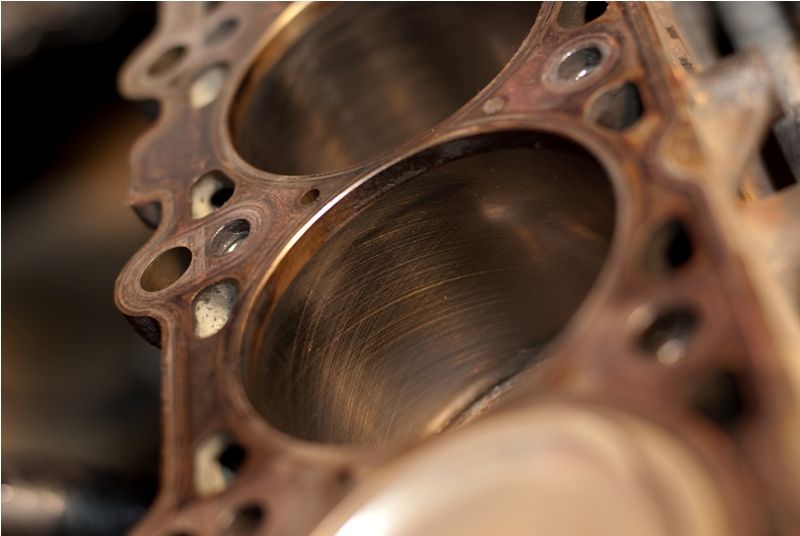 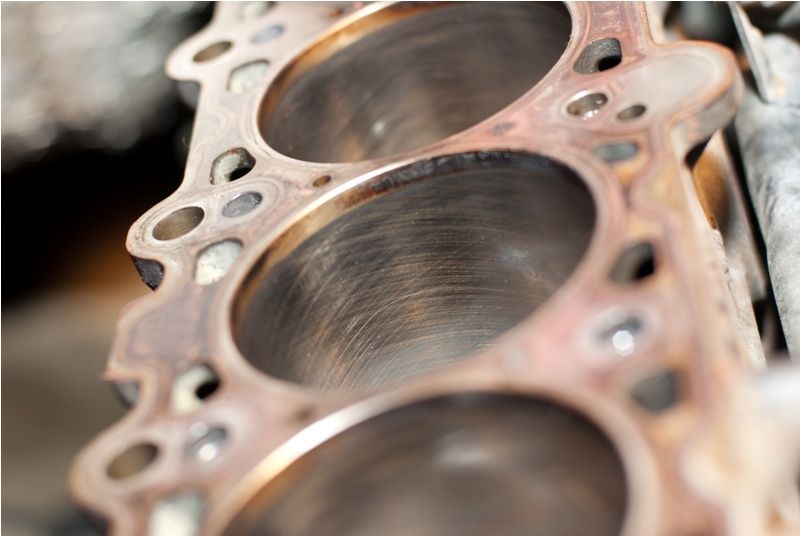 a little cleaner and super fine steel wool and cyl 1 looked literally good as new! 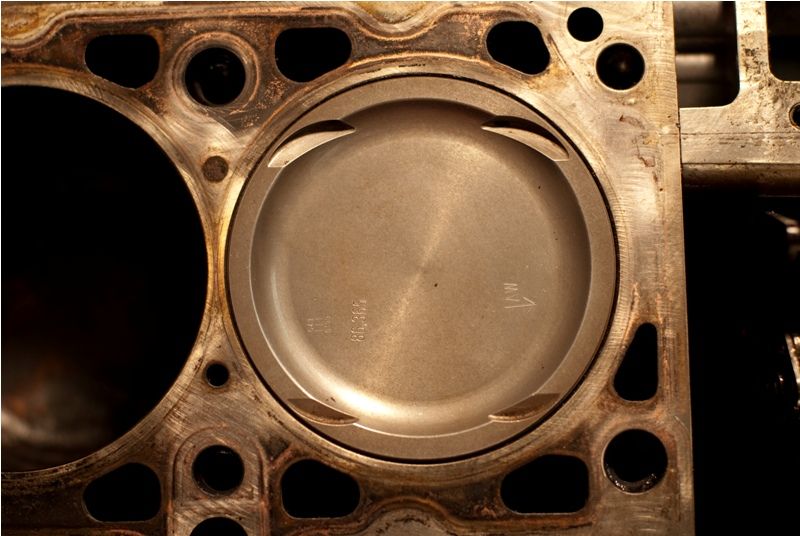 and cyl 6 gets the same treatment, it looks a little worse than cyl 1 but it cleaned up 100x easier, must have been the coolant working the grime loose 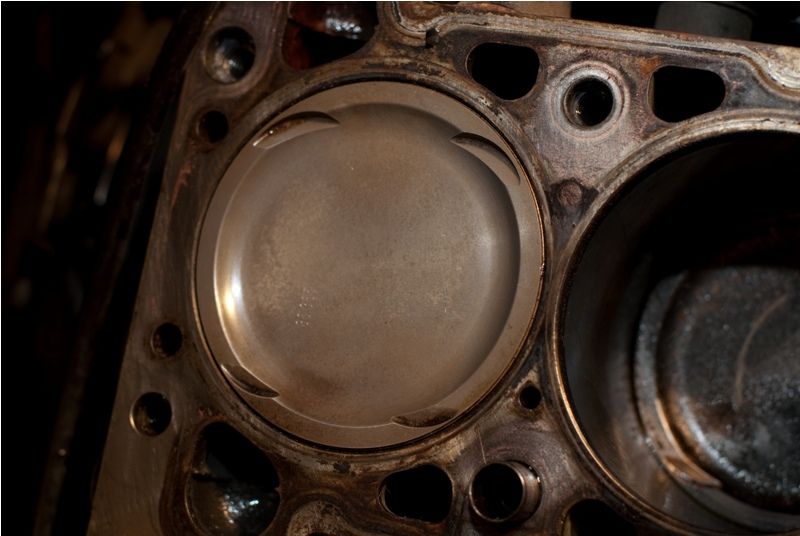 Overall I am VERY pleased with the condition of the motor after tear down....please let me know if you guys see anything that I should pay attention to or be alarmed by. 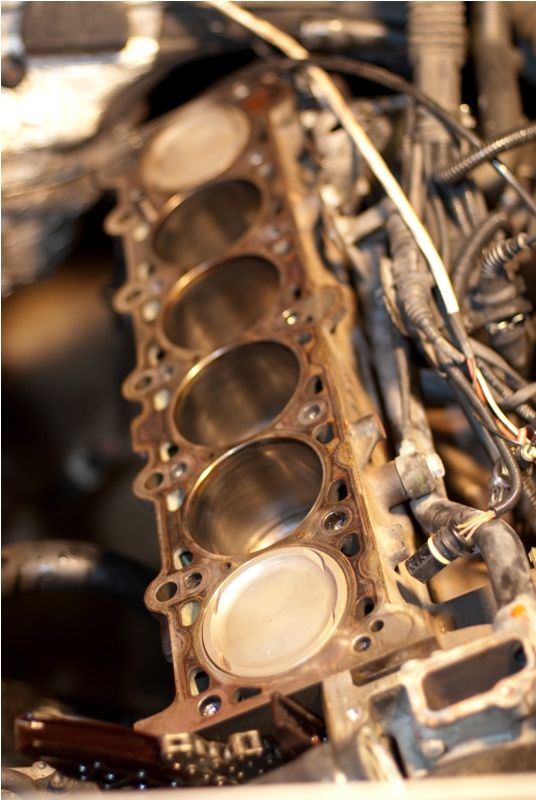 bare head and wastegate piping ready to head to the machine shop 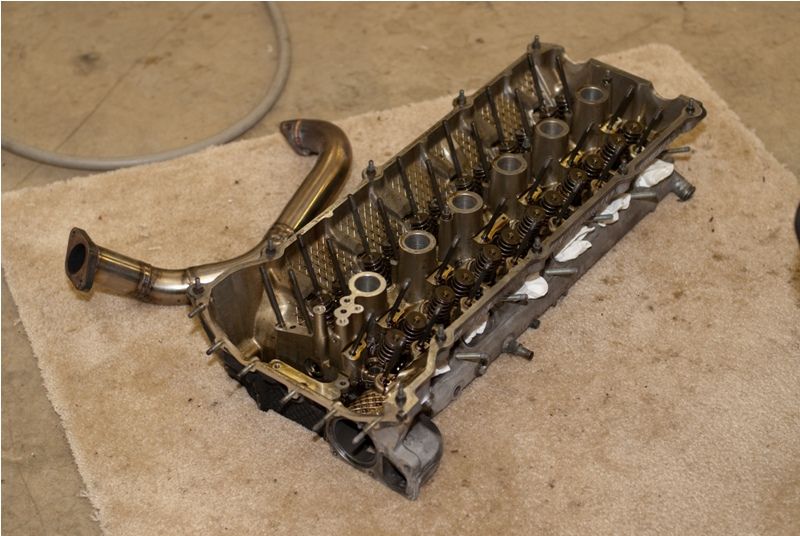 next step is to o-ring the block!
__________________
 |
|
Appreciate
0
|
| 01-21-2010, 06:22 PM | #94 |
|
Second Lieutenant
 15
Rep 201
Posts |
Matt, this is an incredible project. You have another line of work if the real estate market takes another dump.
 Or is it still in the dumper, giving you time to play Otto the Bavarian mechanic?!?  Mike |
|
Appreciate
0
|
| 01-21-2010, 07:54 PM | #95 |
|
Brigadier General
133
Rep 4,764
Posts |
Looks good. What a project!
|
|
Appreciate
0
|
| 01-21-2010, 08:10 PM | #96 | |
|
Lieutenant General
656
Rep 10,587
Posts |
Quote:
I wish I had more time to work on the car, but alas work comes 1st these days as it should 
__________________
|
|
|
Appreciate
0
|
| 01-29-2010, 04:19 PM | #98 |
|
Lieutenant General
656
Rep 10,587
Posts |
head is back from the machine shop along with my wastegate piping. Apparently the flanges on both ends were pretty well warped from the welding, explains why I couldnt get rid of the exhaust leaks!!
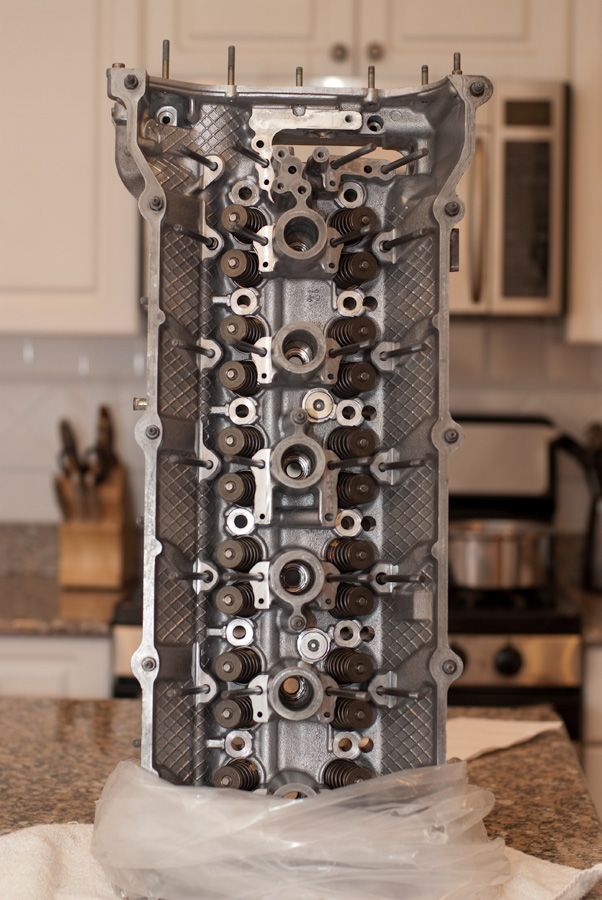   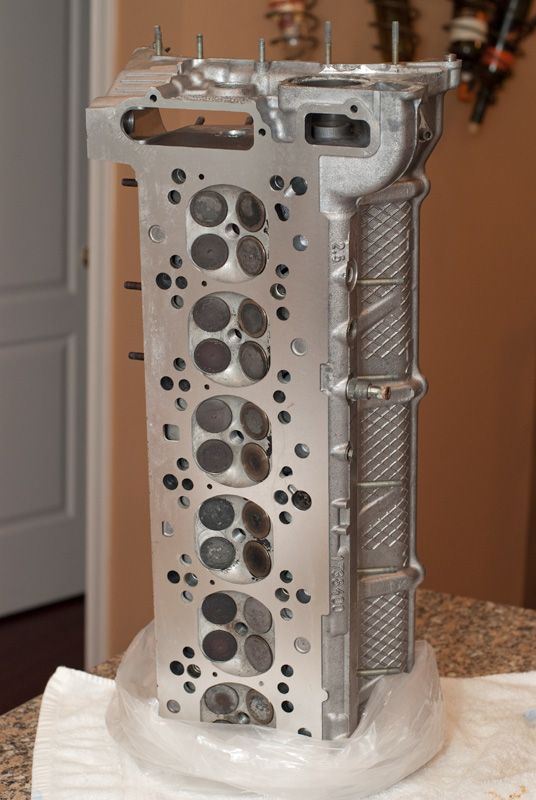 and the pooch looking at me like i'm crazy for having the head in the kitchen island like some sort of HP shrine 
__________________
|
|
Appreciate
0
|
| 03-04-2010, 08:24 PM | #100 |
|
Lieutenant General
656
Rep 10,587
Posts |
hey guys, i'm back!!!
Went thru a pretty bad sinus reconstruction in early in early February and then the crazy ass blizzards we've had around here so no work on the car in wayyyy too long. Here is where I am now. Thanks to a great member here I got a great rundown on how to properly prep the block in car and get ready for oringing. Local member Boris is lending me his oring tool, thanks man! Today's progress, more will happen Saturday as i'm slammed tomorrow w plans in the evening. 1st step sealing the cylinders so no metal shavings or wd40 (which will be used as lubricant for the honing stones I'll be using on the block later) enter the cylinder which could certainly cause damage. I've been trying to figure out the best way. What I ended up was using 3" PVC screw in end caps and sanding down the threads to get just under a 3 3/8" OD which pretty closely seals the cylinder. I had to cut off the end blocks on the caps and glue them to the underside to reduce their height. 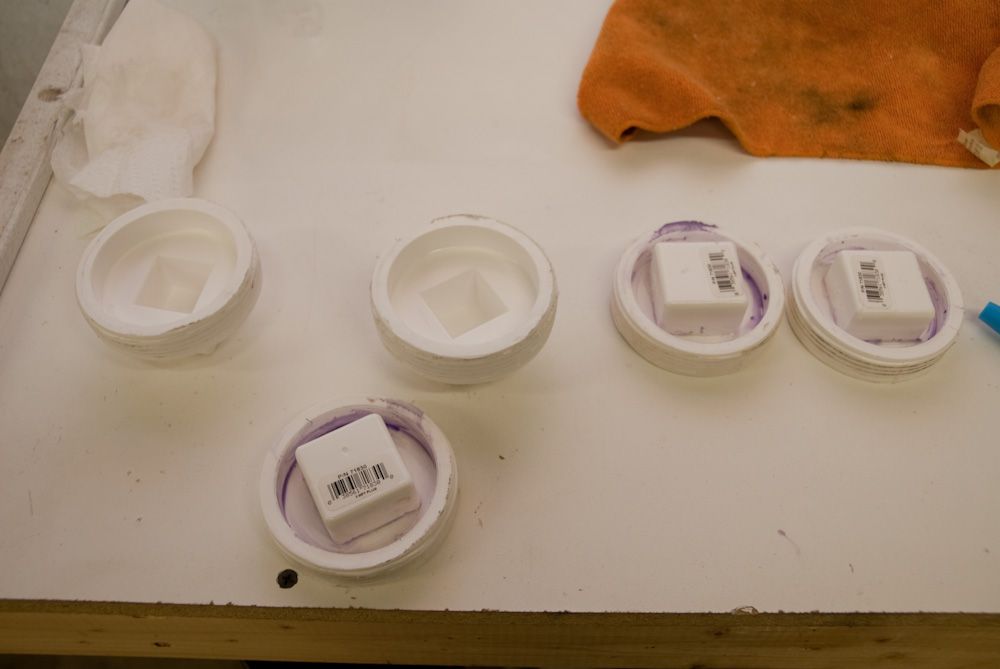 2 of the cylinders I cut a few circles w a 3.5" hole saw, or I should say Adam did. Put those on top of the PVC caps to bring the level up to make it easier to seal with Silicone. 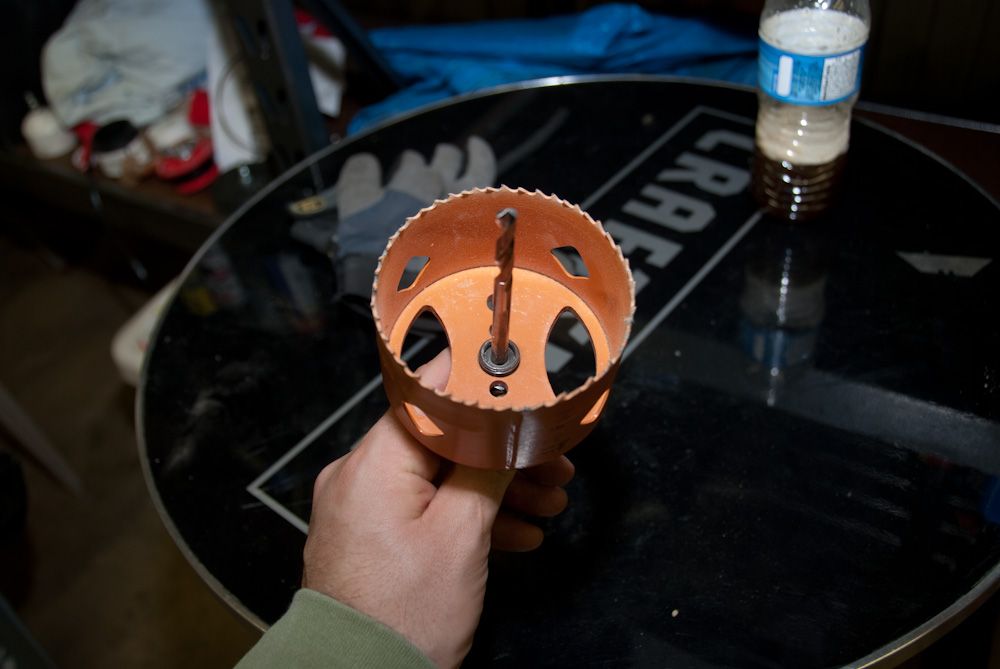 Here is the end result, all nicely siliconed up so seal it. Silicone will be easy to remove after the block prep is done. 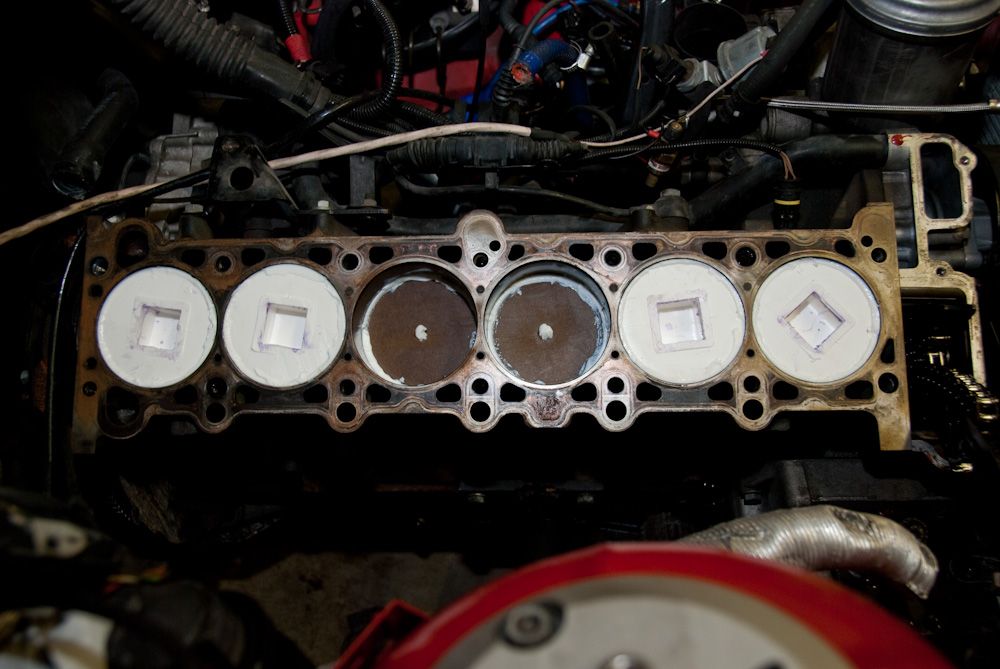 close up to see the level, its close to the block height but I made sure it was below by a few mm for clearance. 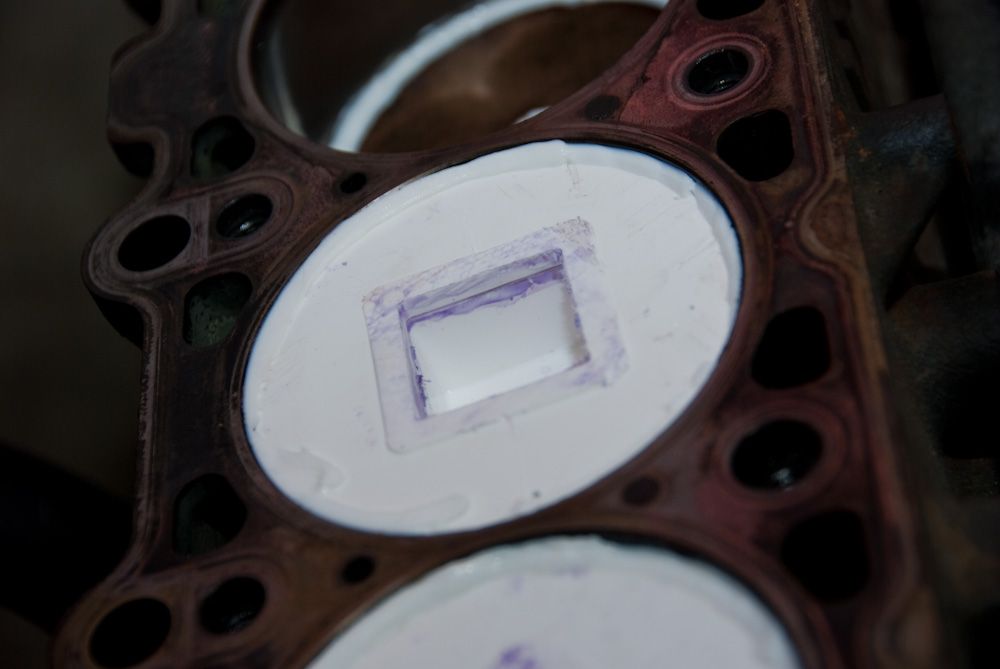 More to come and i'll try and keep it as detailed as possible. ================================================== ====== For more good news and a bit of fun, Adam got some new wheels for his ESS s/c M5 I am in love with these wheels, wish I could find a set for my M3. 18x9.5" in the rear and only 19lbs! Wrapped in 275 Ps2's in the rear. He's still having traction issues at the top end of 2nd gear and into 3rd.  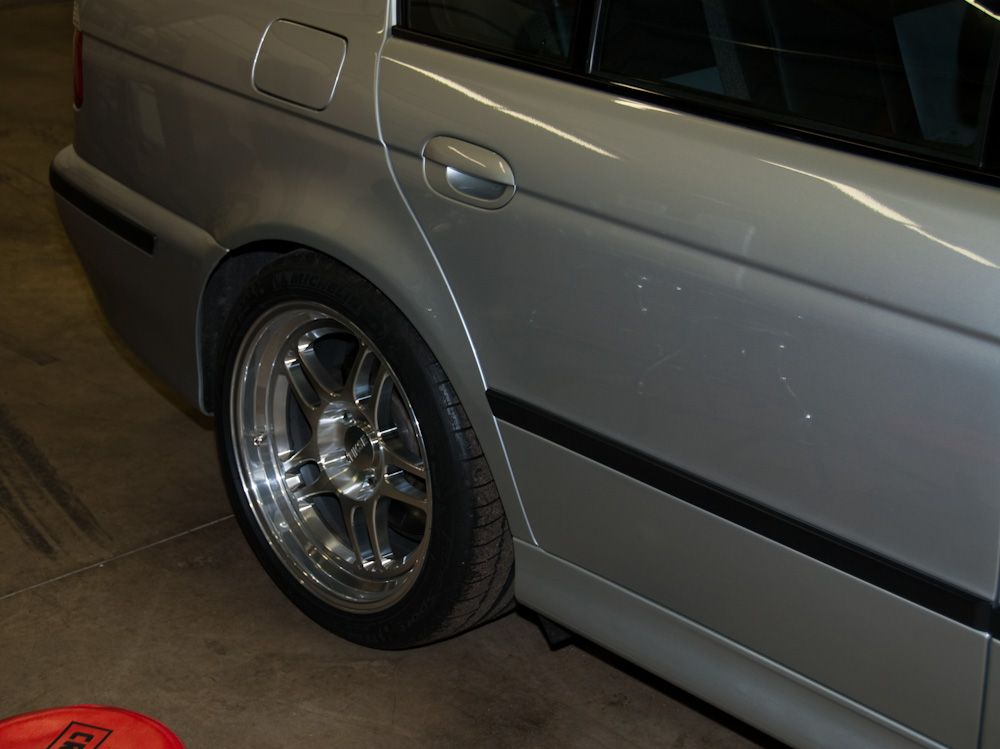 and hows this for a clean interior on an e39, freshly detailed and a nice coat of Poorboy's Leather Stuff, the seats drank it up....and god the smell is good! 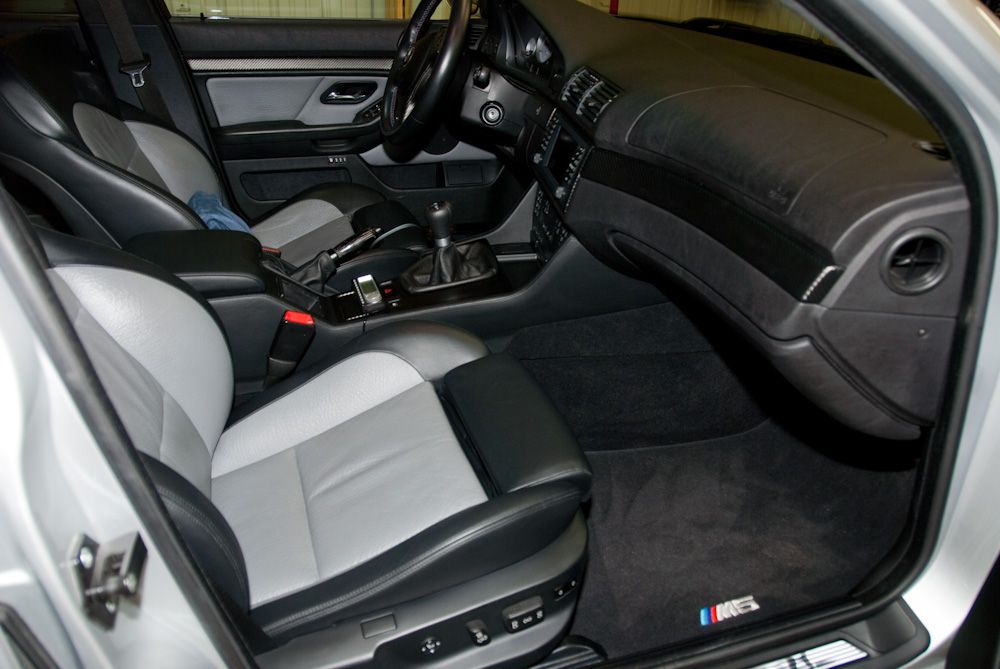 and a great addition to the garage, tankless hot water heater FTW!!!! 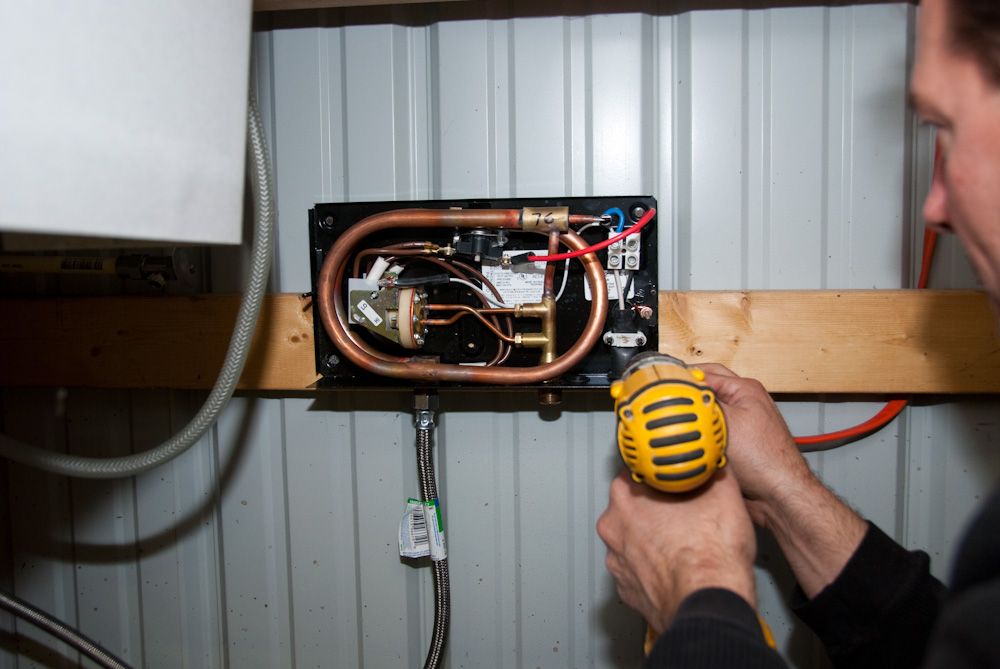 Adam hard at work 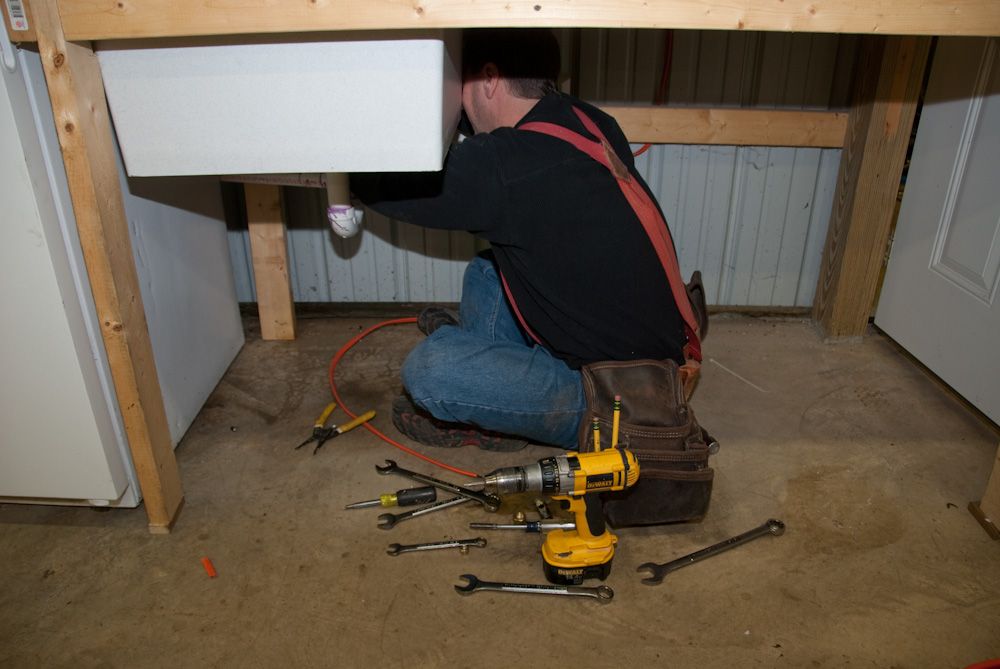 Giggity!! No more freezing hands baby 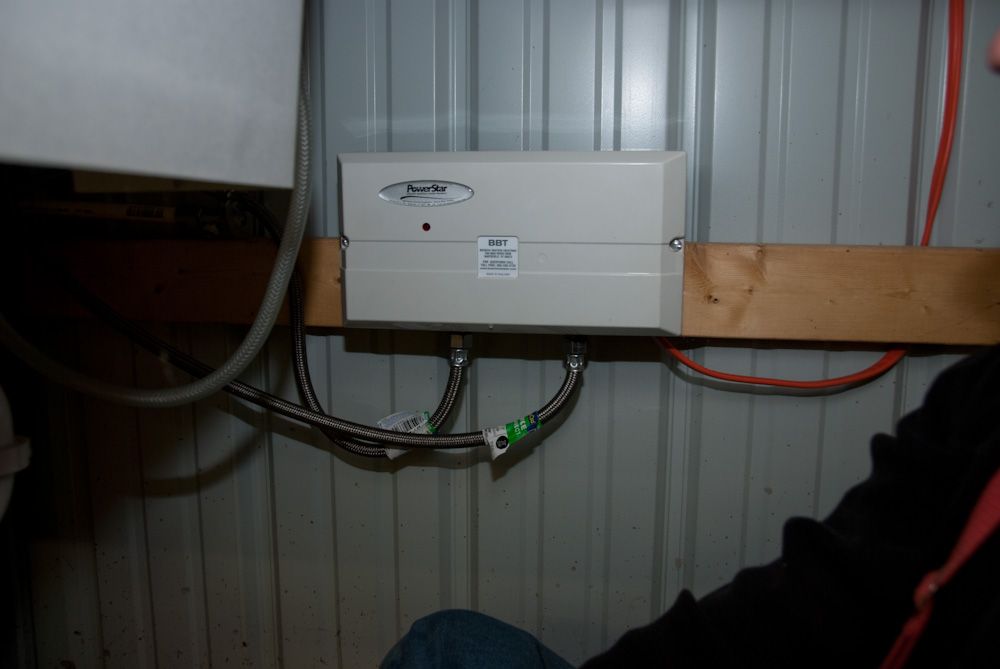
__________________
|
|
Appreciate
0
|
| 03-04-2010, 09:34 PM | #101 |
|
Major General

811
Rep 7,750
Posts |
nice....finally some heat

__________________
Paul Seto - BMW Car Club of America
President, National Capital Chapter (MD/DC/NoVA) Director, National Events ///M Chapter Become a BMW CCA member; Click HERE to join and use my member #339225 for a referral  Join our NCC Facebook Page |
|
Appreciate
0
|
| 03-04-2010, 10:00 PM | #103 | |
|
Lieutenant General
656
Rep 10,587
Posts |
Quote:

__________________
|
|
|
Appreciate
0
|
| 03-05-2010, 08:51 AM | #105 | |
|
Captain
49
Rep 704
Posts |
Quote:
 Let me know if you need help Adam.
__________________
|
|
|
Appreciate
0
|
| 03-05-2010, 09:21 AM | #106 |
|
First Lieutenant

10
Rep 394
Posts |
awsome job!
|
|
Appreciate
0
|
| 03-05-2010, 09:39 AM | #107 |
|
Major
 43
Rep 1,210
Posts |
I heard rumors of deer circling the property and doing trial kamikazee runs across the road
__________________
|
|
Appreciate
0
|
| 03-05-2010, 10:39 AM | #108 |
|
Racer 5
48
Rep 823
Posts
Drives: '09 E92 335i xDrive M Sport
Join Date: Mar 2009
Location: MD
|
Matt, the car's soul is beginning to rumble. Its like Terminator rising from the flames. Adam's wheels looked very slick (especially the machined curves) and very light.
The scent of Poorboy's Leather Stuff is still in my nose and on the back of my jacket...so I bought some this morning along with JetSeal 109 for the new wheels.
__________________
|
|
Appreciate
0
|
| 03-06-2010, 10:43 AM | #109 |
|
Lieutenant General
656
Rep 10,587
Posts |
BLOCK PREP
many thanks to Don - dcvee for this technique, he was nice enough to take his time and explain this in a PM to me. Thanks man! 1st up use plastic scrapers you can pick up at Home Depot for a few bucks and lacquer thinner to get the top of the block clean, removing all gasket material. 2 honing block in 6"x2"x1" in both coarse and fine from McMaster.  The coarse block before being used.  Now that I had the block all sealed up, I can use wd40 for honing oil without it getting down into the bores and damaging things. started with the coarse block, wet it with wd40. Start from the front of the block by cyl 1 and with the stone hanging over each side of the block use even pressure and small circular movements and grind all the way to the back of the block. Keep the stone hanging over the block at all times! Work from front to back, then back to front. This is one pass. I did 2 passes with the coarse, keeping it well lubed. Then wipe clean with lacquer thinner and do 1 more pass. here is what the block looked like after 2 passes.   Then use the fine block and do 3 passes with the same technique.  Me hard at work, shoulders started getting tired!  Again clean the block really well w the LT. Now take some 400 grit aluminum oxide wet sand paper and wrap it around one of the blocks, wet with wd40...spray the block too. Make 6 passes with the sandpaper. this will really smooth it out and bring up the shine. and you end up with this after you clean it all up.  and after the bore plugs are removed and cleaned. 
__________________
|
|
Appreciate
0
|
| 03-06-2010, 11:53 AM | #110 |
|
Brigadier General
133
Rep 4,764
Posts |
Outstanding. Warm weather is just around the corner!
|
|
Appreciate
0
|
 |
| Bookmarks |
|
|
 pics!!!