

|
|
|
|
 |

|
 |
BMW Garage | BMW Meets | Register | Today's Posts | Search |
 |

|
BMW 3-Series (E90 E92) Forum
>
HELP: Scratched iDrive Anti-Glar Coating (with photos).
|
 |
| 12-01-2012, 06:24 PM | #46 |
|
New Member
8
Rep 26
Posts |
I did the procedure in this link:
http://mbworld.org/forums/w211-amg/3...nd-screen.html It came out perfect! I taped it off like they did, if you removed the screen it would be a lot easier to get into the corners, I managed with a q-tip. Was on a 2012 535 M-sport. |
|
Appreciate
0
|
| 12-27-2012, 02:17 PM | #47 | |
|
Major
 
49
Rep 1,173
Posts |
Quote:
 If it fails then I'll have to purchase a new screen within the next 3 months.
__________________
2011 E90 335i xDrive MSport 6MT
2009 E90 328i xDrive 2004 E46 330i ZHP 2010 E92 335i xDrive 2001 E46 325xi |
|
|
Appreciate
0
|
| 12-29-2012, 07:10 PM | #48 |
|
Major
49
Rep 1,173
Posts |
Just got done polishing the anti-glare coating off. I bought the same Novus kit like the write up. It was a bit difficult to remove with just the #2 fine polish, so I had to use the more abrasive #3 polish, then I switched back to #2. Finished it off with the #1 cleaner and it looks great. It's all uniform but the true test is what does it look like installed back into the car and in day light.
Here's a few crappy photo for now. I'll take batter ones tomorrow. 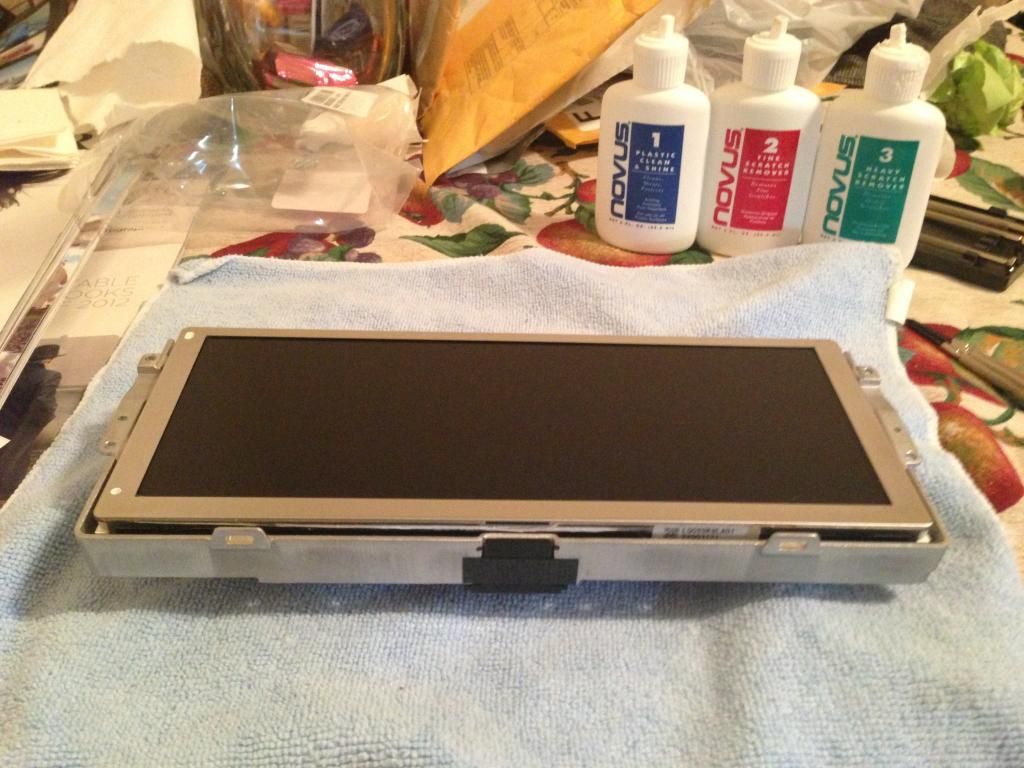 Also here's the back of the screen and the bezel, just in case anyone wanted to see.  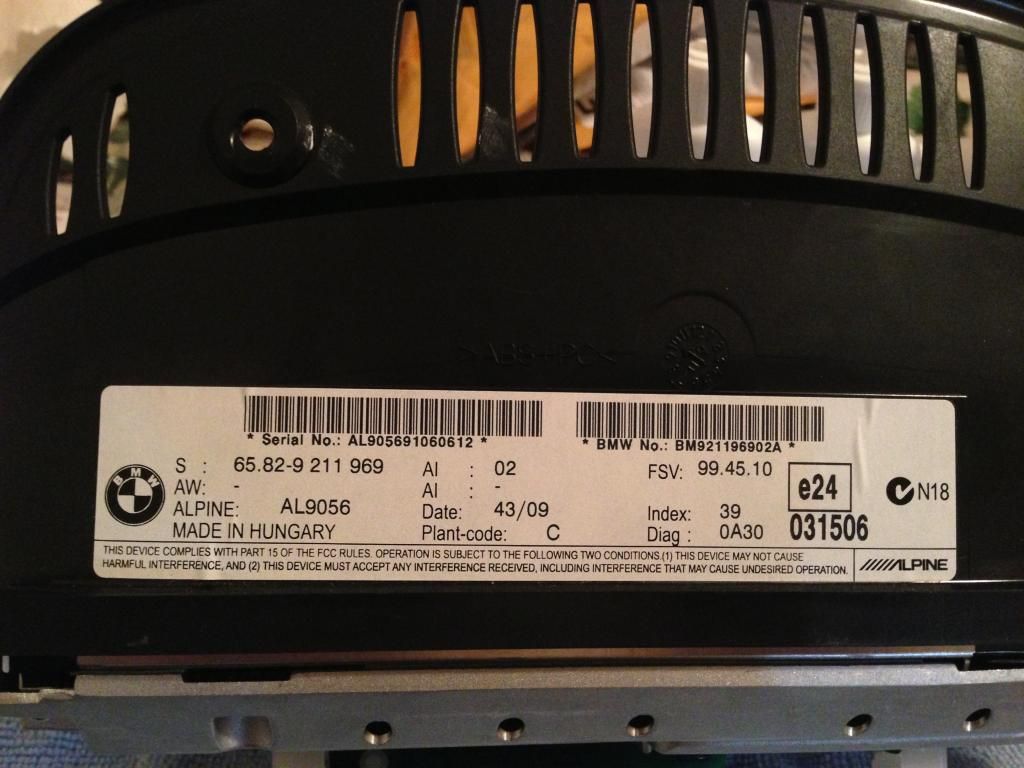
__________________
2011 E90 335i xDrive MSport 6MT
2009 E90 328i xDrive 2004 E46 330i ZHP 2010 E92 335i xDrive 2001 E46 325xi |
|
Appreciate
0
|
| 12-30-2012, 10:10 AM | #49 |
|
Major
49
Rep 1,173
Posts |
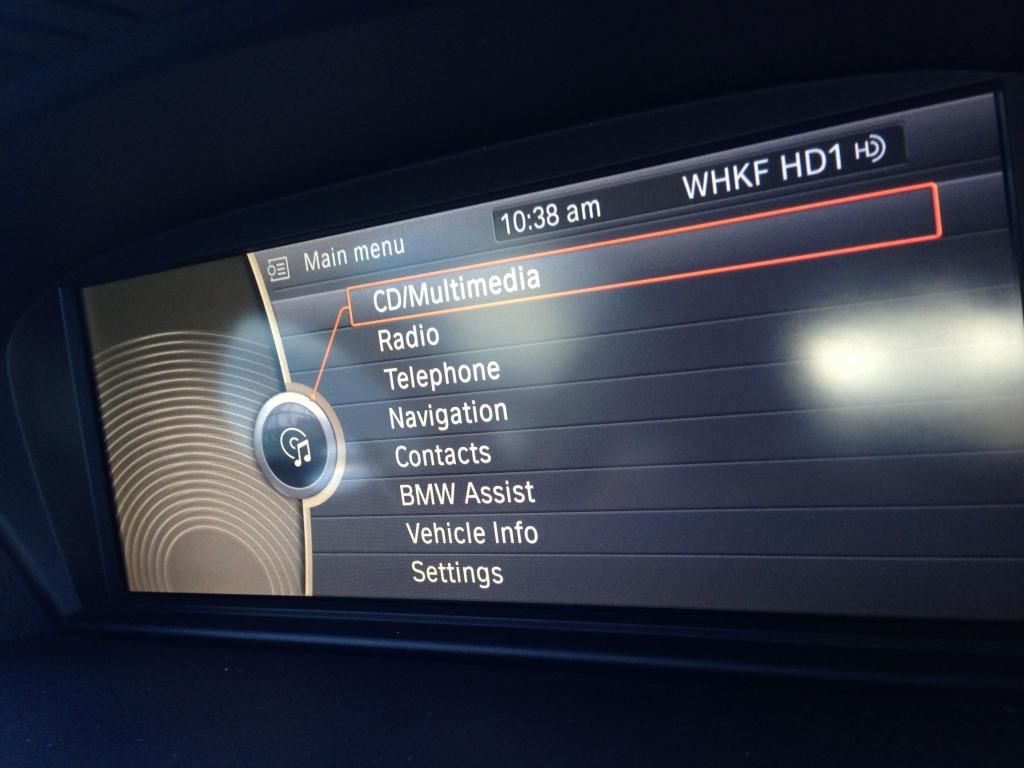
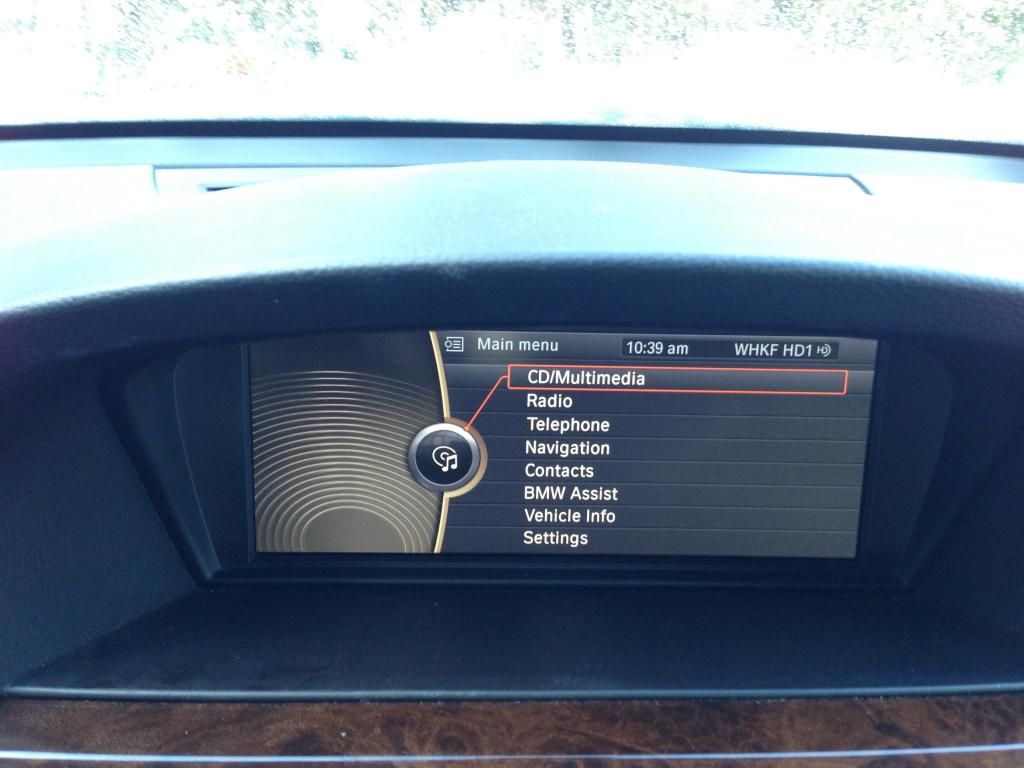
Here's some daylight photos. It wasn't actually sunny where the car was parked but it definitely looks better already.
__________________
2011 E90 335i xDrive MSport 6MT
2009 E90 328i xDrive 2004 E46 330i ZHP 2010 E92 335i xDrive 2001 E46 325xi |
|
Appreciate
0
|
| 02-12-2013, 07:51 AM | #51 |
|
Banned
9
Rep 160
Posts |
I thought the anti-plastic looked cheap and was annoying/intrusive.
I don't think there going to say anything when you return the lease. There pretty forgiving and overlook a lot of small things like that. *Update, wow it looks like new after you polished it, nice job. |
|
Appreciate
0
|
| 04-07-2013, 02:58 AM | #52 |
|
New Member
1
Rep 26
Posts
Drives: 2010 M3 Sedan
Join Date: Feb 2013
Location: San Francisco, CA
|
I had a similar issue. I got my e90 M3 used about a month ago and didn't notice that the nav screen was scratched until it was too late. You can only see the scratches in fairly bright sunlight so it took me a couple of weeks before I had it out in the right light to see it.
I just applied the Lexerd film mentioned earlier in this thread. It worked great. It looks like a brand new screen. If you run into this issue it's definitely worth a try before going to the polish technique. Results likely aren't AS good, but it's a hell of a lot easier so worth a first shot. P.S. This thread was super helpful while figuring out my options to correct the problem. Thanks for posting! |
|
Appreciate
0
|
| 05-07-2013, 10:00 PM | #54 |
|
Registered
0
Rep 3
Posts |
I am going to attempt to remove my anti-glare from the navigation and have a few questions as I am going to remove the Nav screen from the car rather than just tape it off. Is the screen hard to remove? As far as I can tell, there are just two plugs that plug into the screen from the car. Is that it? Is the casing easy to remove? Do I need to disconnect the battery at all? Thanks in advance!
|
|
Appreciate
0
|
| 05-08-2013, 08:53 PM | #55 |
|
Registered
0
Rep 3
Posts |
Well, with the input from TomTomTuning, I have a brand new looking Nav screen. It was very easy to do and looks great. I had bought an anti-glare screen to put on it, but the screen itself doesn't even need it. Way to go BMW for a) putting a POS anti-glare screen on the nav systems and for b) not knowing about any sort of fix except for replacing the nag! Great thread, guys!
|
|
Appreciate
0
|
| 05-08-2013, 09:06 PM | #56 | |
|
Major
49
Rep 1,173
Posts |
Glad I could help!
I've received a few PM's about removing the screen so I figured Id post up some information here.  Quote:
__________________
2011 E90 335i xDrive MSport 6MT
2009 E90 328i xDrive 2004 E46 330i ZHP 2010 E92 335i xDrive 2001 E46 325xi |
|
|
Appreciate
0
|
| 05-10-2013, 10:20 AM | #57 |
|
Registered
0
Rep 2
Posts |
I too suffer from scratches on the idrive coating. I purchased my Novus from ebay but have not gathered the courage to wipe away the anti-glare coating.
To Tom and the others that have removed the coating, how is the visibility on sunny days with the sun roof open? I am afraid that I may not get any visibilty on a sunny day after I remove the coating. Is the visibility on a sunny day not as bad as I think it is after removing the anti glare coating? Please advise. Thanks |
|
Appreciate
0
|
| 05-12-2013, 09:41 PM | #58 |
|
101
Rep 952
Posts |
I did this on my X5s screen a while back, just used some polish I had in my garage, took the screen out (easy), 10 minutes, some elbow grease, and the coating was completely removed, scratches gone, and the screen looked brand new. Very little difference in appearance before and after, slightly glossier but who cares, the scratches are gone and it looks like nothing ever happened.
For those of you worried about visibility/glare, I don't think it's an issue AT ALL. My X5 doesn't have the "hood" that the 3 and 5 series have, so the screen is much more exposed, and its a non issue. |
|
Appreciate
0
|
| 05-12-2013, 11:22 PM | #59 | |
|
Registered
0
Rep 2
Posts |
Quote:
Thank you all for sharing! |
|
|
Appreciate
0
|
| 07-28-2013, 10:45 PM | #60 |
|
Registered
0
Rep 1
Posts |
Hello,
Just wanted to thank everyone who took time to provide detailed instructions about this procedure. Reading this entire post about 20 times and doing additional research gave me the confidence to fix my CIC screen issues. The previous owner scratched the hell out of my screen. Here is a link I found for how to remove the CIC screen. [u2b] [/u2b] I ordered everything from Amazon: "NOVUS 7136 Plastic Polish Kit - 2 oz." "Lexerd - 2010 BMW 128 135 335 328 M3 528 650 Z4 X5 X6 TrueVue Anti-Glare Navigation Screen Protector" http://www.amazon.com/Lexerd-TrueVue...n+Protector%22 I started with 1, and then 2, but ended up having to use 3. Was worried the whole time that I was ruining the screen, but everything turned out great. The polish kit steps took about 2 hours. Used credit card on the corners, and also used q tips, and even cotton balls and some points. Here are a few Pics, Sorry that I didn't take more time to get better angles. I can add additional pics later, but it looks brand new. |
|
Appreciate
0
|
| 08-11-2013, 03:11 PM | #61 |
|
Registered
0
Rep 2
Posts |
Had to say thanks on this! I just did a CIC retrofit (e60) and am disappointed about some of the streak looking scratches on the screen.. ordered some Novus after seeing results here. Will post how it works out
|
|
Appreciate
0
|
| 09-27-2013, 06:40 PM | #62 |
|
Registered
0
Rep 2
Posts |
I did the same thing on my CIC screen. I got a CPO 335i with some sort of droplet marks that wouldn't wipe off. It was like they got some sort of cleaner overspray on it. Thank you BMW!
I pulled the display out and used Novus #2 only on it. It came out really really nicely. Given the amount of polishing and elbow grease needed, I'd really recommend removing the display. Don't be afraid if you are the least bit handy. Sheldon |
|
Appreciate
0
|
| 10-15-2013, 04:13 PM | #63 |

452
Rep 18,331
Posts |
I bought a brand new LCD screen from China for 250 shipped and swapped it out. I also retrofitted my old CCC housing that had the plastic covering over the LCD to my new CID screen to prevent the scratches to ever happen again!
 I polished the clear cover and the unit looks brand new from factory, not a visible scratch whatsover and especially the LCD screen is brand new! I still have the older screen which I will get to polishing it and see where it takes me.. |
|
Appreciate
0
|
| 10-15-2013, 04:23 PM | #64 | |
|
Lieutenant Colonel
 
176
Rep 1,843
Posts |
Quote:
|
|
|
Appreciate
0
|
| 11-05-2013, 04:13 PM | #65 | |
|
Registered
0
Rep 1
Posts |
Quote:
Last edited by qship5; 11-05-2013 at 05:27 PM.. |
|
|
Appreciate
0
|
| 11-06-2013, 12:58 PM | #66 |
|
452
Rep 18,331
Posts |
The bottom trim pops off, the one directly underneath the CIC screen. Once you pop out that trim there will be two Philips head screws on top corner on each side. Remove screws and screen will come right out. Detach the wiring harnass and CID cable and your done
|
|
Appreciate
0
|
 |
| Bookmarks |
|
|


