

|
|
|
|
 |

|

|
BMW Garage | BMW Meets | Register | Today's Posts | Search |

|

|
BMW 3-Series (E90 E92) Forum
>
2011 - E90 - Full Install Project - Completed
|
 |
| 06-06-2011, 08:17 AM | #1 |
|
Captain
 
102
Rep 832
Posts |
2011 - E90 - Full Install Project - Completed
Firstly credit where credits due!
I would like to say a massive thank you to all the members who have taken the time to produce guides and contributed to the hundreds of threads on this forum. Without their help I would have probably not bothered with my own little project, the results of which I am very happy with. I have been a member of many car forums in the past but have to say the level of genuine knowledge, expertise and good will on this forum is remarkable! I would like to make a personal mention of thanks to VP Electricity, Technic, kaigoss69, carlitosz and to the many others who have taken the time to post up their own projects and experiences which have helped me no end! Before I post this up I fully acknowledge much of this will simply replicate some of the other excellent guides on here and what I have done has only been achieved through researching others hard work. I’m not looking to take credit for others efforts but simply posting this as a record of my own experience and adding it to the mix. I’m happy to answer any questions and will help out where I can (if there are any questions!) but I will defer anything of a technical nature to the many experts on this forum. If anything I hope this will help other amateur ‘have-a-goers’ like me who are weighing up what to do themselves as in all honesty I was surprised how easy it was to do all this. I haven’t documented every single step as allot of this is available elsewhere on this forum. I hope at least some of you find this useful! Introduction From the moment I ordered my car and first visited this site the one theme that popped up time and time again from other members was the poor standard of BMW’s ‘Base’ stereo system. Having not upgraded from the ‘Base’ option on ordering I prepared myself for the worst during the months I spent awaiting delivery. Personally I would describe myself as massive lover of music and although I am in no way an expert in audio systems I do have a reasonable understanding of what it’s all about and a keen ear for sound quality. When my car finally arrived I couldn’t wait to hear for myself the quality of the stereo and have to say that sitting on my driveway with the engine off at a moderate volume I did initially wonder what all the fuss was about? It did not sound as bad as I was expecting and I did think at that time it would suffice. This feeling of contentment soon wore off and within days I knew something had to be done! Upgrade I first considered the Alpine upgrade offered from BMW but after looking into this I didn’t think this would be enough for me and although this might have been quite an attractive upgrade a couple of years ago the price of this has crept up somewhat. I also didn’t like the fact the kits required splicing wires and ultimately feared if there wasn’t enough oomph I would be stuck with it as I really couldn’t justify upgrading again! I decided I would go aftermarket and initially add a set of good quality front components, an amp and some under seat subs but after much research it was apparent this was not that simple a concept. For a start cars fitted with the ‘Base’ system have an inbuilt factory EQ to make up for the lack of tweeters and low quality speakers. This would need sorting out first so I looked into having the car re-coded to Hi-Fi at my local dealer. Although they had not come across this request before they stated any re-coding would cost just over £100 per hour (ouch). This did not really instil much confidence that they knew what they were doing but more importantly it soon transpired on the forum that newer cars could not in fact be re-coded as the hardware was not there. The tweaked EQ would need to be normalised externally. The best solution to this would be to add a JBL MS8 and with its eight channels came further possibilities. This prompted me to add a centre channel as well as upgrade the rears. My Equipment List The main components of my install are 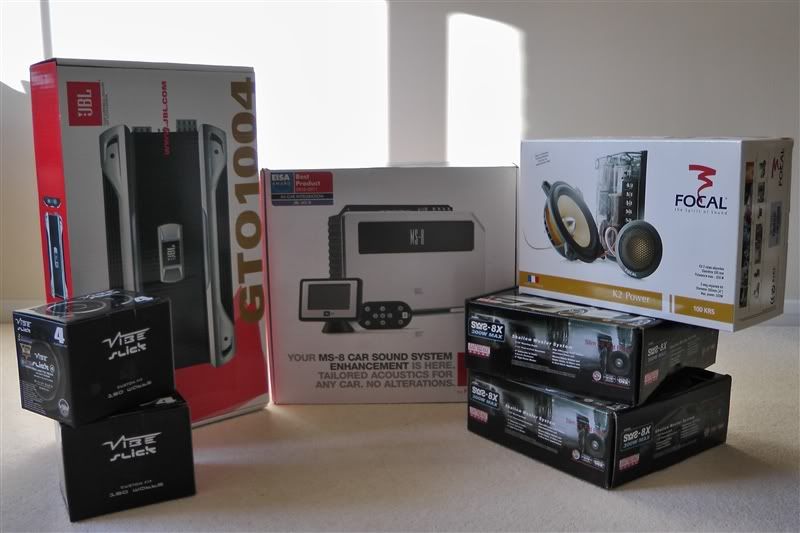 Focal 100KRS K2 - Front Doors 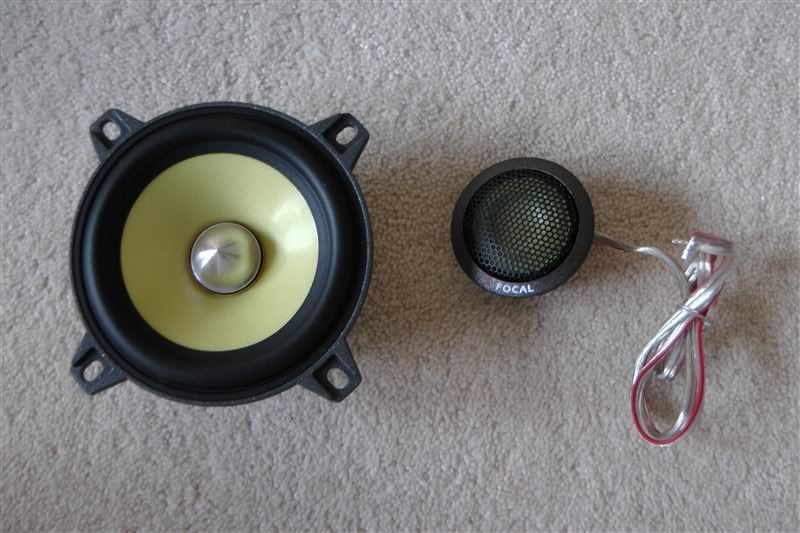 Earthquake SWS8X (4 ohms) – Under Seats 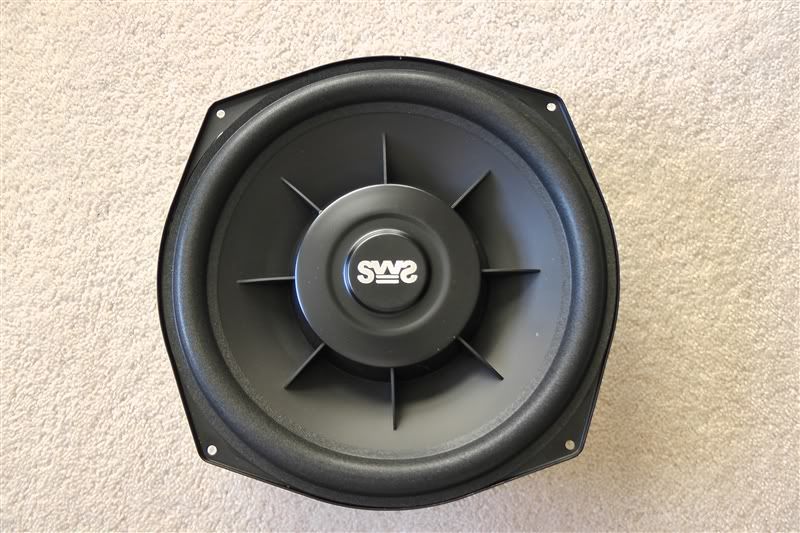 Vibe Slick 4 – Centre Channel & Rear Deck 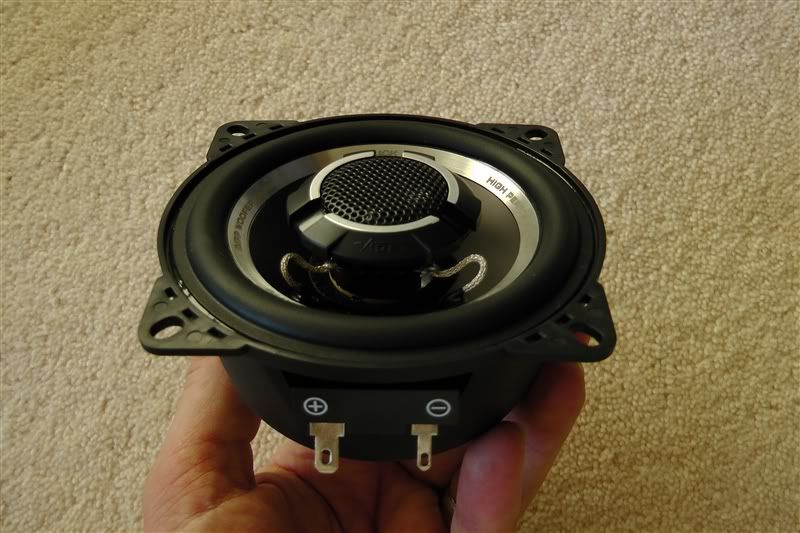 JBL MS8 Processor  JBL GTO1004 Amplifier  In order to make the install as plug and play as possible I ordered Technic’s harness along with his custom speaker adaptors and custom jumpers to allow for the under seats to be amped separately. 
__________________
F31 335d M Sport XD - Mineral Grey - Coral Red - 19" 442M - HK Audio - M Sport Plus Pack - Heated Seats Check out my E90stereo install guide - http://www.e90post.com/forums/showthread.php?t=540954 Last edited by B33M3R; 06-06-2011 at 09:01 AM.. |
| 06-06-2011, 08:17 AM | #2 |
|
Captain
102
Rep 832
Posts |
Front Doors
As my car came fitted with the ‘Base’ system the first thing it is lacking are the tweeters in the front doors. The Focal component kit sorts this but in order to fit the new tweeters and keep the car looking stock I ordered the following two parts from BMW 51337171201 – Left Door Trim 51337171202 – Right Door Trim  The trim is exactly the same as the standard trim except as you can see it has the speaker grill and holder for a tweeter where the standard doesn’t. 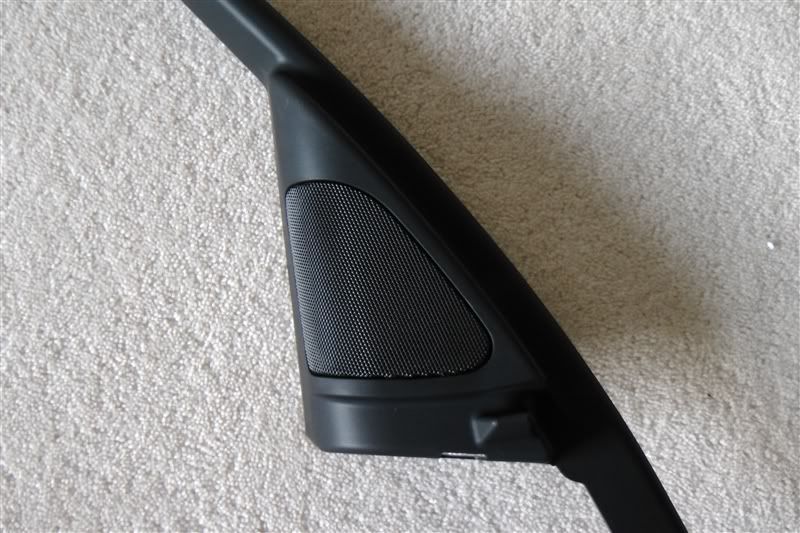 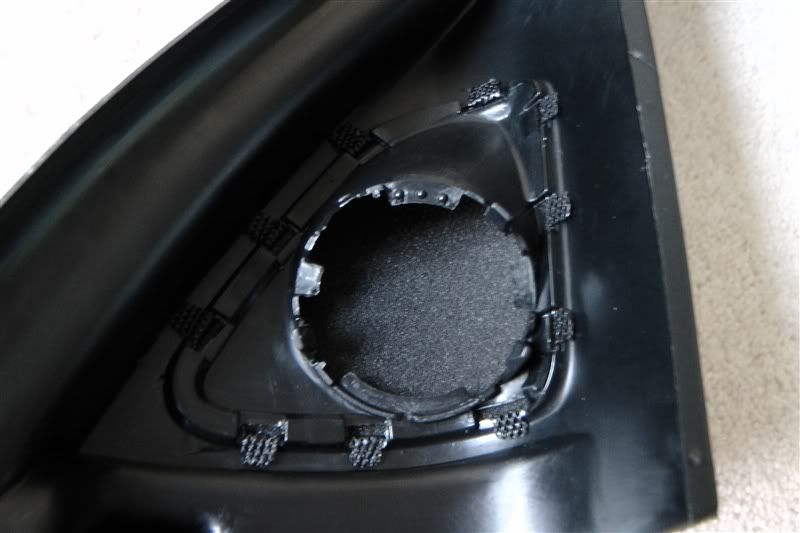 Already on the car are foam inserts which sit behind these grills. They have a circular recess to snugly hold a tweeter in place. I almost ordered these inserts separately but they are not needed as they are already present even in ‘Base’ spec. I didn’t take any pictures of removing and re-fitting the above door trims or front door cards as there is an excellent guide available on the BSW website http://bavariansoundwerks.com/produc...dan_Logic7.pdf The only thing I would mention is that the door trims above are extremely sharp on their edges so don’t be tempted to run your finger between them and the metal door frame in order to pry them off, as I did, unless you enjoy slicing your fingers. Ouch painful! I actually ordered a set of these off EBay for about £10 and have to say they are very good quality and helped me do this entire install without marking the car in any way or breaking any upholstery clips or plugs etc. 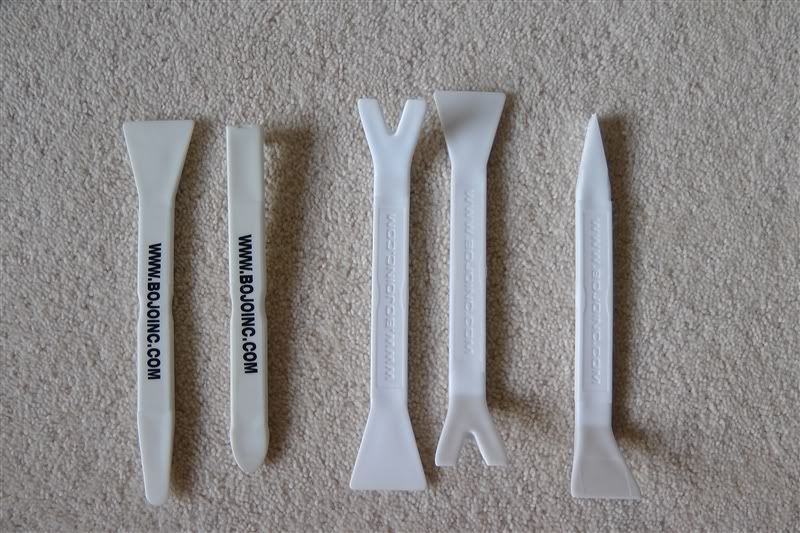 Front Door Cards Removed  Original BMW speaker is held in by three nuts 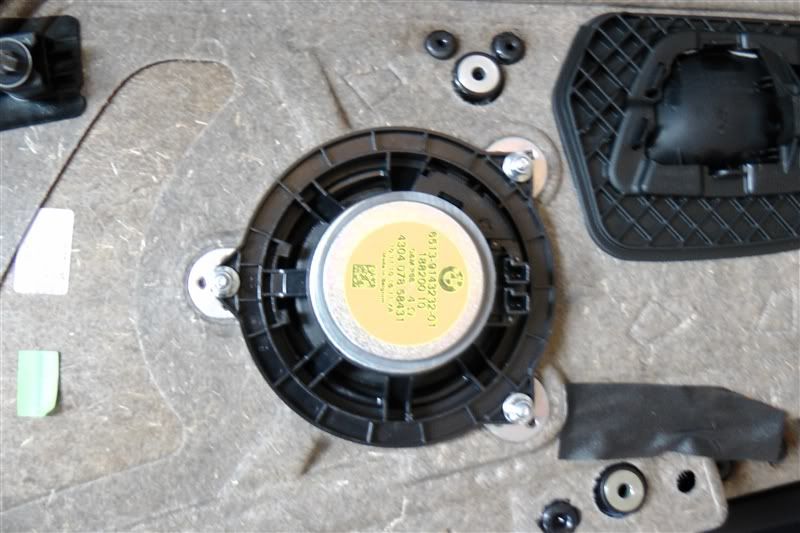 Original speaker removed 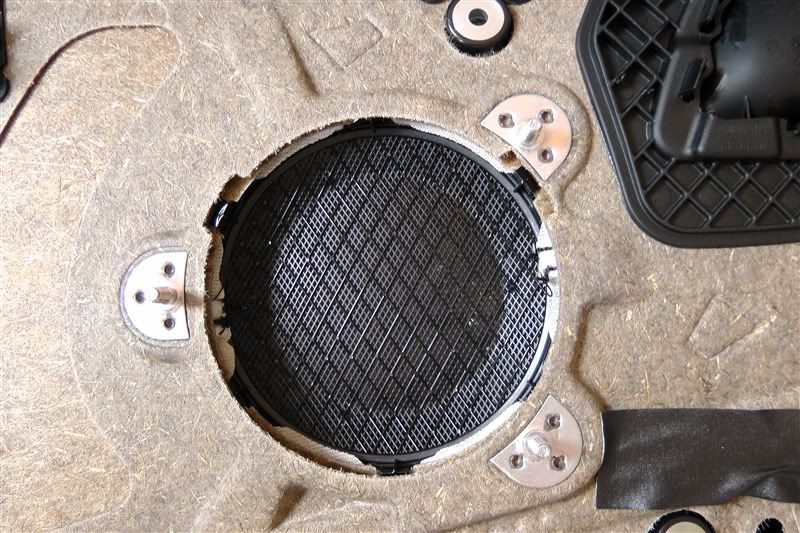 Paper cone rubbish out  Making way for lovely new Focals 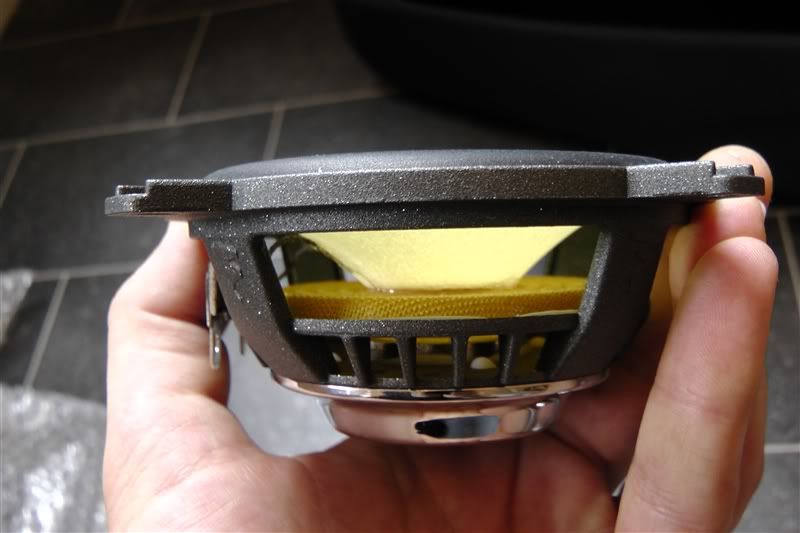 Now this is where 808Mguy’s Speaker Adaptor Rings come in very handy. As you can see here they fit perfectly over the original threads. 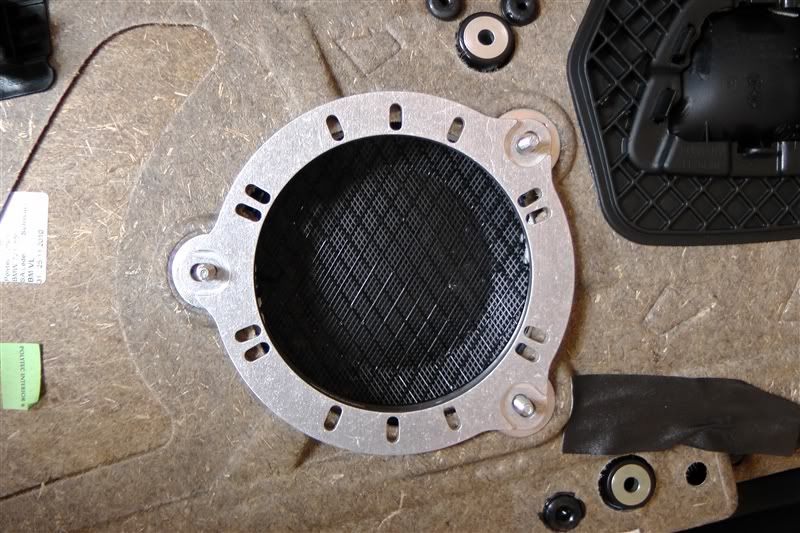 And allow for an aftermarket speaker to be easily and securely mounted. Here you can see the Focal lines up perfectly. (Remember though that speaker depth is an issue so research what will fit your particular model first! Again there are some good threads on this forum.) 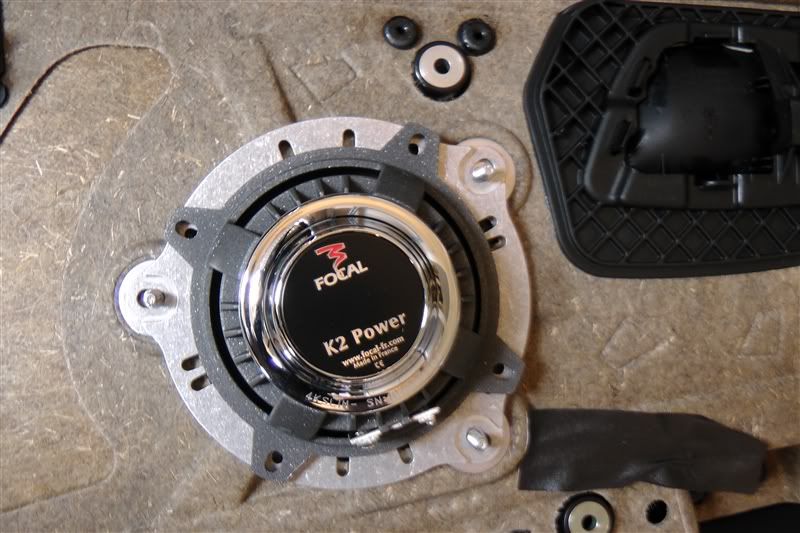 I decided to get some of this rubber foam strip (available at Focus) to make sure I got a nice snug fit between the speakers, adapter rings and door cards.  Here you can see it fitted to the adaptor ring although stupidly I should have applied it to the door facing side after mounting the speaker in the adaptor to avoid the speaker’s screws compressing the foam. This I rectified by removing and re-fitting before mounting it to the door. (Note the addition of a plaster to my left index finger after my discovery of how sharp the tweeter mounts are!) 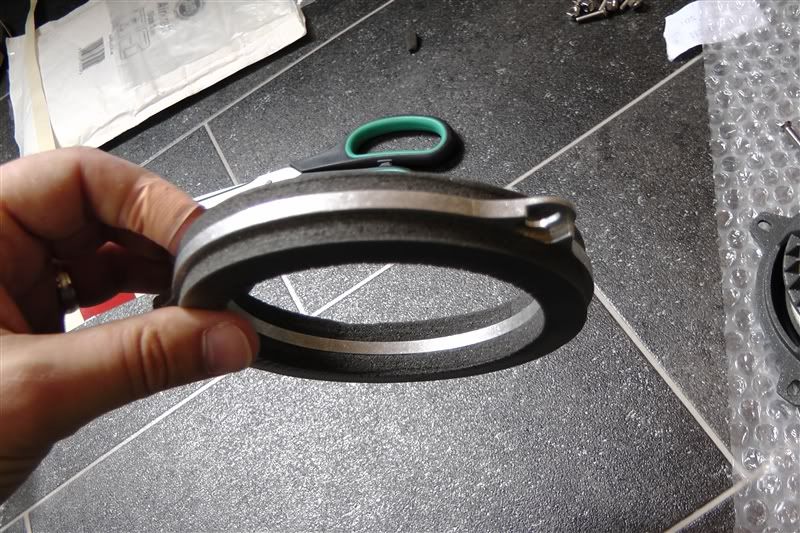 Speaker mounted to the Adaptor Ring 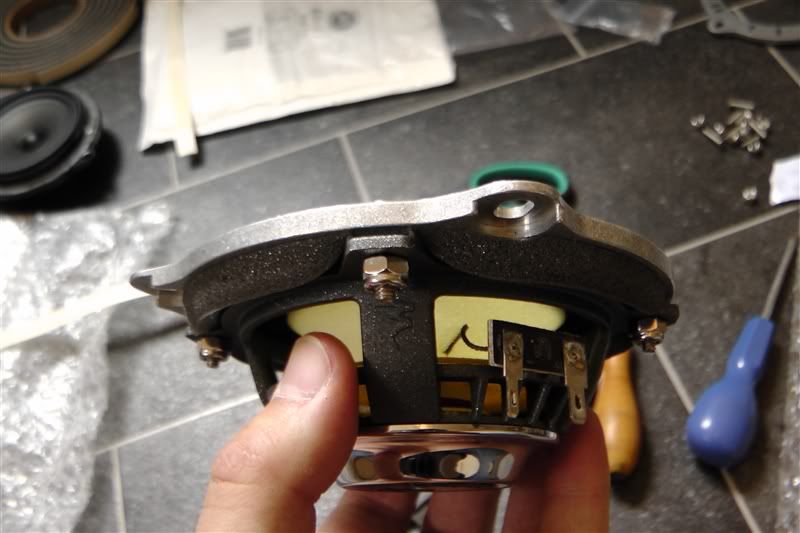 Here you can see the face of the Adaptor Ring where I later re-applied the foam rubber prior to mounting to the door card. 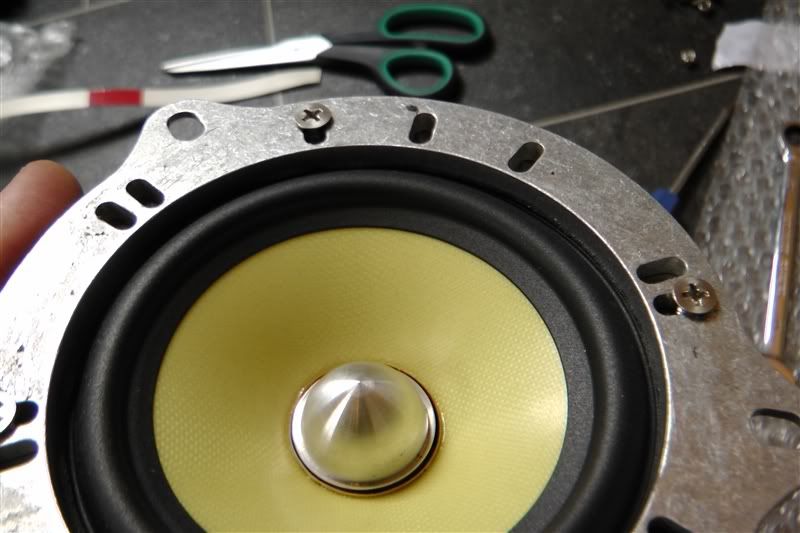 And the speaker fitted on to the door. Perfect! 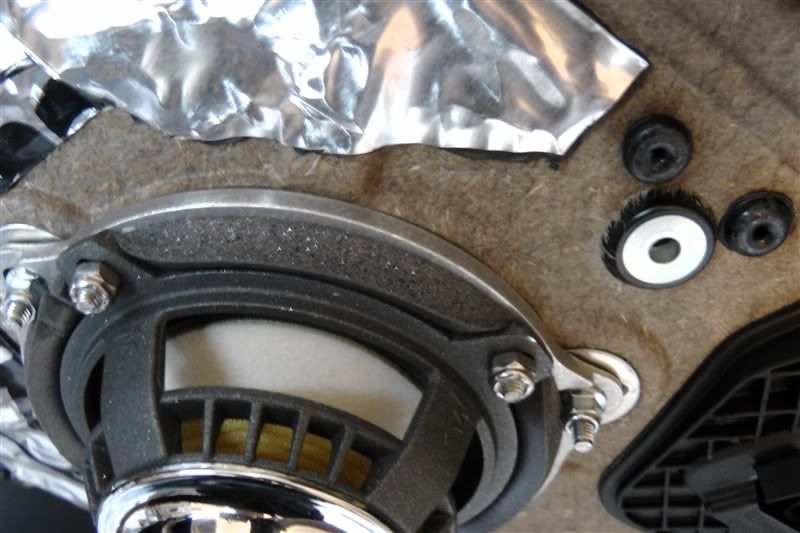 Tweeter The Focal tweeter comes like this  But after carefully prying out the metal grill and turning the actual tweeter inside its housing it pops out ready to be installed into the tweeter holders in the new door trims. 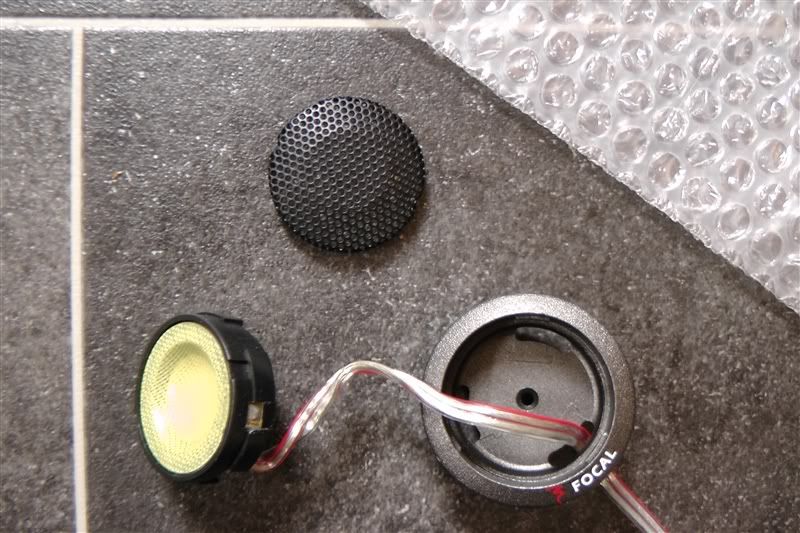 These actually clip into place and after re-inserting the foam backing mentioned earlier they were held in very securely. 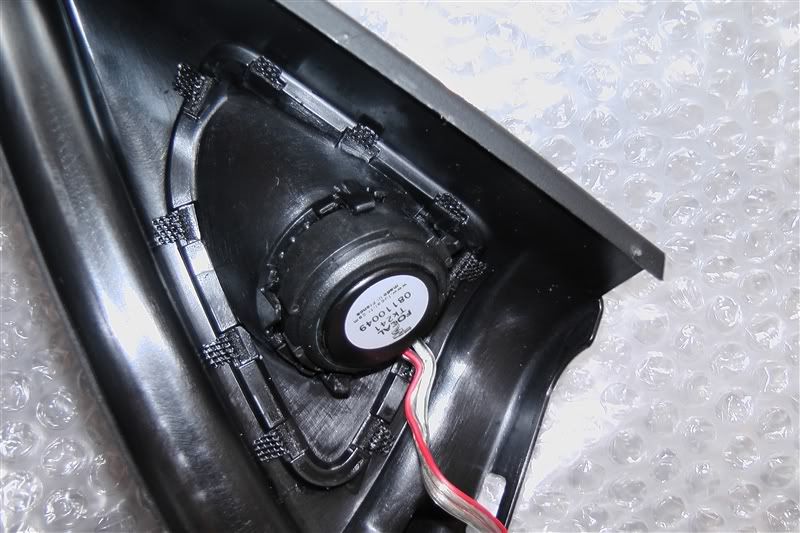 I decided to apply Dynamat to my doors following the guidance included in the BSW PDF and on doing so realised I had discovered a nice easy way to mount the Focals sizeable crossovers. 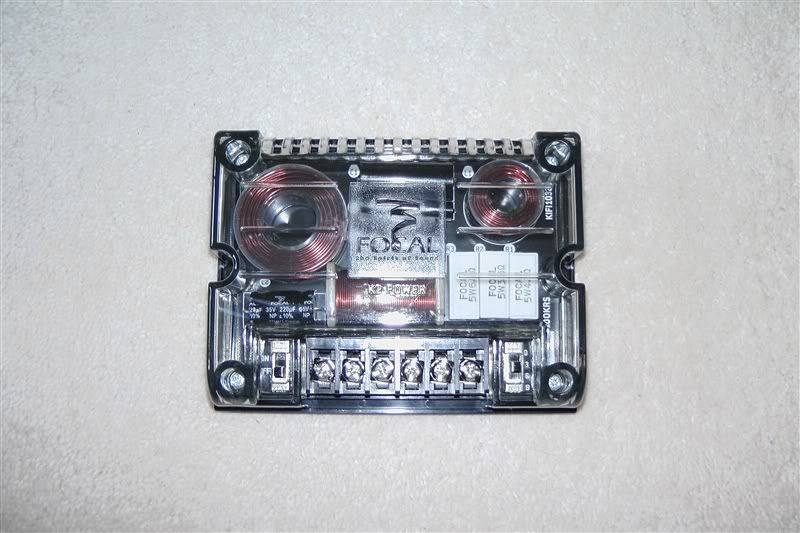 After first checking the available space I could see that the crossover would have no problem fitting in the bottom rearmost corner of the door cards here.  I applied a Dynamat base layer 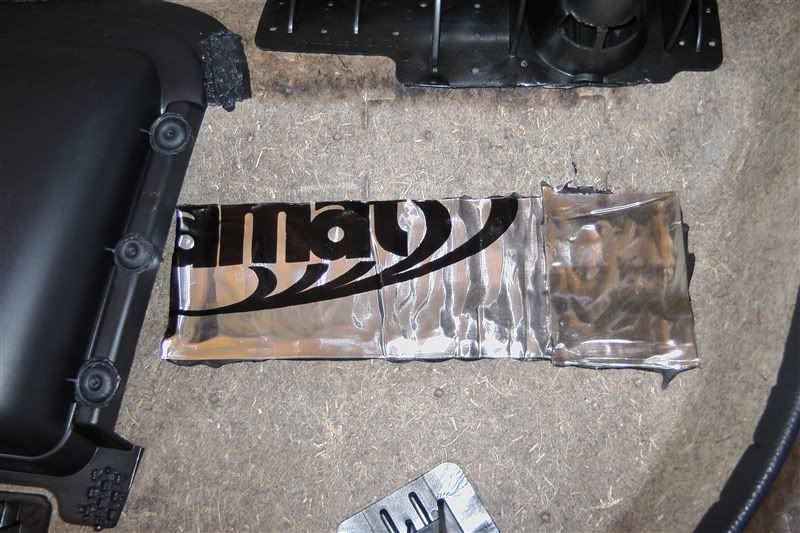 Before cutting a section just larger than the size of the crossover itself and inserting its mounting screws through from behind. 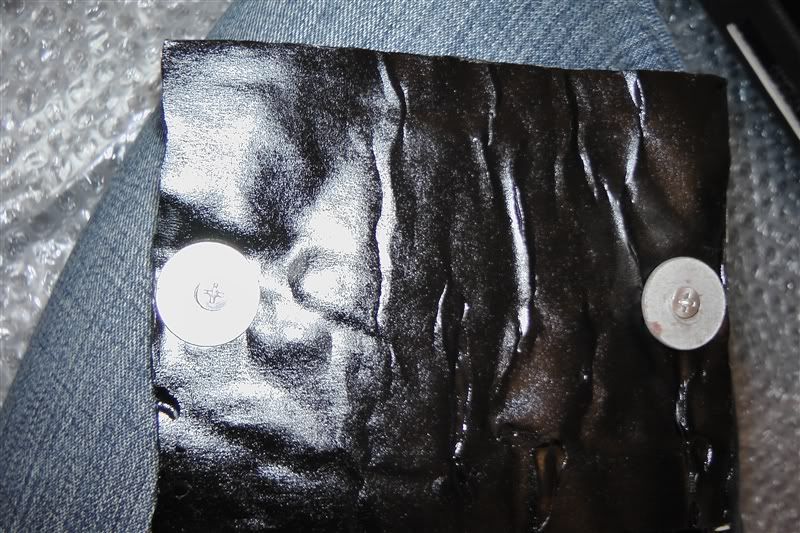 After sticking this down and applying a couple of reinforcing layers on the top I was left with a very secure mount for the crossovers. 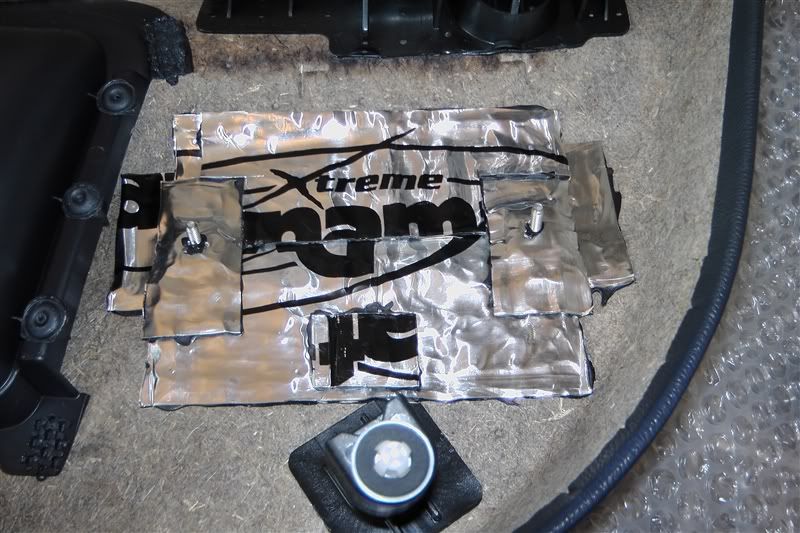 Now this may look a little Mickey Mouse but this Dynamat is going nowhere and the crossover was left securely fixed to the door with little chance of any vibration! 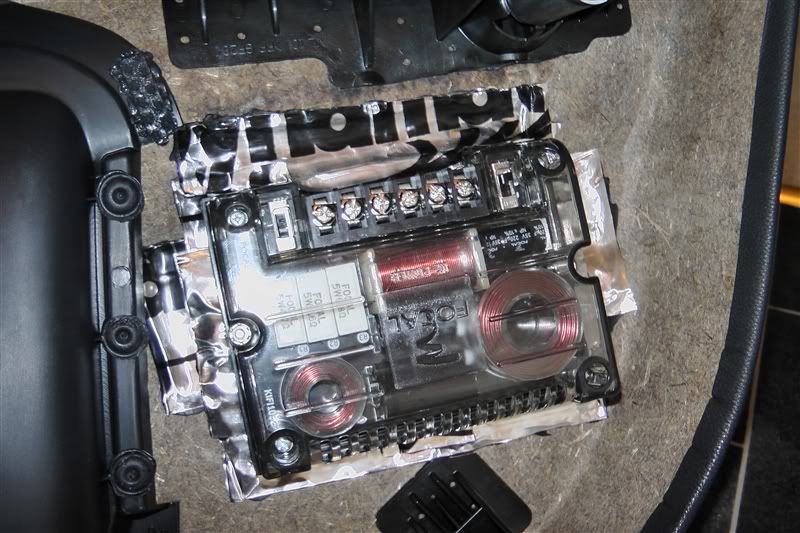 Once this was done I connected up all my wiring taking great care to ensure everything was well secured to avoid vibration once fitted. Technics speaker adaptors were used and mounted near to where the original speakers connect up to the car so I was left with two truly plug and play front door cards ready for re-fitting. You can see the two empty connectors ready to accept the Focal tweeters waiting on the car. 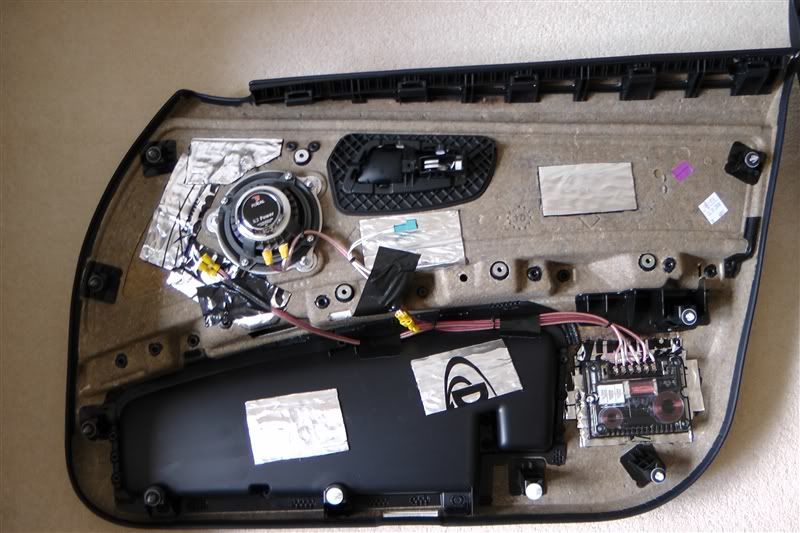 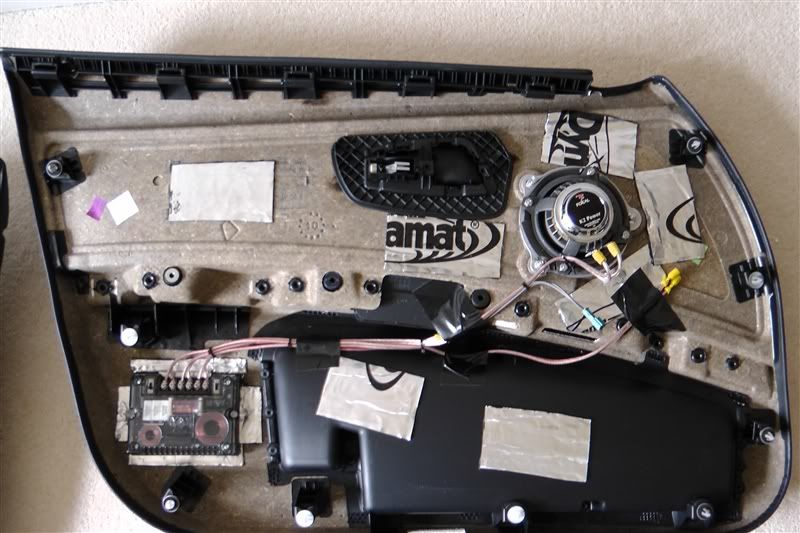 After re-fitting the front doors I tested the front speakers worked before moving on. I’m happy to say they did!
__________________
F31 335d M Sport XD - Mineral Grey - Coral Red - 19" 442M - HK Audio - M Sport Plus Pack - Heated Seats Check out my E90stereo install guide - http://www.e90post.com/forums/showthread.php?t=540954 Last edited by B33M3R; 06-06-2011 at 08:50 AM.. |
|
Appreciate
0
|
| 06-06-2011, 08:18 AM | #3 |
|
Captain
102
Rep 832
Posts |
Rear Speakers
The rear speaker grills simply lift up and unclip. Be careful though as they need to lift up from the front as they are hooked in at the rear. Just go slow and steady and you will be fine. When I began planning this install I originally decided not to upgrade the rear speakers and was going to leave them stock. Had I realised this would not be the case I would have ordered an additional two speaker connectors from Technic to keep them plug and play. To get around this oversight I ordered the following parts from BMW (after Technic kindly provided me the part numbers!) and I made up my own connectors for the rear. If you are ordering Technic’s harness I would recommend his speaker connectors as his speaker wire is a thicker gauge than on these parts and much less hassle! Part No. 61138373583 x 2 – These connect to the cars plugs. 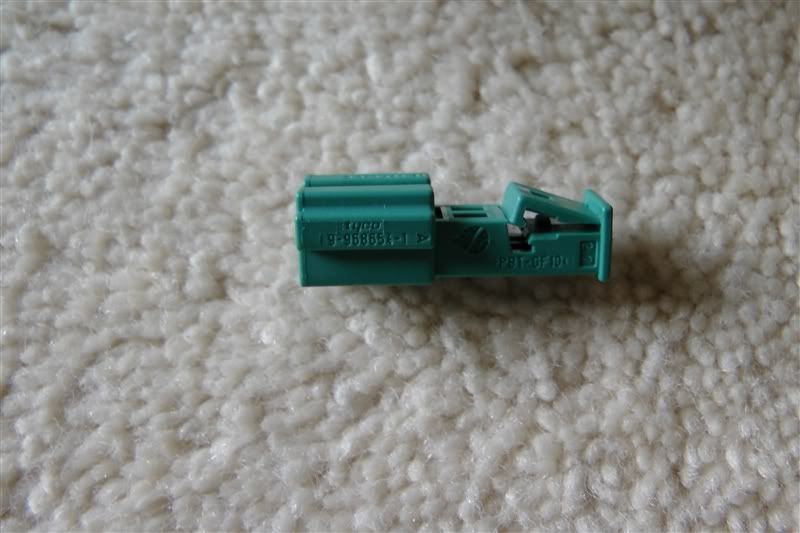 Part No. 61130005198 x 4 – These fit inside the above plugs and are secured by a push down clip. 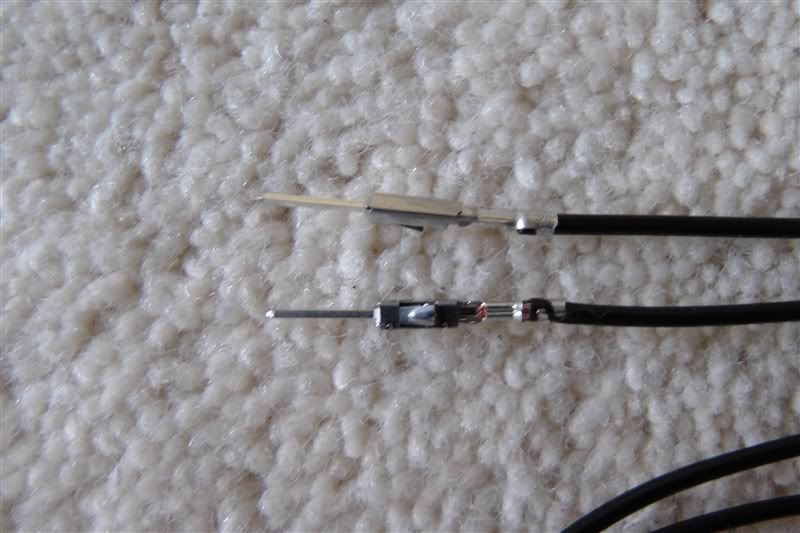 Here is my connector. I used the speaker wire supplied with the Vibe Slick 4’s, cut to length, and soldered them onto the above connectors wires before heat shrinking. Not the best picture but plug and play and secure. 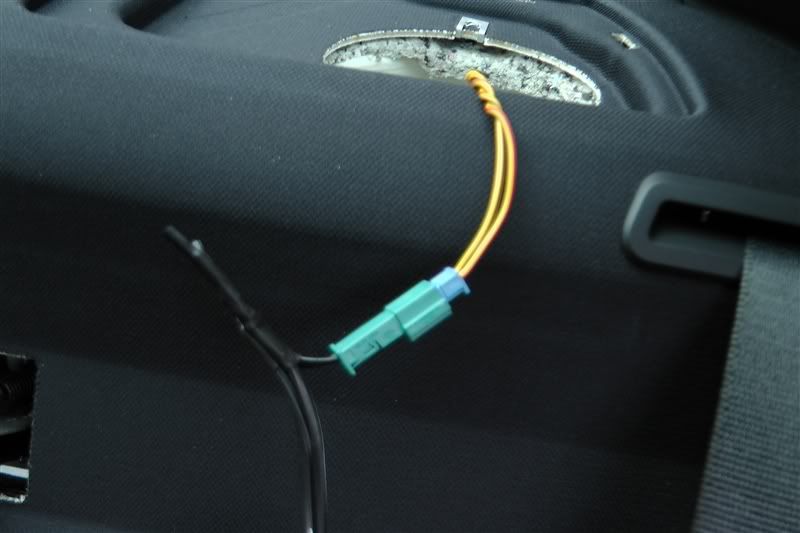 The Vibe speakers have four mounting tabs whereas BMW’s fitment requires only three. The tabs on the Vibe speakers are made in such a way that they can be cut off by carefully snipping them with wire cutters. Any remaining rough edge can be filed down easily with a file before mounting. The speakers fit fine and all I used was the original fitting screws but added a washer around the top screw to allow it to hold the uppermost edge of the speaker in place. 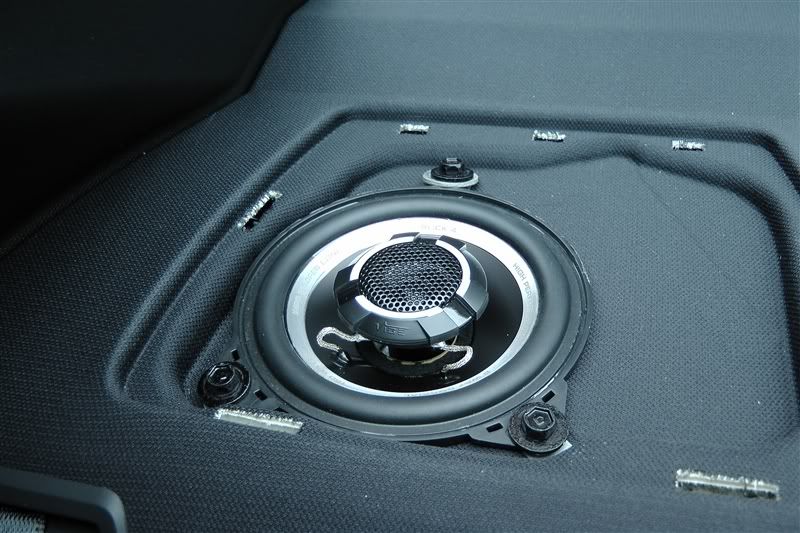 Again after fitting I tested the rear speakers worked before moving on.
__________________
F31 335d M Sport XD - Mineral Grey - Coral Red - 19" 442M - HK Audio - M Sport Plus Pack - Heated Seats Check out my E90stereo install guide - http://www.e90post.com/forums/showthread.php?t=540954 Last edited by B33M3R; 06-06-2011 at 08:30 AM.. |
|
Appreciate
0
|
| 06-06-2011, 08:19 AM | #4 |
|
Captain
102
Rep 832
Posts |
Centre Speaker and Technic Harness
Next I decided to tackle adding the centre speaker and fitting Technic’s harness. This is the part I was most apprehensive of as I couldn’t find a guide specific to removing the latest LCI iDrive head unit. I just took it really slowly and carefully fitting both at the same time. It was actually far easier than I expected. First I removed the metal trim piece by carefully prying the edge where it meets the passenger side door. This actually comes out really easily and it is merely push fitted into the green slots using metal type ‘spikes’ on the metal trim piece. 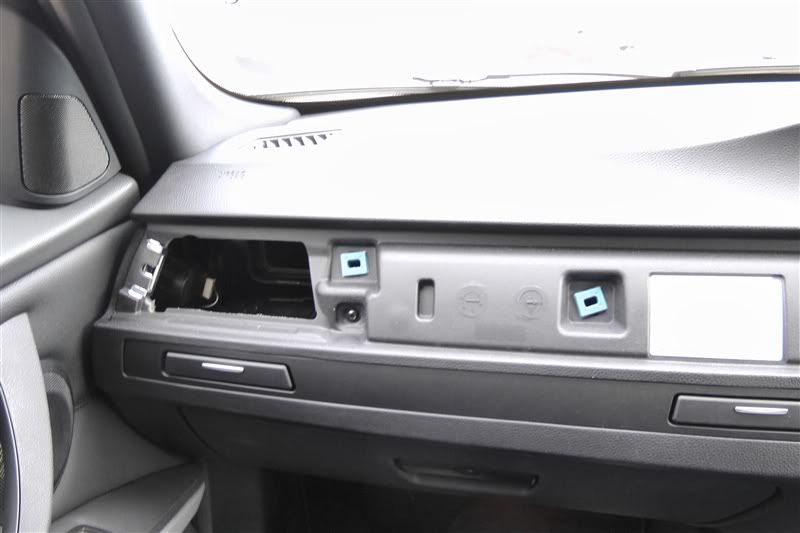 Be careful as there are two clips which attach to the metal trim piece behind the centre vents. These attach to the hazard light switch and hot/cold blend switch. These just unclip. 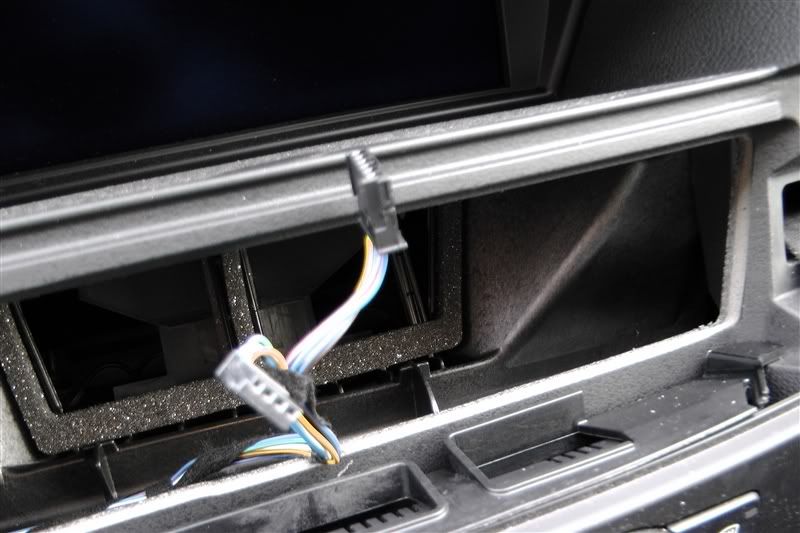 There is one further clip which attaches to the rear of the Start/Stop button  Once these are disconnected put the metal trim piece some place safe so as not to scratch it. It feels expensive! Now remove the heater controls which again pull out with little force. 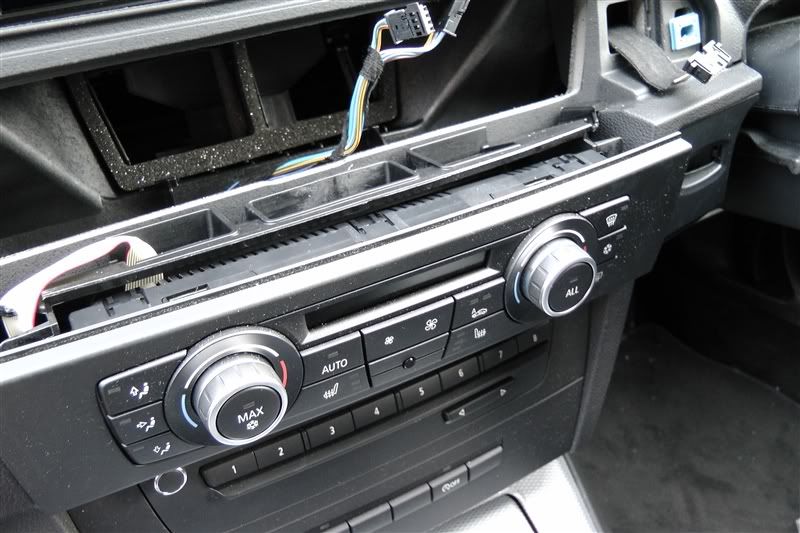 I found that along the top edge of the heater controls where two plastic lugs which clipped into the dashboard itself. 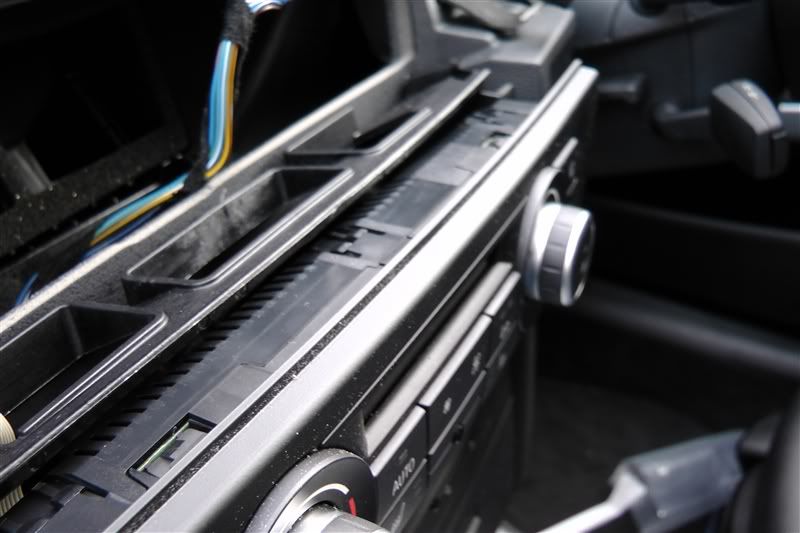 These didn’t require any force to remove and in all honesty you can just get your fingers behind the unit and push it out uniformly. 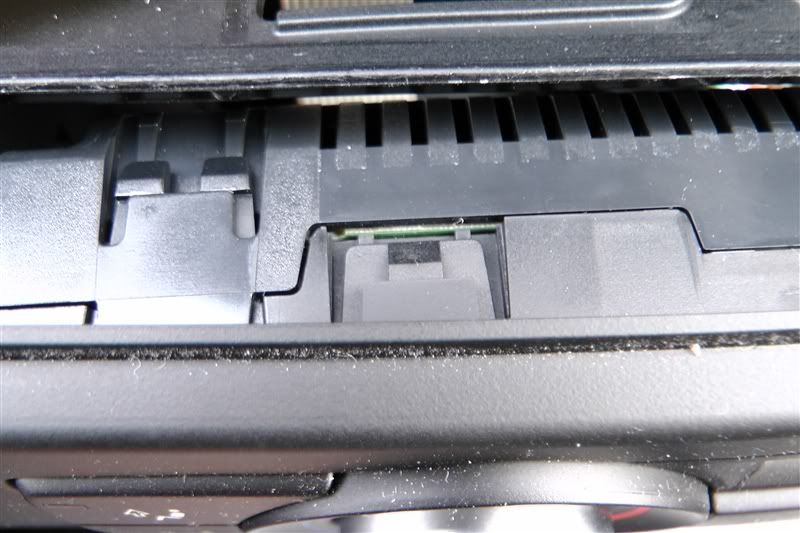 On either side of the unit were two spring loaded clips that just popped out in this process. (I should’ve photographed these!) I wouldn’t suggest pushing anything in from the sides of the unit as I have seen reference to on other guides, using a folded credit card etc. I had one of these to hand but it wasn’t necessary with this method. It may be that the pre-LCI cars have a different fitment. Slight pressure was all that was needed. Once you have it out there are three multi plugs which simply unclip. The centre and right hand clips in the picture have a bracket which you unclip and hinge downward. It can be seen on the centre plug in grey against the black. You push this to the left of the picture and it releases the black clip. 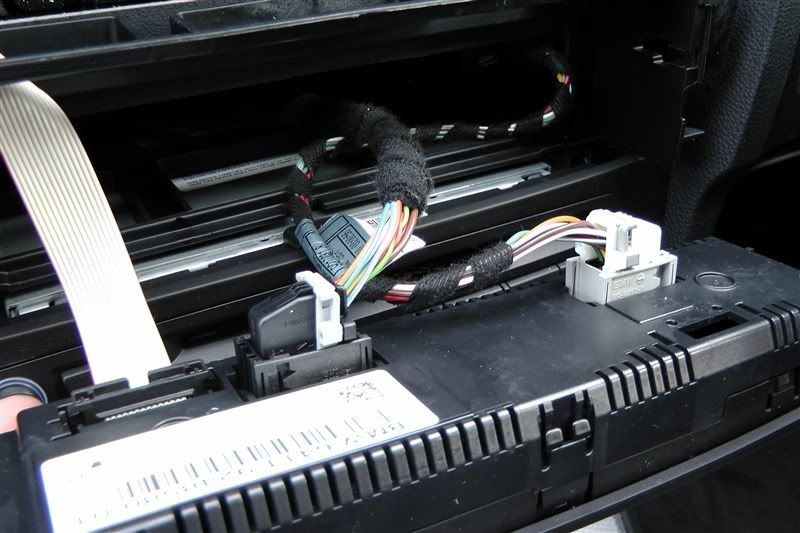 Here with the unit removed you can see the hinge type clip in the background. 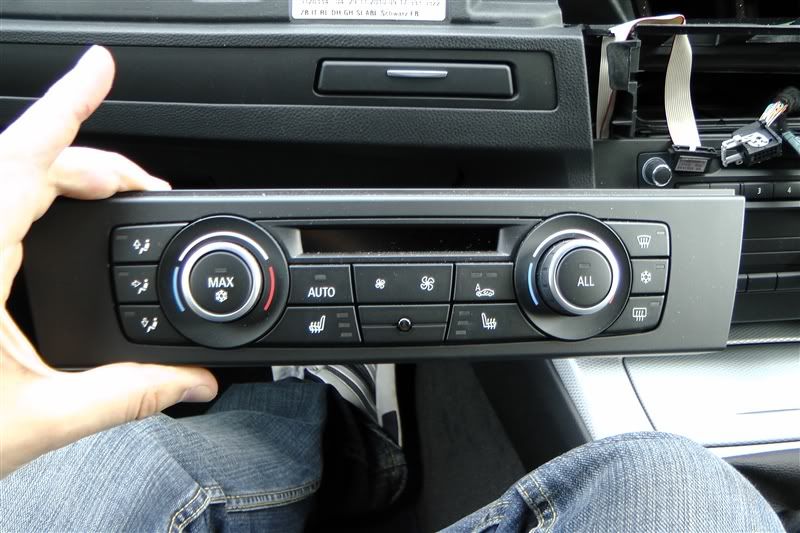 Once the heater controls are removed the outer plastic trim surround can be carefully pried off.  This is held in place by four long slim metal rods which again pull out with light pressure.  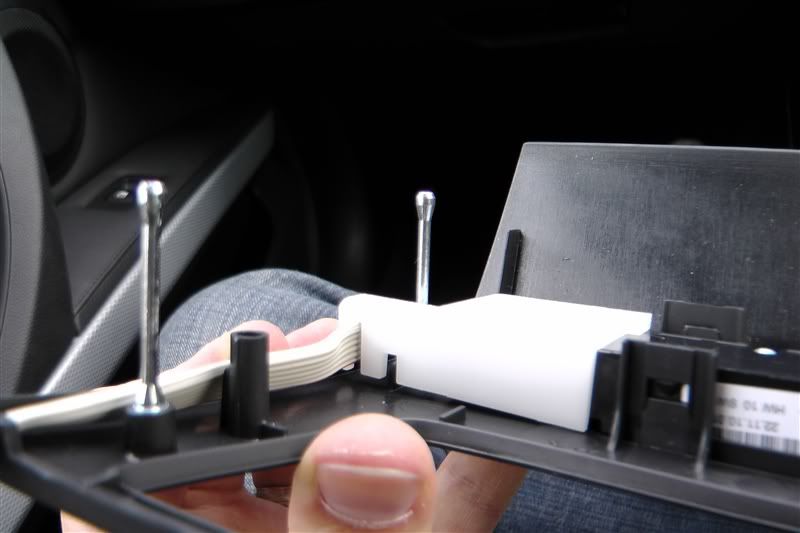 There is one multi plug which needs to be unclipped before freeing the surround completely. 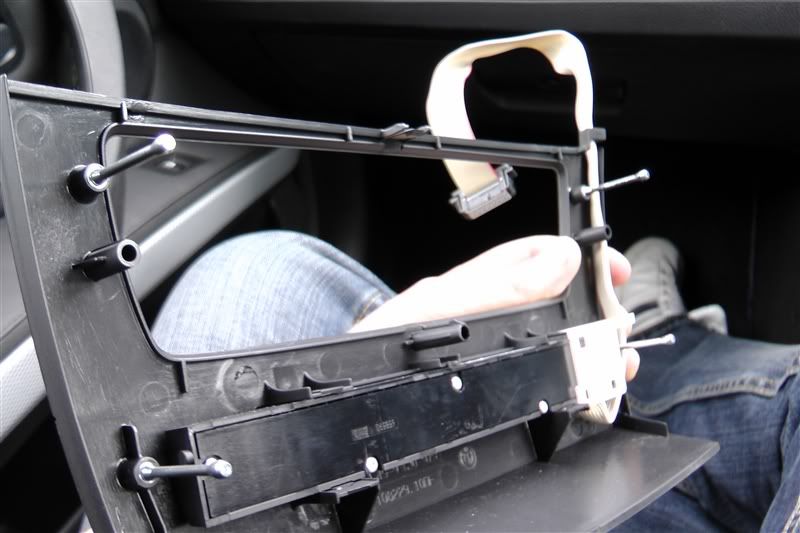 Next comes the removal of the head unit 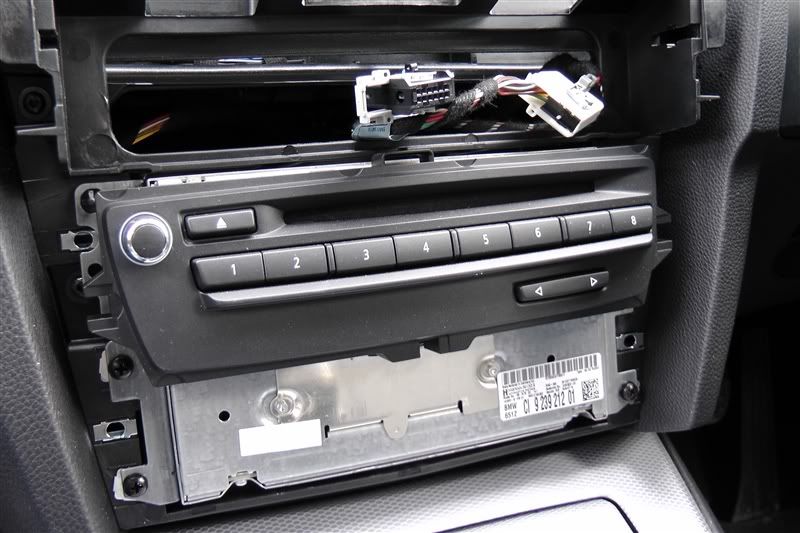 This is held in by four screws 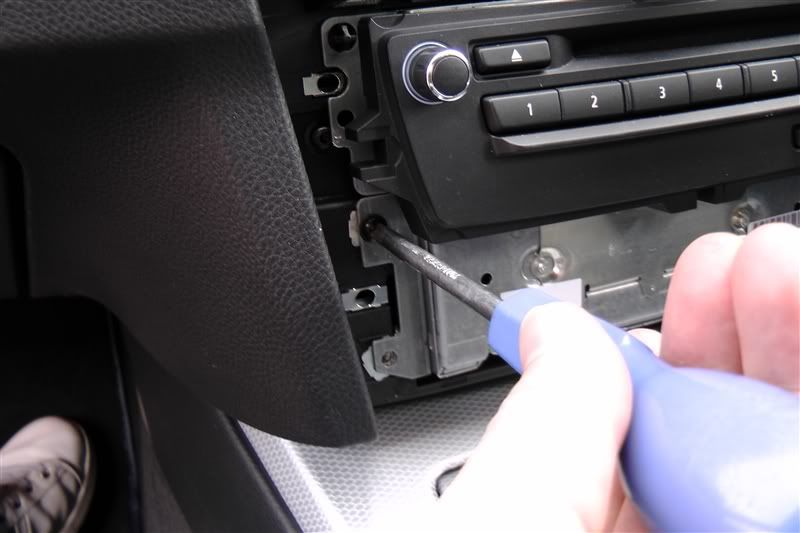 And simply slides out after they’re removed. I recommend placing a towel or similar onto the centre console to protect the metal surface from scratches as the head unit will rest here whilst you’re fitting the centre speaker and harness and it has a metal frame. 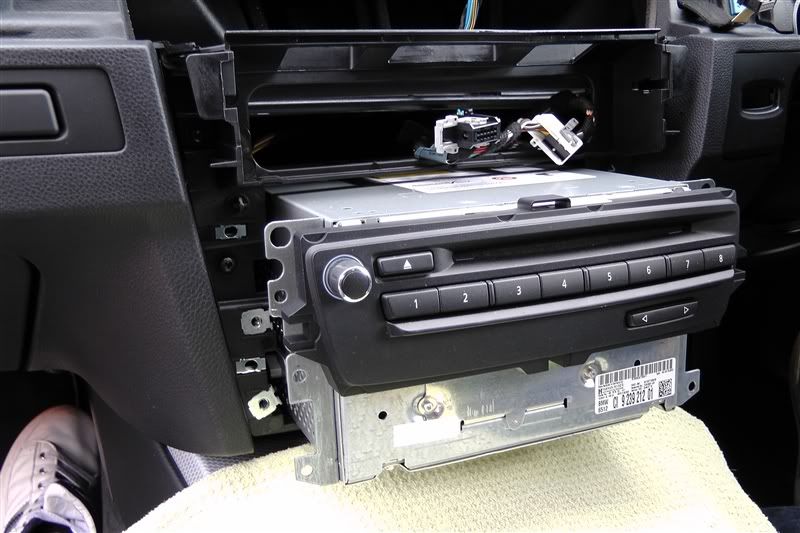 Once pulled out the connectors are visible at the bottom left hand side. 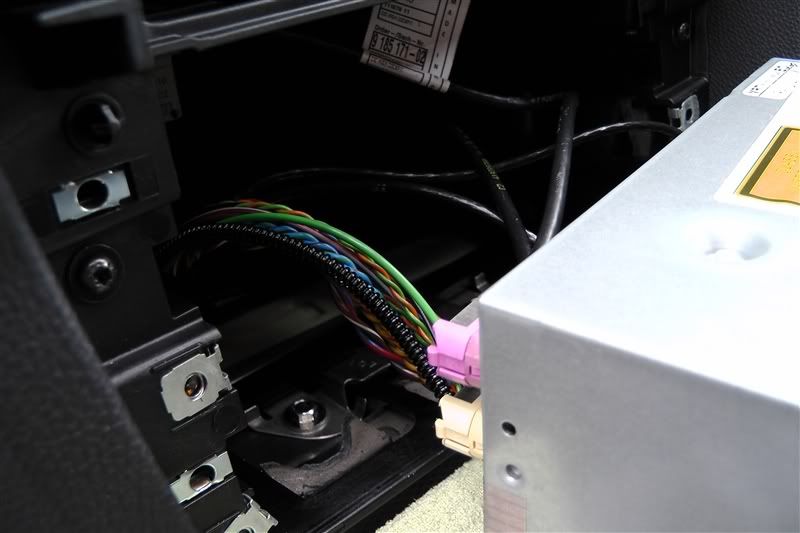 Once I had this clear I decided to fit the centre speaker. For this I used Technic’s guide which was a great help. As you can see the ‘Base’ stereo has no centre speaker as standard.  The grill itself lifts up by applying upward pressure at its edges, I suggest using a trim tool here to reduce the risk of marking the dash and starting at the corner nearest to the passenger seat. Once off underneath this is a plastic frame held in by four torx screws. In the centre of this is the space for the speaker. 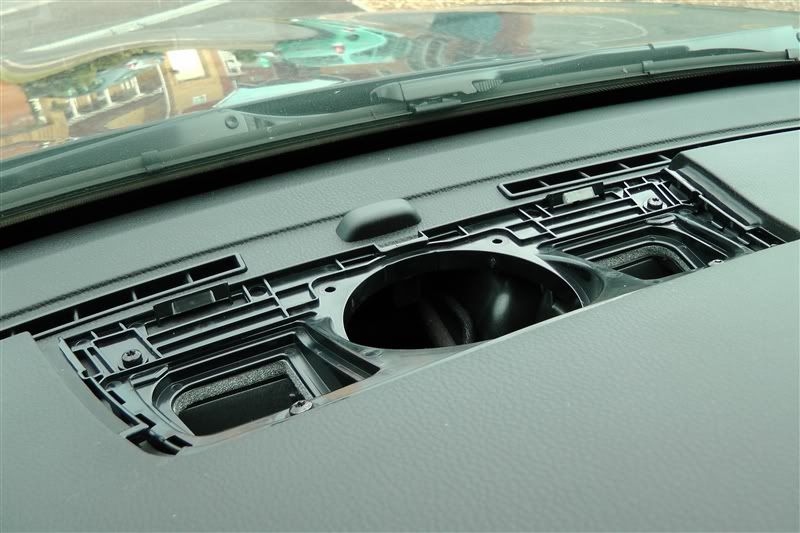 After taking the frame out I mounted the Vibe speaker and set it aside so that I could feed the speaker wire through. Again, like with the rear speakers the Vibe speaker has four mounting tabs which can be clipped off and any rough edges filed down. I used three screws and the same method of placing a washer around the top screw to hold it firmly in place. I also used some foam rubber around the Vibe speaker itself to make a good seal and prevent any vibration. 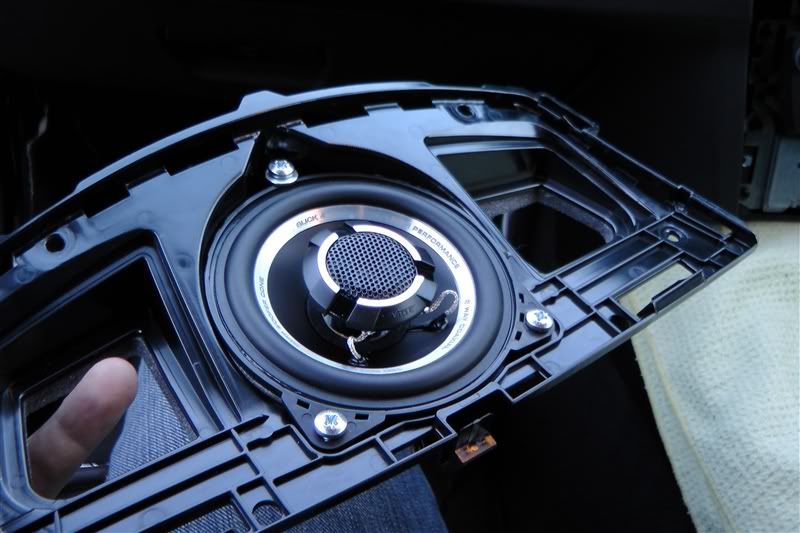 Before attempting to pass the centre speakers wire down through the dashboard I removed the trim underneath the glove box. This is held in by two Torx screws along the front edge and has two slot type fitments at the rear. 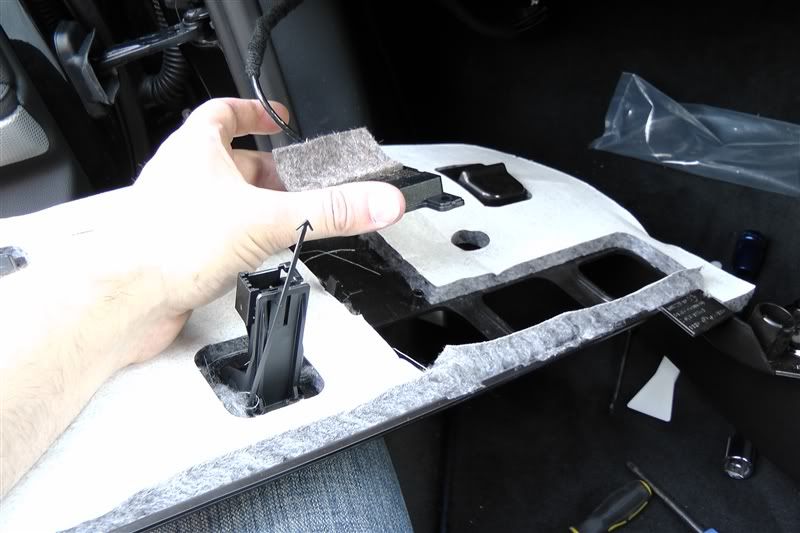 When this drops down there is a multi plug which goes into what looks like a diagnostic port and a transmitter/receiver or similar attached to the trim itself which needs releasing. It has two clips which need gently prying back and it then slides off two circular locators like this. 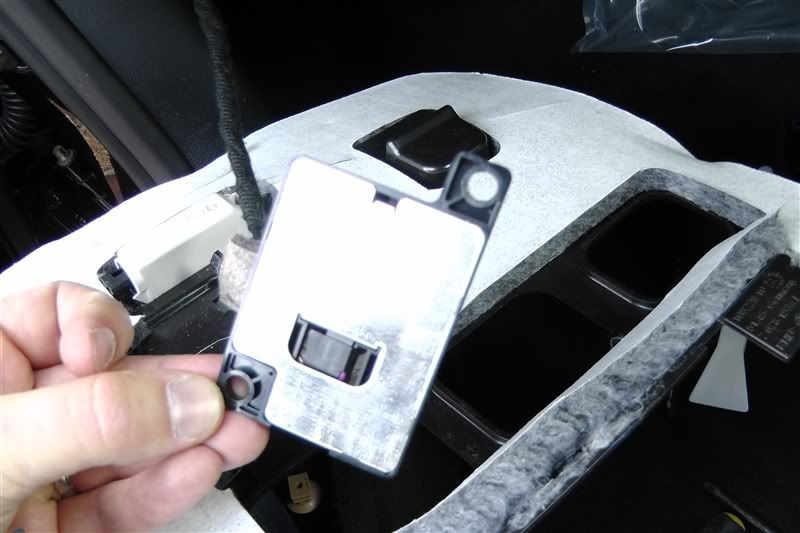 The speaker wire fed easily down through the dash 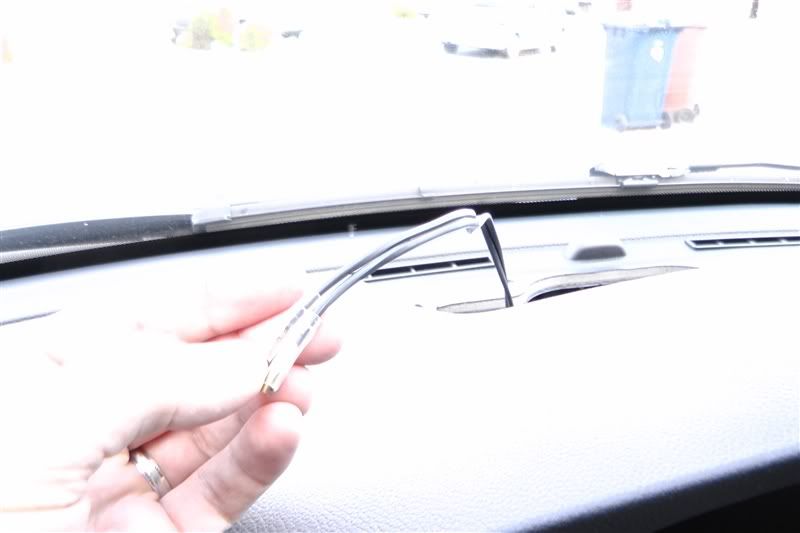 Dropping down nicely behind the head unit where I routed it through to the passenger foot well. 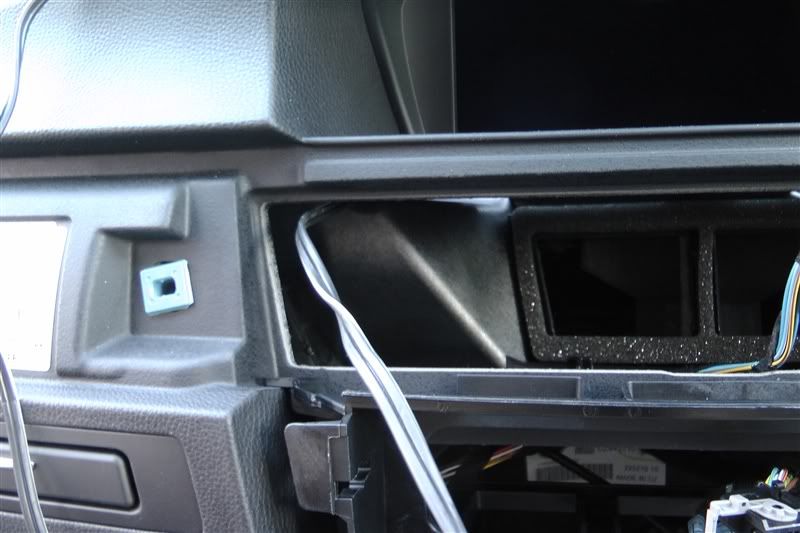 I then unplugged the cars harness from the back of the head unit. Be sure when you remove the original harness plug from the rear of the head unit and before plugging in Technics harness you remove the fibre optic cables (seen here with the green wire and circular pins) and transfer them into Technics or else none of your Nav/Telephone/Bluetooth etc. will work! 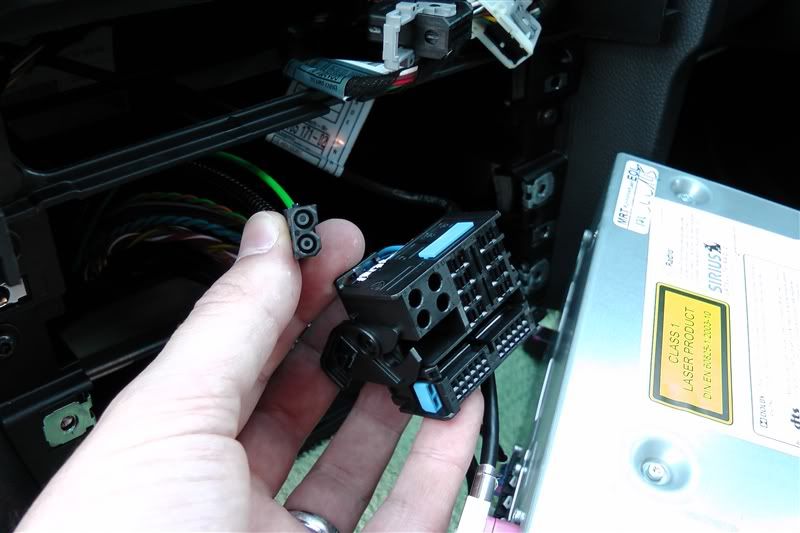 After this it was time to fit Technics harness 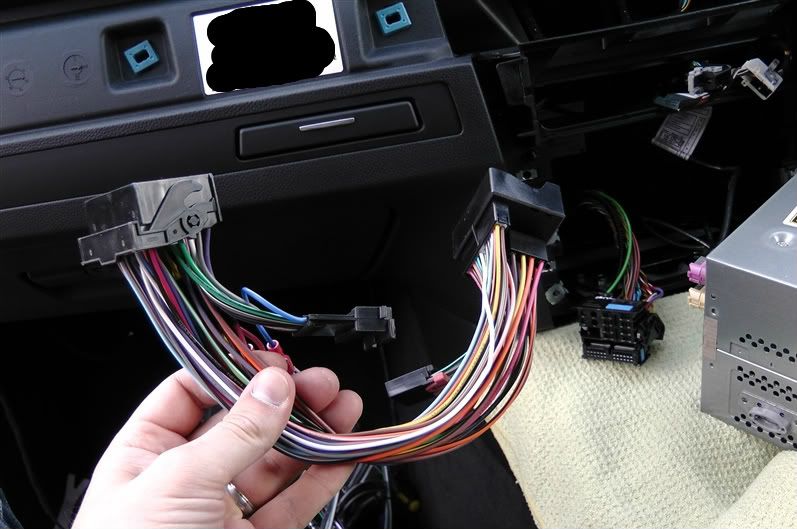 Technics harness simply fits in line between the head unit and the cars loom. 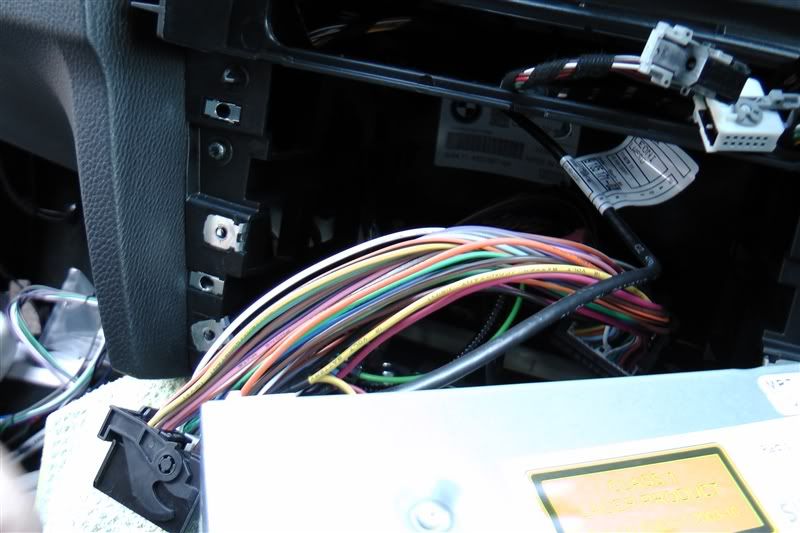 It has two plugs on it which connect to the long cables which go to the rear of the car. 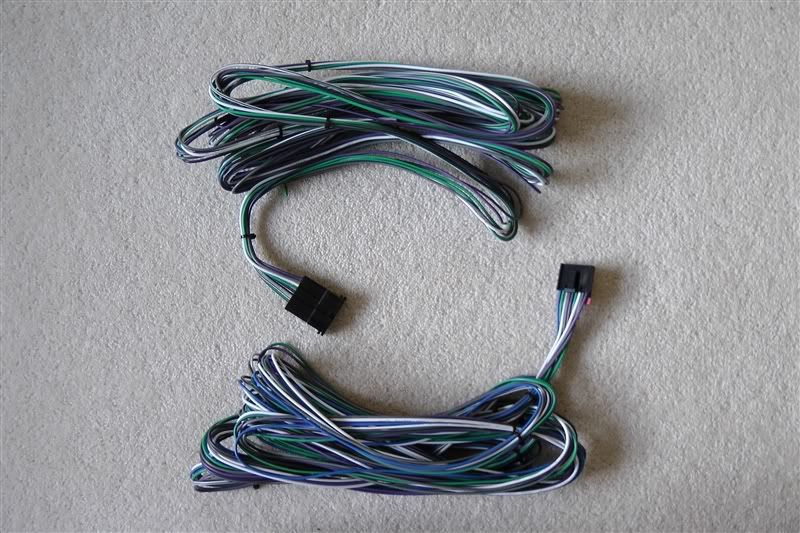 One of these cables is an ‘output’ and one an ‘input’. The ‘output’ runs from Technics harness behind the head unit to the rear of the car carrying the speaker outputs (sound signals) and remote turn on (for switching the amps etc. on and off) The ‘input’ then takes whatever amplified signal configuration you chose from the rear of the car back to meet up again with the harness and into the cars original loom and onto the speakers. 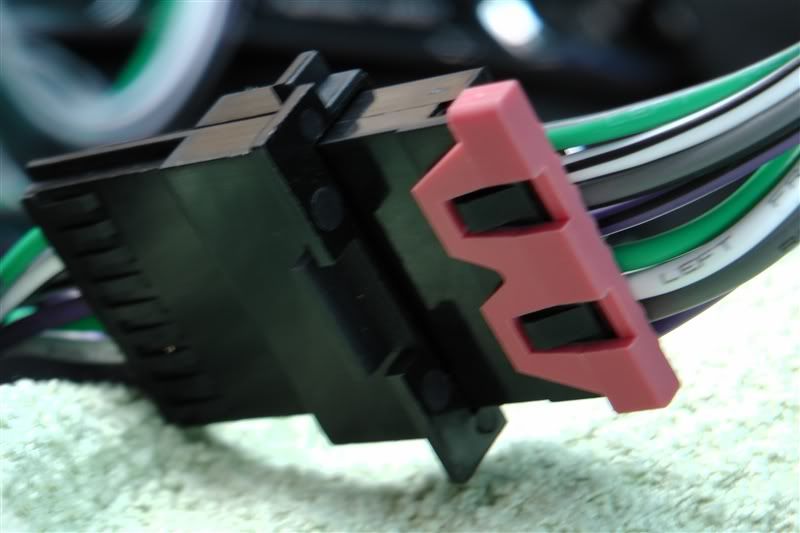 I ran all the necessary wires, including my additional centre speaker wire through a gap behind the centre console which was ran up underneath the passenger foot well and hidden from view after the panel underneath the glove box was refitted. 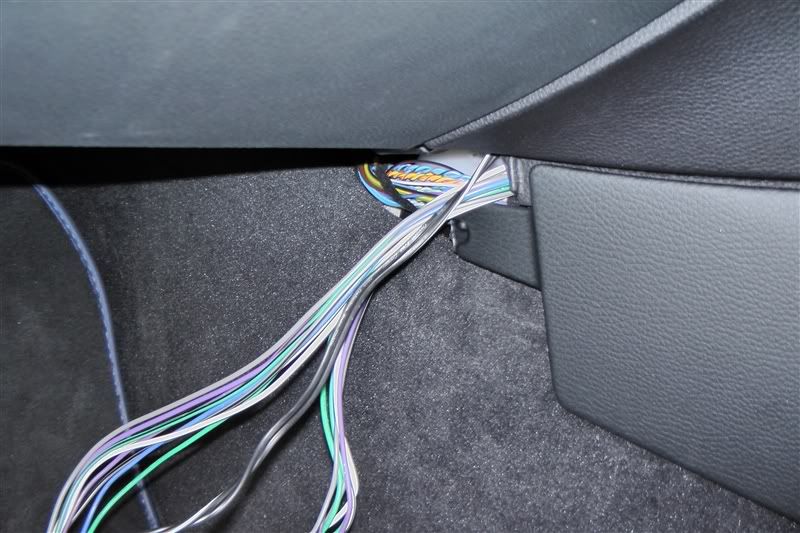 It was quite fiddly but with trial and error the new harness and additional cabling fitted in behind the head unit and it was slid back into place. It is quite a snug fit but it does fit. I found swearing at it allot helped. Be patient!  I then fitted the new centre speaker into the dash, which I think looks quite good. 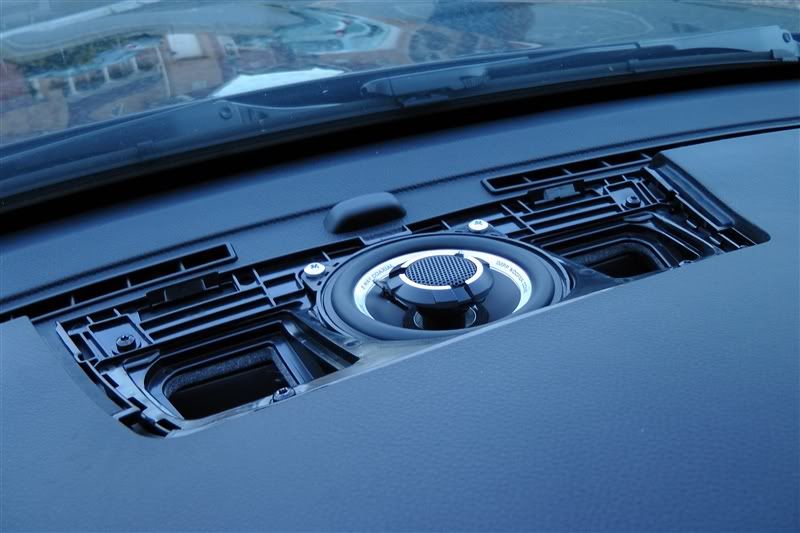 To fit a centre speaker you will also require a new trim piece, part no 51457123750 for the iDrive version. 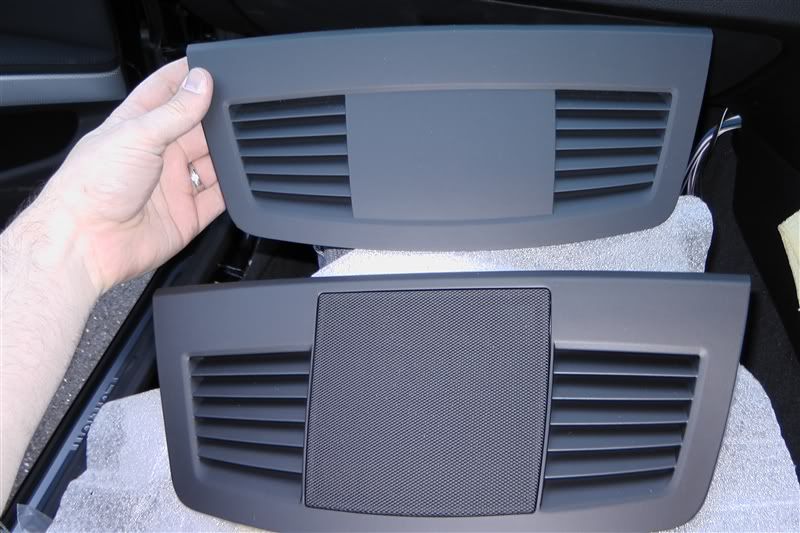 For some reason the new trim panel has additional long plastic lug (as below) which prevented it fitting straight away. I simply snipped this off and it fitted perfectly. Maybe this is something added by BMW to prevent this mod being done? Who knows? 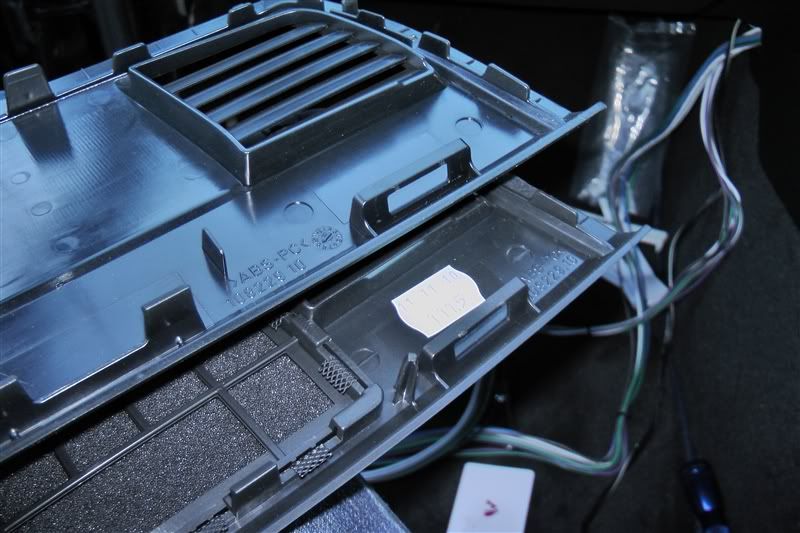 New trim fitted 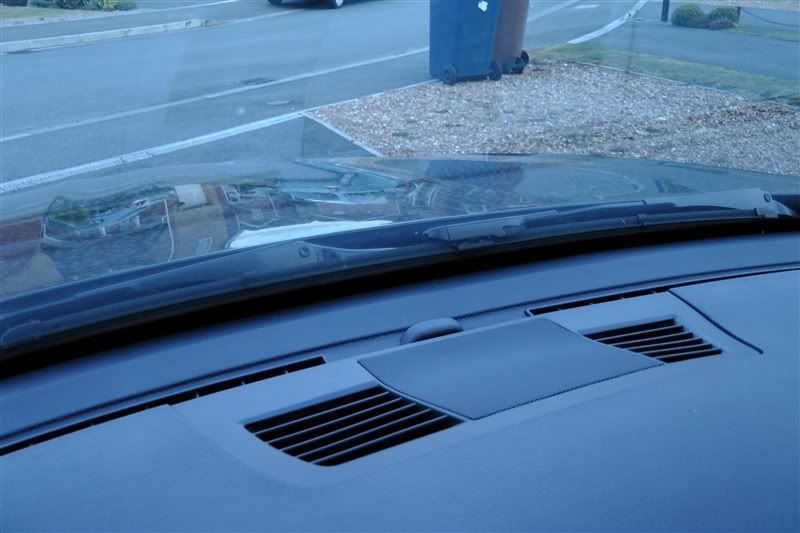
__________________
F31 335d M Sport XD - Mineral Grey - Coral Red - 19" 442M - HK Audio - M Sport Plus Pack - Heated Seats Check out my E90stereo install guide - http://www.e90post.com/forums/showthread.php?t=540954 Last edited by B33M3R; 06-06-2011 at 08:38 AM.. |
|
Appreciate
0
|
| 06-06-2011, 08:19 AM | #5 |
|
Captain
102
Rep 832
Posts |
Under Seat Earthquake SWS8’s
I managed to find two second hand under seat enclosures for sale on eBay a couple of months ago and bought them so that I could use these and preserve my originals for when I eventually change the car. Also the newer cars speakers are glued in rather than screwed in so you can’t get them out without damaging them. I had to hand a couple of JTsherri’s spacers which I thoroughly recommend investing in if you are doing this! 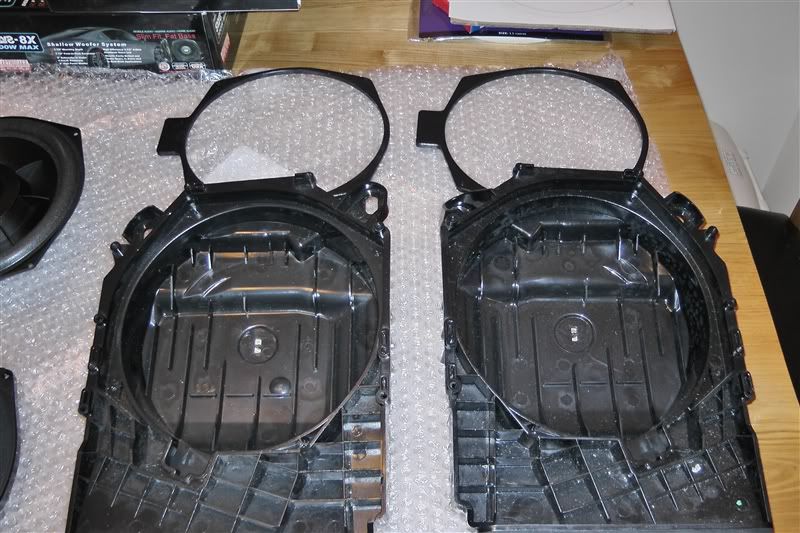 Original v Earthquake 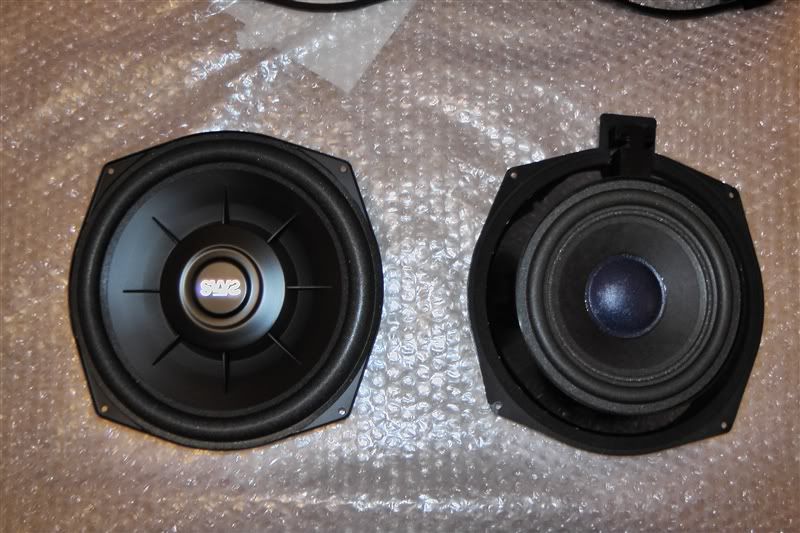 These were extremely easy to make up using the spacers. I put a layer of foam rubber on the underside of the spacer to mate with the enclosure. I then ran foam rubber around the underside of the SWS8 where it mated to the spacer. This formed a perfect seal. 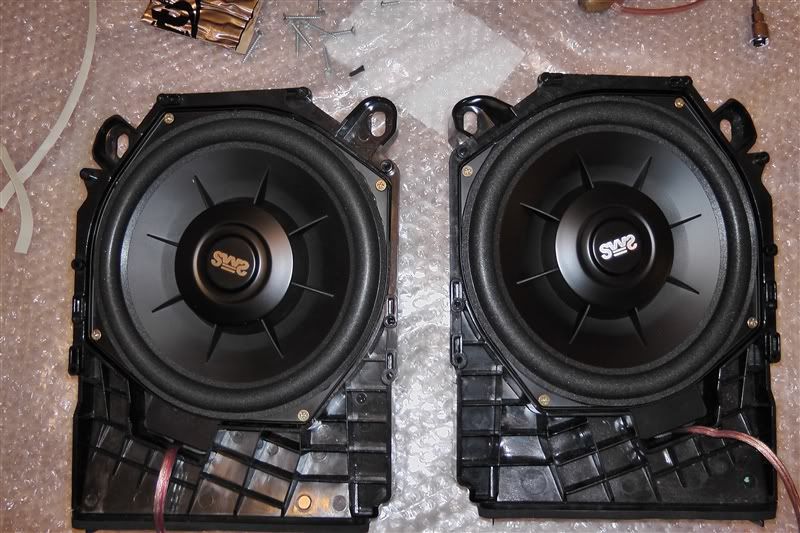 For the area where the new speaker wire exits the enclosure I ran foam rubber around the edge before screwing it down firmly. This again formed a really tight seal without the need for cutting a groove in the spacers. 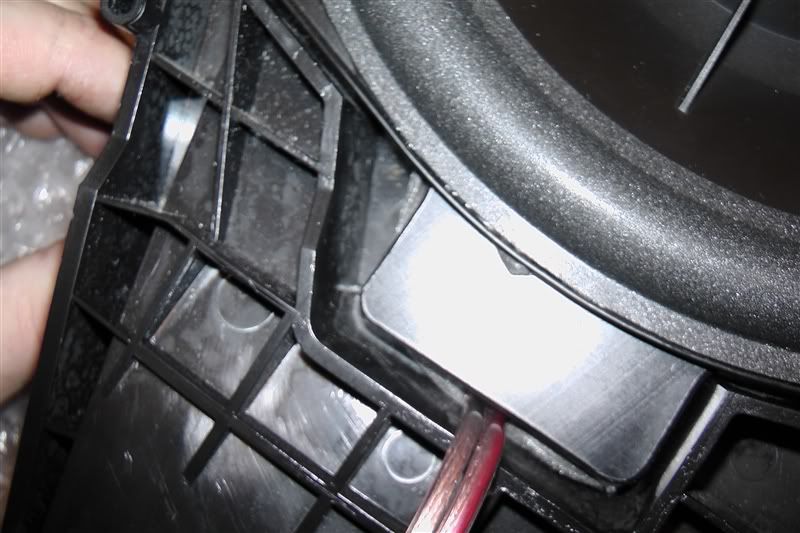 Next I fitted the new enclosures by loosening the four Torx bolts on each front seat and carefully tipping them backwards. Make sure you have disconnected the battery by this point in case you accidently unplug the cables under the seats. I have read somewhere that this can cause an airbag error which requires a dealer reset. I found that there was more than enough slack in these cables for this not to happen but better to be safe than sorry. 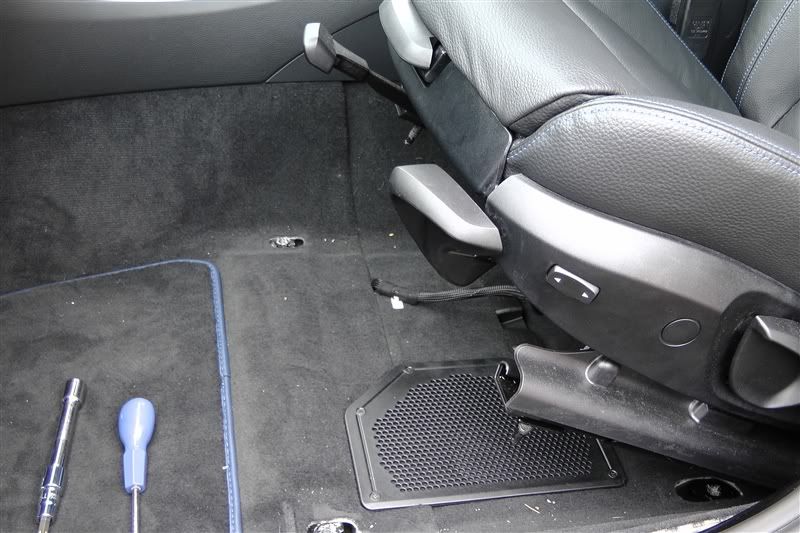 The grills simply unscrew 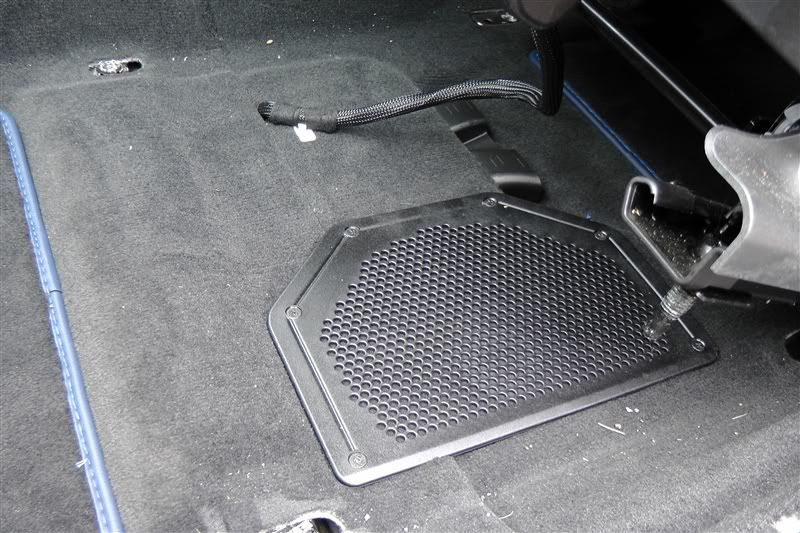 To reveal the enclosure 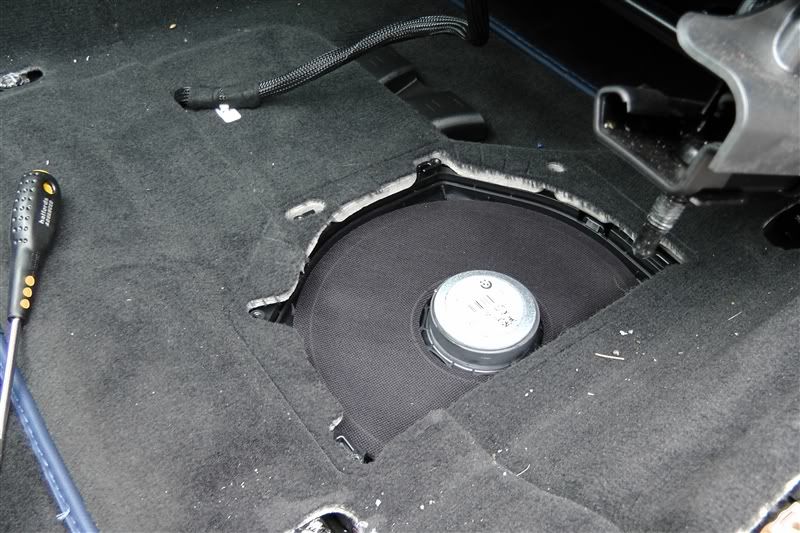 There are two Torx screws holding this in, once removed it lifts straight out. There is a plug to disconnect from the speaker before you can lift it out. 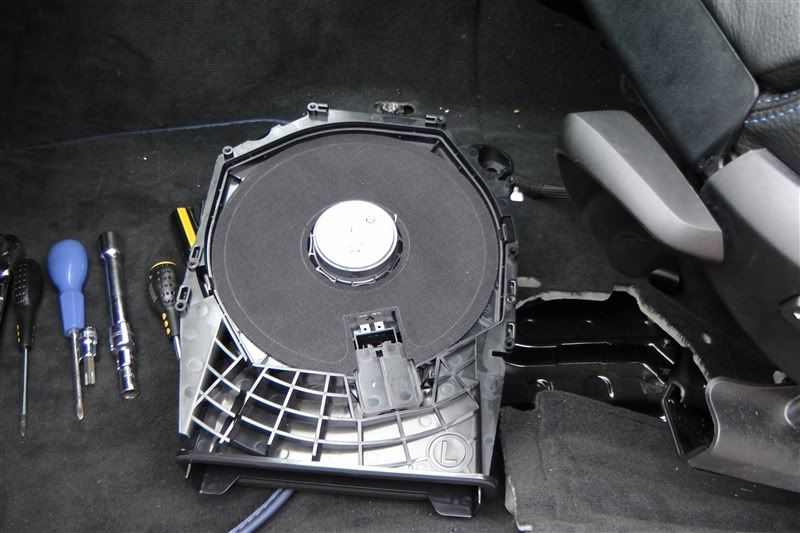 New enclosure ready to go 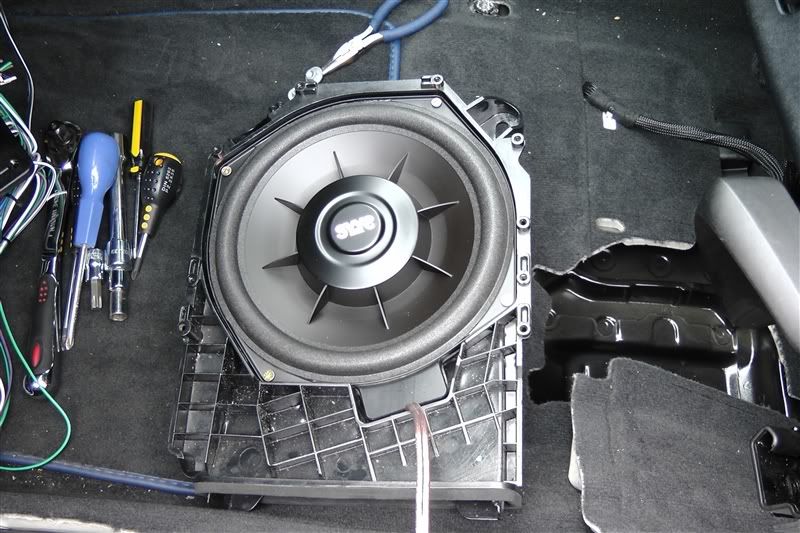 And in she goes. Now doesn’t that look much better? 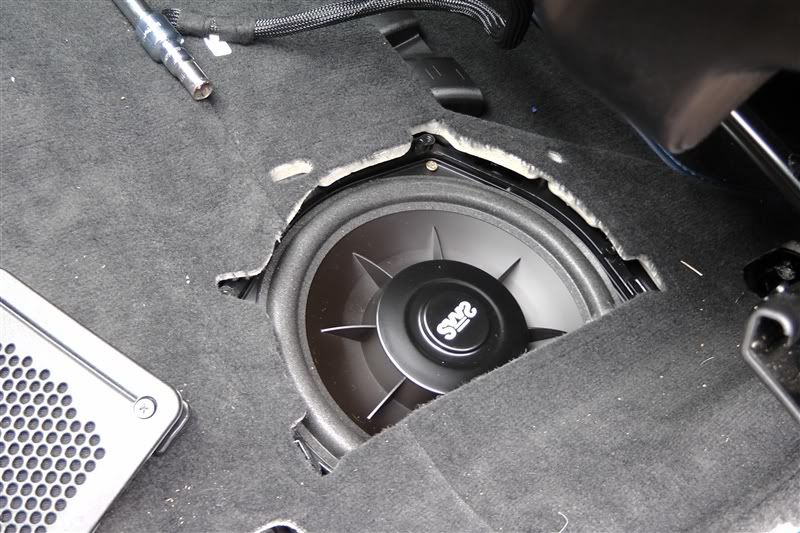 Included with JTsherri’s spacers are two further spacers the same shape as the grill which fit on top of the enclosure and underneath the carpet to raise them off the SWS8 and prevent it being hit by the cone. The grill then screws neatly back in place. 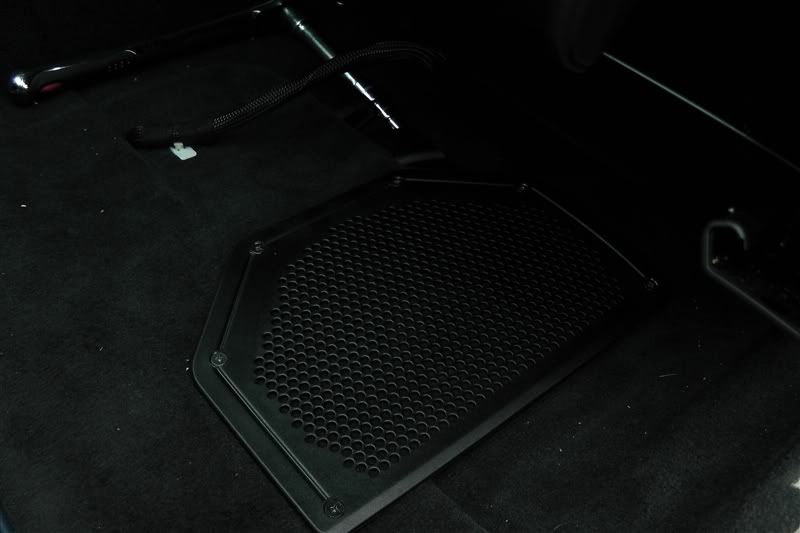 Before re-fitting the seats make sure you fit Technics jumpers into the original connectors that ran to the under seat speakers. There is one each side of the car. I found that the two centre pins would not push in fully no matter what I did (same on both sides) so I applied heat shrink, to prevent the possibility of shorting, prior to pushing them in as far as they would go. They made good contact so there is are issues, it may be the plugs have been changed slightly on newer cars? 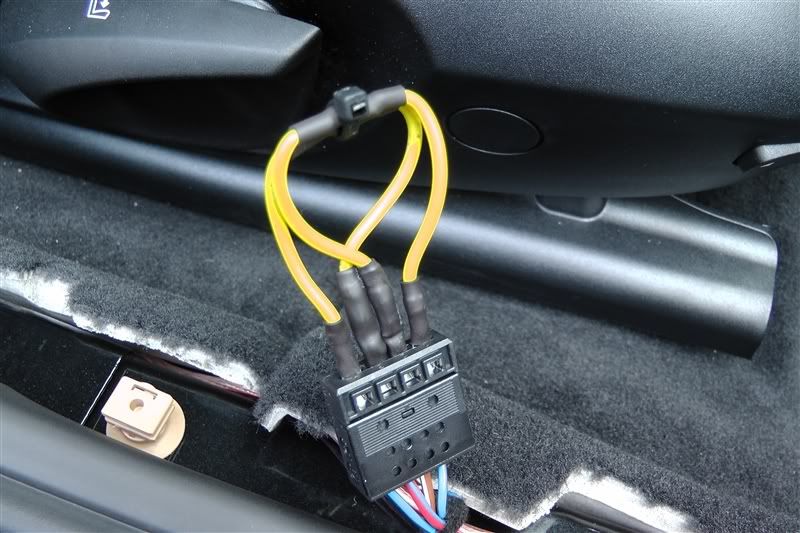 The cables from Technics harness ran down the passenger side of the car quite easily and there was plenty of room for the new speaker cables for the centre speaker and passenger side SWS8. I also decided to permanently mount the display for the MS8 in the glove box as I know I will probably want to fiddle with it now and again so I ran the displays cable down the passenger side also. I ran the new speaker cable to the driver’s side SWS8 down the driver’s side of the car. The trim panels lift up easily each side and are a push fit. Below is a picture of the cables passing underneath the rear seat, passenger side (trim removed). I neatened these up with cable ties before replacing the trim. 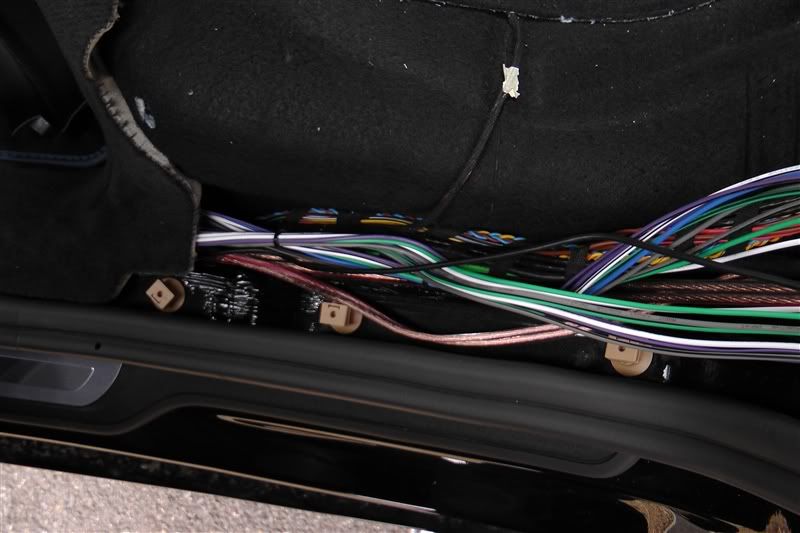
__________________
F31 335d M Sport XD - Mineral Grey - Coral Red - 19" 442M - HK Audio - M Sport Plus Pack - Heated Seats Check out my E90stereo install guide - http://www.e90post.com/forums/showthread.php?t=540954 Last edited by B33M3R; 06-06-2011 at 08:40 AM.. |
|
Appreciate
0
|
| 06-06-2011, 08:20 AM | #6 |
|
Captain
102
Rep 832
Posts |
Power Hook Up
For the main power hook up I used a ring connector which fitted underneath the below battery distribution cover prior to the fused side. I used 4 AWG passing through an inline fuse before meeting a fused distribution block I mounted underneath the boot lining next to the COMBOX. 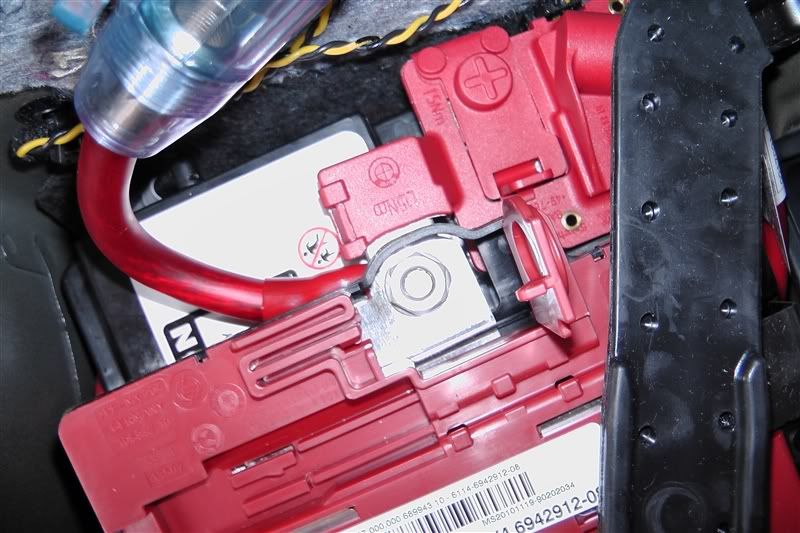 From this I used two separate runs of 8 AWG to both the Amp and the MS8. 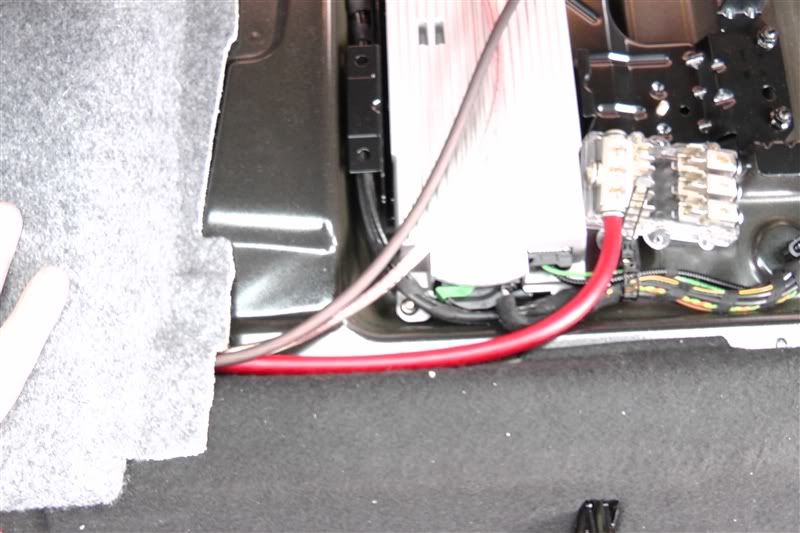 Both the Amp and MS8 were each earthed separately using 8 AWG cable to the cars main ground points on either side of the rear seat. (One to each side, passenger side shown) 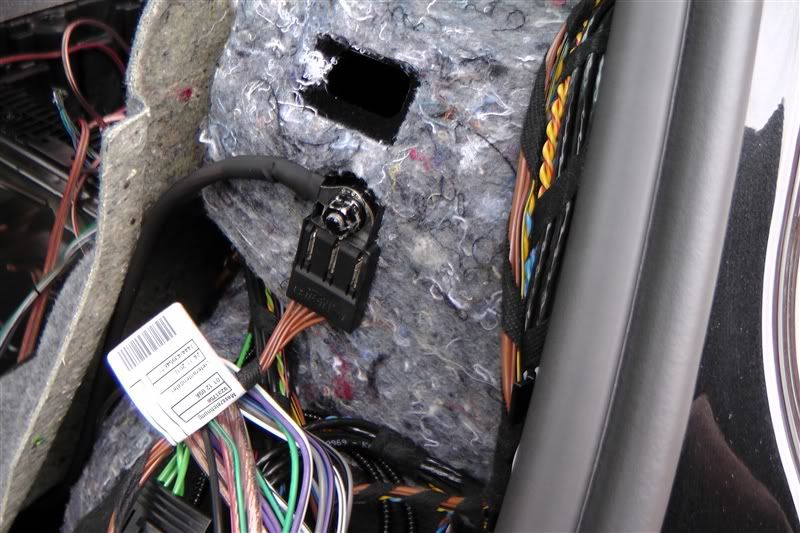
__________________
F31 335d M Sport XD - Mineral Grey - Coral Red - 19" 442M - HK Audio - M Sport Plus Pack - Heated Seats Check out my E90stereo install guide - http://www.e90post.com/forums/showthread.php?t=540954 Last edited by B33M3R; 06-06-2011 at 08:41 AM.. |
|
Appreciate
0
|
| 06-06-2011, 08:21 AM | #7 |
|
Captain
102
Rep 832
Posts |
Amp & MS8 Fitting
As much as I wanted to do a completely stealth install this just wasn’t on the cards with the Amp I chose. I could have possibly mounted the MS8 underneath the boot floor but this would have been tight and wiring would have been an issue. After much deliberation I decided to mount both to the back of the rear seat. I first cut two exact templates of the amp and the MS8 out of MDF and fixed these securely to the seat back taking care to use screws short enough not to protrude through the seat itself. Once these boards were secure I mounted the amp and MS8 to them giving a solid, secure fit. As for all the remaining wiring I made this as neat and as hidden as possible. 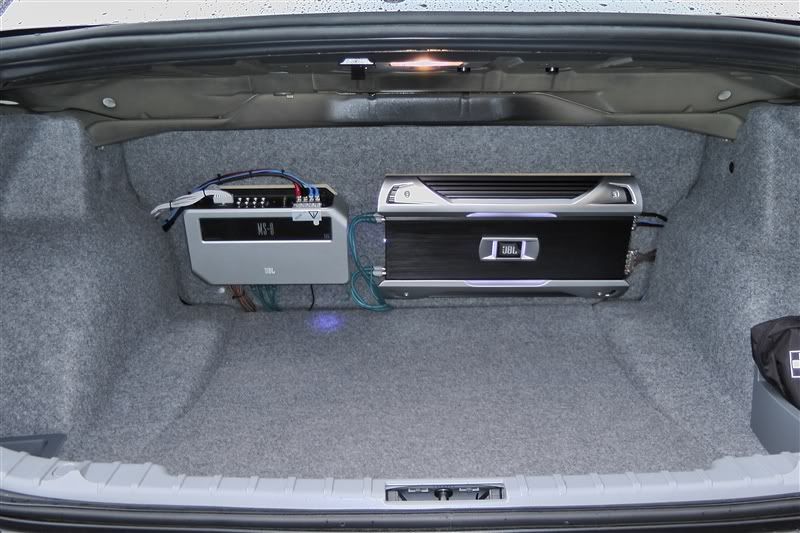 MS8 Screen 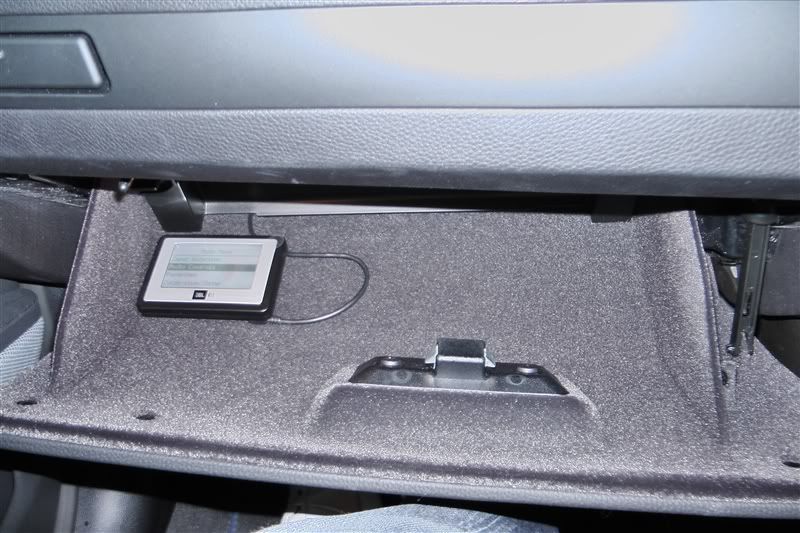
__________________
F31 335d M Sport XD - Mineral Grey - Coral Red - 19" 442M - HK Audio - M Sport Plus Pack - Heated Seats Check out my E90stereo install guide - http://www.e90post.com/forums/showthread.php?t=540954 Last edited by B33M3R; 06-06-2011 at 08:43 AM.. |
|
Appreciate
0
|
| 06-06-2011, 08:21 AM | #8 |
|
Captain
102
Rep 832
Posts |
Setup
This system takes a speaker level input from the head unit with all four channels going into the MS8 via Techincs harness. From this I am running the Vibe Slick 4 centre and rear speakers using the MS8 and the front door Focals and under seat SWS8’s using the amp. I have retained full PDC front and rear sounds and door chimes/bongs all with adjustable volume using the iDrive and they are just as before. I also have no Bluetooth echo which I am really pleased about. The only thing I have found that is lost is front and rear fade using the iDrive as the MS8 sums the signals to provide a full range signal to work with. If this is an issue this fade can be adjusted via the MS8 itself. Summary Overall this was a very easy install but did take a good two full days to do. I managed to do it without making a single mark or breaking a single clip and this entire setup can be removed with little or no trace come trade in time. The difference in sound quality and volume is amazing so much so that I doubt there are any OEM systems that would come close to this. I still have some tinkering to do in regards to setting up my crossovers and levels via the MS8 but I am enjoying this part of it. I would recommend this type of setup and I’m really pleased I went for the MS8 option.
__________________
F31 335d M Sport XD - Mineral Grey - Coral Red - 19" 442M - HK Audio - M Sport Plus Pack - Heated Seats Check out my E90stereo install guide - http://www.e90post.com/forums/showthread.php?t=540954 Last edited by B33M3R; 06-06-2011 at 08:44 AM.. |
|
Appreciate
0
|
| 06-06-2011, 10:56 AM | #9 |
|
Brigadier General
 
306
Rep 3,969
Posts |
Excellent write-up, and very clean install (one of the best I have seen)! Congrats!
The only thing I would have done differently is to get a smaller digital amp and mount it and the MS-8 behind the panels or under the trunk floor.
__________________
Mobridge DA2 > JBL MS-8 > ARC XDi 600/4 > JBL Gti 408 Mids & Vifa OT19 Tweeters; PG Ti2 1600.5 > Morel HCW-10 & IDMax 15
|
|
Appreciate
0
|
| 06-06-2011, 12:41 PM | #11 |
|
Colonel
 
236
Rep 2,338
Posts |
Always good to see a DIY project. Very nice!
 BTW, regarding the front door speaker adapter, the speaker is actually meant to be mounted to the other side of the adapter so that the speaker is sandwiched between the adapter and the door panel. Your speaker is very shallow so it doesn't matter for you but if you were using something deeper, the only way it would fit would be to mount it the other way. I only used the foam gasketing on the door panel side to ensure a tight seal between the speaker/adapter assembly and the door panel.
__________________
2016 Porsche Cayman GTS - Sapphire Blue / Black Full Leather Interior / Carrera S Wheels
|
|
Appreciate
0
|
| 06-06-2011, 12:52 PM | #12 | |
|
Captain
102
Rep 832
Posts |
Quote:
Agree with you about the amp, ultimately I wanted this to be stealth but had to draw a line with the cost! I would have prefered to have got a JL XD600/6 but they were several hundred pounds more than the JBL amp so it was a bit of a trade off in order to swing the MS8. I'm having a think about ways to hide it all anyway, maybe a false seat back or fabric cover etc.? Watch this space!
__________________
F31 335d M Sport XD - Mineral Grey - Coral Red - 19" 442M - HK Audio - M Sport Plus Pack - Heated Seats Check out my E90stereo install guide - http://www.e90post.com/forums/showthread.php?t=540954 |
|
|
Appreciate
0
|
| 06-06-2011, 12:53 PM | #13 | |
|
Captain
102
Rep 832
Posts |
Quote:

__________________
F31 335d M Sport XD - Mineral Grey - Coral Red - 19" 442M - HK Audio - M Sport Plus Pack - Heated Seats Check out my E90stereo install guide - http://www.e90post.com/forums/showthread.php?t=540954 |
|
|
Appreciate
0
|
| 06-06-2011, 12:56 PM | #14 | |
|
Captain
102
Rep 832
Posts |
Quote:
So the adapters go the other side??  To be honest I did have a little play with them both sides but they just seemed to feel right the way I mounted them. I can see what you mean though, if they were any deeper I'd have had a problem. Great bit of kit though, them speakers aren't going anywhere!
__________________
F31 335d M Sport XD - Mineral Grey - Coral Red - 19" 442M - HK Audio - M Sport Plus Pack - Heated Seats Check out my E90stereo install guide - http://www.e90post.com/forums/showthread.php?t=540954 Last edited by B33M3R; 06-06-2011 at 01:14 PM.. |
|
|
Appreciate
0
|
| 06-06-2011, 01:09 PM | #15 | |
|
Brigadier General
306
Rep 3,969
Posts |
Quote:
__________________
Mobridge DA2 > JBL MS-8 > ARC XDi 600/4 > JBL Gti 408 Mids & Vifa OT19 Tweeters; PG Ti2 1600.5 > Morel HCW-10 & IDMax 15
|
|
|
Appreciate
0
|
| 06-06-2011, 01:19 PM | #17 | |
|
Colonel
236
Rep 2,338
Posts |
Quote:
 
__________________
2016 Porsche Cayman GTS - Sapphire Blue / Black Full Leather Interior / Carrera S Wheels
|
|
|
Appreciate
0
|
| 06-06-2011, 01:30 PM | #18 |
|
Brigadier General
306
Rep 3,969
Posts |
Stop it, he won't be able to sleep at night now wondering whether the 7-8 mm difference in position will affect the sound. After all, with the speakers that far back, most of the soundwaves would be blocked by the door panel, whereas a more forward placement would allow for a more direct "line of sight" between the speaker cone, and the listener!
it's 9:40 pm in the UK, OP are you outside already ripping your doorpanels off? Isn't this forum fun!
__________________
Mobridge DA2 > JBL MS-8 > ARC XDi 600/4 > JBL Gti 408 Mids & Vifa OT19 Tweeters; PG Ti2 1600.5 > Morel HCW-10 & IDMax 15
Last edited by kaigoss69; 06-06-2011 at 01:39 PM.. |
|
Appreciate
0
|
| 06-06-2011, 01:48 PM | #19 | |
|
Colonel
236
Rep 2,338
Posts |
Quote:
 They are fine the way he has it. If he ever wanted to mount a deeper speaker, it would have to go in the other way.
__________________
2016 Porsche Cayman GTS - Sapphire Blue / Black Full Leather Interior / Carrera S Wheels
|
|
|
Appreciate
0
|
| 06-06-2011, 02:05 PM | #20 | |
|
Lieutenant Colonel
 507
Rep 1,614
Posts |
Quote:
You have the patience of Job to do this - and I'm just talking about the photo documentation! I'm in awe of your work - very nicely done. |
|
|
Appreciate
0
|
| 06-06-2011, 02:25 PM | #21 | |
|
Captain
102
Rep 832
Posts |
Quote:
I've been sitting saying to myself "I will not remove my door cards" "I will not remove my door cards" "I will not remove my door cards"
__________________
F31 335d M Sport XD - Mineral Grey - Coral Red - 19" 442M - HK Audio - M Sport Plus Pack - Heated Seats Check out my E90stereo install guide - http://www.e90post.com/forums/showthread.php?t=540954 |
|
|
Appreciate
0
|
| 06-07-2011, 12:32 AM | #22 | |
|
Private First Class
 27
Rep 145
Posts |
Quote:
Besides you know how easy they are to pop off! |
|
|
Appreciate
0
|
 |
| Bookmarks |
|
|


