

|
|
|
|
 |

|
 |
BMW Garage | BMW Meets | Register | Today's Posts | Search |
 |

|
BMW 3-Series (E90 E92) Forum
>
Gloss Cosmic Blue Wrap - (1/18 update)
|
 |
| 05-05-2016, 08:07 AM | #23 |
|
Colonel
 
483
Rep 2,283
Posts |
Welcome to my build! Page 1: My Feed Page 2: The Mods  Page 3: The Look Page 4: The Power Page 5: Comments The Mods Engine Intake Scoops: RPI Intake: Turner Hotside Intake Inlets: N/A Turbos: Frankenturbo F21Bi (Rev 3 Installed at 123,800 miles) Outlets: VRSF metal Intercooler: VRSF RACE w/ upper piping Charge Pipe: BMP w/ TiAl BOV and custom bung for 7th WMI nozzle Manifold: BMP Forward Facing polished aluminum MAP: 3.5 Bar Vacuum Lines: All Silicone Manifold Vac Line: 1/4" upgraded silicone Valve Cover: Vargas CNC clear anodized (w/ breather cap and in/hg regulator) PCV High Side: Earls -AN Fittings and lines, ECS Tuning Catch Can, VVT Check valve PCV Low Side: Cyl head plugs, Earls -AN Fittings and lines, ECS Tuning Catch Can, VVT Check valve Piggyback: N/A Flash: Wedge Performance flash Spark: NGK 95770 (formerly 5992) gapped to 0.018" Radiator: CSF High Performance Aluminum Oil Cooler: Mishimoto 19row w/ -10AN lines Oil Cooler Thermostat: -RB Turbo thermostat delete plate -Improved Racing Oil Cooler External Thermostat (185F) Coolant Expansion Tank: Turner Motorsport Aluminum (relocation kit) Fueling Fuel Type: 93 Octane Direct Port WMI: 80/20 water and M1 mix @ ~2523cc/min flow --Nozzles: 5 GPH x6 and 10 GPH x1 (in charge pipe for IAT suppression) from Prometh --Nozzle Holder: Prometh --Check Valves: Prometh Mini --Lines: 1/4" Prometh and -4AN stainless Prometh --Fuel Rail: Prometh --Flow Sensor: AEM 1000cc gauge (even though I am well over that ) --Solenoid: Prometh Xtreme Duty --Pump: Prometh PM190 50GPH --Filter: Prometh --Tank: Prometh 5.4 Gallon --Level Sensor: Prometh --Controller: Torqbyte CM10-LT LPFP: Fuel-it! Stage 2 Lines: Stock HPFP: Newest Revision (replaced at 122k) Ethanol Sensor: none Injectors: Index 12 Exhaust Downpipe: VRSF Catles Secondaries: Stock Resonators: Stock Muffler: Deleted Tips: ECS Tuning 4" Black Double wall Swivel Drivetrain Engine Mounts: Turner Motorsport - 60A Durometer Poly Shift Knob: ZHP knob Linkage: Dinan Short Throw Shift Kit Flywheel: Spec SMF Steel Clutch: Spec Stg3+ CDV: Modified larger Pedal: BMS Clutch Stop Trans Mounts: 034 Motorsports - 50 durometer rubber Driveshaft: Stock Differential: Stock Axles: Stock Wheels and Tires Front Wheels: Avant Garde M510 Polished Cognac - 19x9.5 ET30 Front Tires: Nitto Invo 235/35R19 Front Spacers: none Rear Wheels: Avant Garde M510 Polished Cognac - 19x11 ET34 Rear Tires: Nitto Invo 285/35R19 Rear Spacers: none Lugs/Bolts: Black ECS Bolts Suspension/Chassis Strut Bar: Turner Aluminum Strut Brace Coilovers: Billstein PSS B14 Front Strut Mounts: stock modified (pin removed for camber adjustment) Front Thrust Arms: stock Front Sway Bar: H&R 27mm Front End Links: Turner Adjustable 13.58" Rear Shock Mounts: Powerflex Yellow Rear Trailing Arms: ECS Tuning -Bushings: Stock Rear Toe Arms: SPL Parts Titanium Adjustable w/ Eccentric Bolt Lockout Rear Camber Arms: stock Rear Sway Bar: stock Rear End Links: stock Brakes Front Rotors: ECS Tuning V4 Drilled Front Calipers: Stock Modified (ECS brass guide bushings, G2 Blue Caliper Paint) Front Pads: EBC RedStuff Front Lines: ECS Tuning Stainless Rear Rotors: ECS Tuning V4 Drilled Rear Calipers: Stock Modified (ECS brass guide bushings, G2 Blue Caliper Paint) Rear Pads: EBC RedStuff Rear Lines: ECS Tuning Stainless Fluid: Pentosin SuperDOT 4 Body/Cosmetics Body: 3M Gloss Cosmic Blue Vinyl Hood: Seibon CF Hood (Pre-LCI M3 style) Front Bumper: ECS Pre-Lci MTech w/ lower center grill deleted Front Lip: 3D Designs Carbon Front Lip Grilles: ECS Gloss Black Roof: 3M Gloss Black Vinyl Mirrors: Stock w/ 3M Gloss Black / Cosmic Blue combo Fenders: ECS M3 Rep fenders w/ 335i logo Side Skirts: BMW Performance Skirts Rear Bumper: ECS MTech Diffuser: eBay big fin Carbon Fiber Trunk: ECS Tuning CSL Full Carbon Fiber Trunk Spoiler: n/a Tint Windshield: 50% Ceramic Tint Driver/Pass: 20% Ceramic Tint Rear three: 5% Ceramic License Plate Holder: Rennline Lighting Headlights: Custom painted OEM housings D1S: 6000k xenonsupply.com Angel Eyes: Full LED Rings from 888concept Blinker: Amber LED v-leds.com DRL: Blue LED amazon H7 Fogs: V-Leds Micro Extreme 6K 4500 Lumen Sidemarker: ECS M3 Rep fender markers Taillights: OEM LCI Taillights Blinker: stock LCI Reverse: stock License Plate: Weisslicht LED Domes: LED e92-lighting.com Maps: LED e92-lighting.com Footwells: LED Vleds.com Door lights: LED Vleds.com Audio/Electronics OEM Audio: Logic 7 Head Unit: Pioneer AVH-x8500 BHS Double Din 7" Center Dash: stock Front Tweeters: stock Front Door: stock Rear Door: stock Rear Deck: stock Underseat Subs: stock Amp (speakers): JL Audio 600/6 Amp (Trunk Sub): Alpine V-Power MRP-M350 Trunk Sub: Single JL W3V3 12" Trunk Box: Ported single 12" Radar: Escort - Passport Bluetooth (hardwired) Laser: (none) Interior Interior Seats: stock (saddle brown) Trim: stock (Silver) Floor Mats: Bav Auto Custom Mats - Black w/ 335i embroidery 3 pedals: Turner Motorsport dead pedal: Turner Motorsport Shifter: ZHP Shift Boot: stock E-Brake Handle: stock E-Brake Boot: stock Steering Wheel: stock (sport wheel) Steering Trim: stock Vent Gauge: ECS Boost Gauge w/ amber back light iPhone gauge: MHD App Dash Gauge: AEM WMI CC/Min Flow Gauge (1000cc) / 3D printed custom pod .
__________________
Last edited by Tim603; 01-14-2021 at 08:56 AM.. |
|
Appreciate
0
|
| 05-13-2016, 08:41 AM | #25 |
|
Colonel
483
Rep 2,283
Posts |
Feed continues below
__________________
Last edited by Tim603; 09-19-2019 at 12:52 PM.. |
|
Appreciate
0
|
| 05-20-2016, 10:39 AM | #27 | |
|
New Member
2
Rep 8
Posts |
Quote:
|
|
|
Appreciate
0
|
| 05-20-2016, 03:47 PM | #28 | |
|
Colonel
483
Rep 2,283
Posts |
Quote:
B14 Coils, 15 threads left on front (*raised a little since last pic) , 1 thread left on rear. 13.5" adjustable front end links (11.5" stock). Still have to dial in the rear and see if the rear sway is pre-loaded, if so will get adjustable end links for the rear and might raise it a little
__________________
|
|
|
Appreciate
0
|
| 05-21-2016, 10:29 PM | #29 |
|
Colonel
815
Rep 2,869
Posts |
Car looks great... Like the wheels a lot.
What tail lights are those?
__________________
2019 X3 m40i:Carbon Black:Executive:Premium:Adaptive:Vernasca:699M:HK: Ambient:IND trim:M Mirrors:15mm spacers:Maxton lip:20% tint windows/pano:dsg paddles:TLG mudflaps
2008 328i E90 Jet Black:6MT:RWD:Premium:Sport:Xenon:MTEC V3 AEs:Front Splitters:CF spoiler:19" VMR FF v710 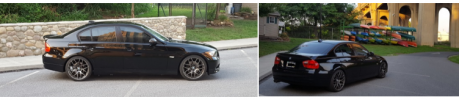 |
|
Appreciate
0
|
| 05-22-2016, 08:51 AM | #30 | |
|
Colonel
483
Rep 2,283
Posts |
Quote:
__________________
|
|
|
Appreciate
0
|
| 05-26-2016, 12:21 PM | #31 |
|
Colonel
483
Rep 2,283
Posts |
Feed Continues 8/13 Frankenturbo F21Bi Rev3 - Inlets, Turner Engine Mounts, Dinan SSK The summer projects are moving right along! The rev3 frankenturbos are finally out and I just got my set in. We decided to ditch the stock inlets and install the new upgraded silicone stock location inlets with the turbos to see what kind of gains they get us from just hardware.  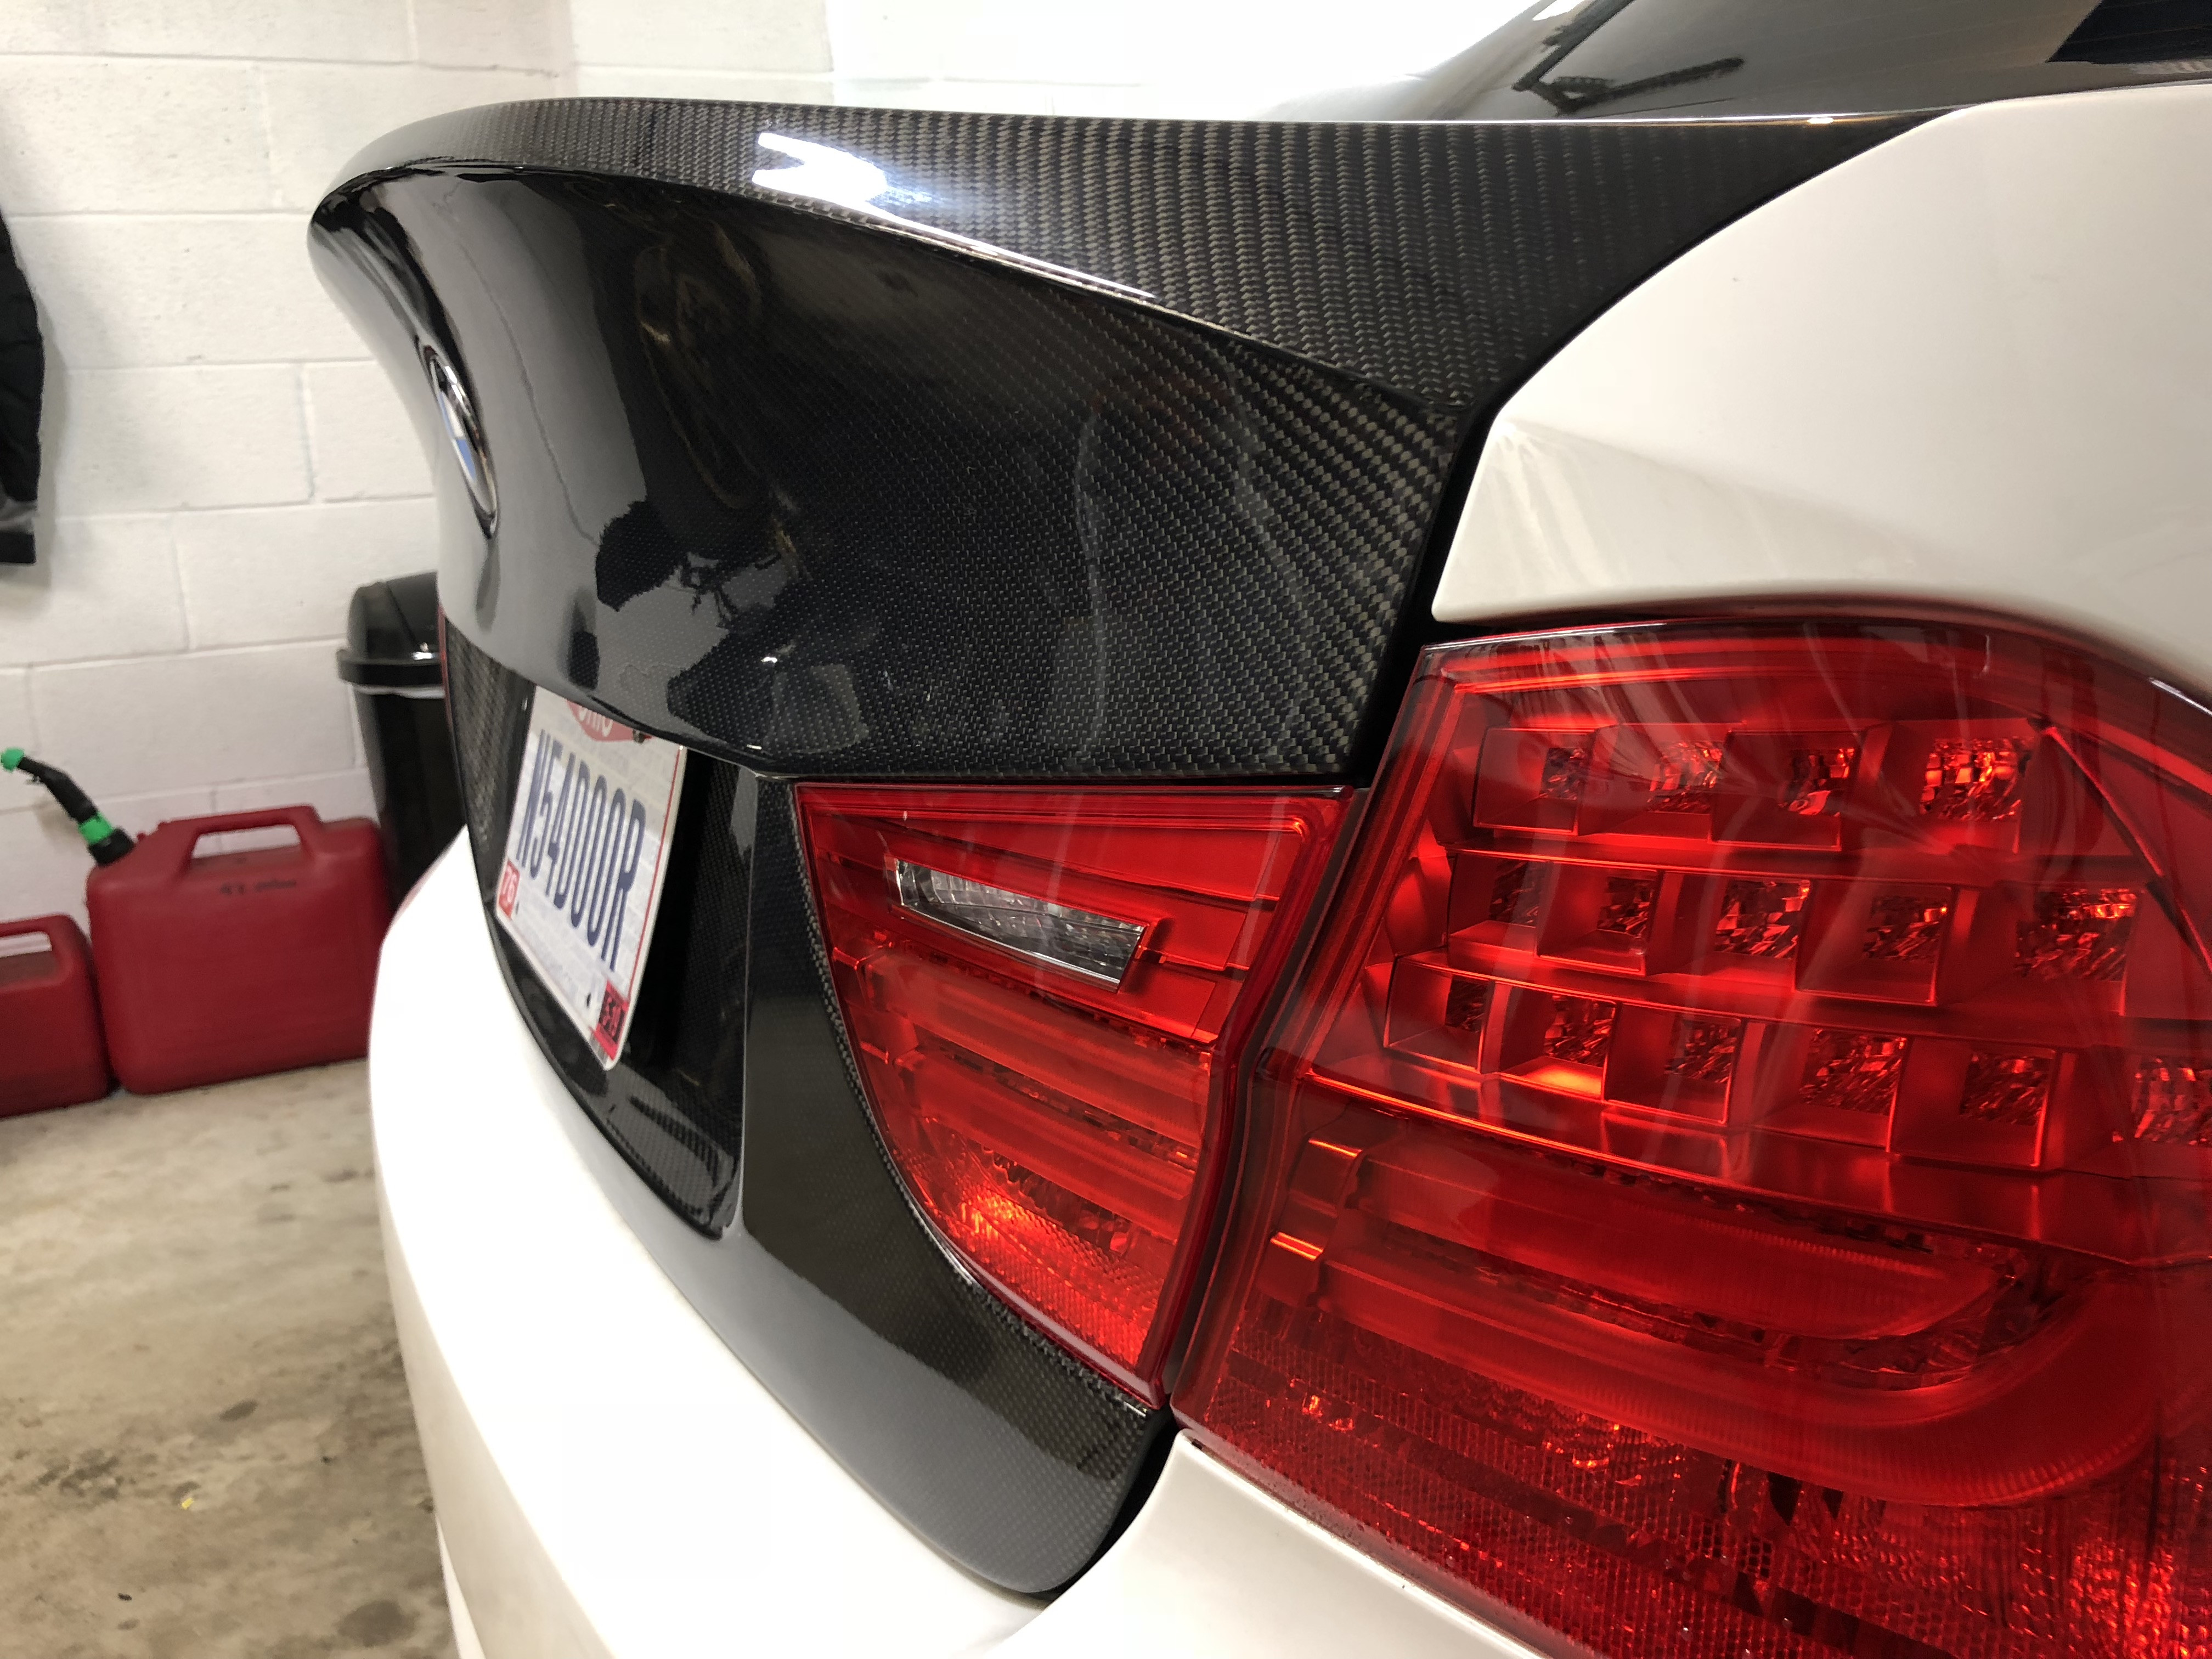 Before I dropped my car off at the shop I couldn't wait to install the new truck and LCI lights I finally got so I went for it   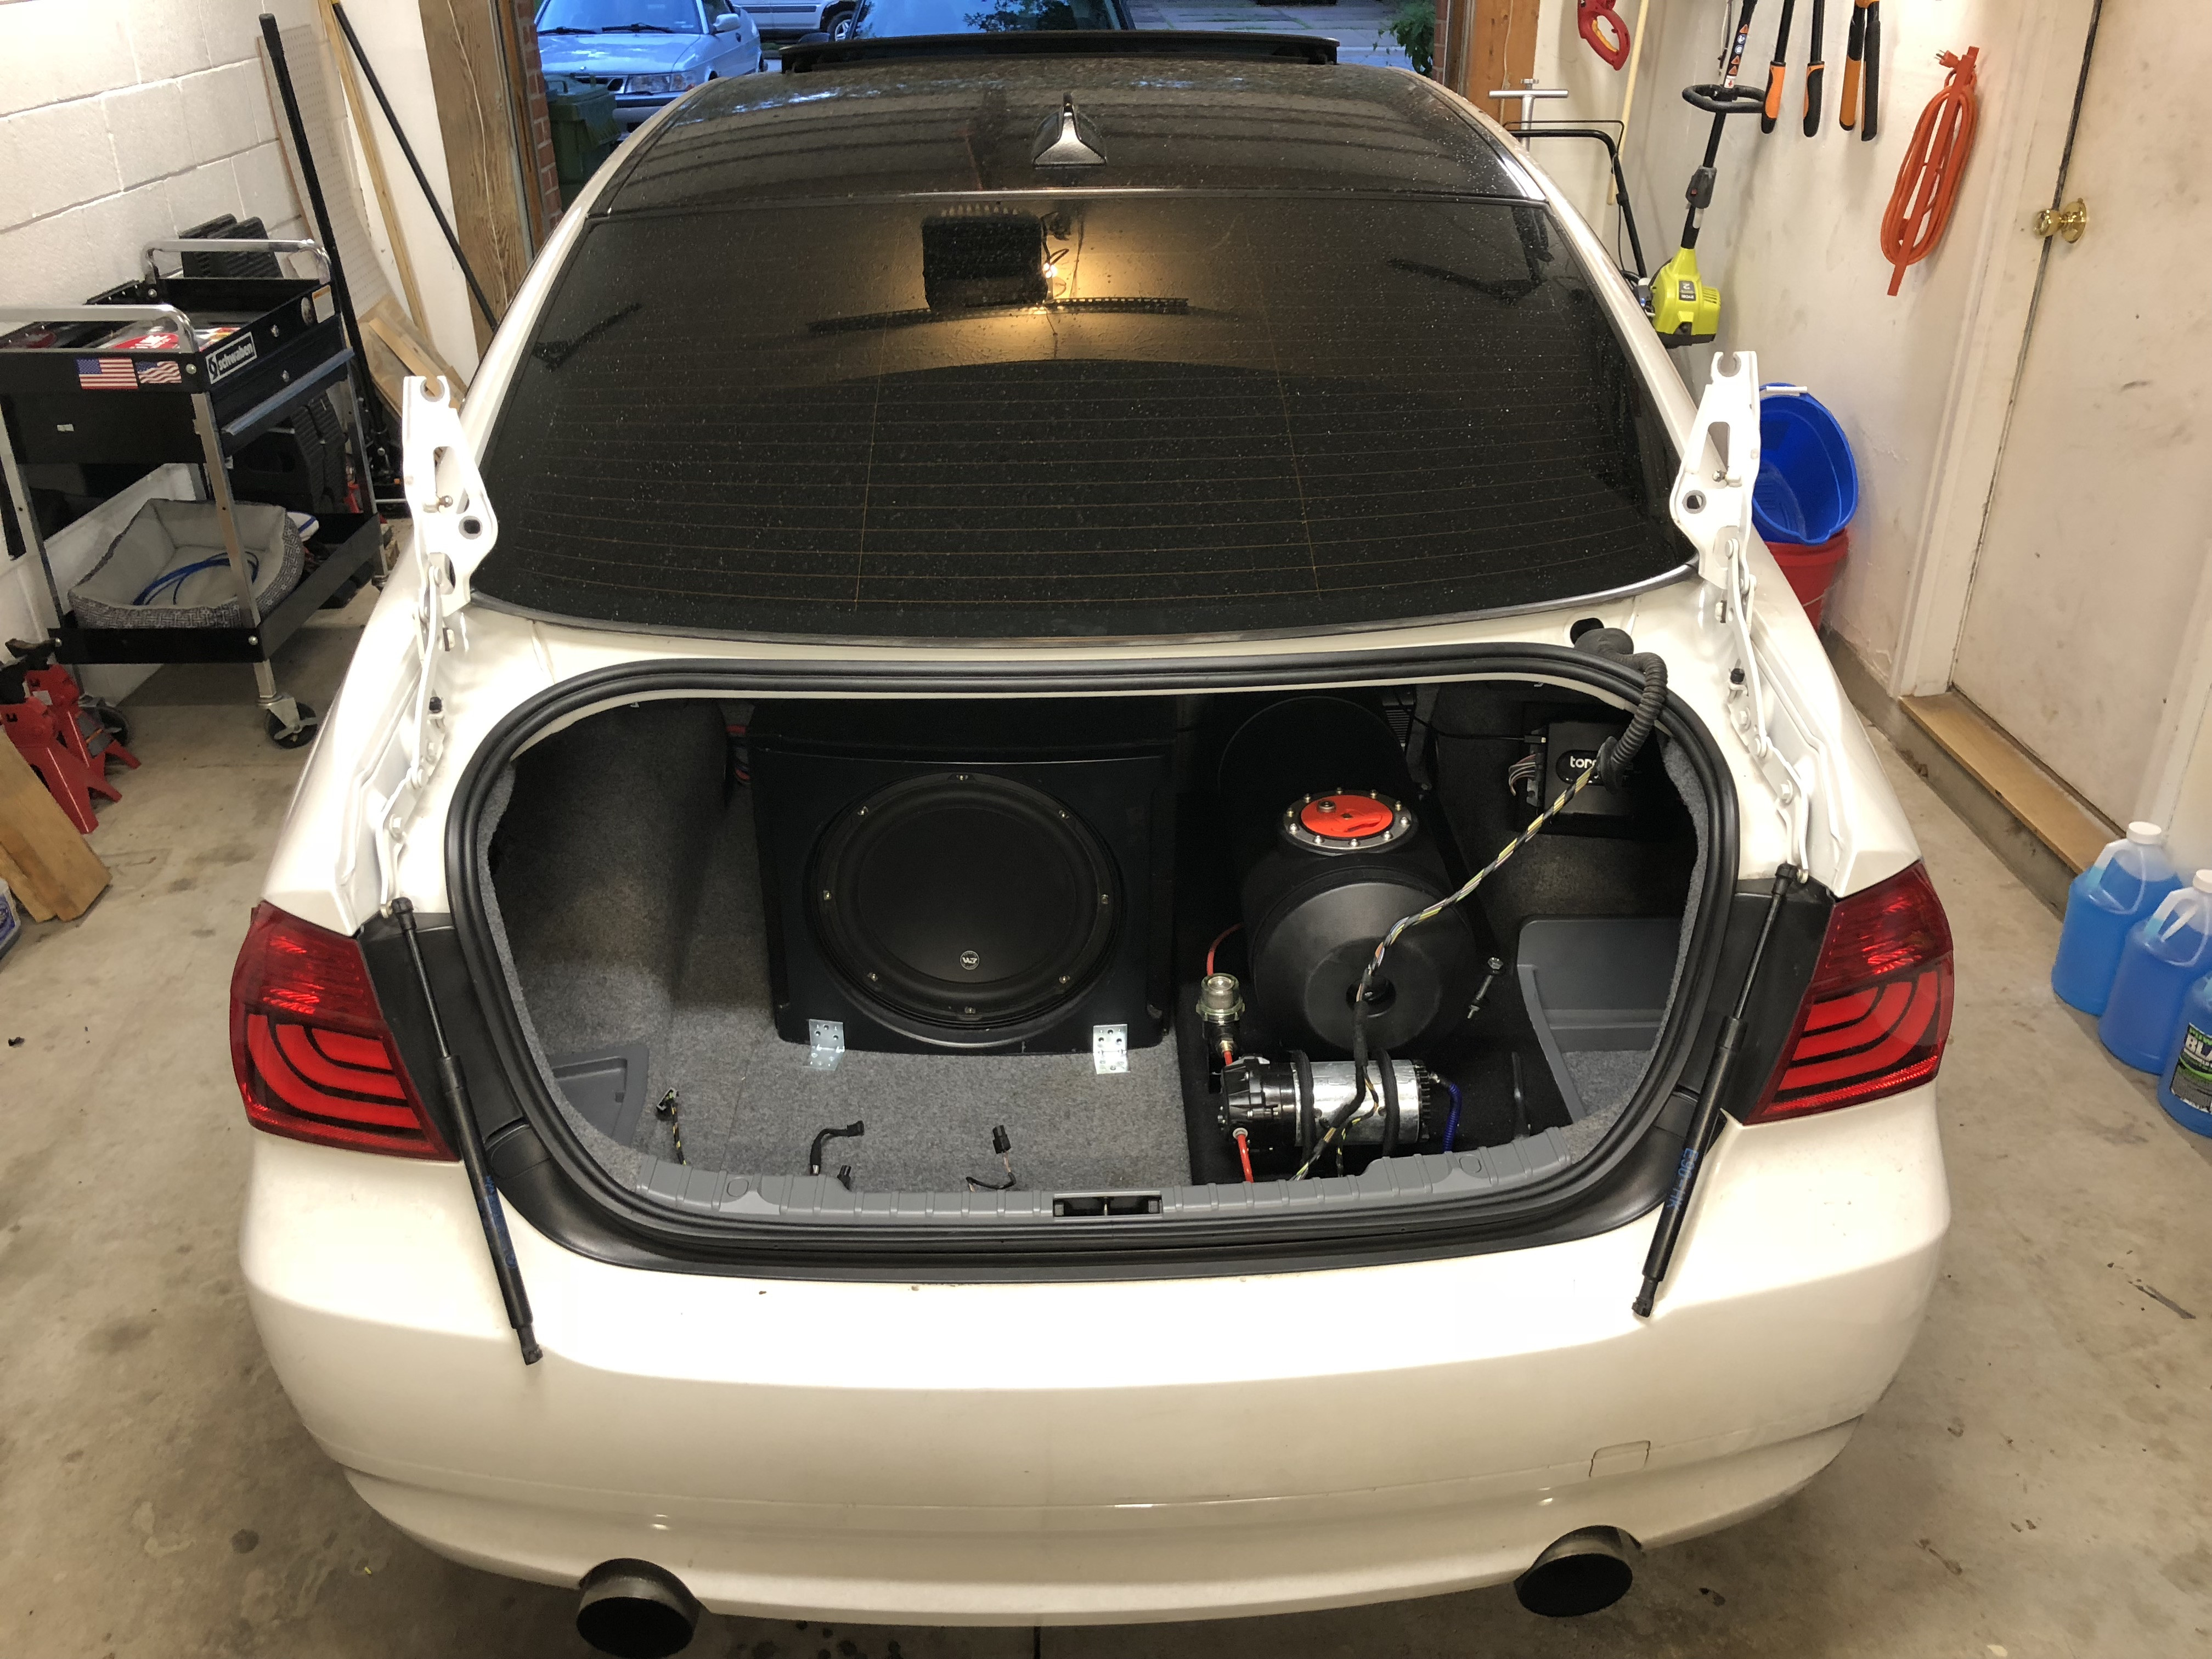  Everything fits great with a little modification (dremel ftw) and it lines up perfectly. 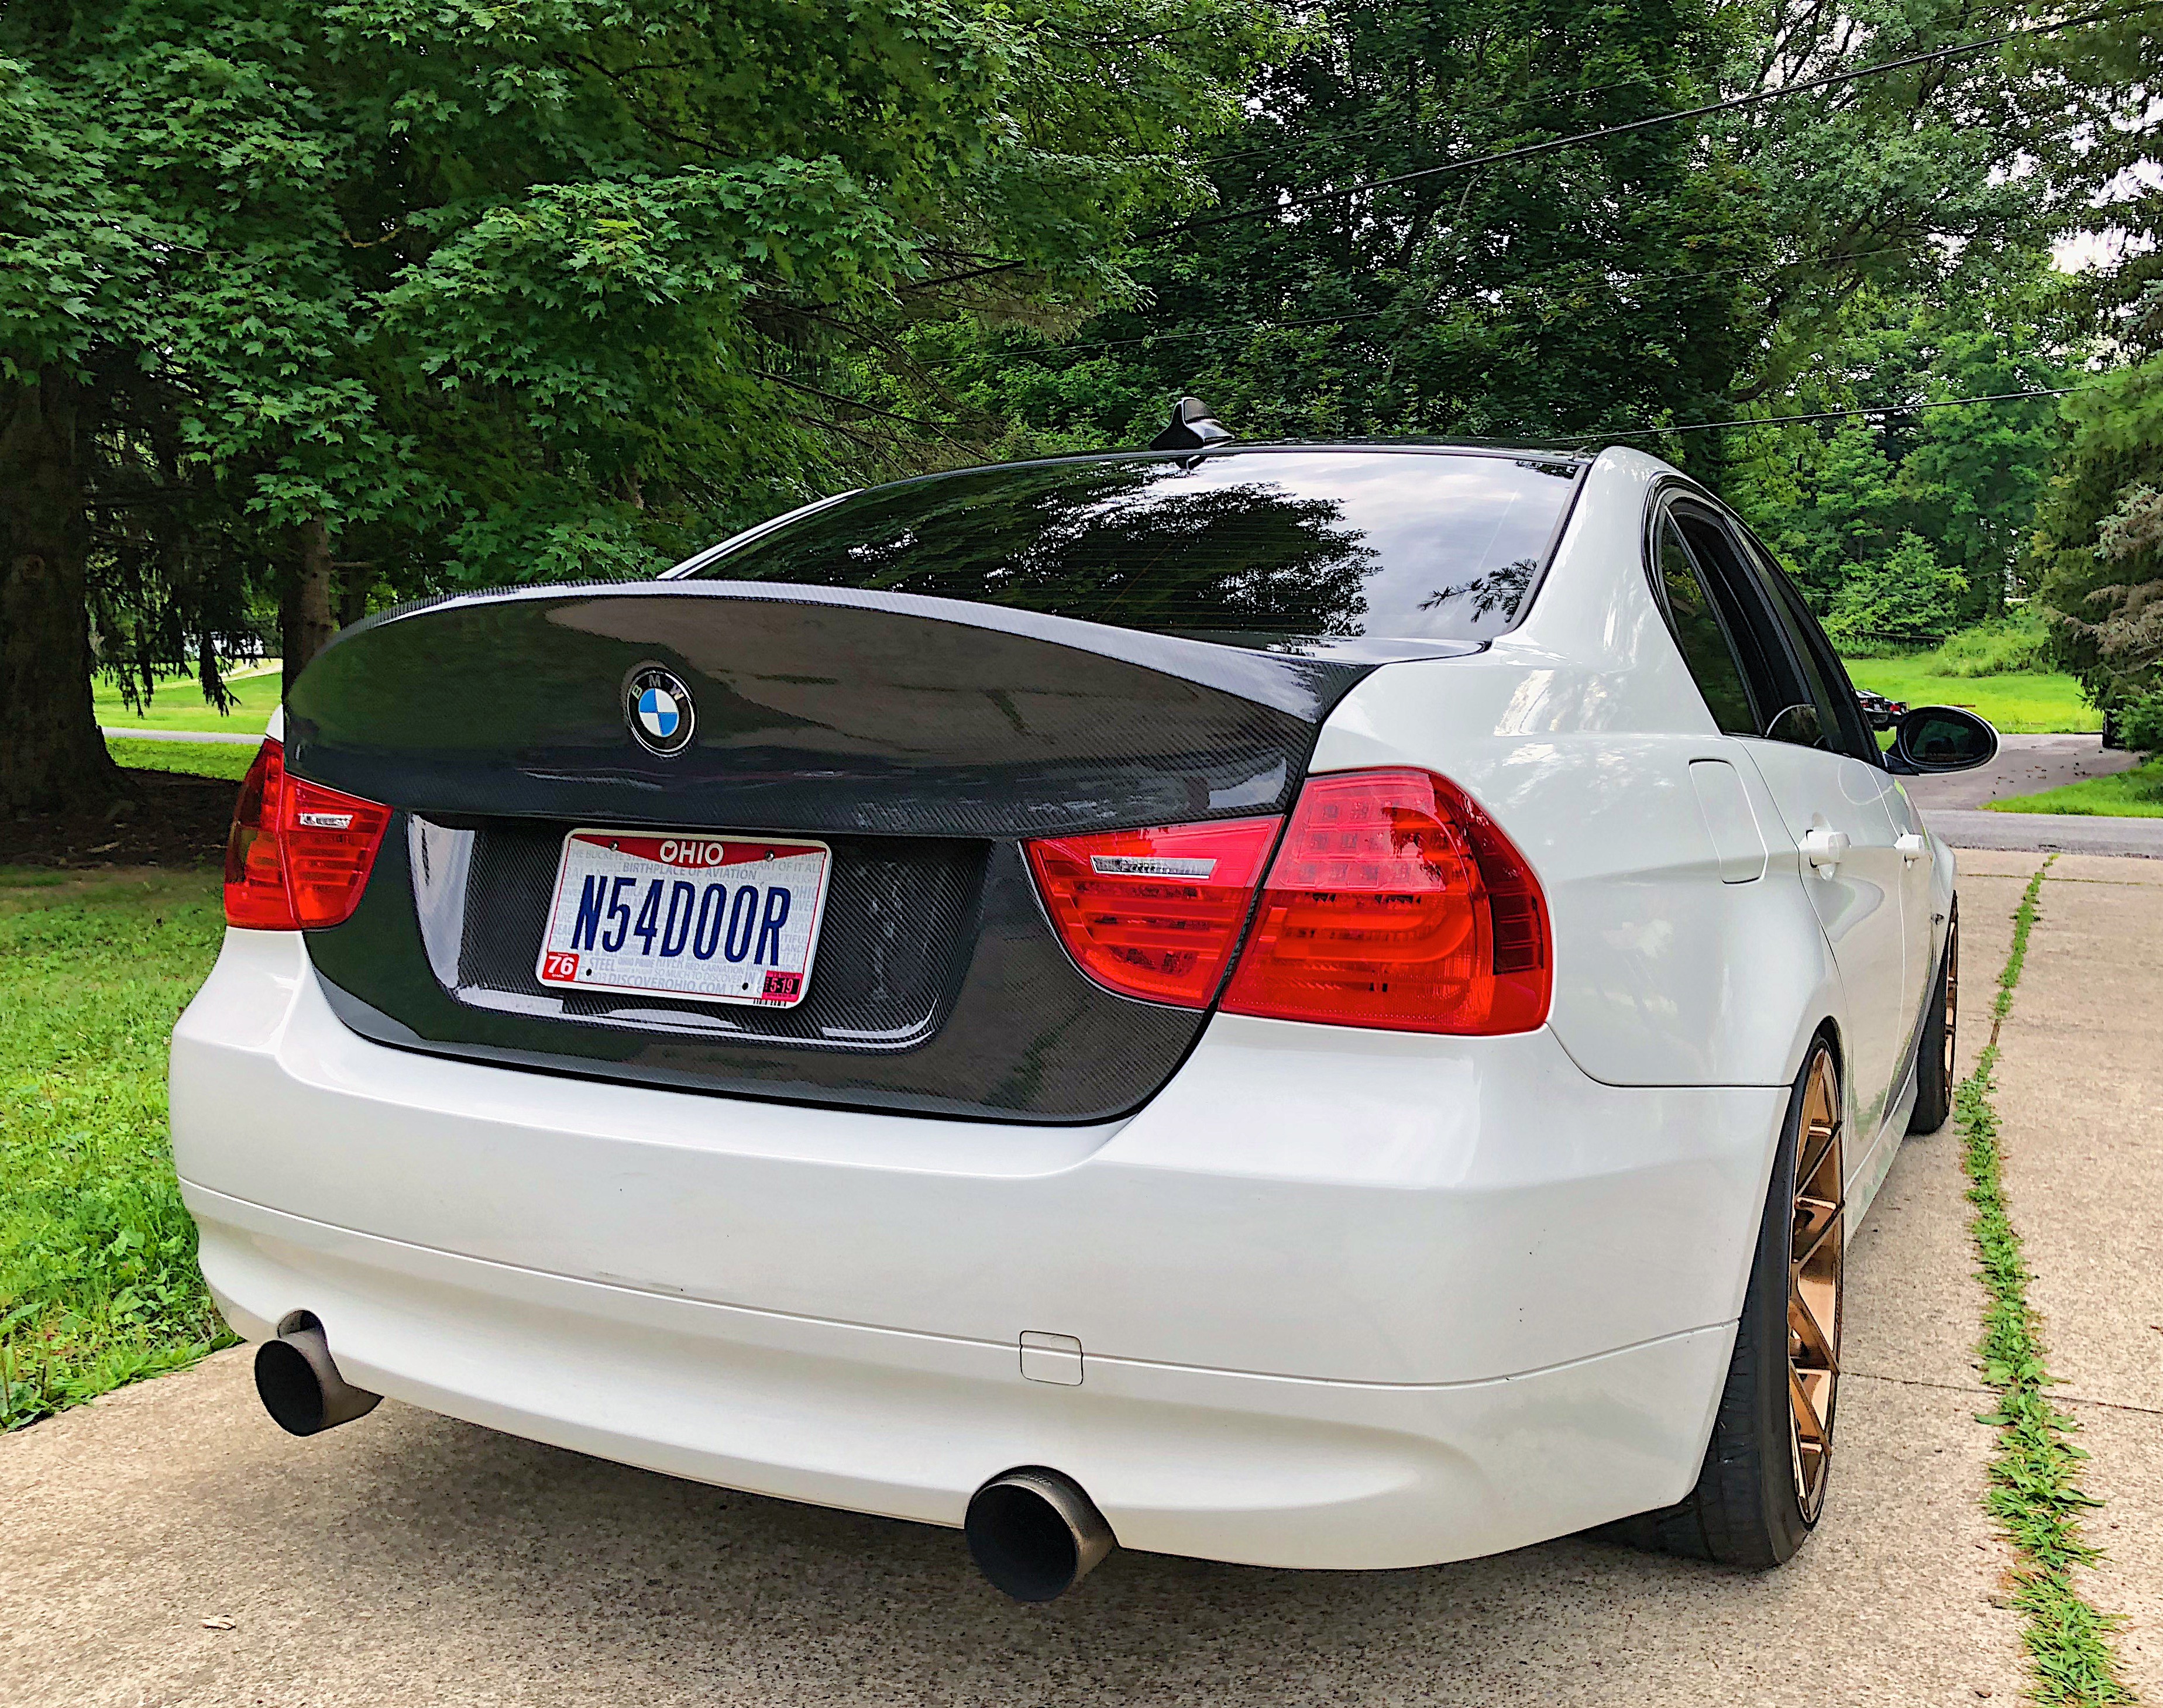   So this upcoming round of installs consists of the following -Frankenturbo F21bi twin turbo upgrade -Silicone upgraded 2" inlets (stock location) -Turner 60A engine mounts -Dinan SSK -Oil and coolant change       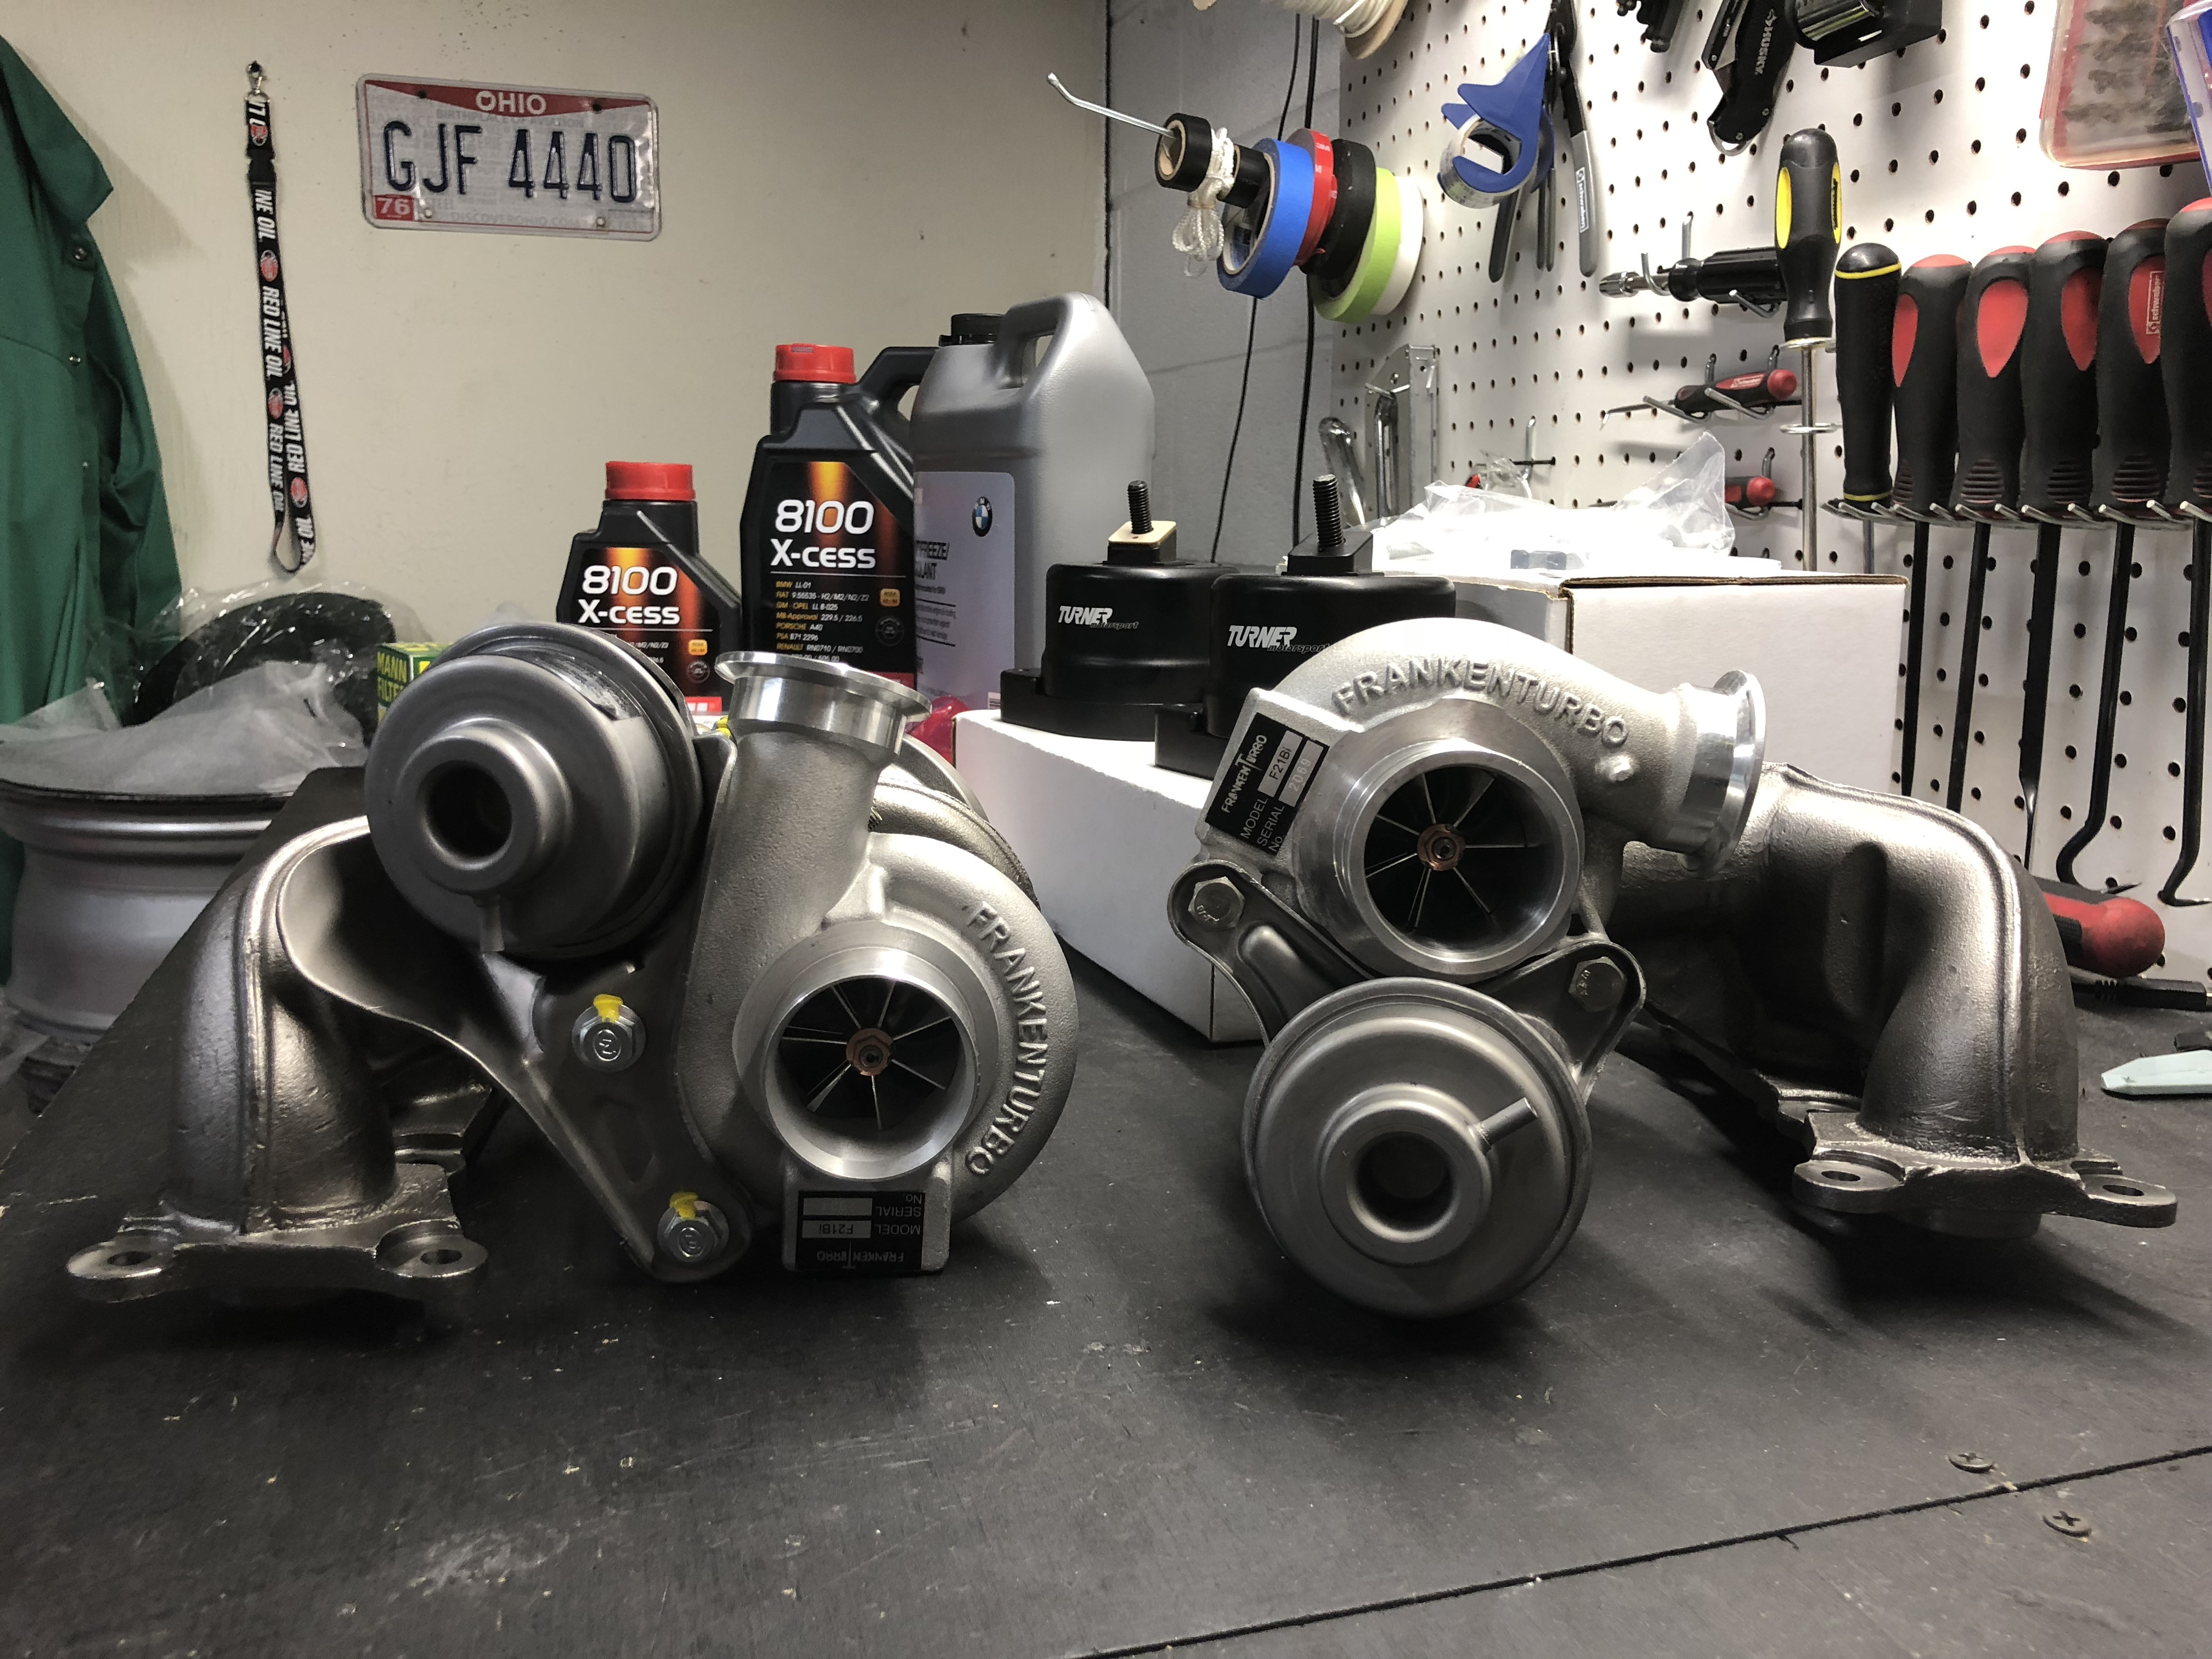 I got the car back and it is running great! Ive been working with Ken at Wedge Performance on the tuning side of things and with the WMI setup things are really healthy. Im running about 9 degrees of timing and targeting 22 lbs of boost. So to do a direct comparison in just hardware, check out these two logs. One is the frankenturbos with stock inlets, the other is frankenturbos with upgraded inlets. The tune is the same. Boost spike to almost 30psi!! Stock Inlets (couldn't keep anything higher than 18psi to redline) https://datazap.me/u/tim603/wmi-test...g=0&data=1-3-4 Frankenturbo 2" inlets (24 psi to redline) https://datazap.me/u/tim603/jb4-map6...-4&zoom=79-172 Obviously with that boost spike and throttle closure there was some work to be done on the tuning side so I got with Ken, got a new back end flash and made some JB4 adjustments to duty cycle. After the changes, here is the latest log. Looking REAL good. https://datazap.me/u/tim603/jb4-map6...g=0&data=1-3-4 Im going to see how much power I can extract from this setup so stay tuned... Coming up I am finally installing the body panels and getting the car wrapped! Oh and I may have got wider wheels for the rear and changed up the color a little bit  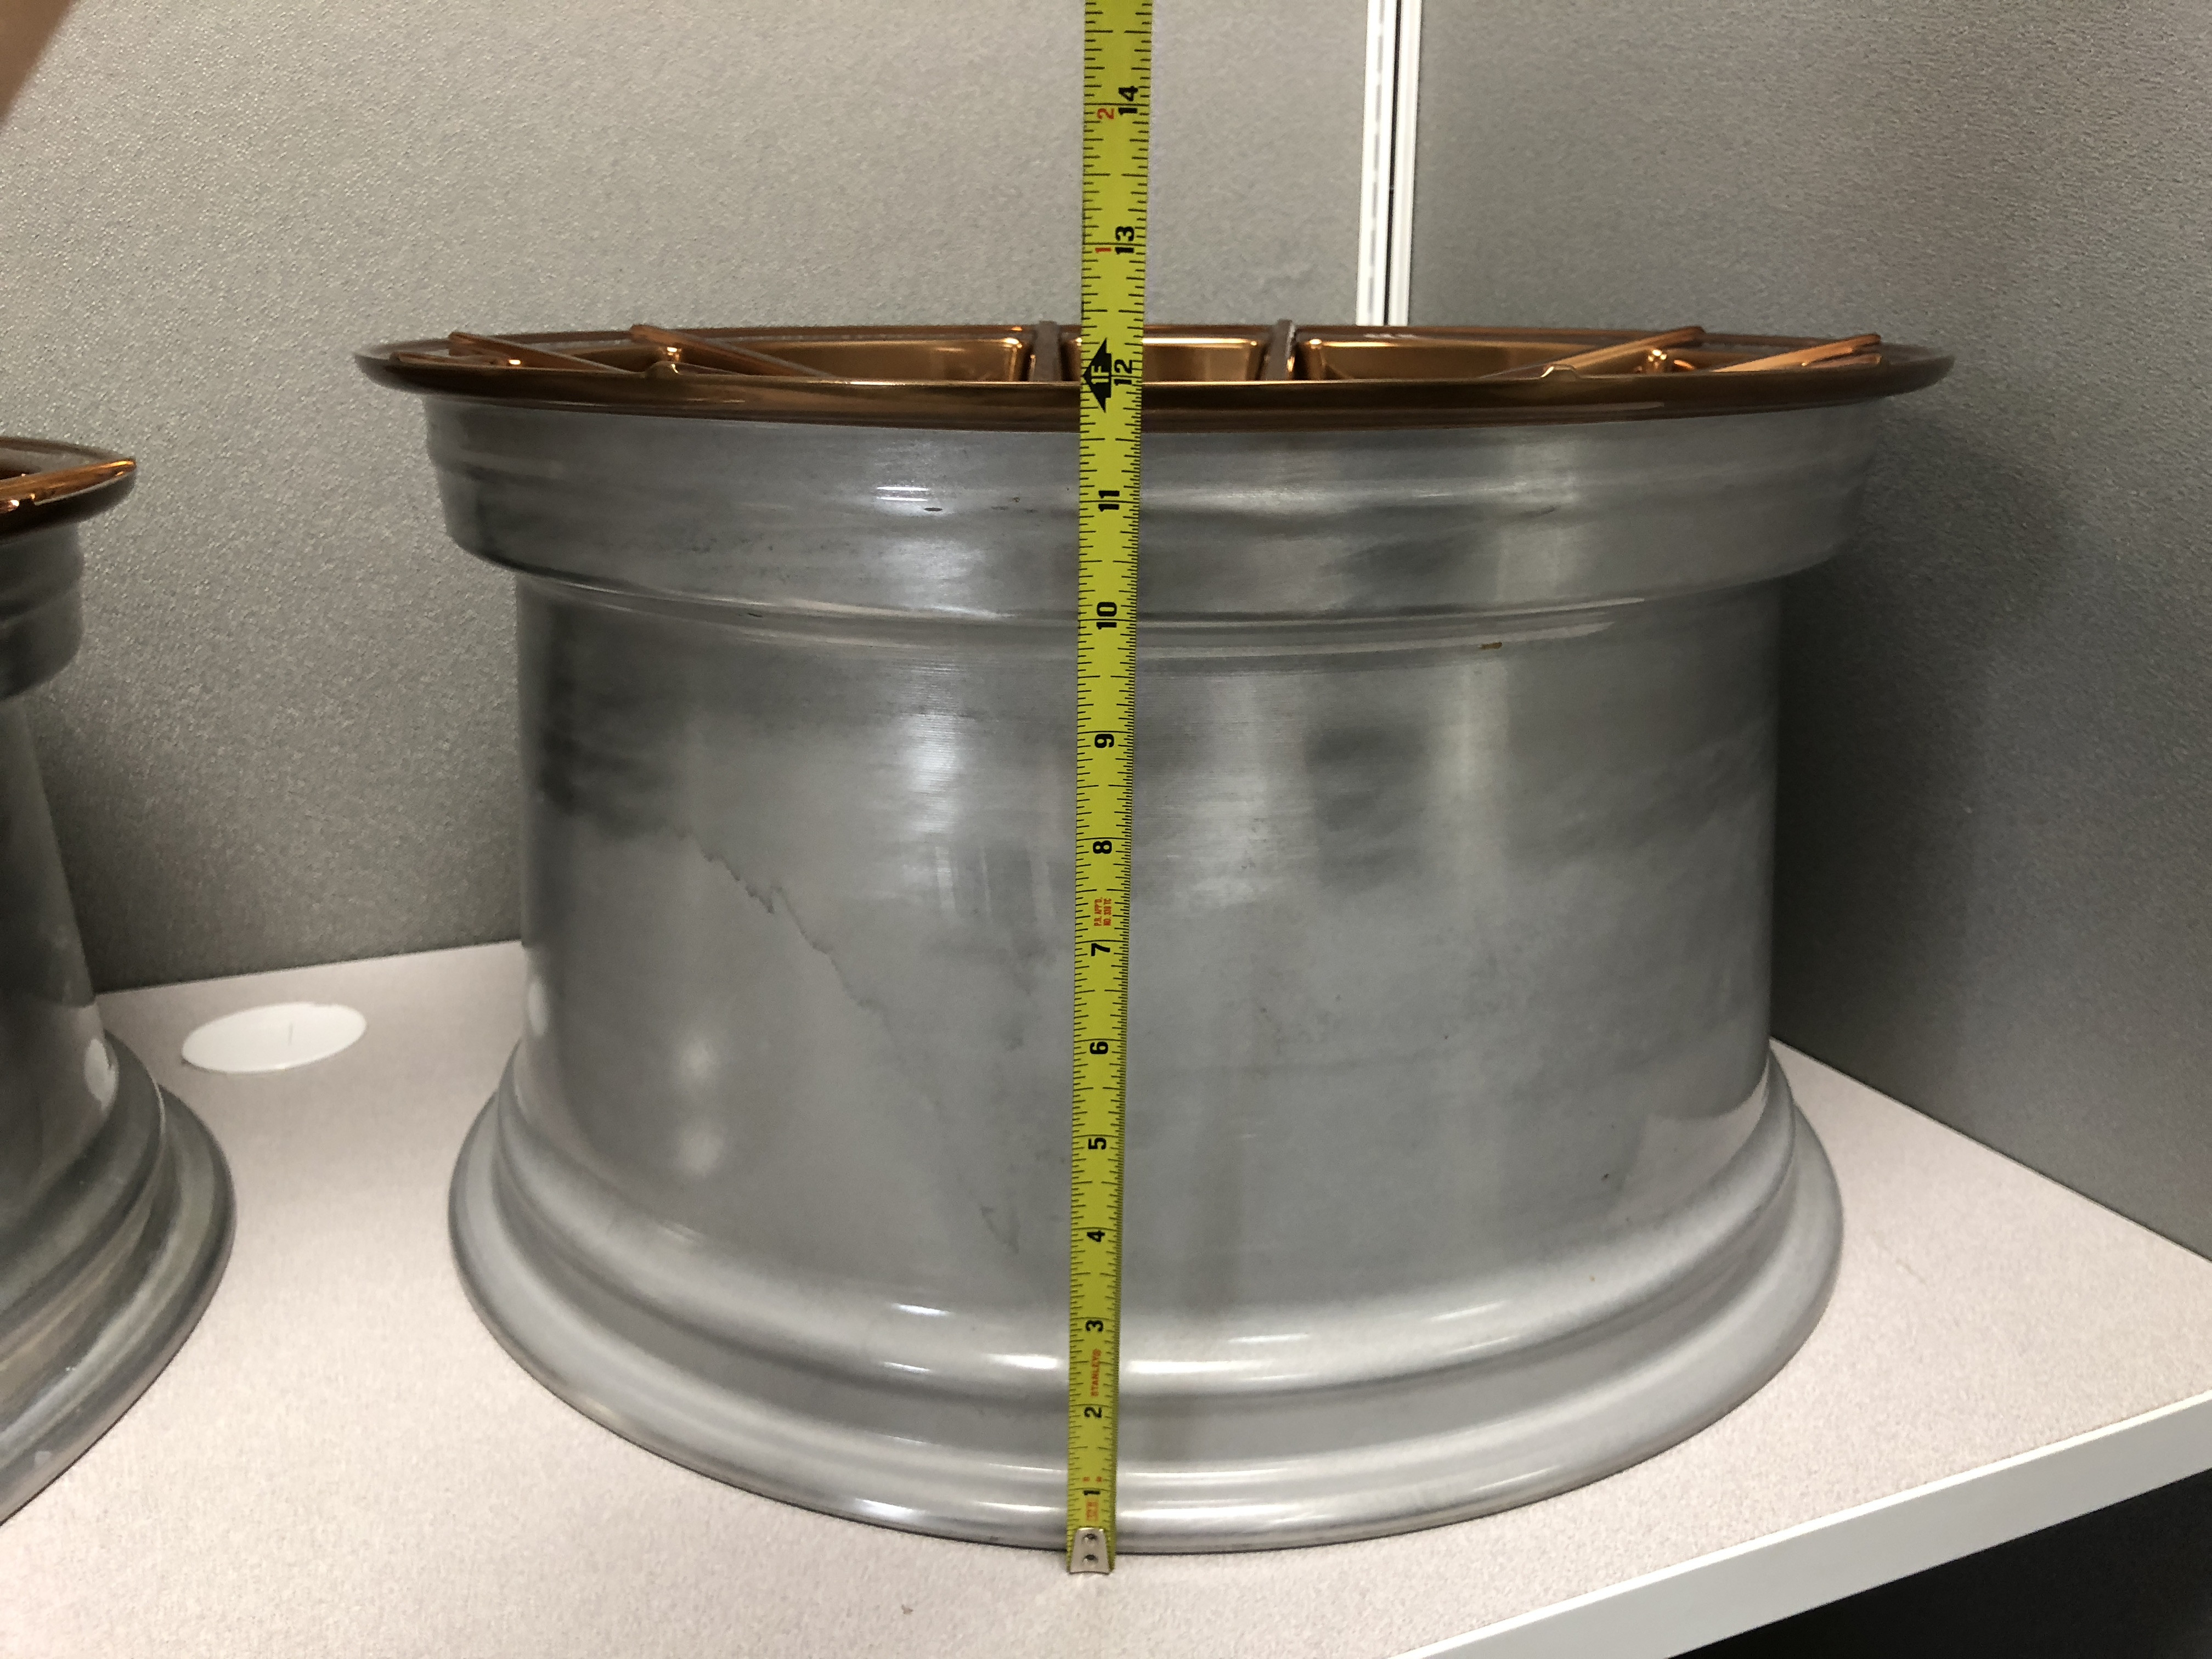 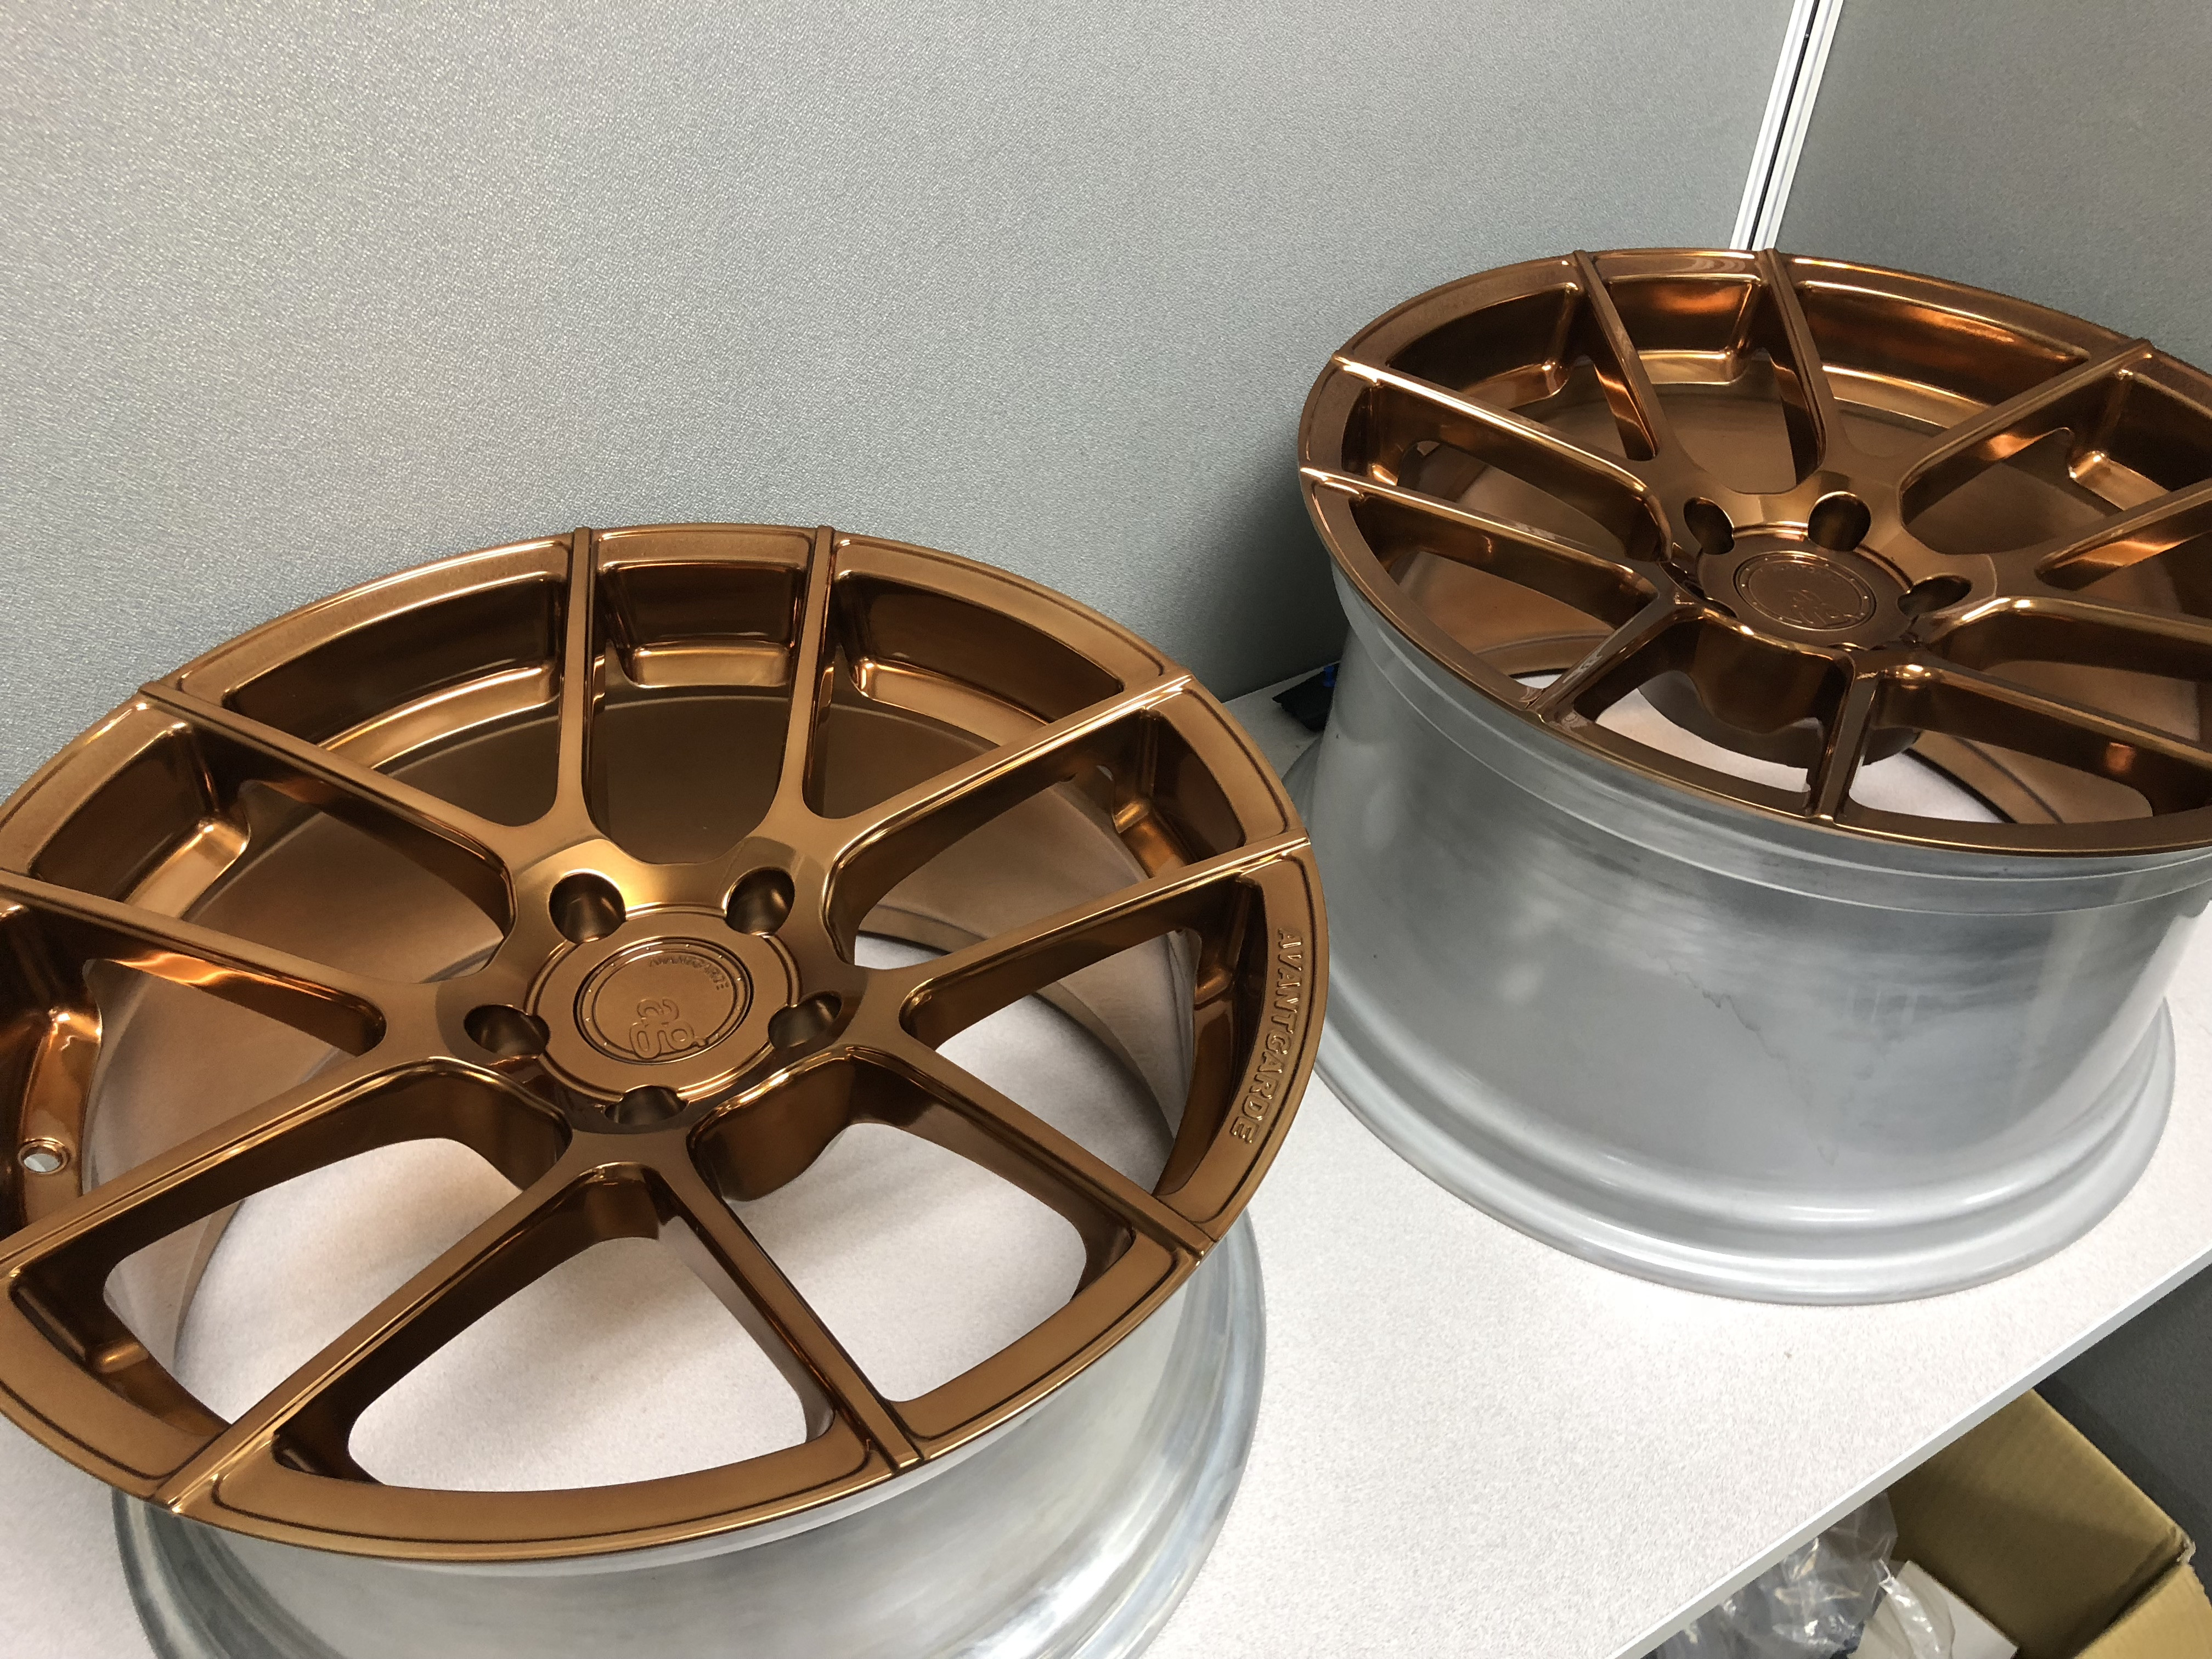 Oh and one of my angel eyes fell off   looks like I will be cracking that open when I install the rest of the body panels to re-epoxy. looks like I will be cracking that open when I install the rest of the body panels to re-epoxy. 6/7 3D Printed Gauge Pod - Custom WMI Kit - 5.4 Gal Tank (6/7 update) Whats up guys, finally got this WMI kit all installed and running! It took me basically 3 days from start to finish but the install is super flush and clean. I couldn't be happier with how it turned out! 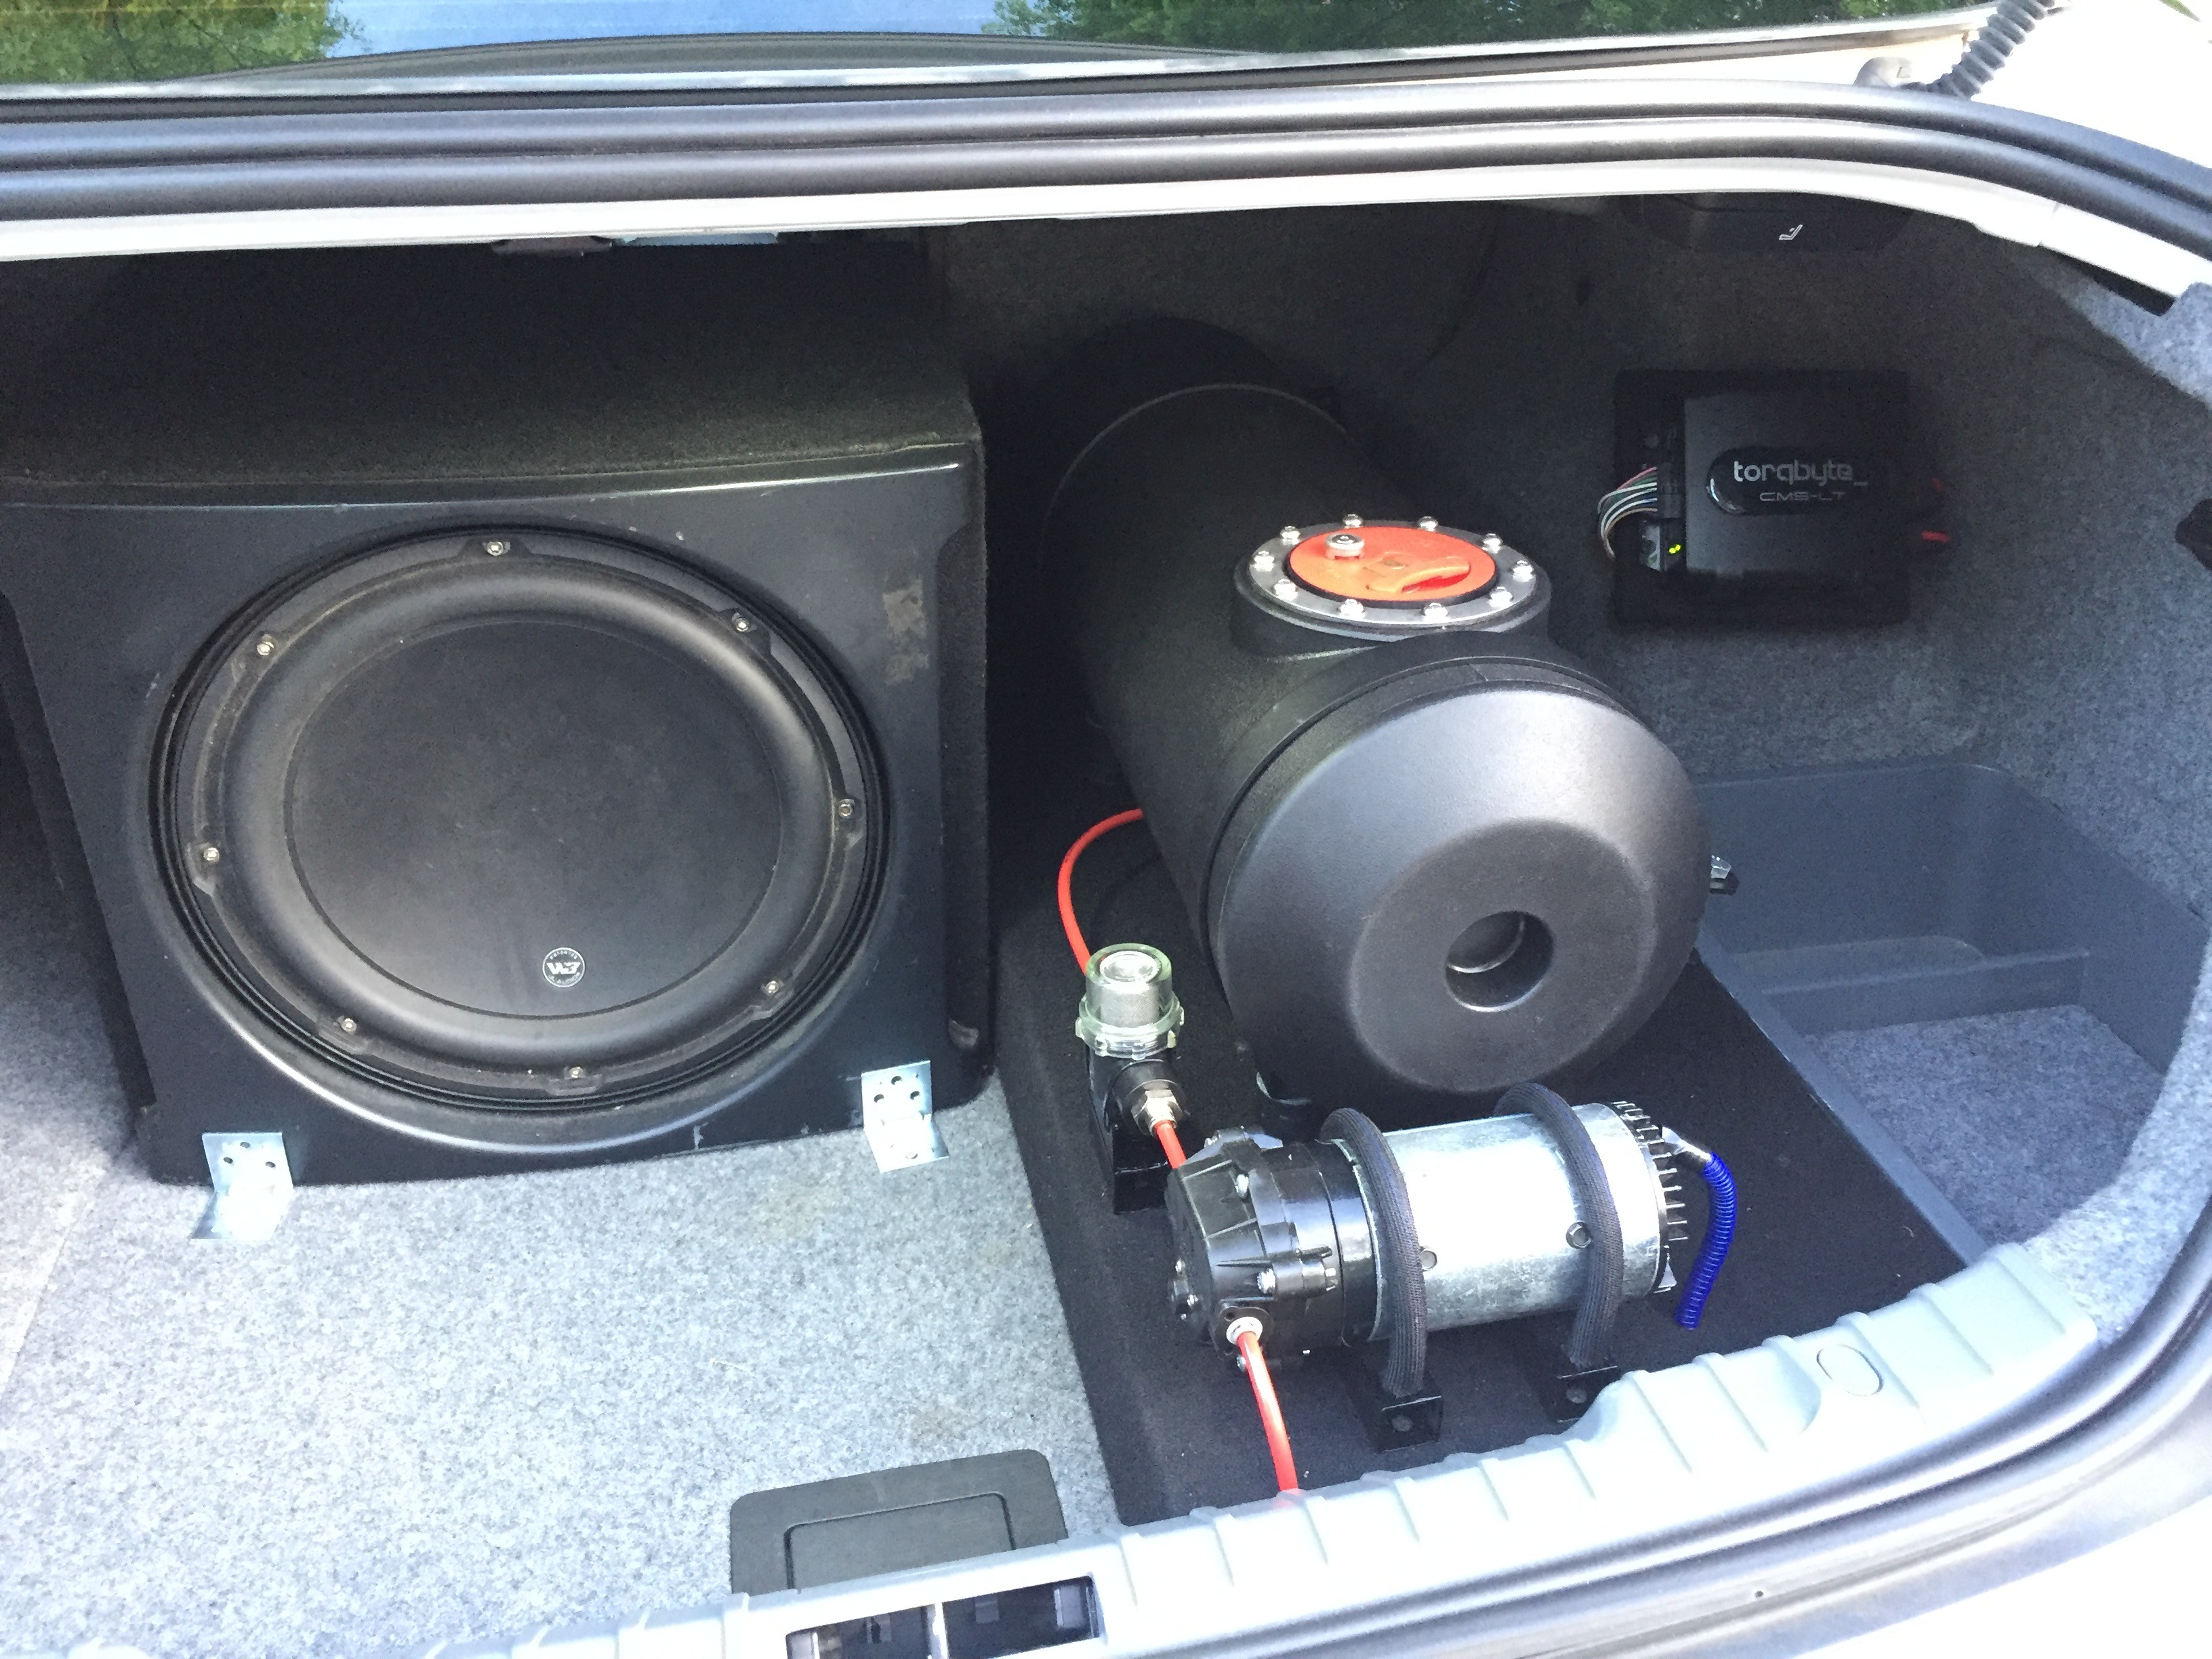 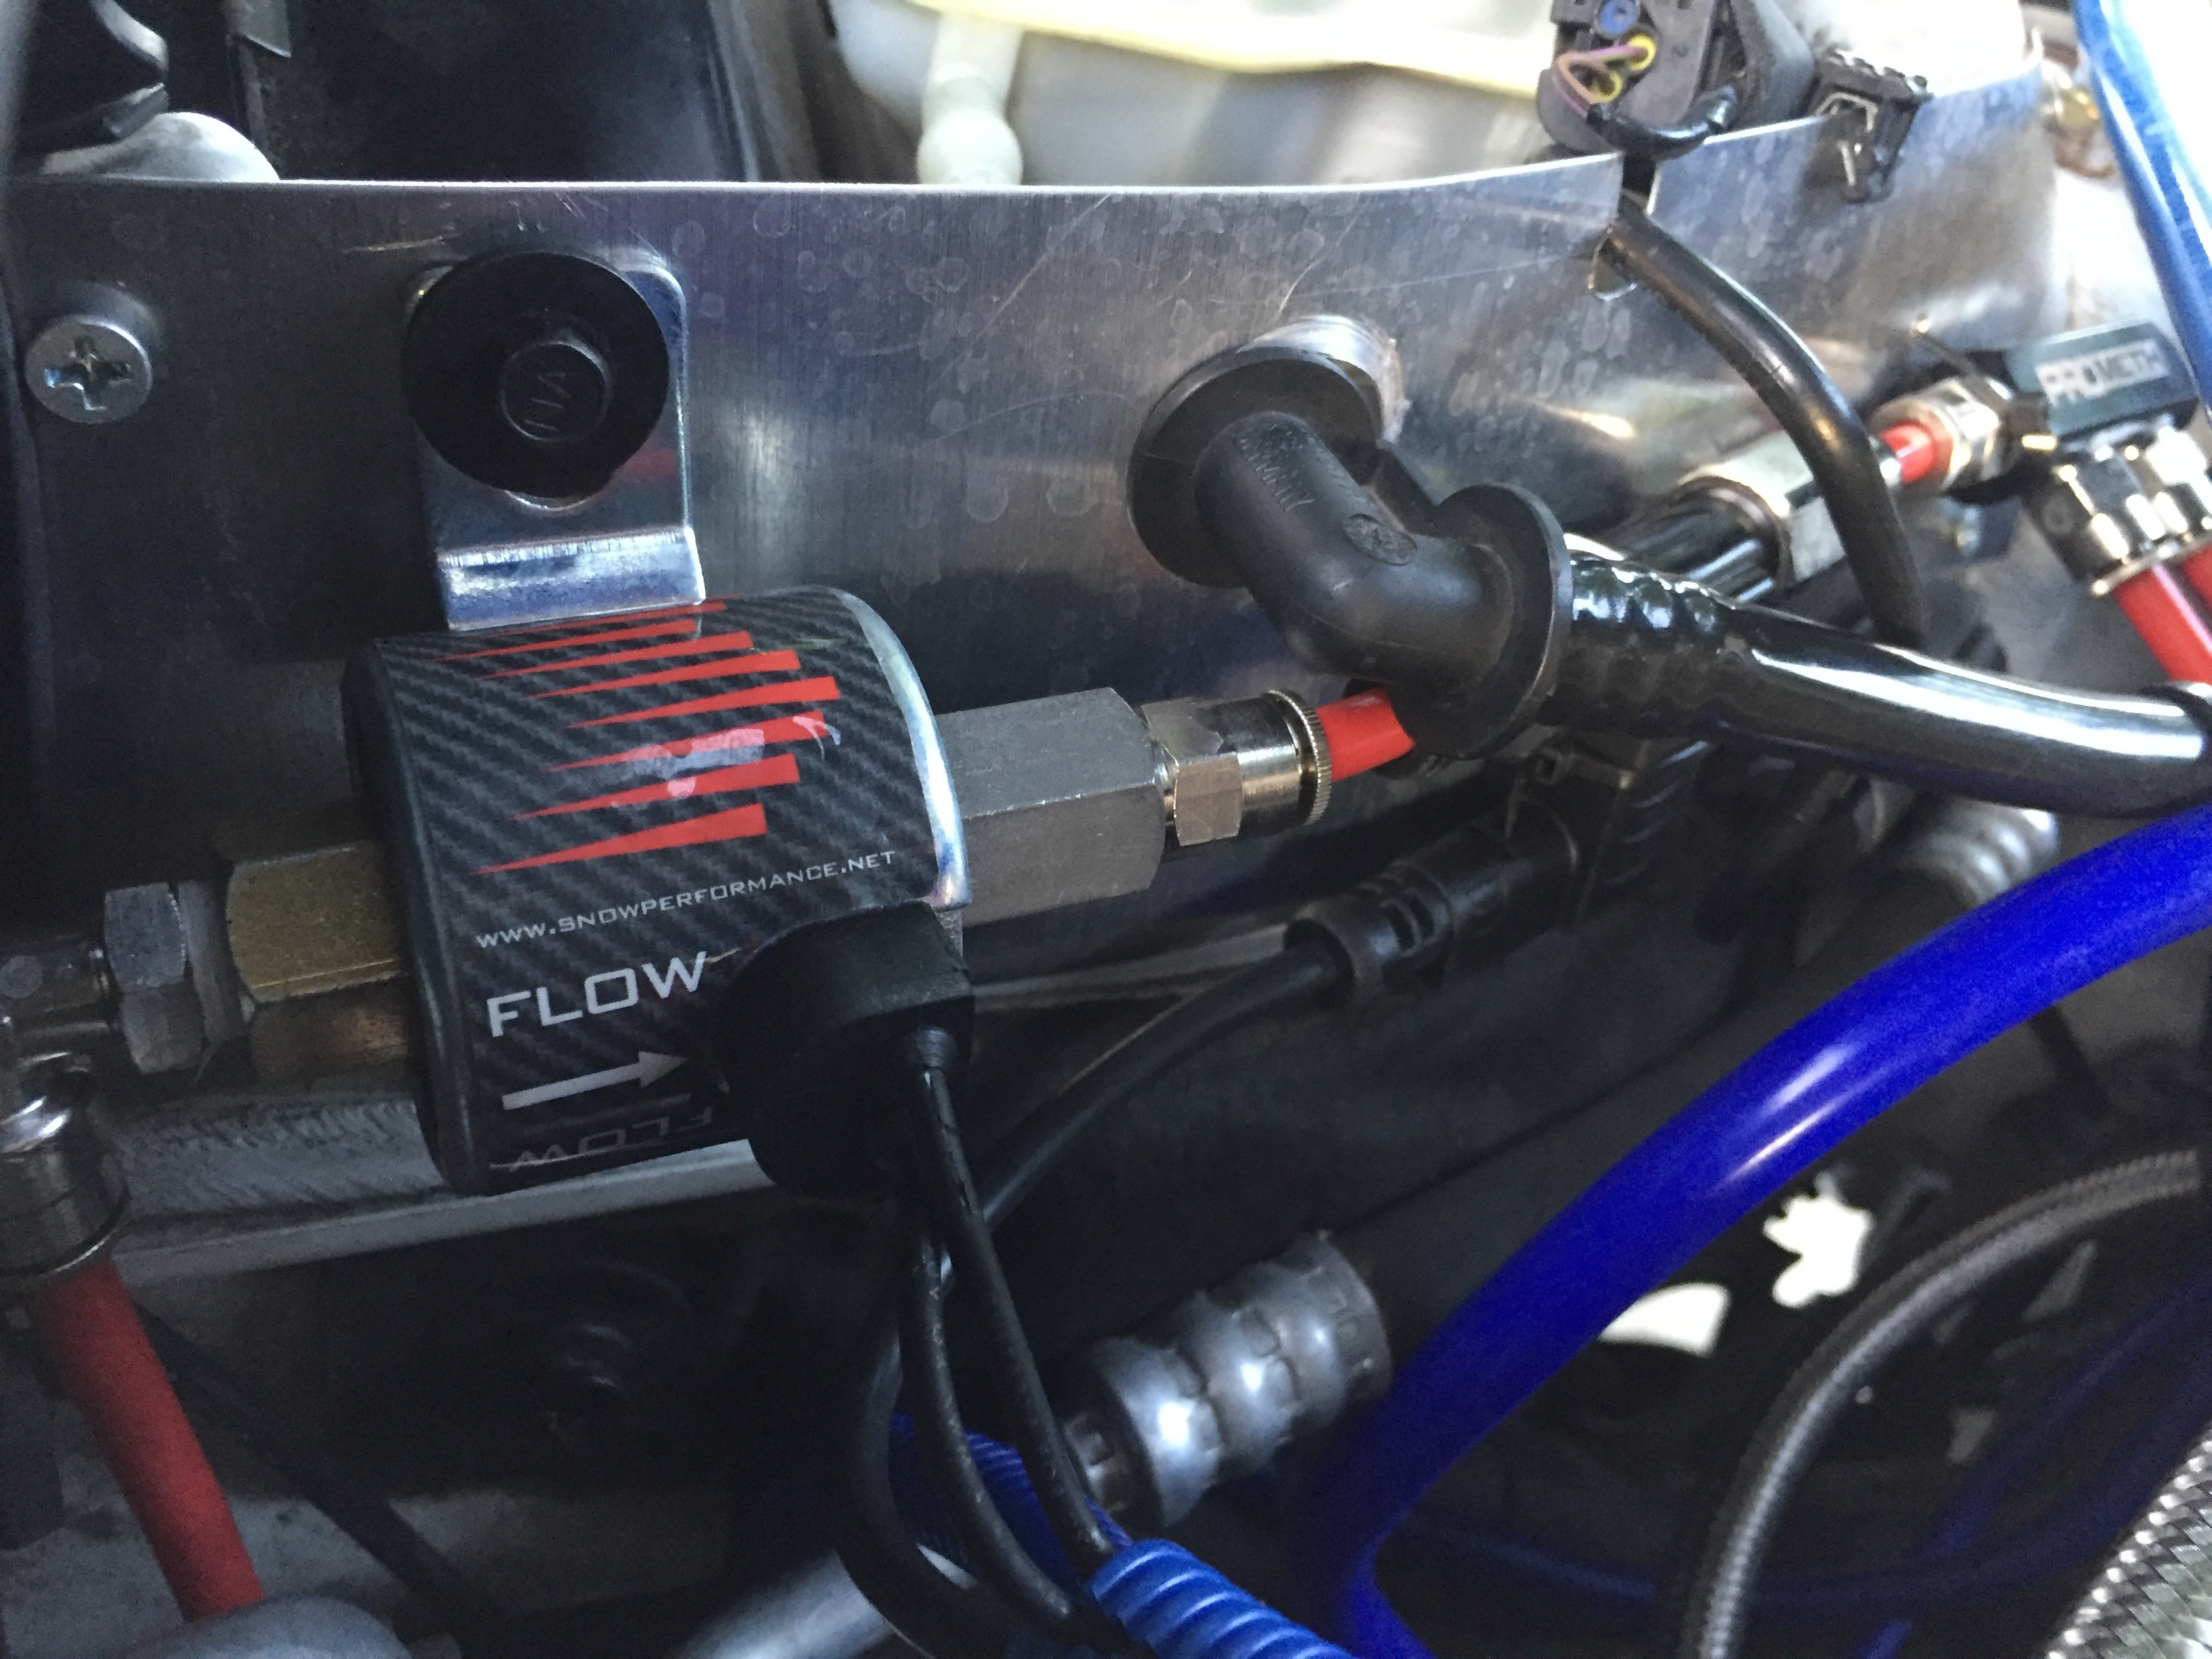 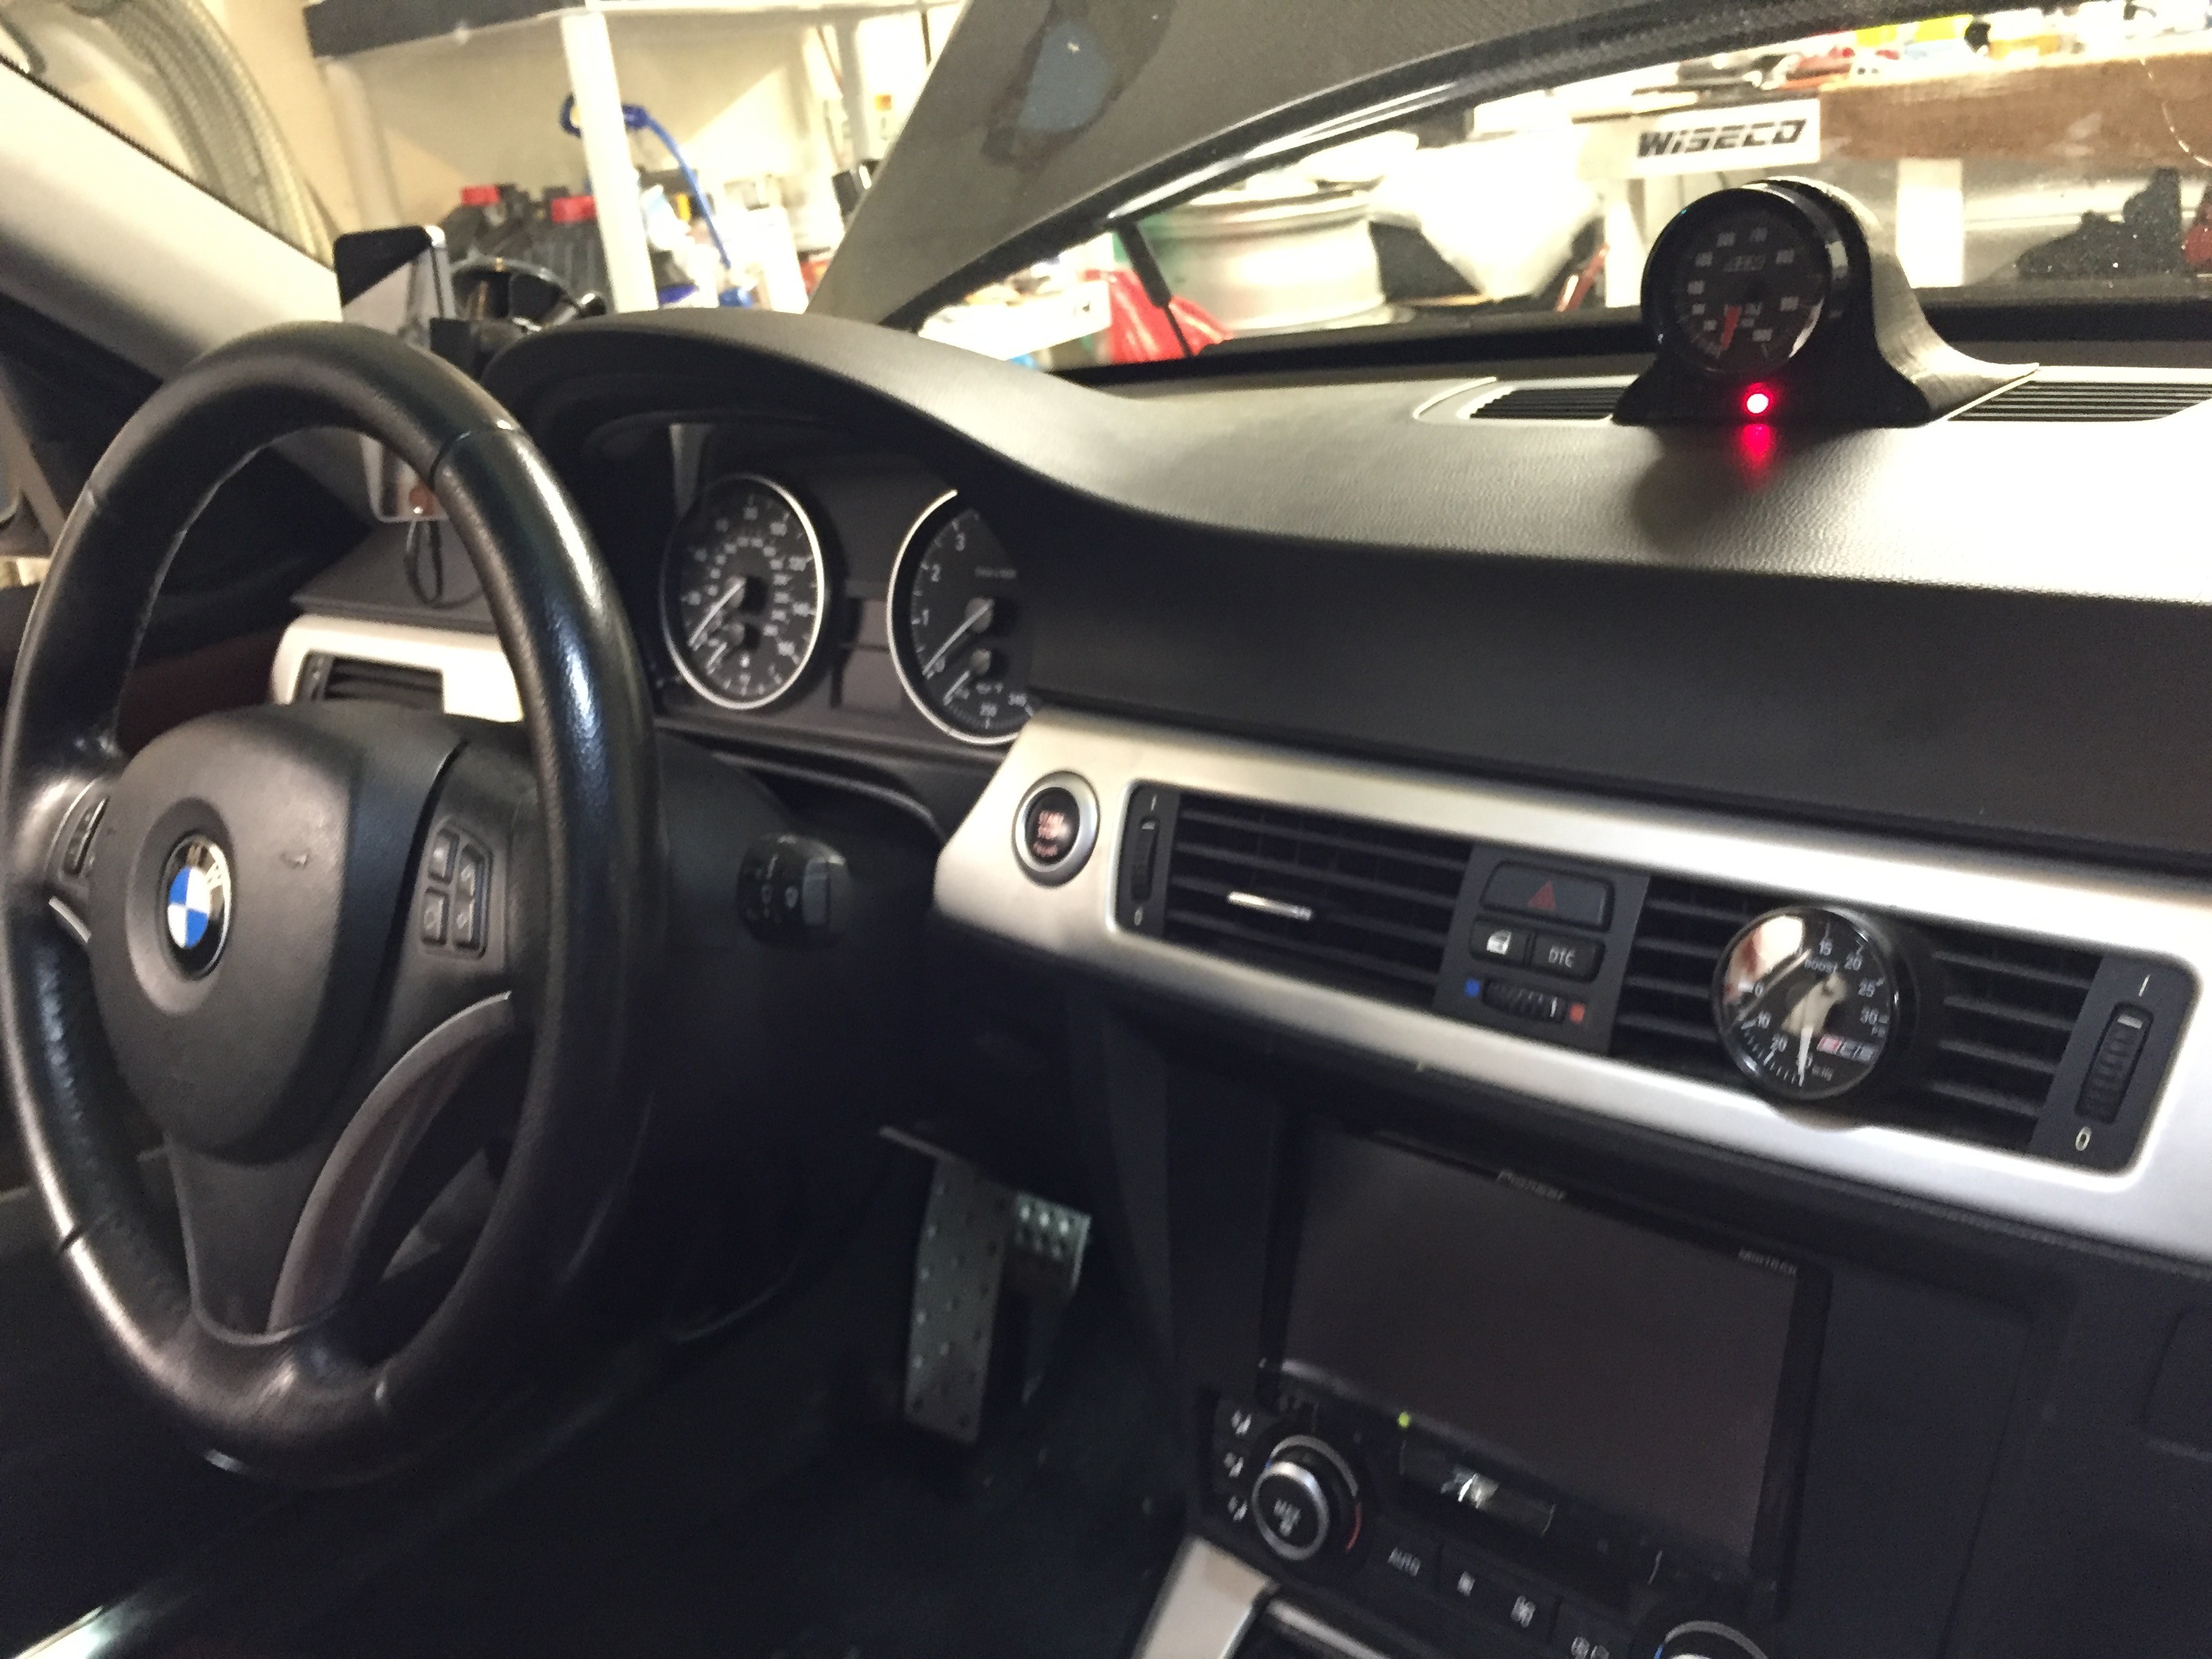 So my list of to do items on this project was as follows. -1/4 barb on manifold with new line to BOV -HPFP Replacement -WMI Kit Install First I layed everything out and started disassembly.  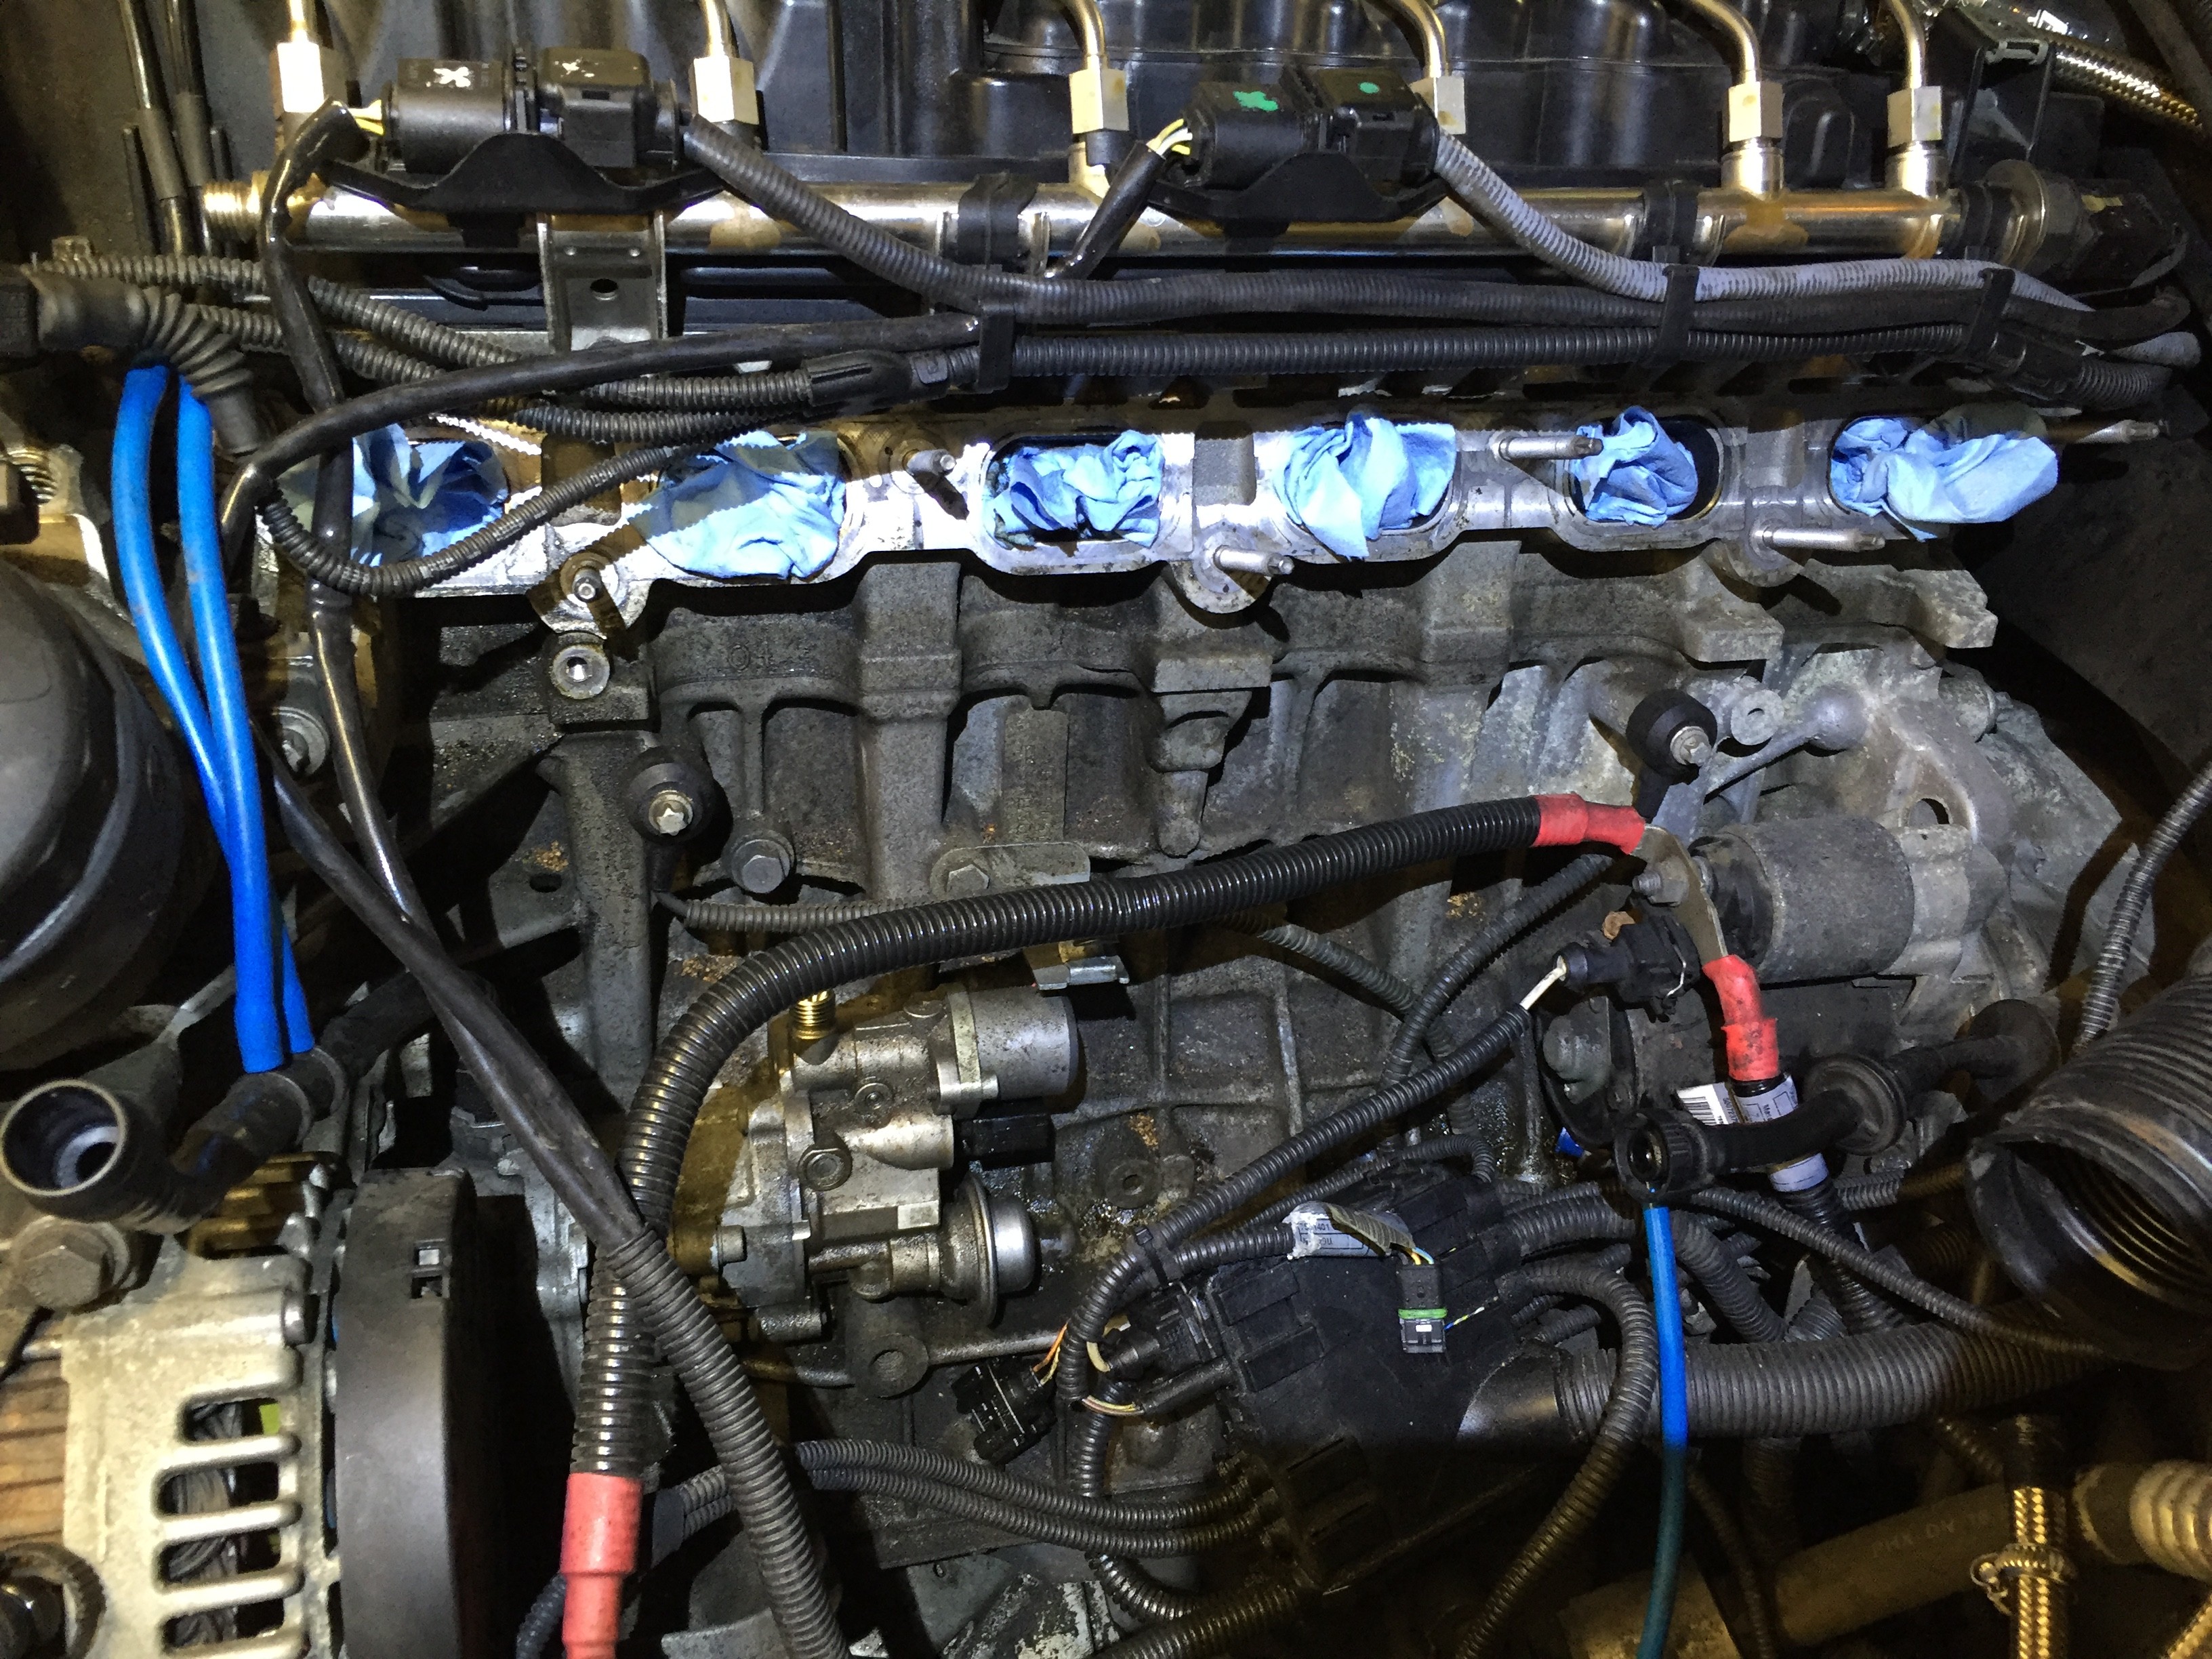 My car started stalling at stop lights as the hpfp pressure was intermittently dropping. Time for a replacement! I did the low pressure sensor while I was in there. 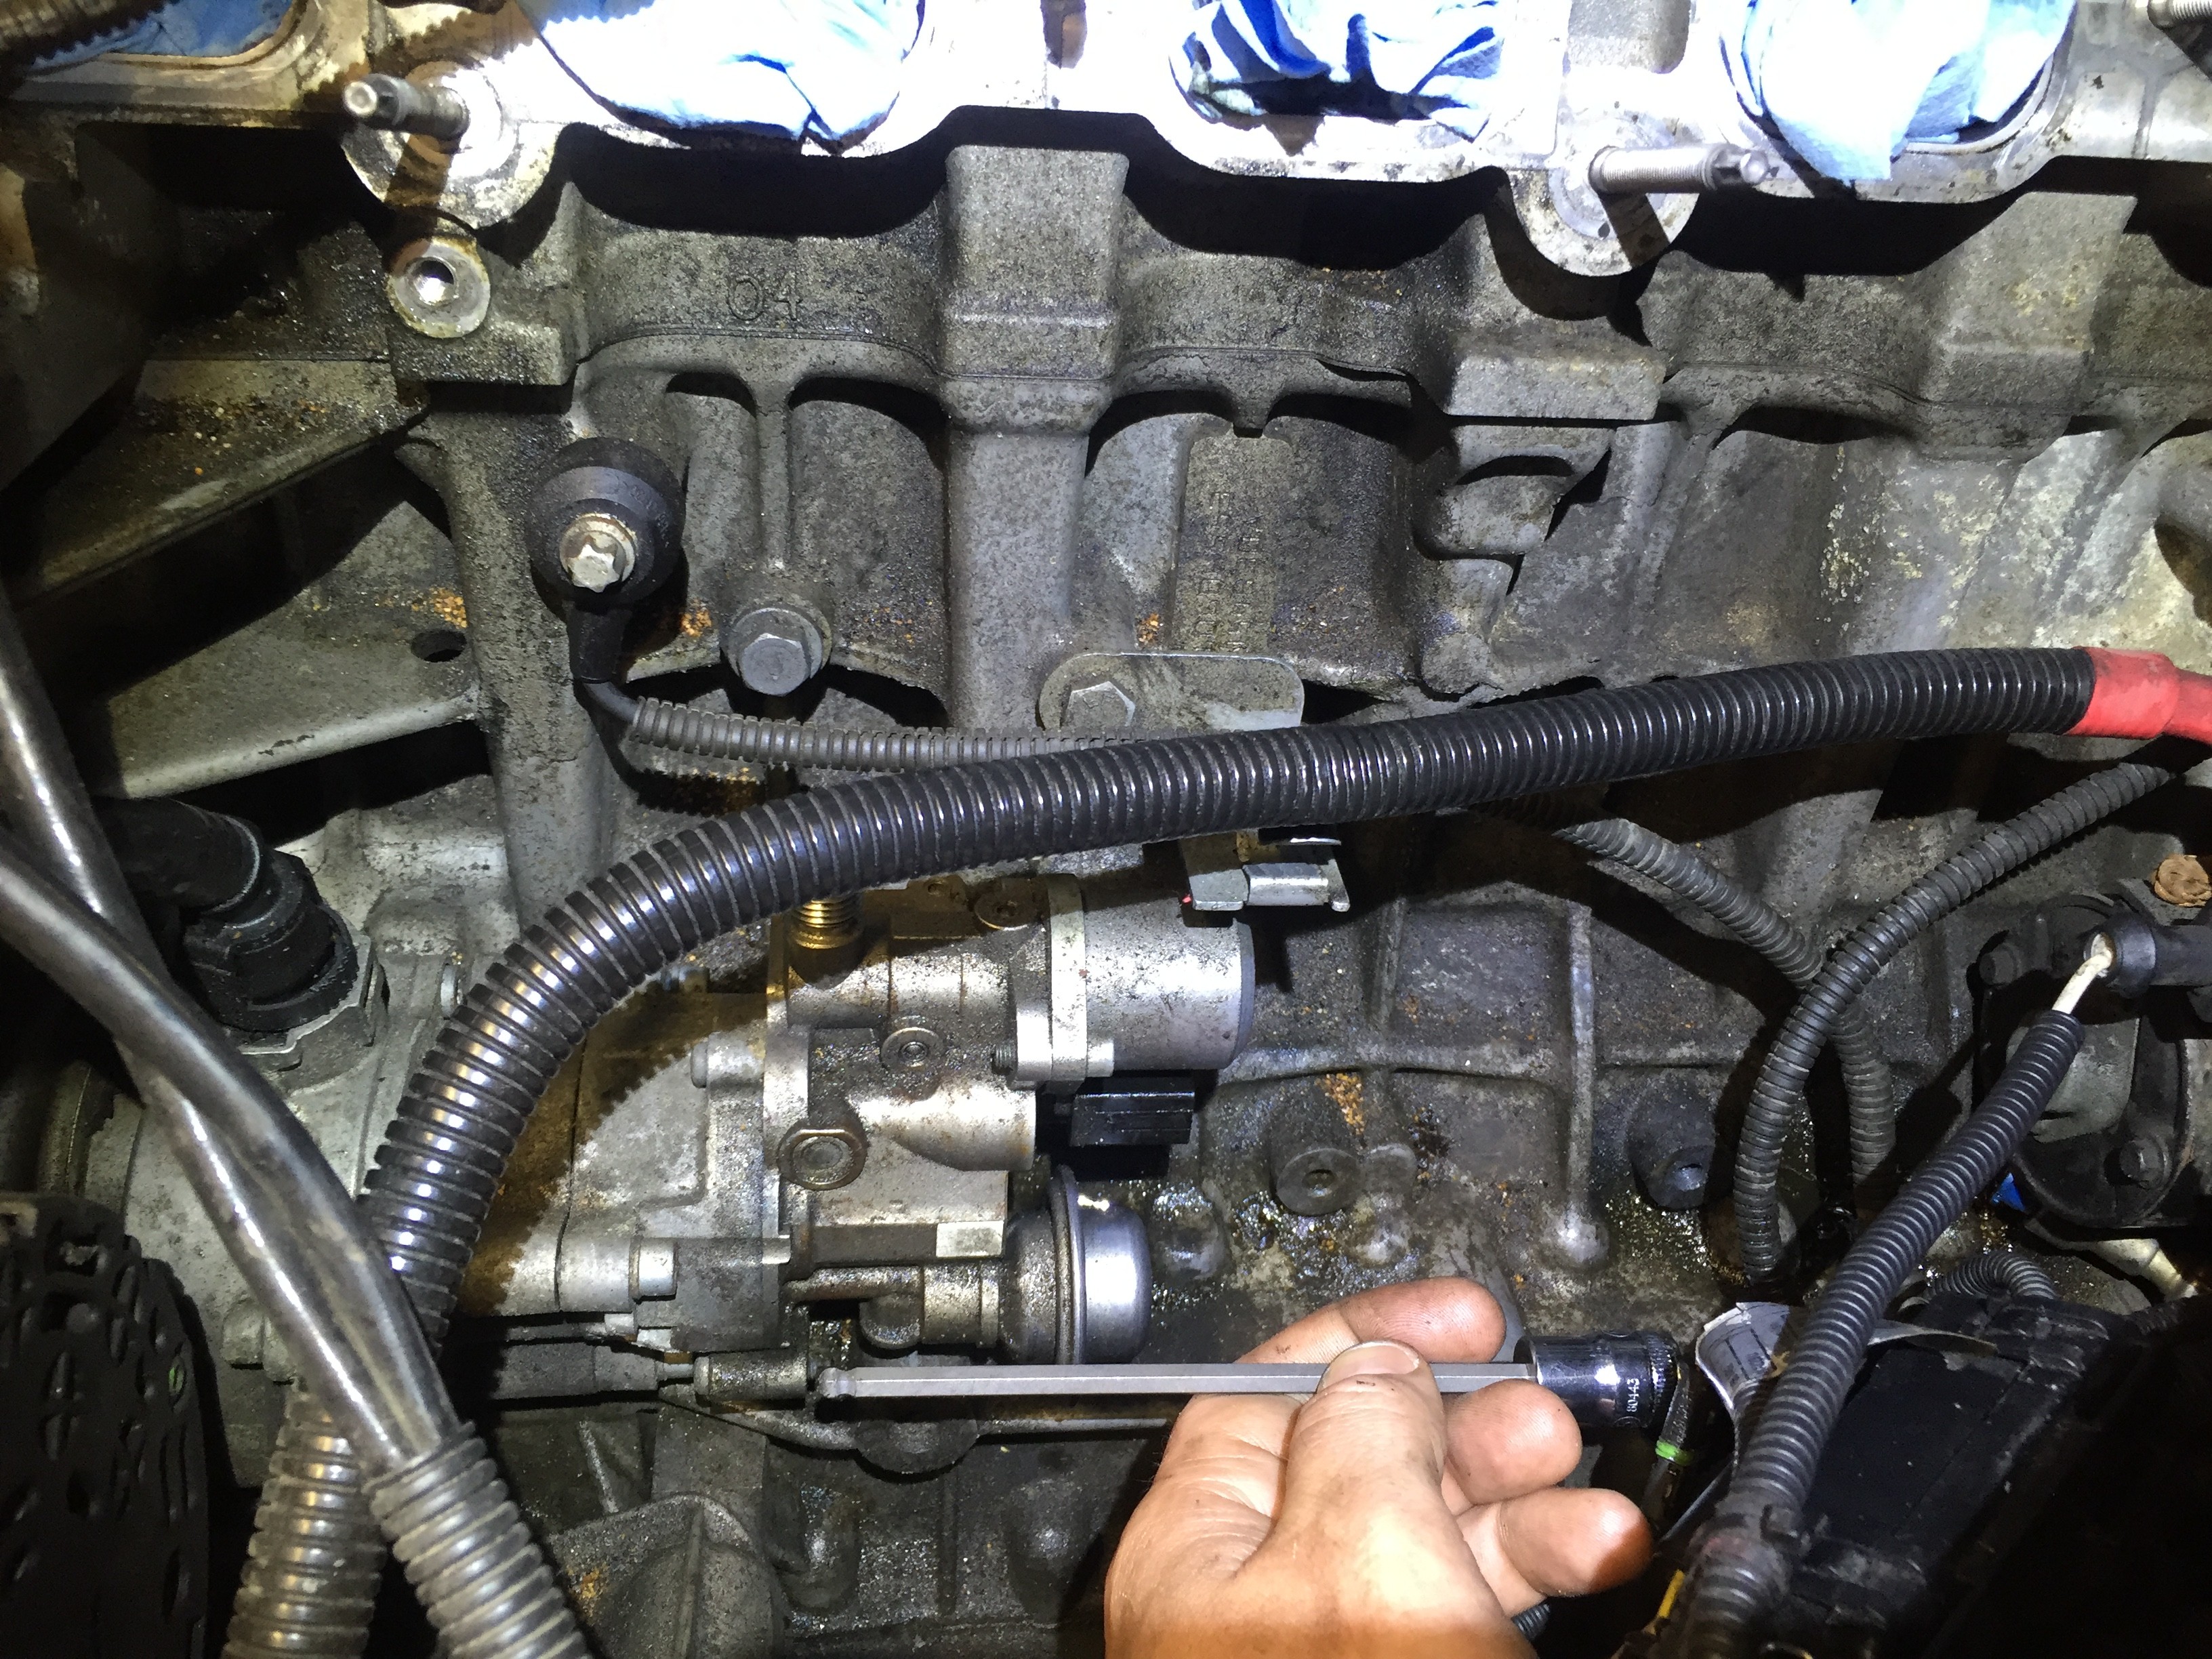 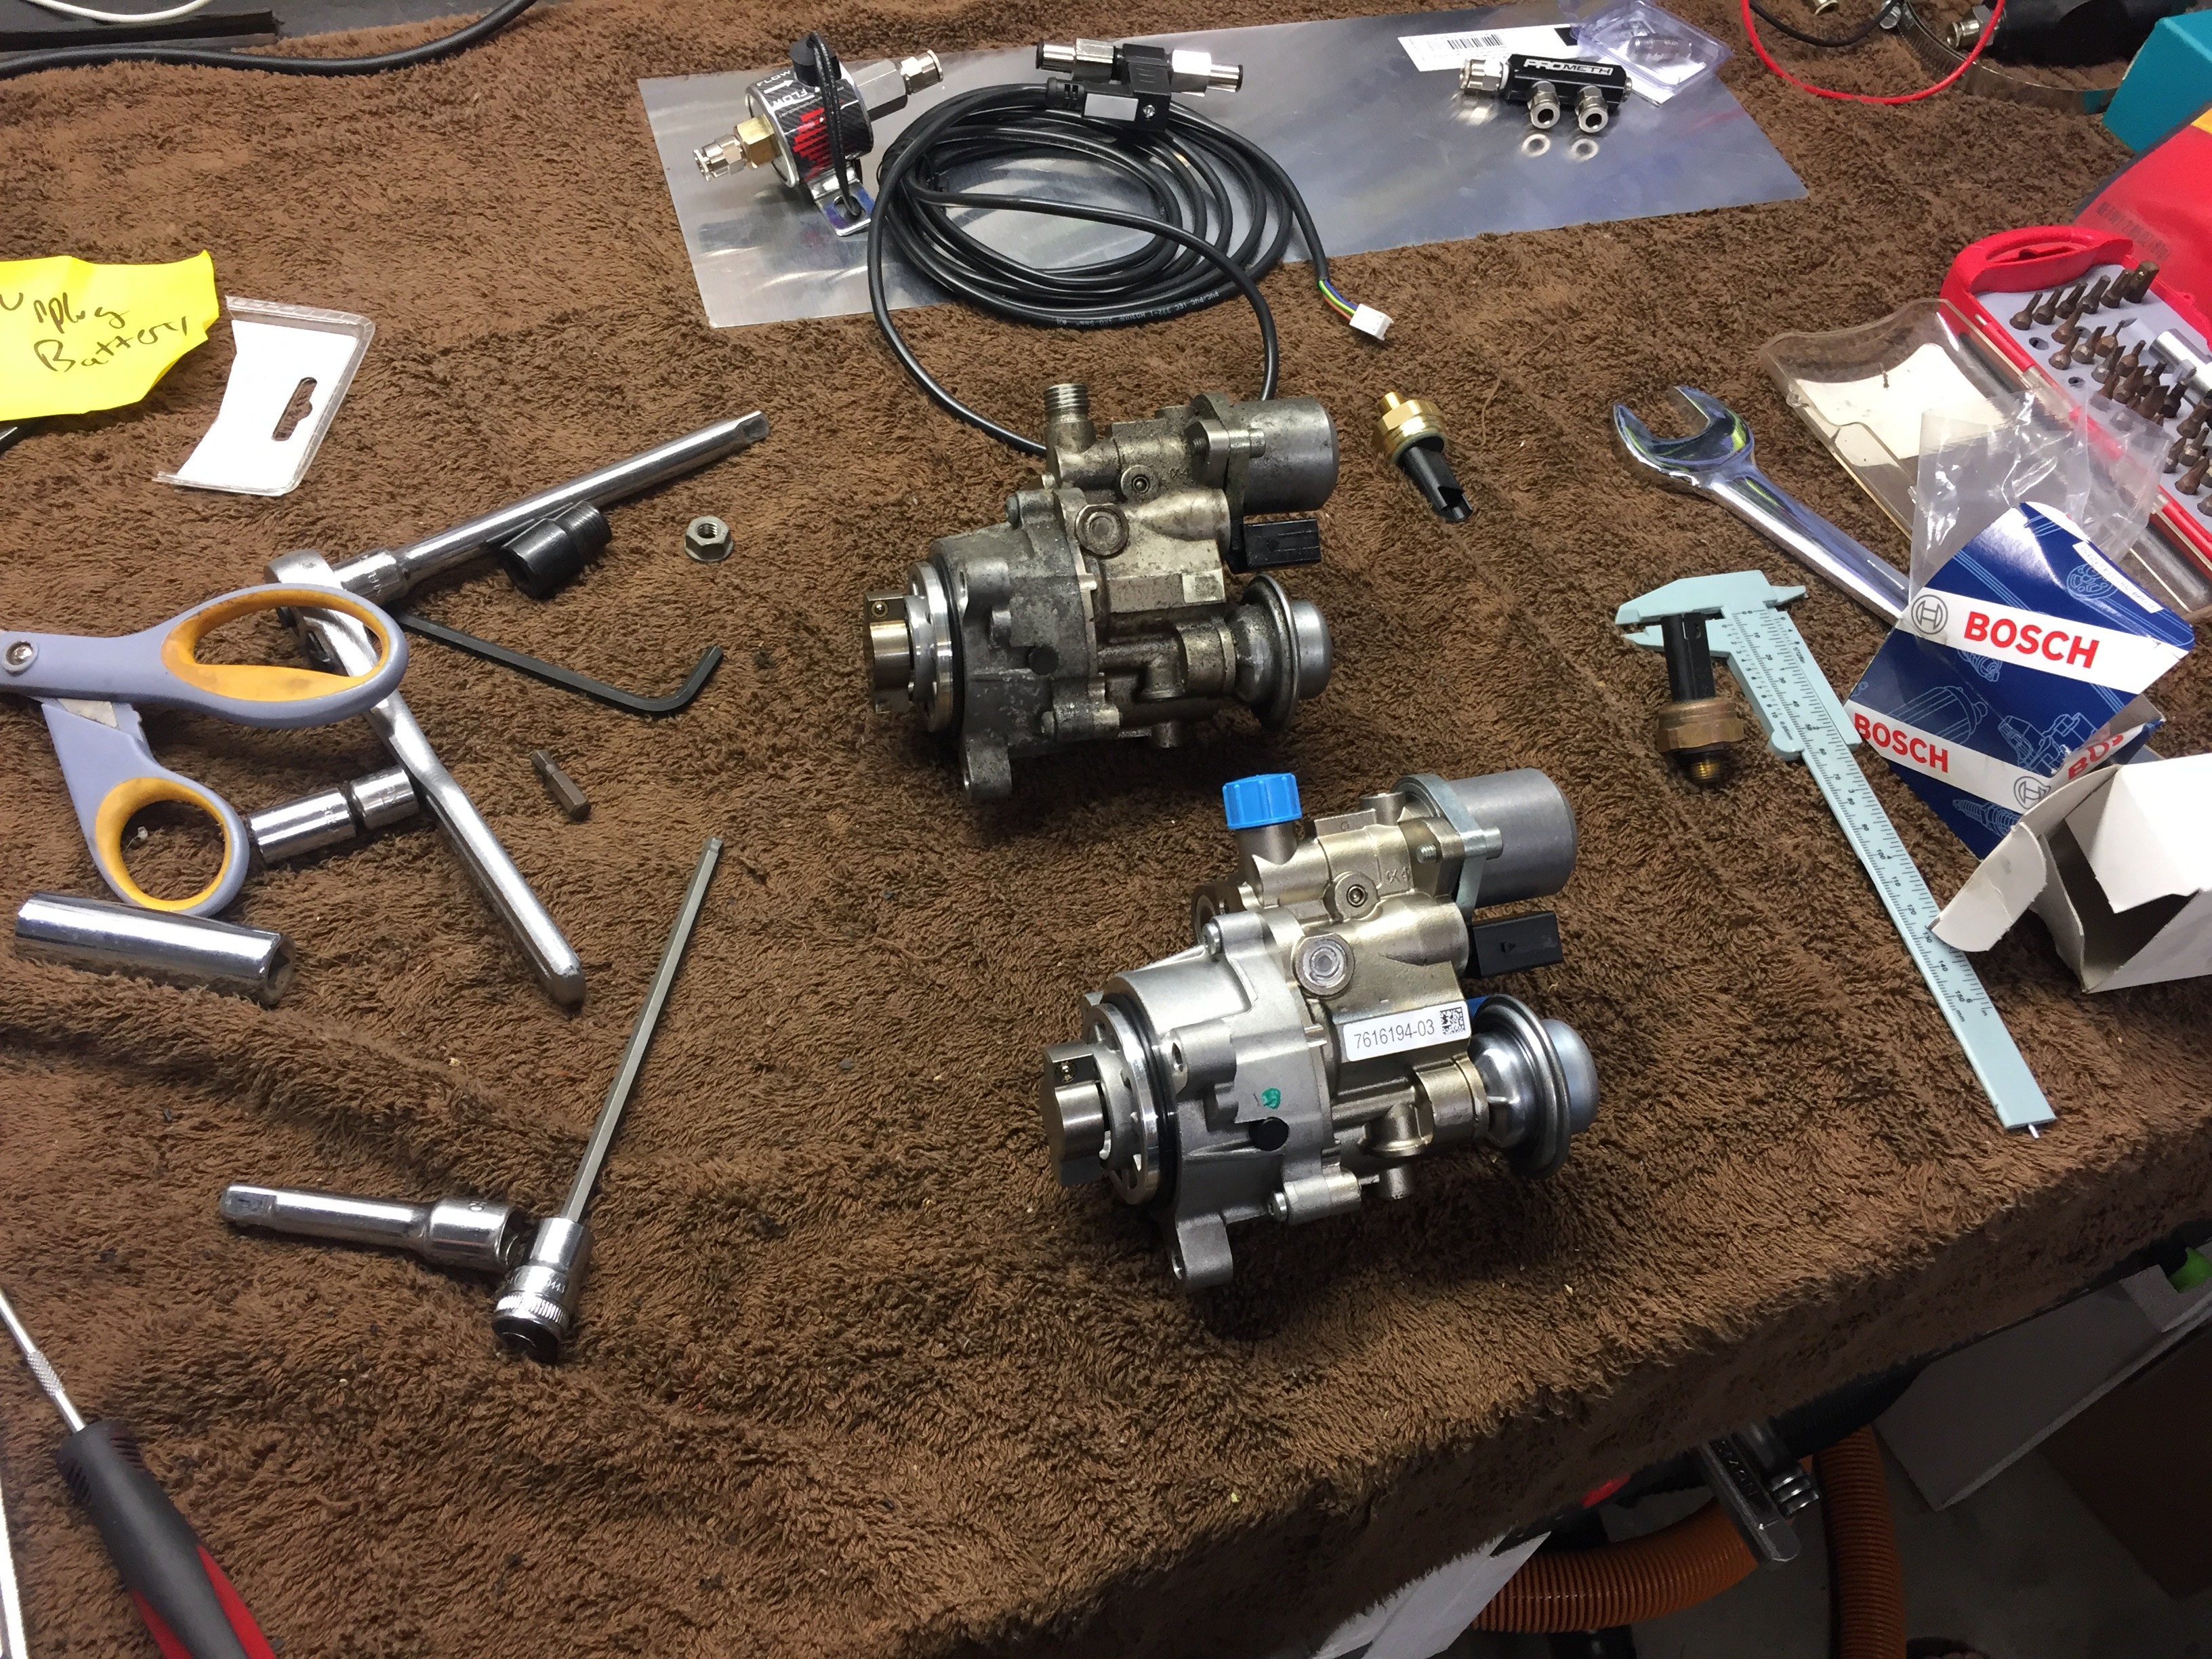 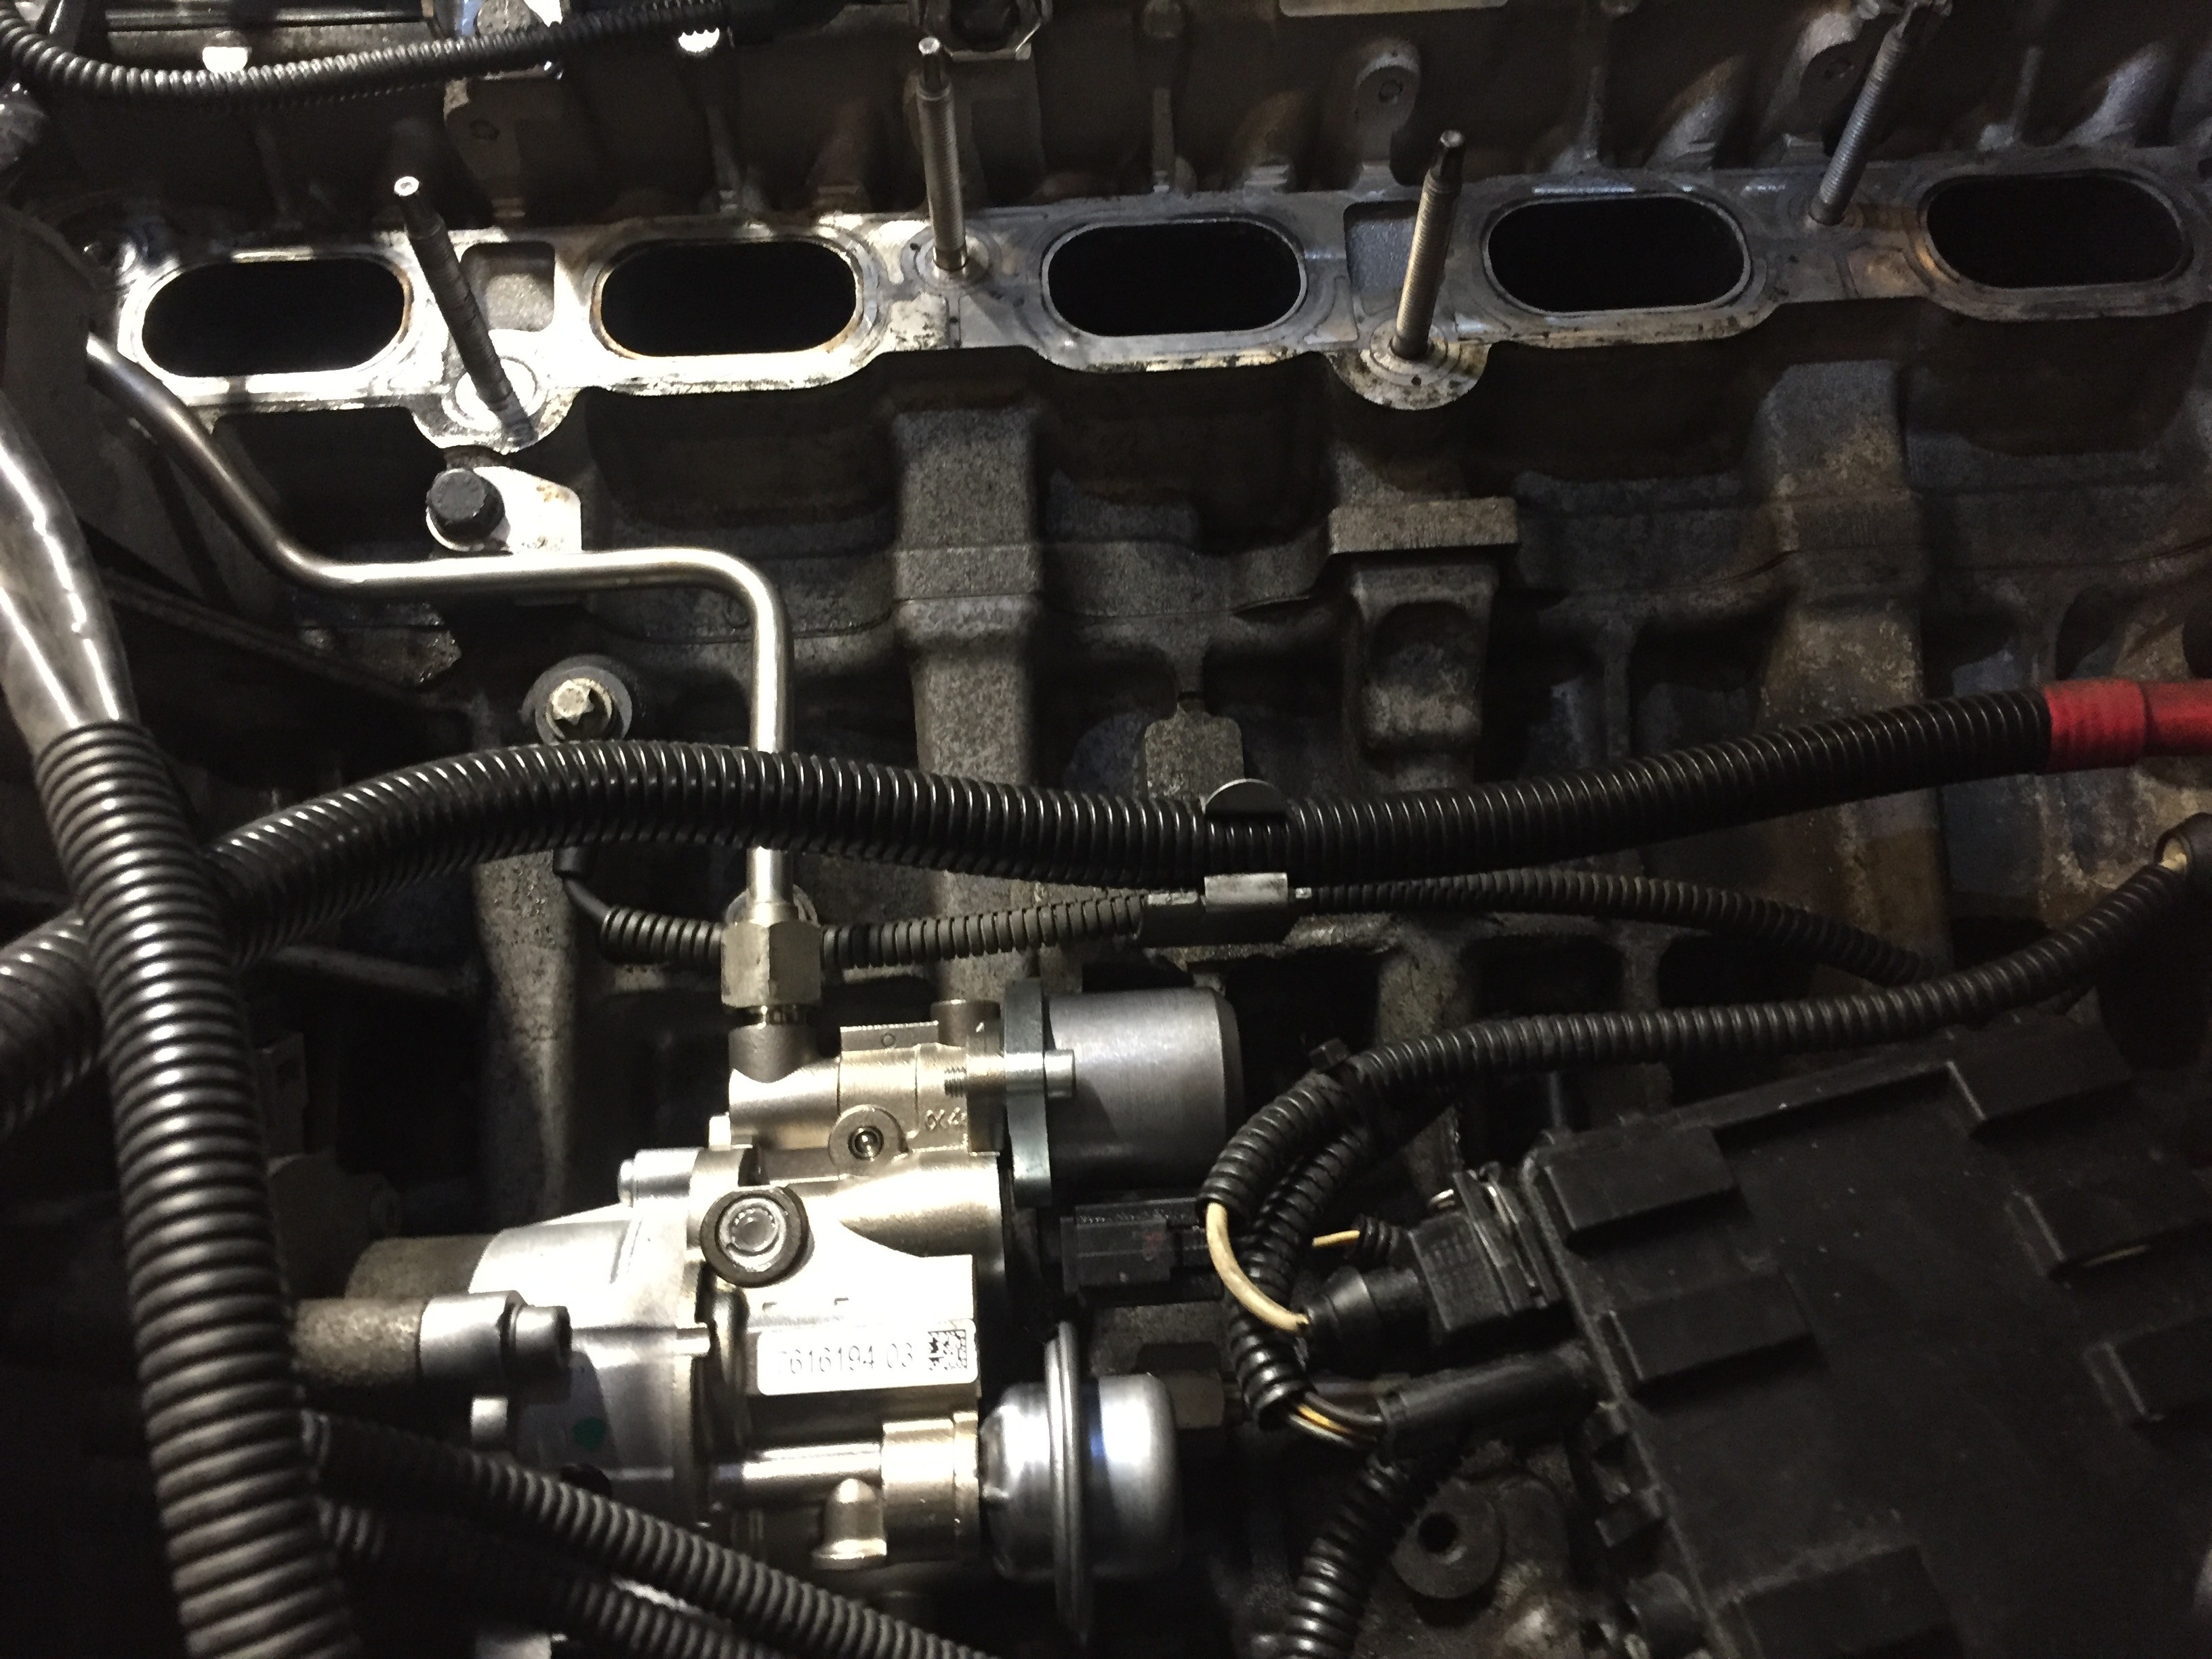 Next up I drilled the manifold, put added the 1/4 brass barb and epoxied it in there for a nice solid seal. No pics of this unfortunately  On to the WMI! Below are the details on what I went with. Nozzles: a 7 GPH and a 10 GPH from Prometh Nozzle Holder: Prometh Check Valves: Prometh Lines: 1/4" Prometh Distribution block: 1 to 2 Prometh Flow Sensor: AEM 1000cc gauge (even though I am well over that )Solenoid: Snow Performance Pump: Devils Own Filter: Prometh Tank: Prometh 5.4 Gallon Level Sensor: Prometh Controller: Torqbyte CM10-LT  First up was to get the nozzles hooked into the charge pipe 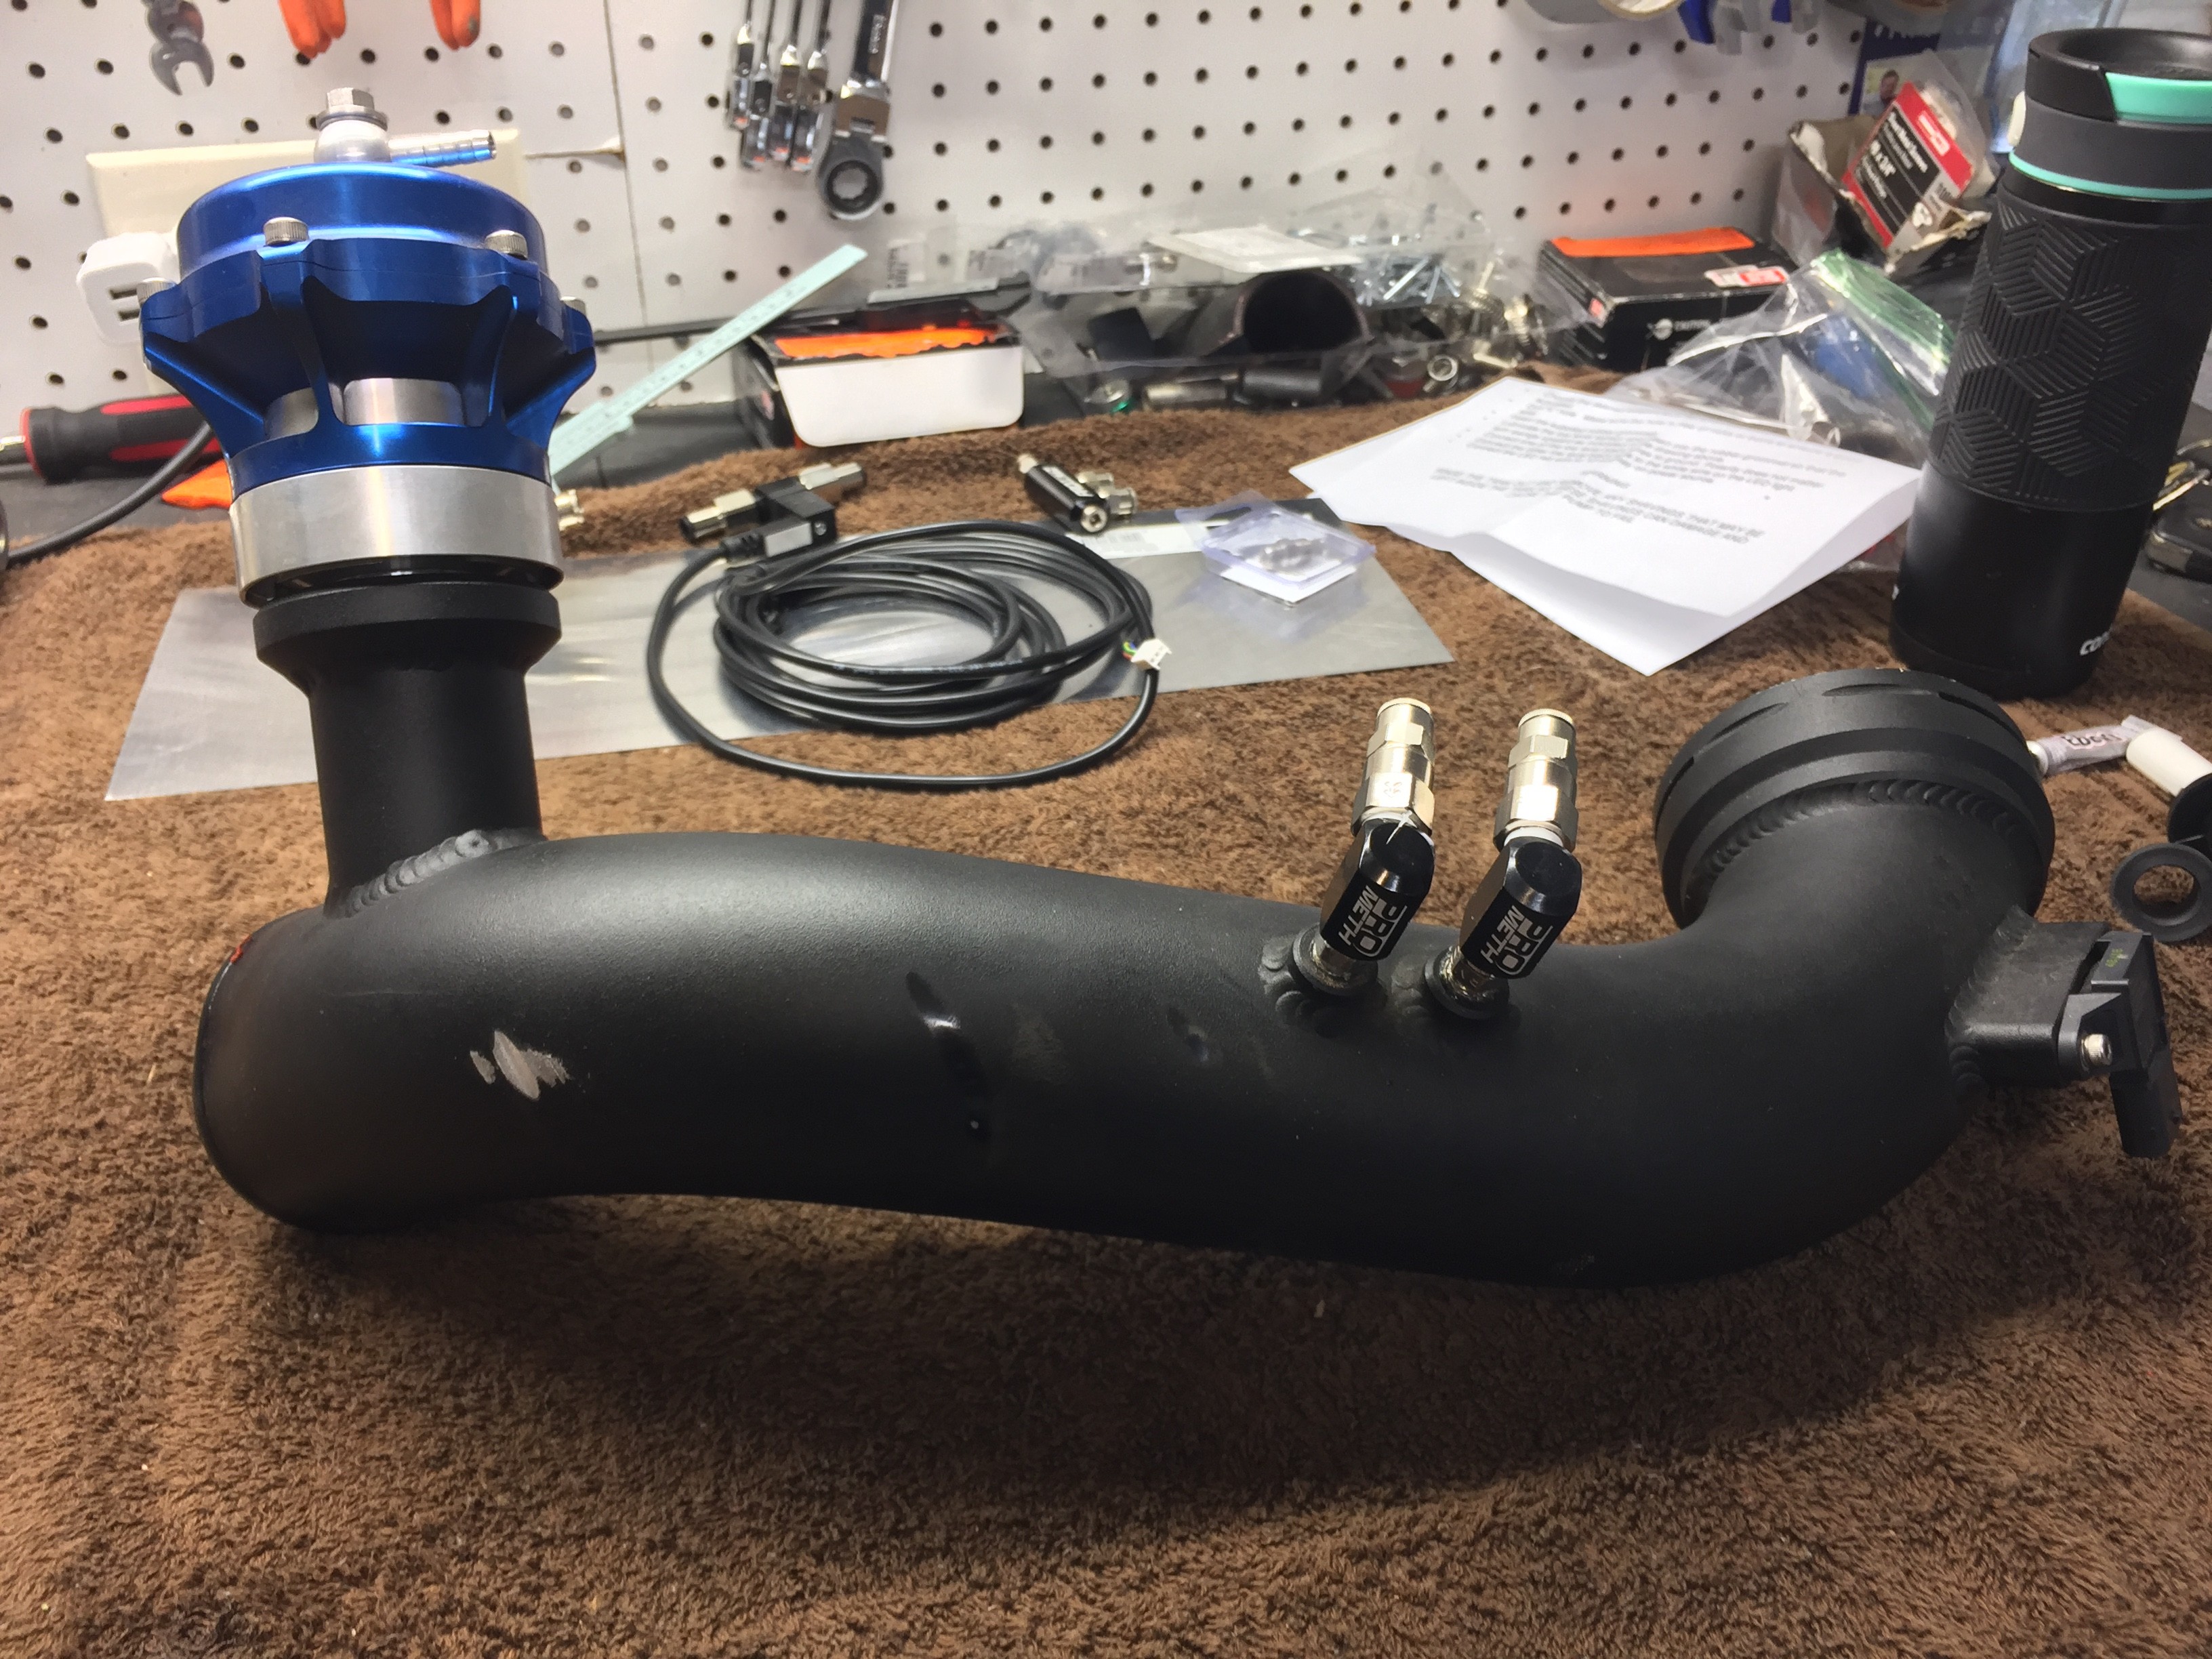 My buddy and I started designing the trunk setup 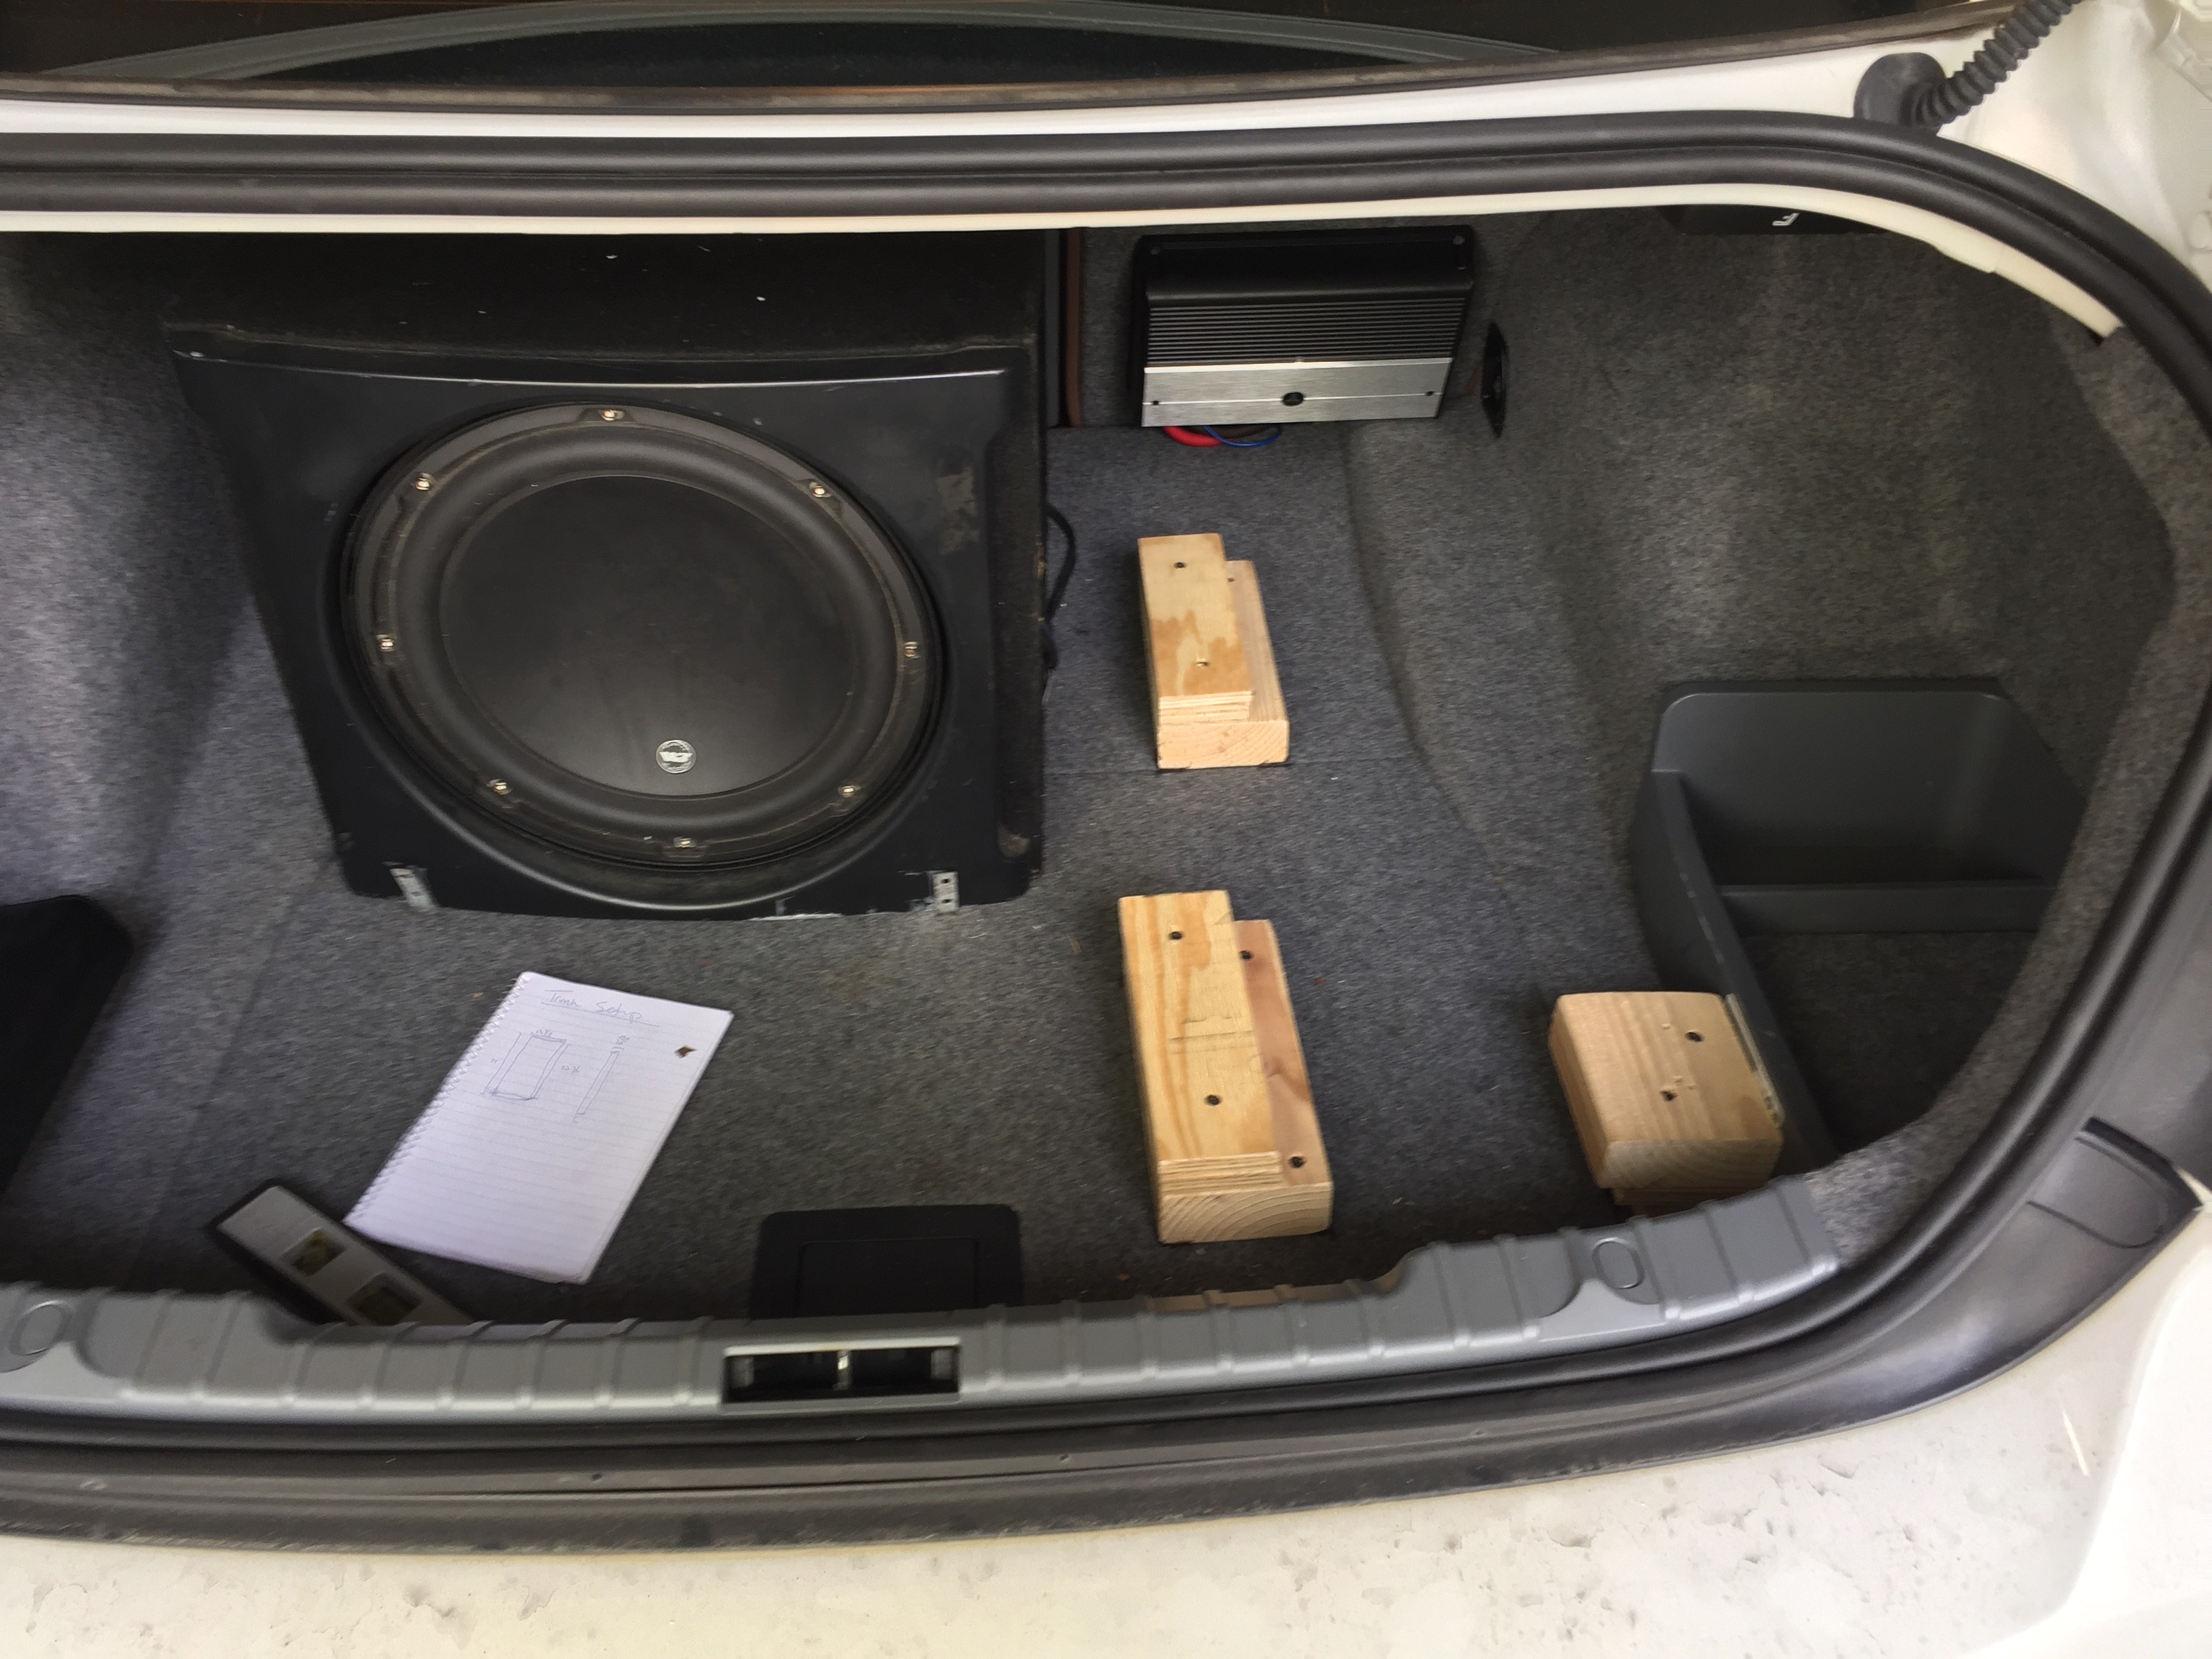  We had to get some metal square tube to mount the pump on and the in line filter. I mounted the pump and filter with zip ties and the pump I insulated the zip ties with some heat wrap just in case.  Next I started in the engine bay building a custom bracket for the solenoid, flow sensor and distribution block. I removed the plastic piece and made a substitute aluminum piece, cut the hole for the brake booster line and brake line and drilled the holes for mounting the parts.   Got the hole drilled for the level sensor  After re-installing most of the engine bay components I mounted the boost sensor for the torqbyte controller and ran all the electrical lines for that, the solenoid and flow sensor.  Blue conduit ftw even it it doesn't match the other blues lol    Now I had to tap into the jb4 harness to snag the RPM signal. Required a little soldering but nothing I couldn't handle  Next I had to tap into the jb4 for the AEM Flow gauge as it has a output signal that way I can log WMI flow through the JB4 and utilize its safety settings!   Next I had quite the harness I made that had to go to the trunk to meet up with the controller as well as pull wires through the dash for the gauge. I decided to mount the controller in the trunk so I could use 8 gauge wire for the pump and power while keeping the wires short. It is much easier to run 16 gauge wire through the cabin instead of 4 thick expensive wires lol.   With the trunk wires up I next ran the WMI line underneath the car, basically followed the gas tank vent line up into the engine bay. With that done I assembled the trunk!   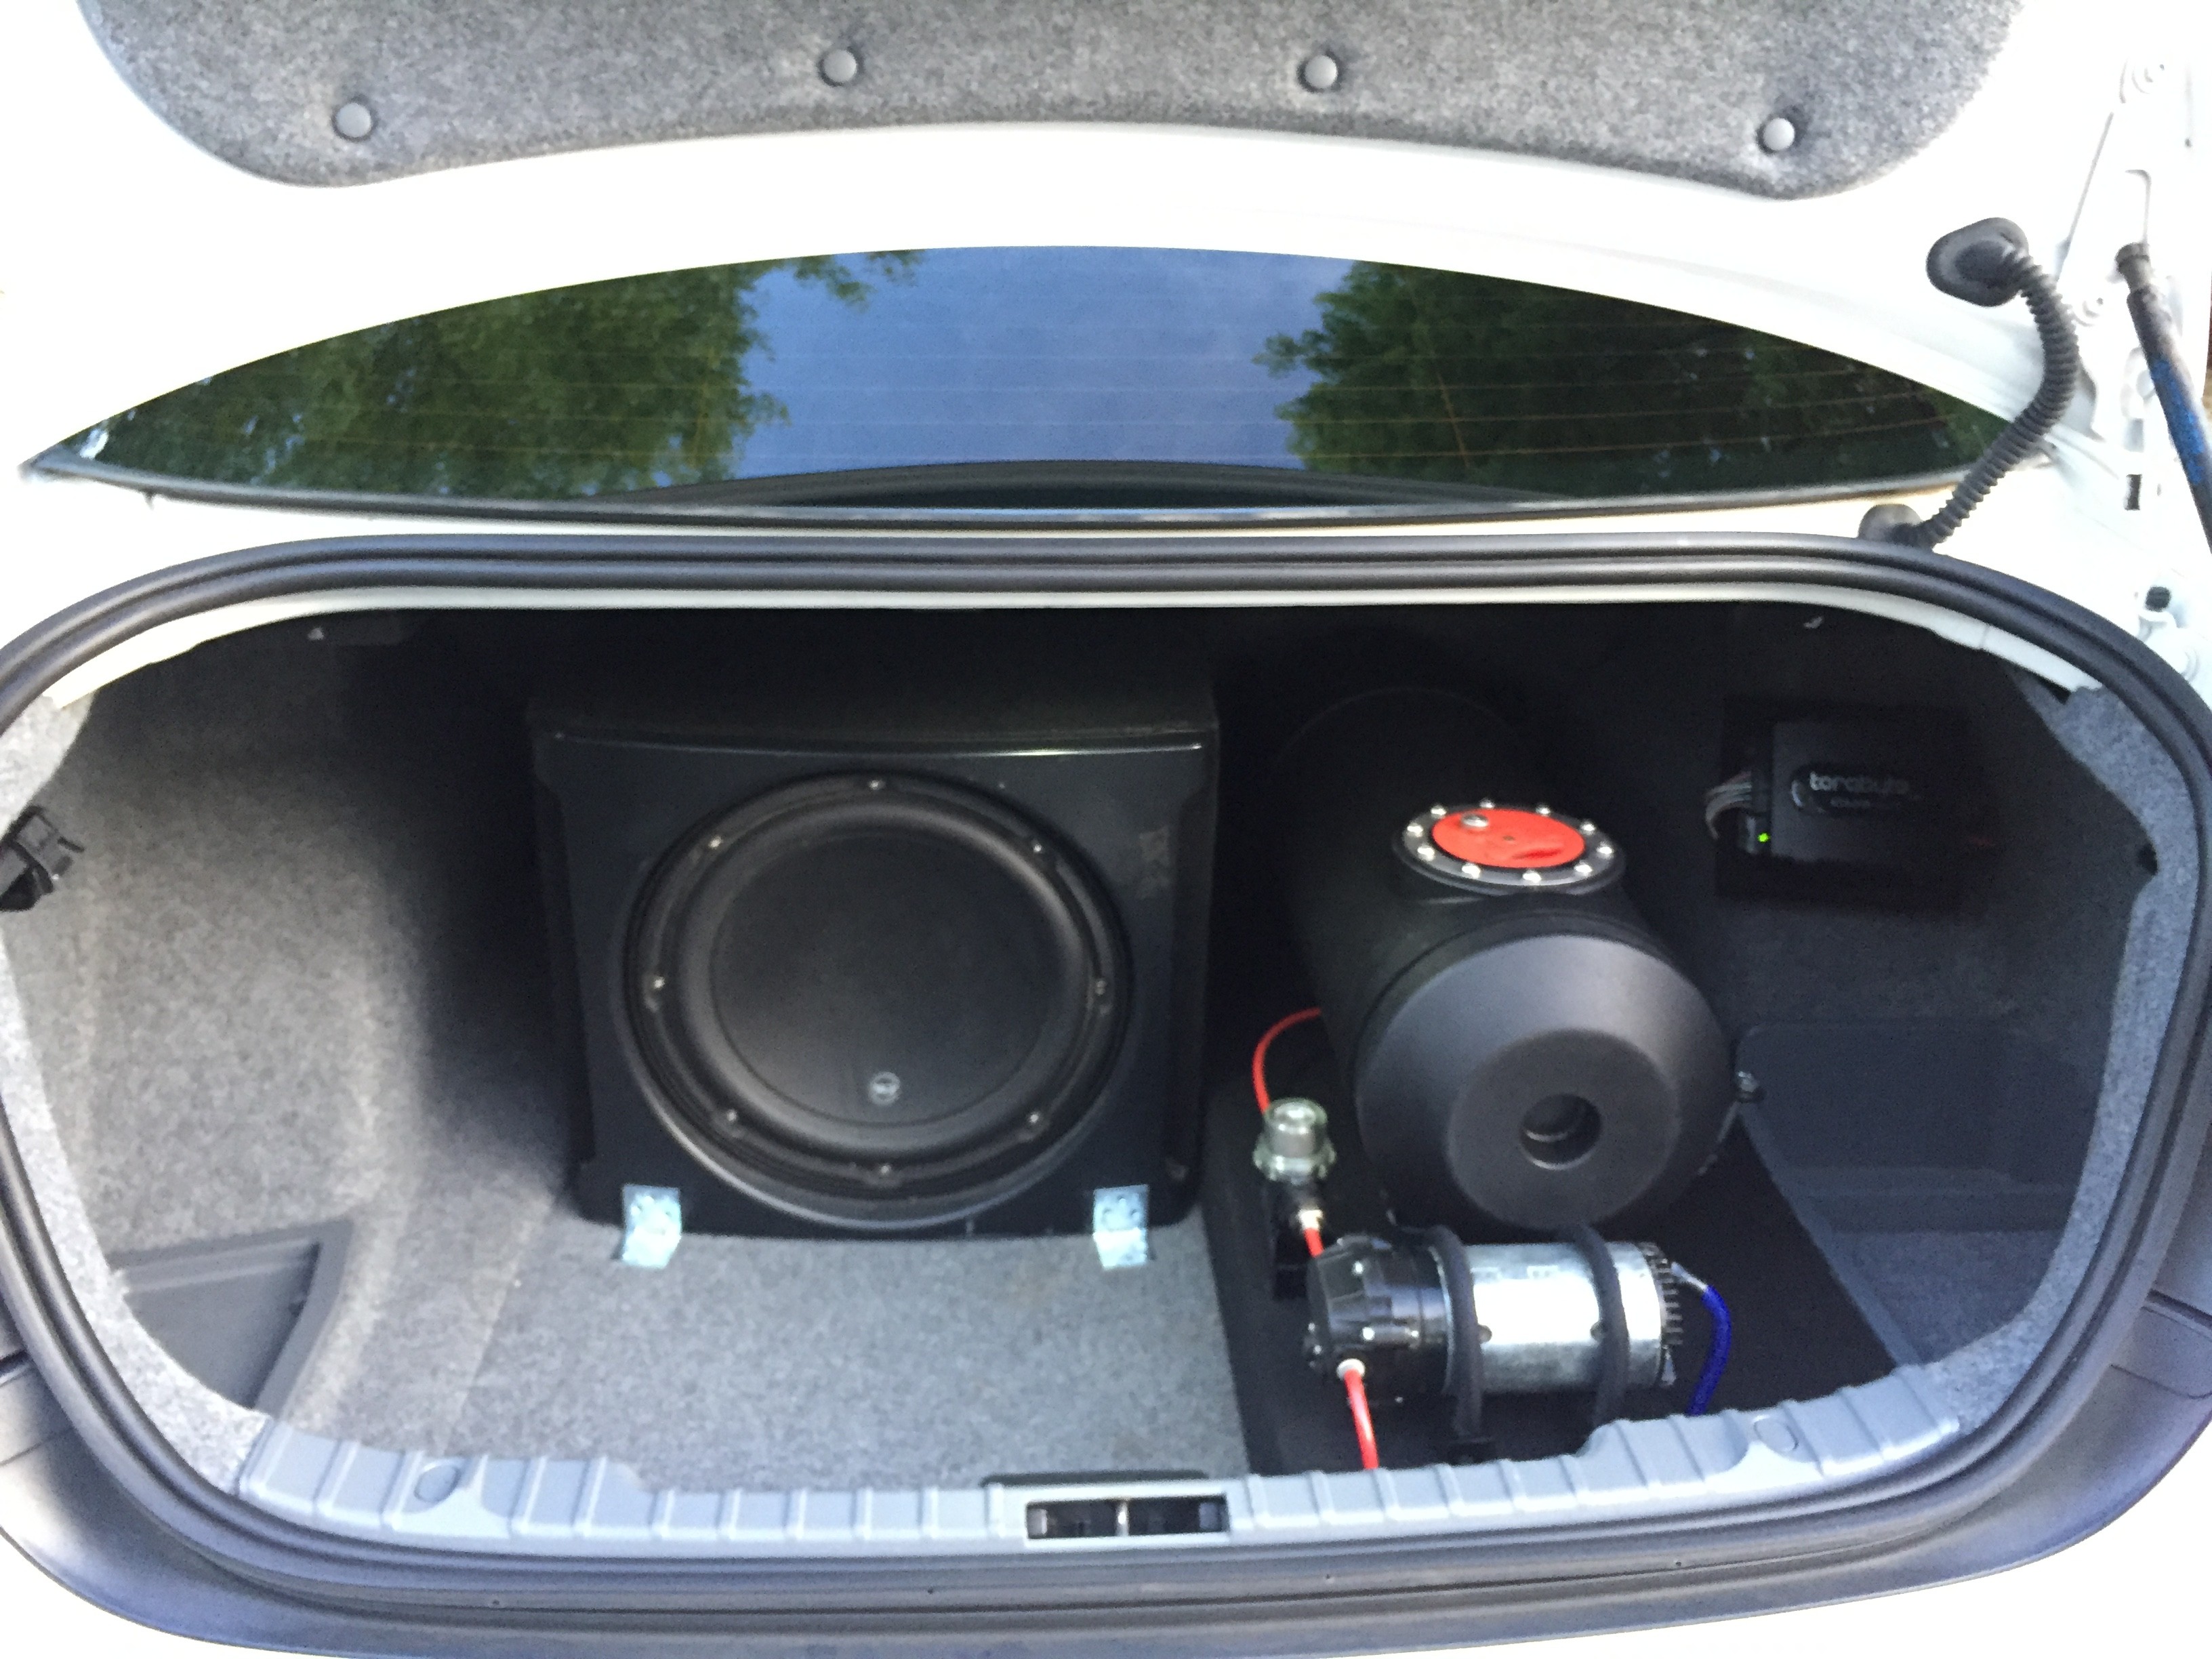 Last up was to paint the 3D printed prototype so I can use that until my final print is done The Red LED is for when my tank is low level.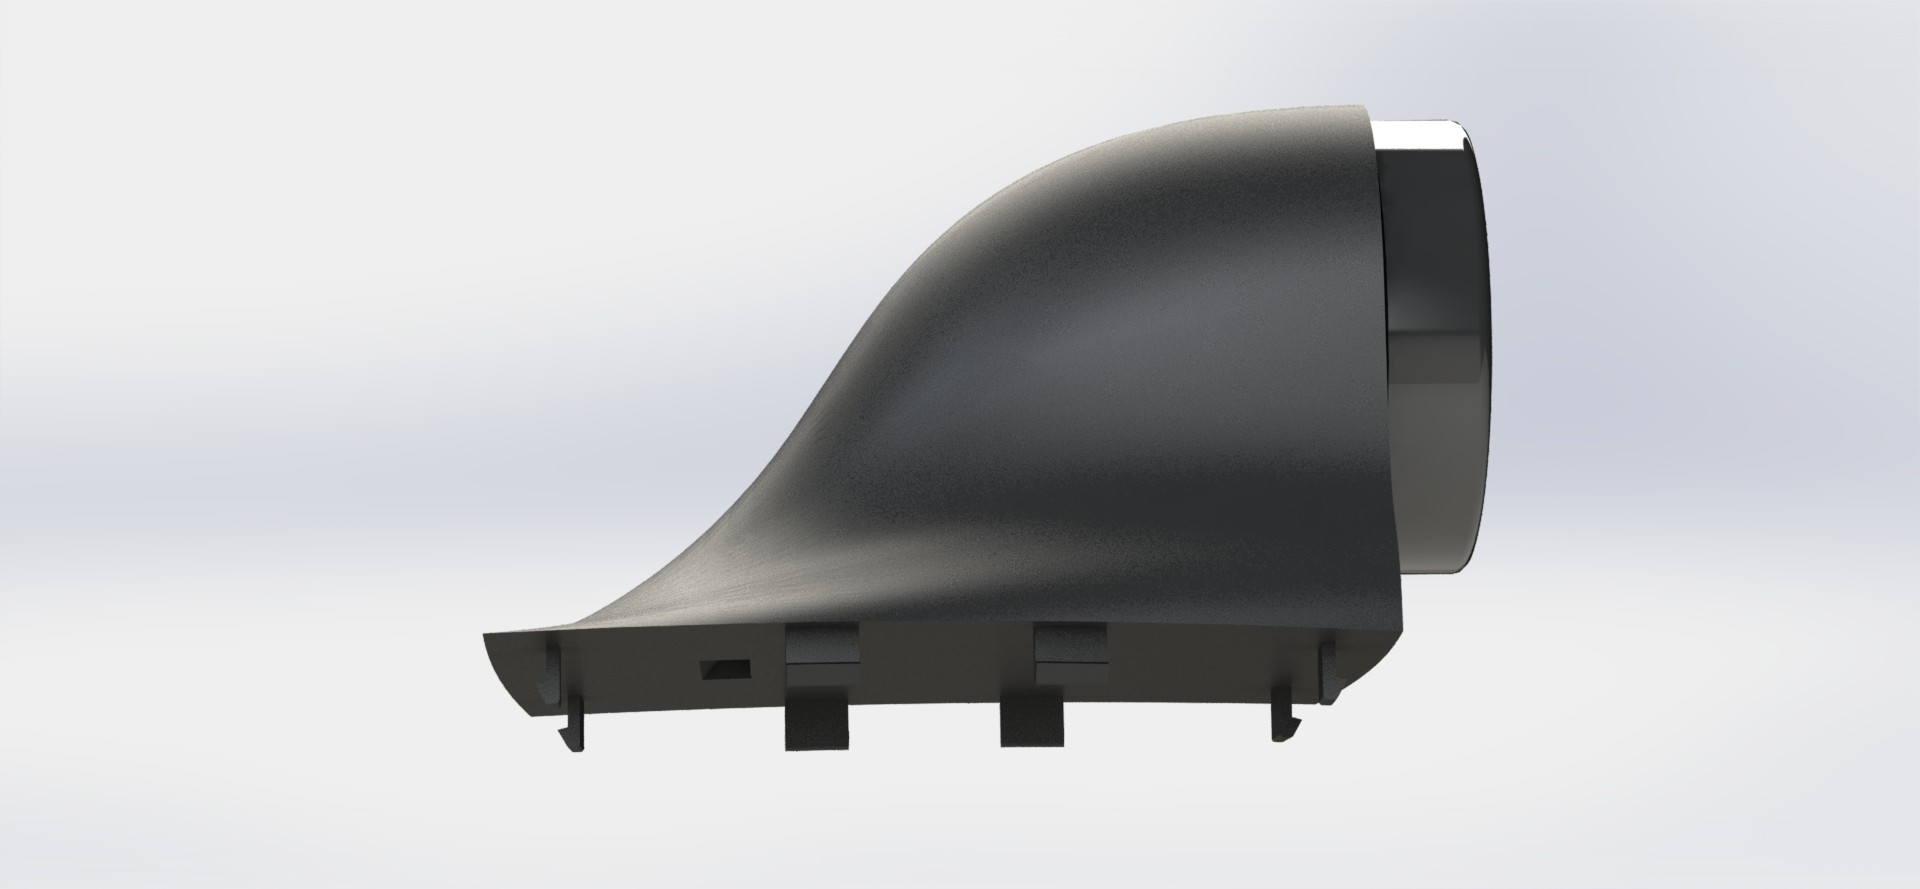 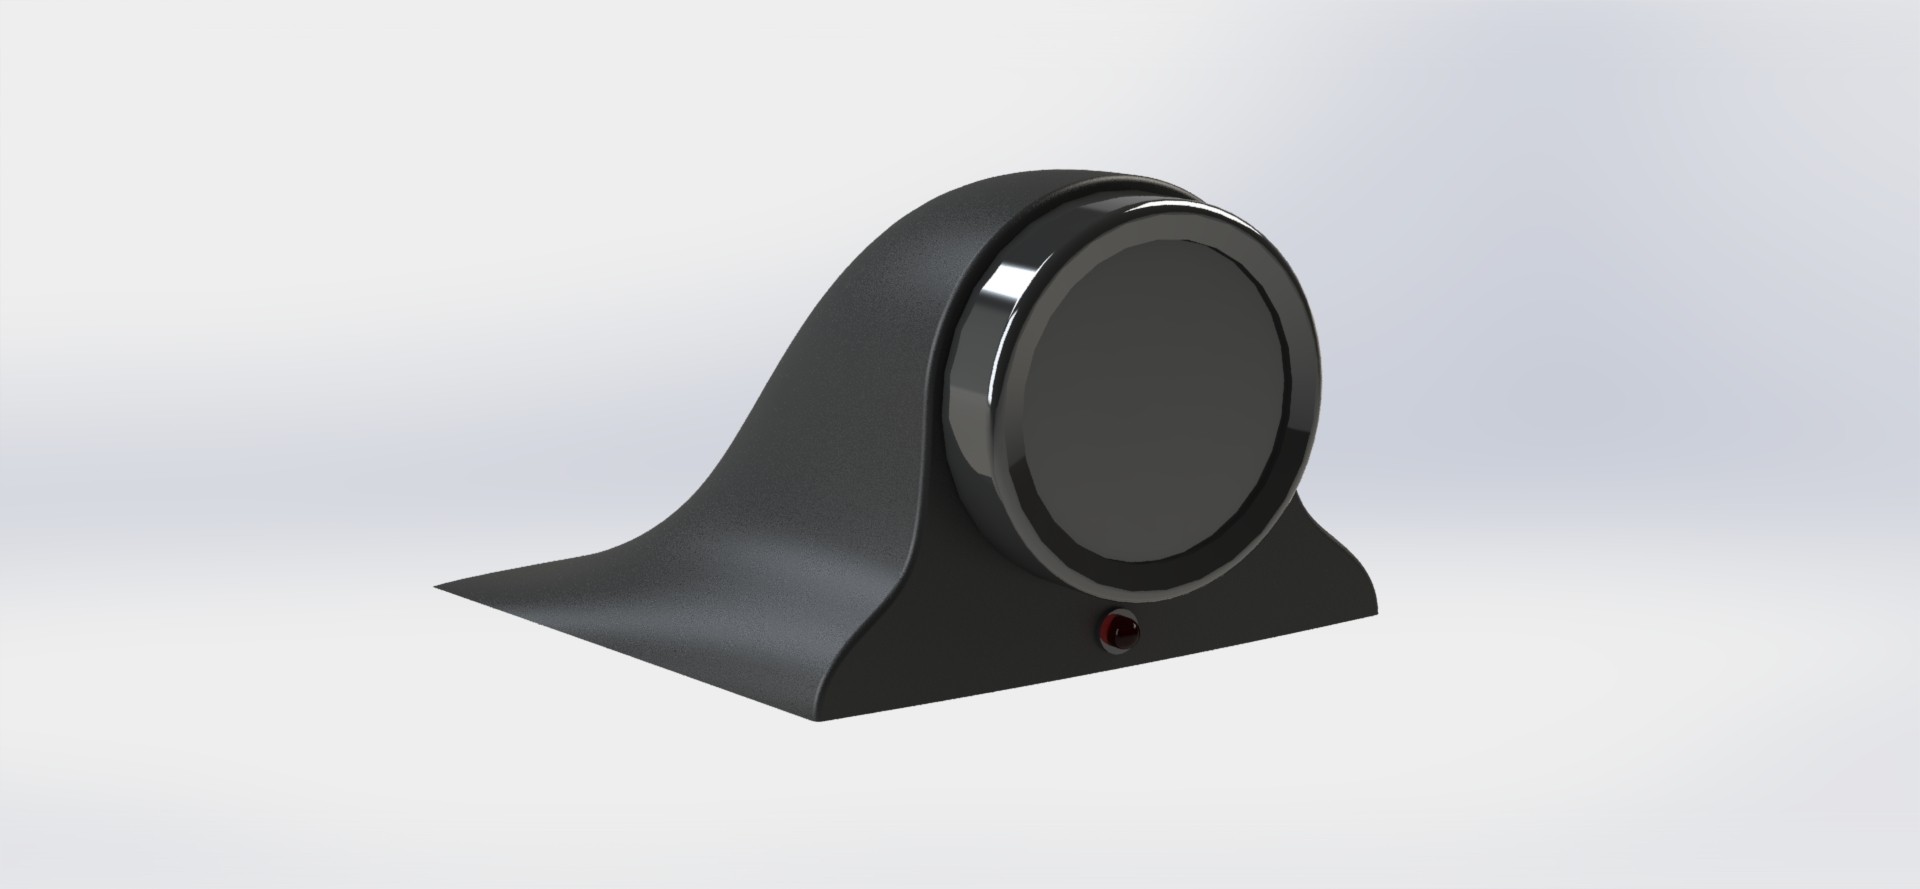 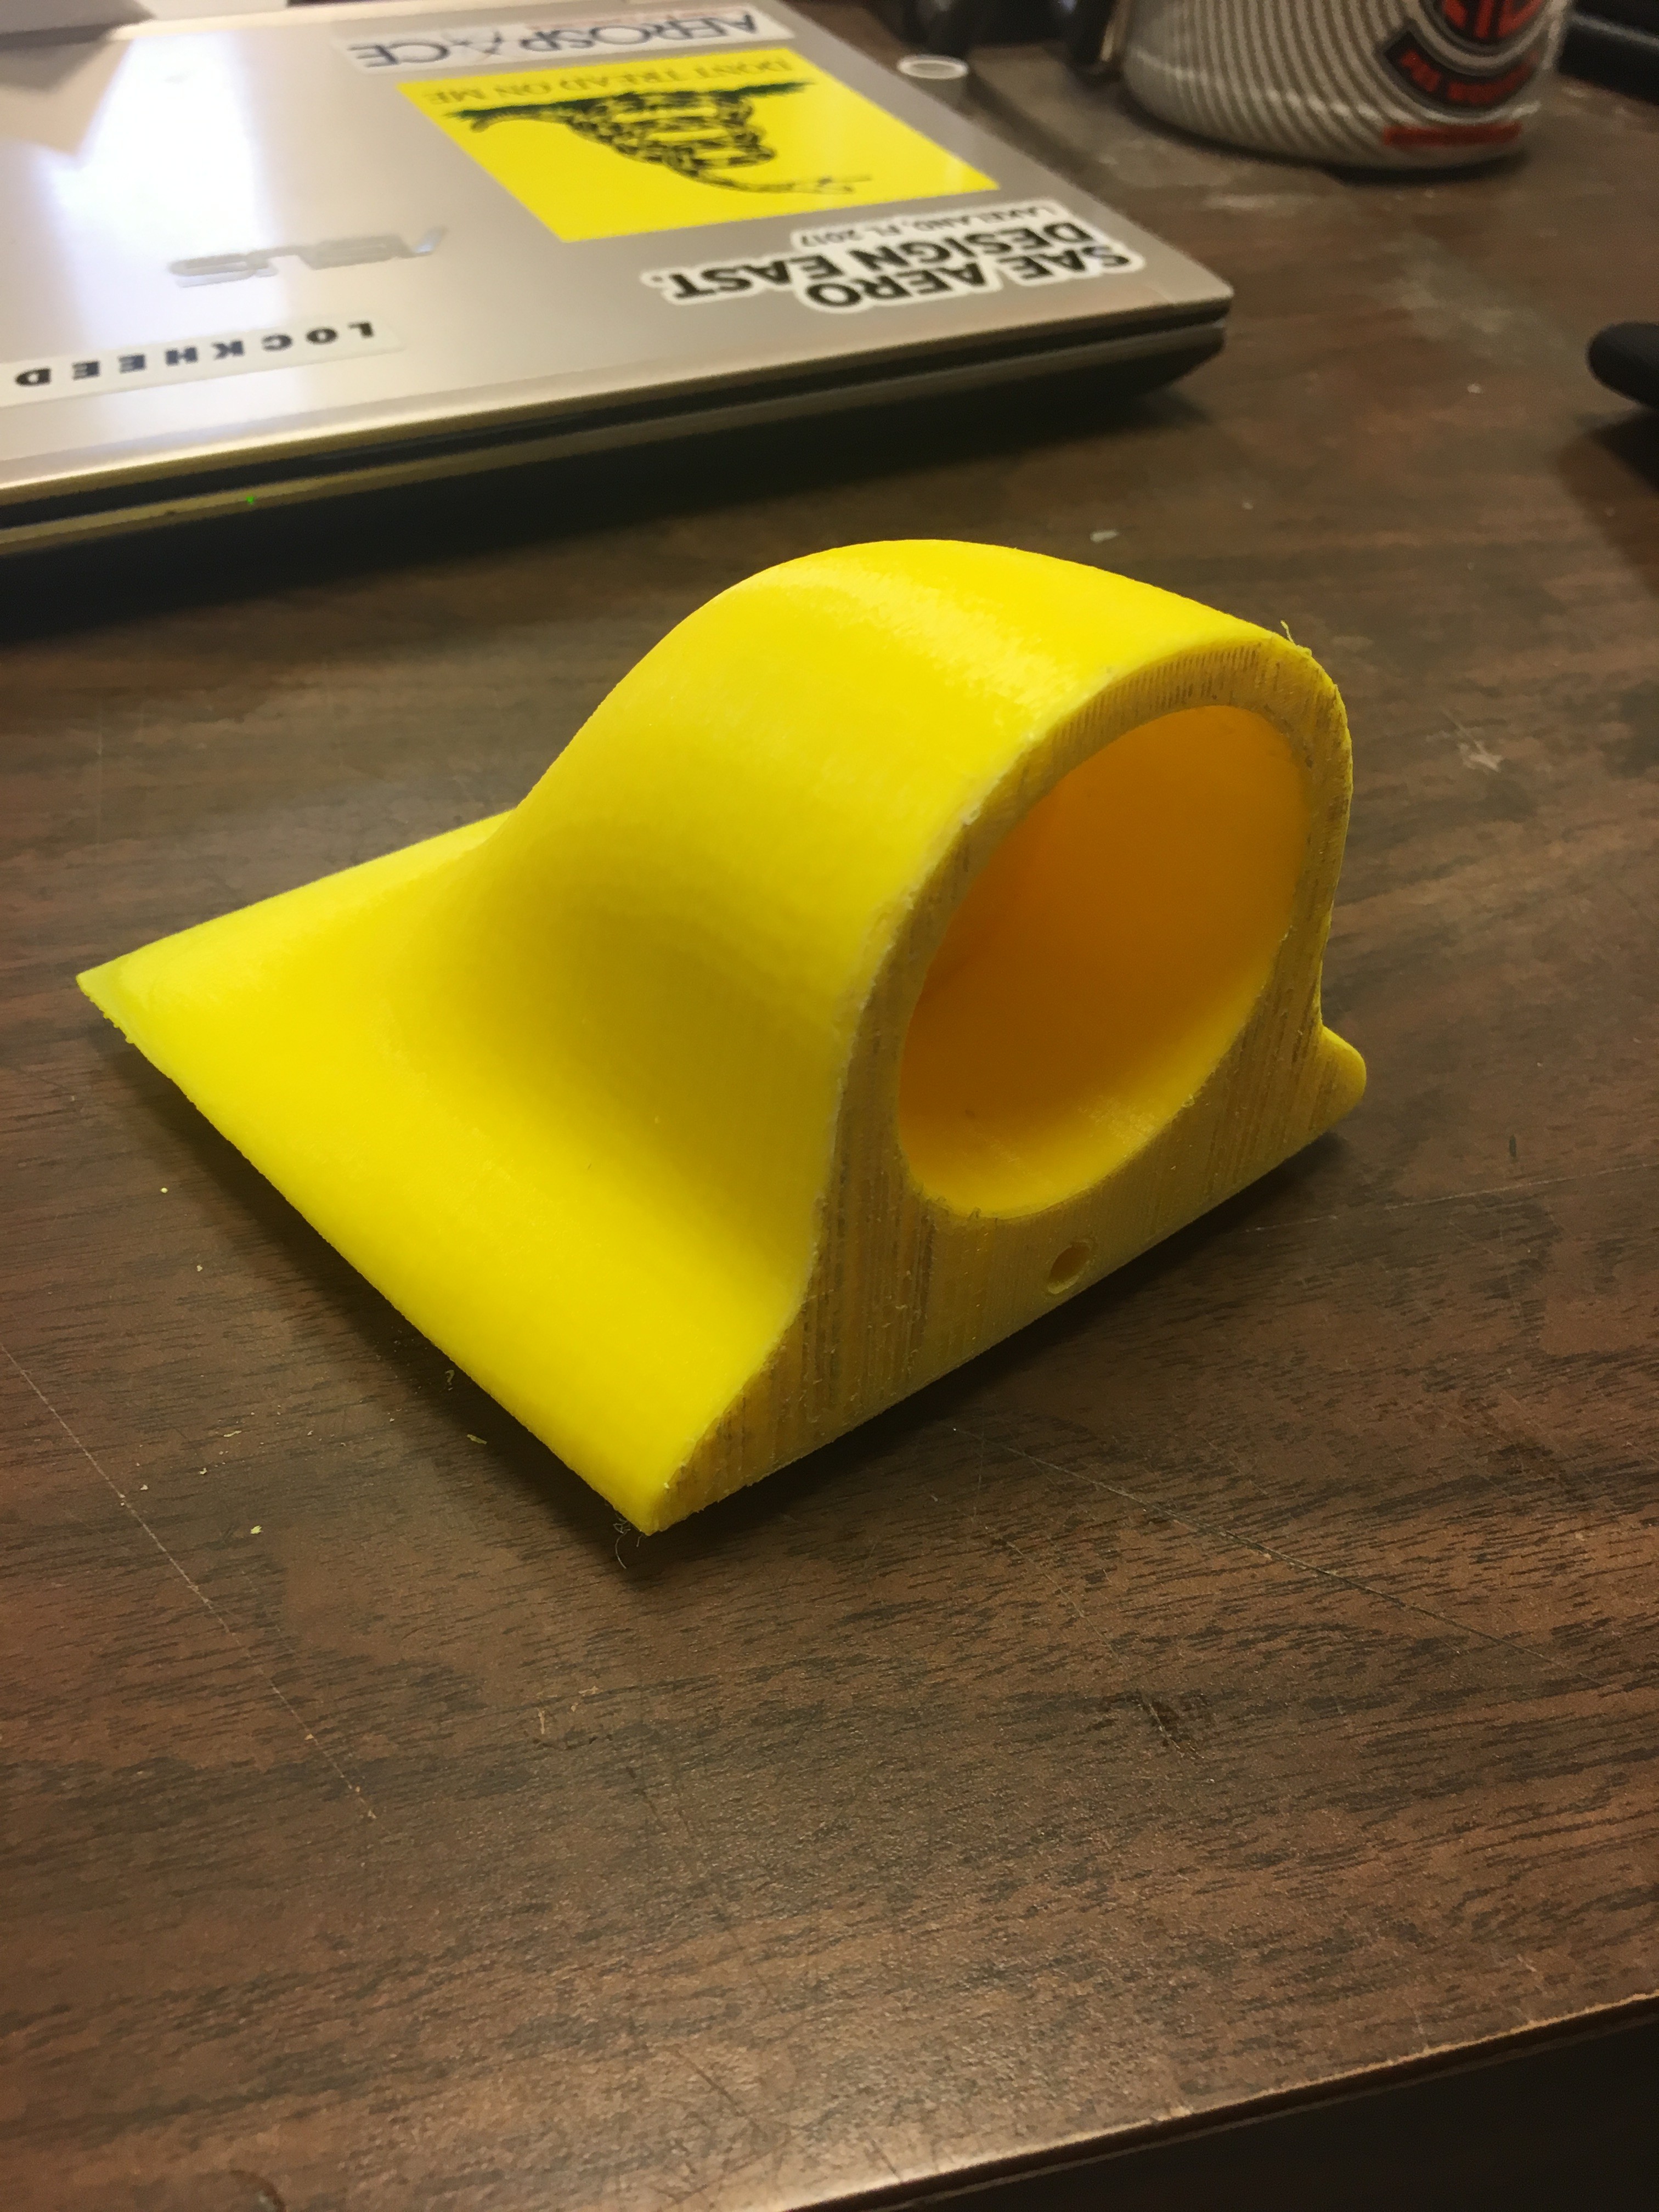  Now I just filled up the tank, assembled the engine bay and all that was left was to set up the controller! The torqybe torqtune software is kind of complicated at first but I had Doug at Frankenturbo give me a tutorial and it is actually pretty easy once you get the hang of it. This controller has so much customization so I love it. Ill take some screenshots of it soon and upload to the next update. 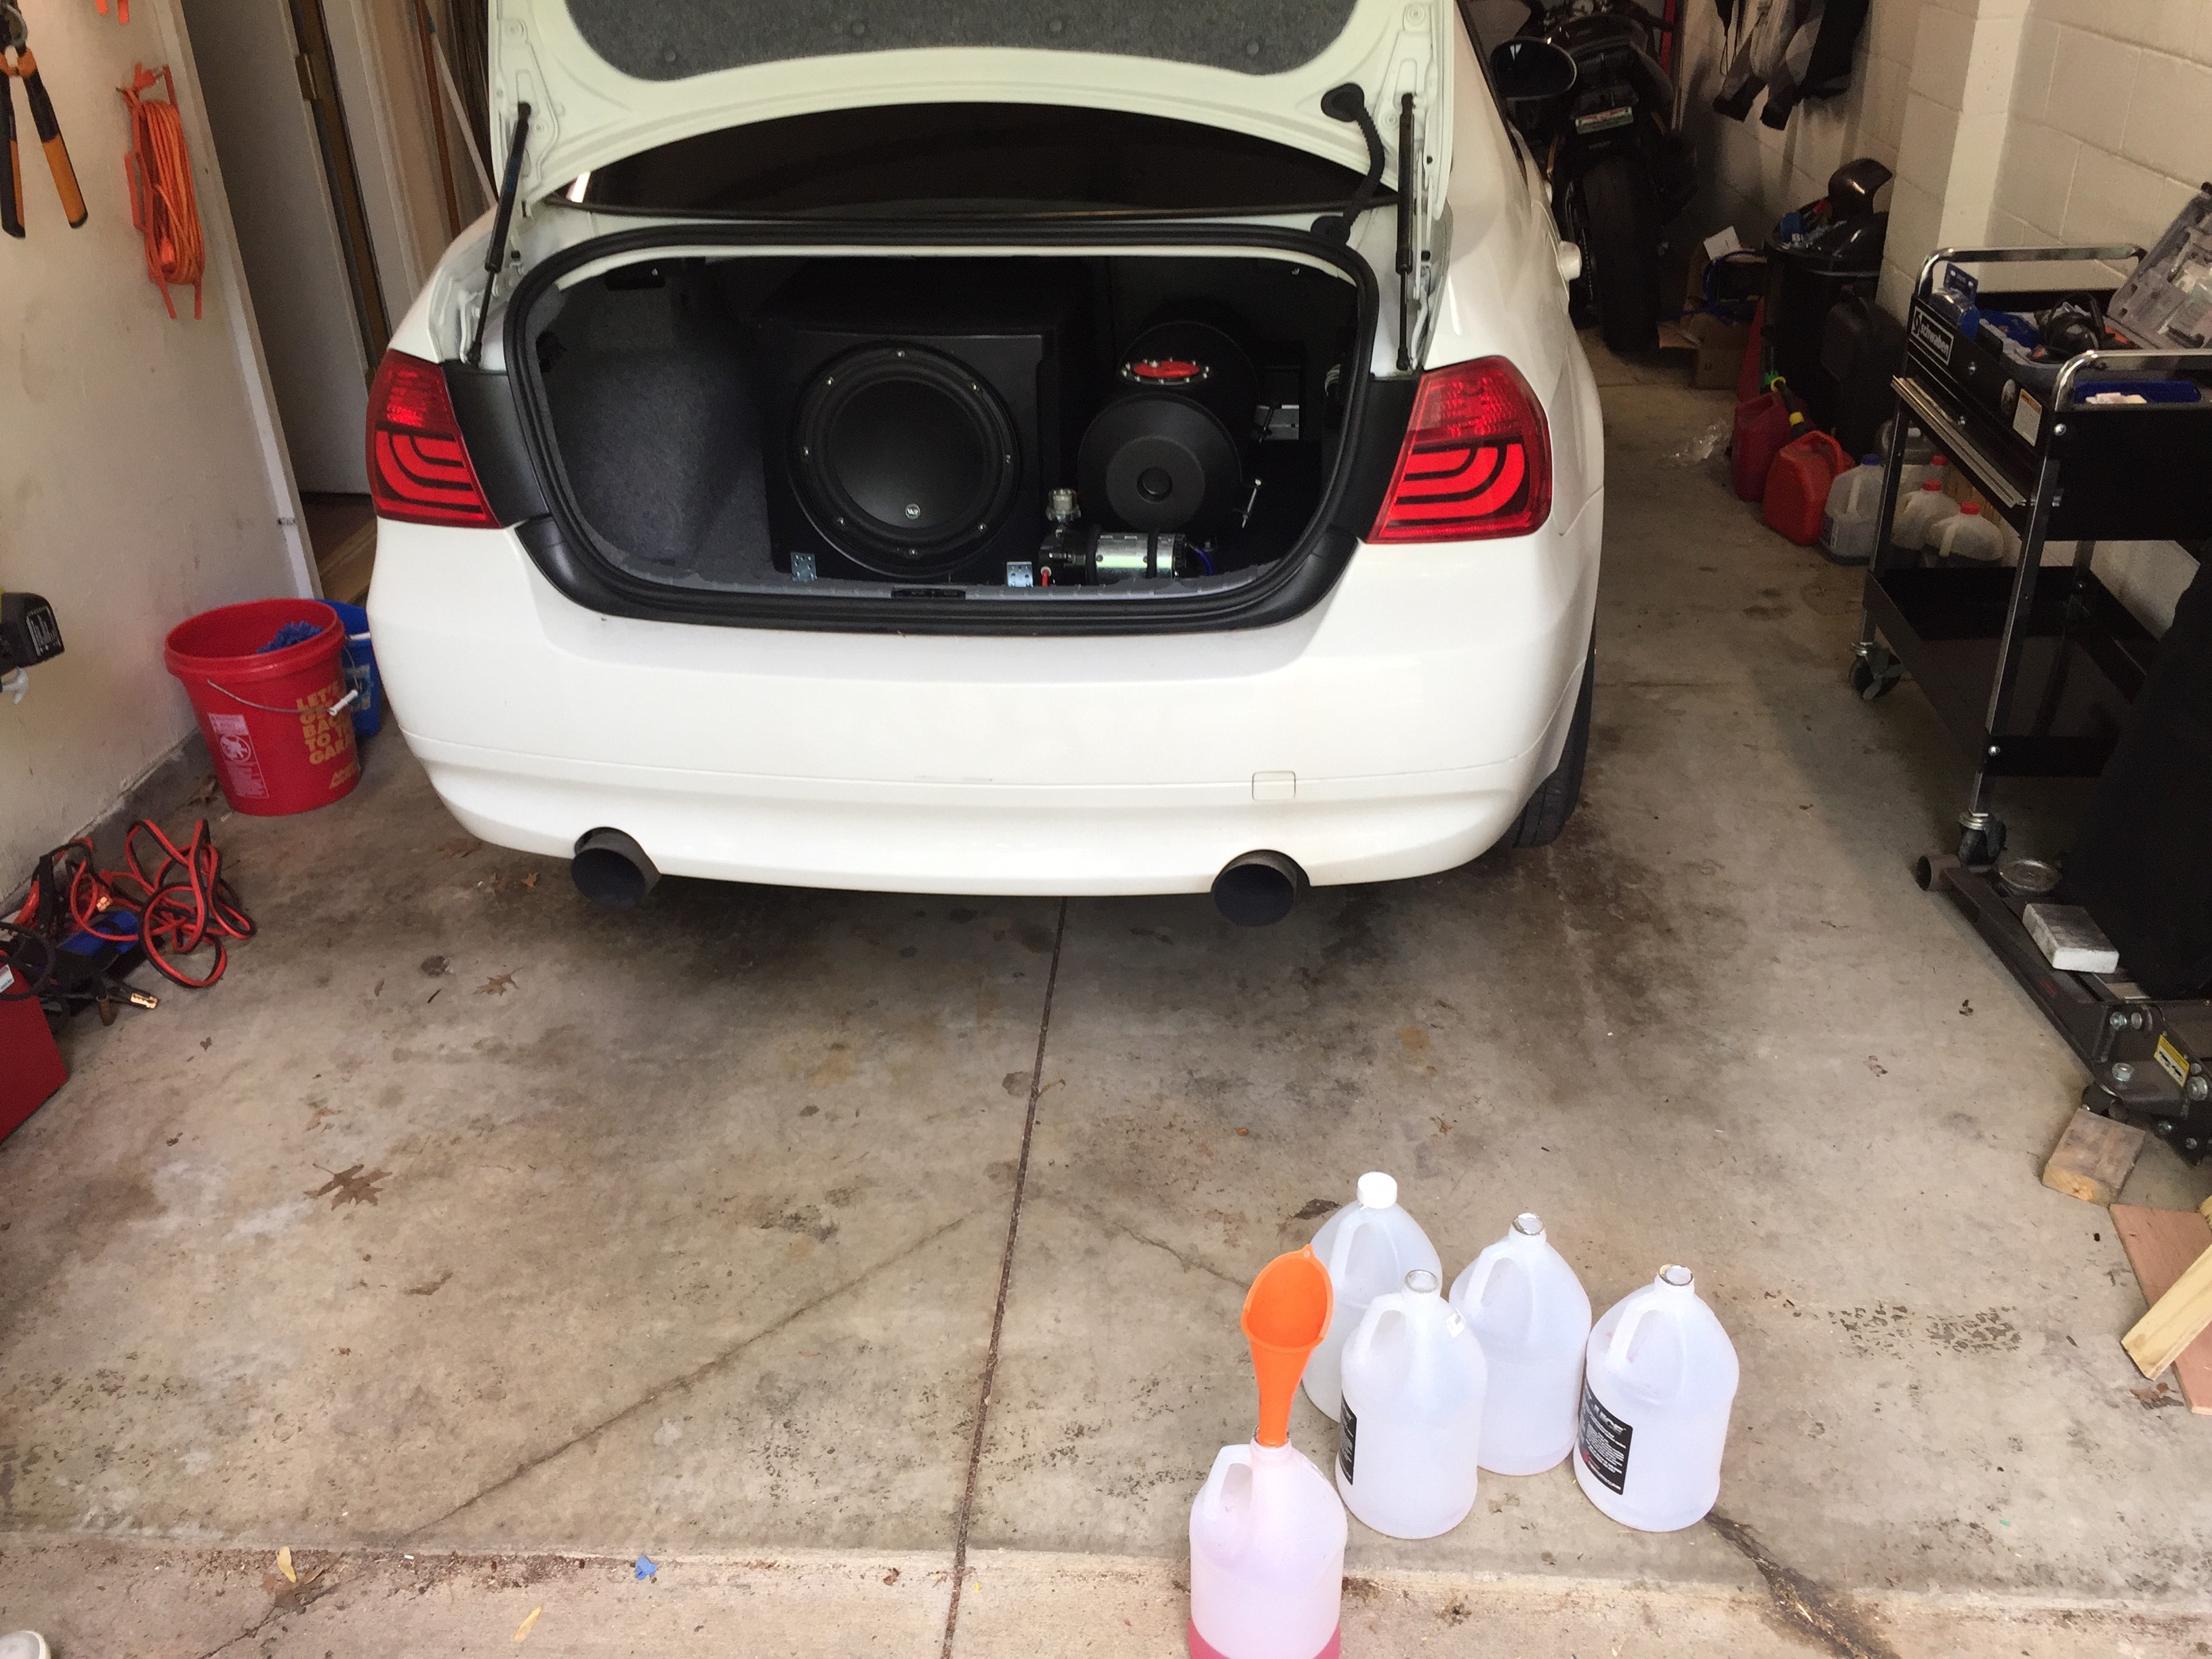  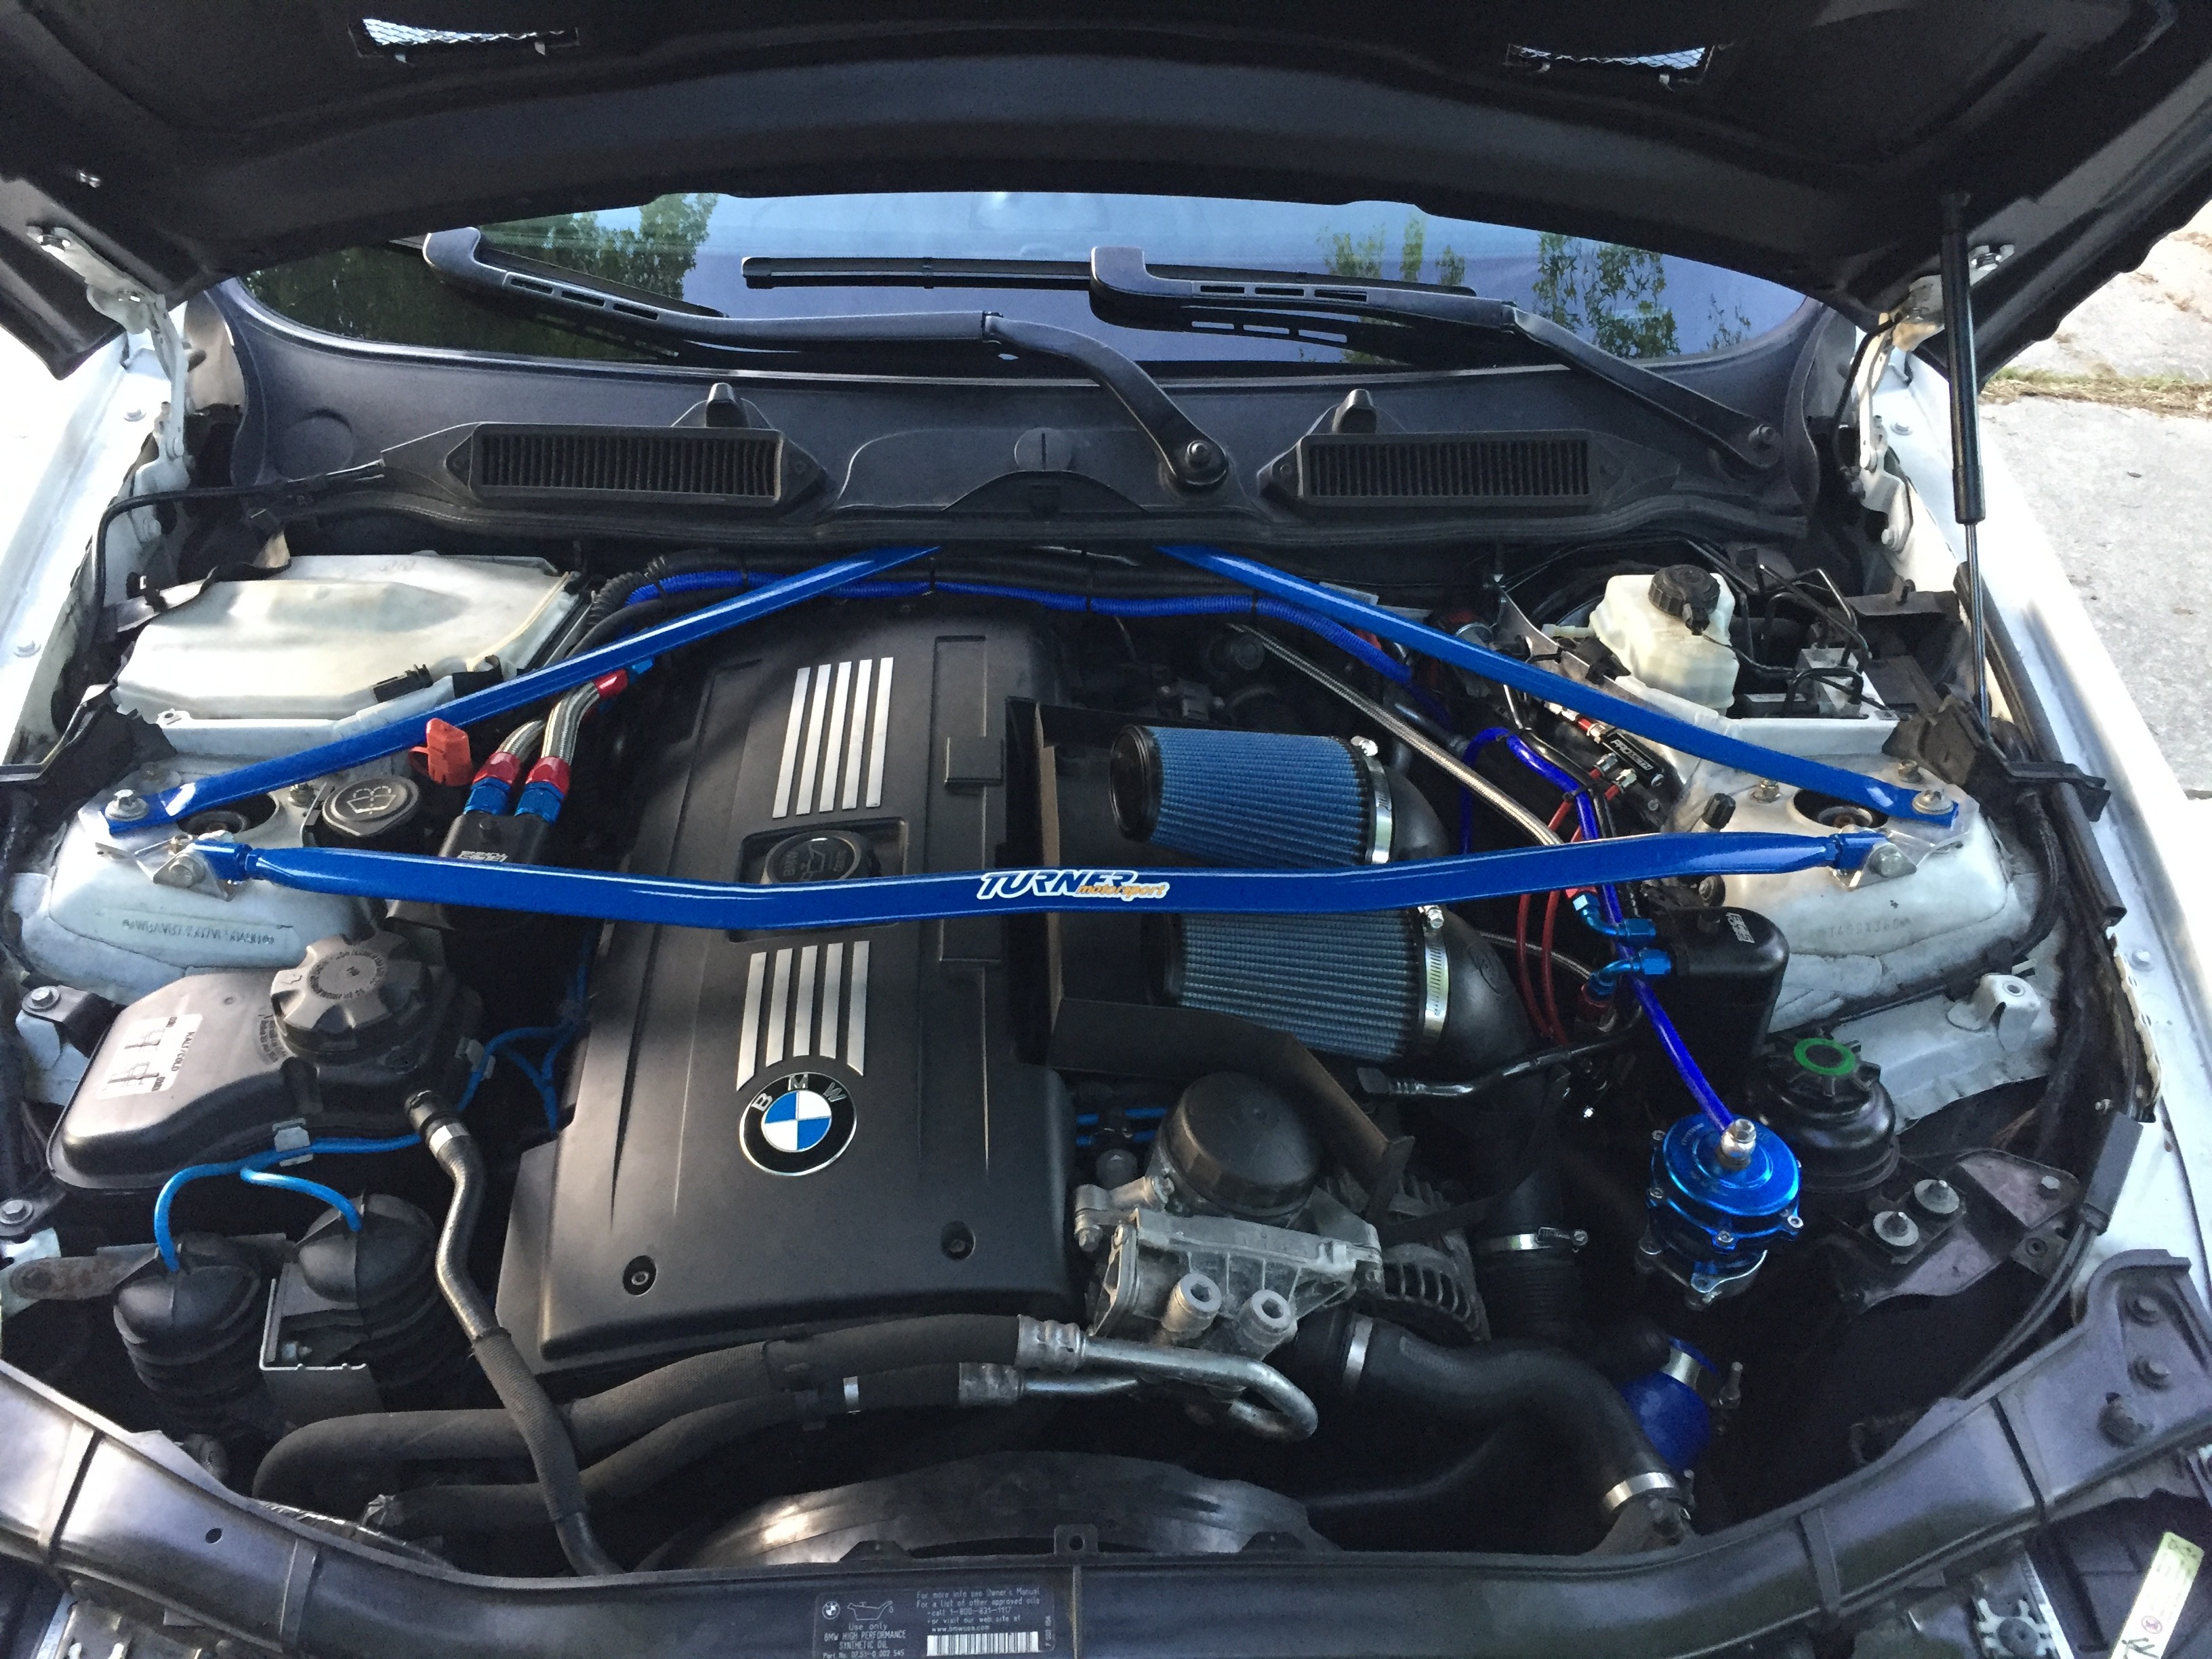 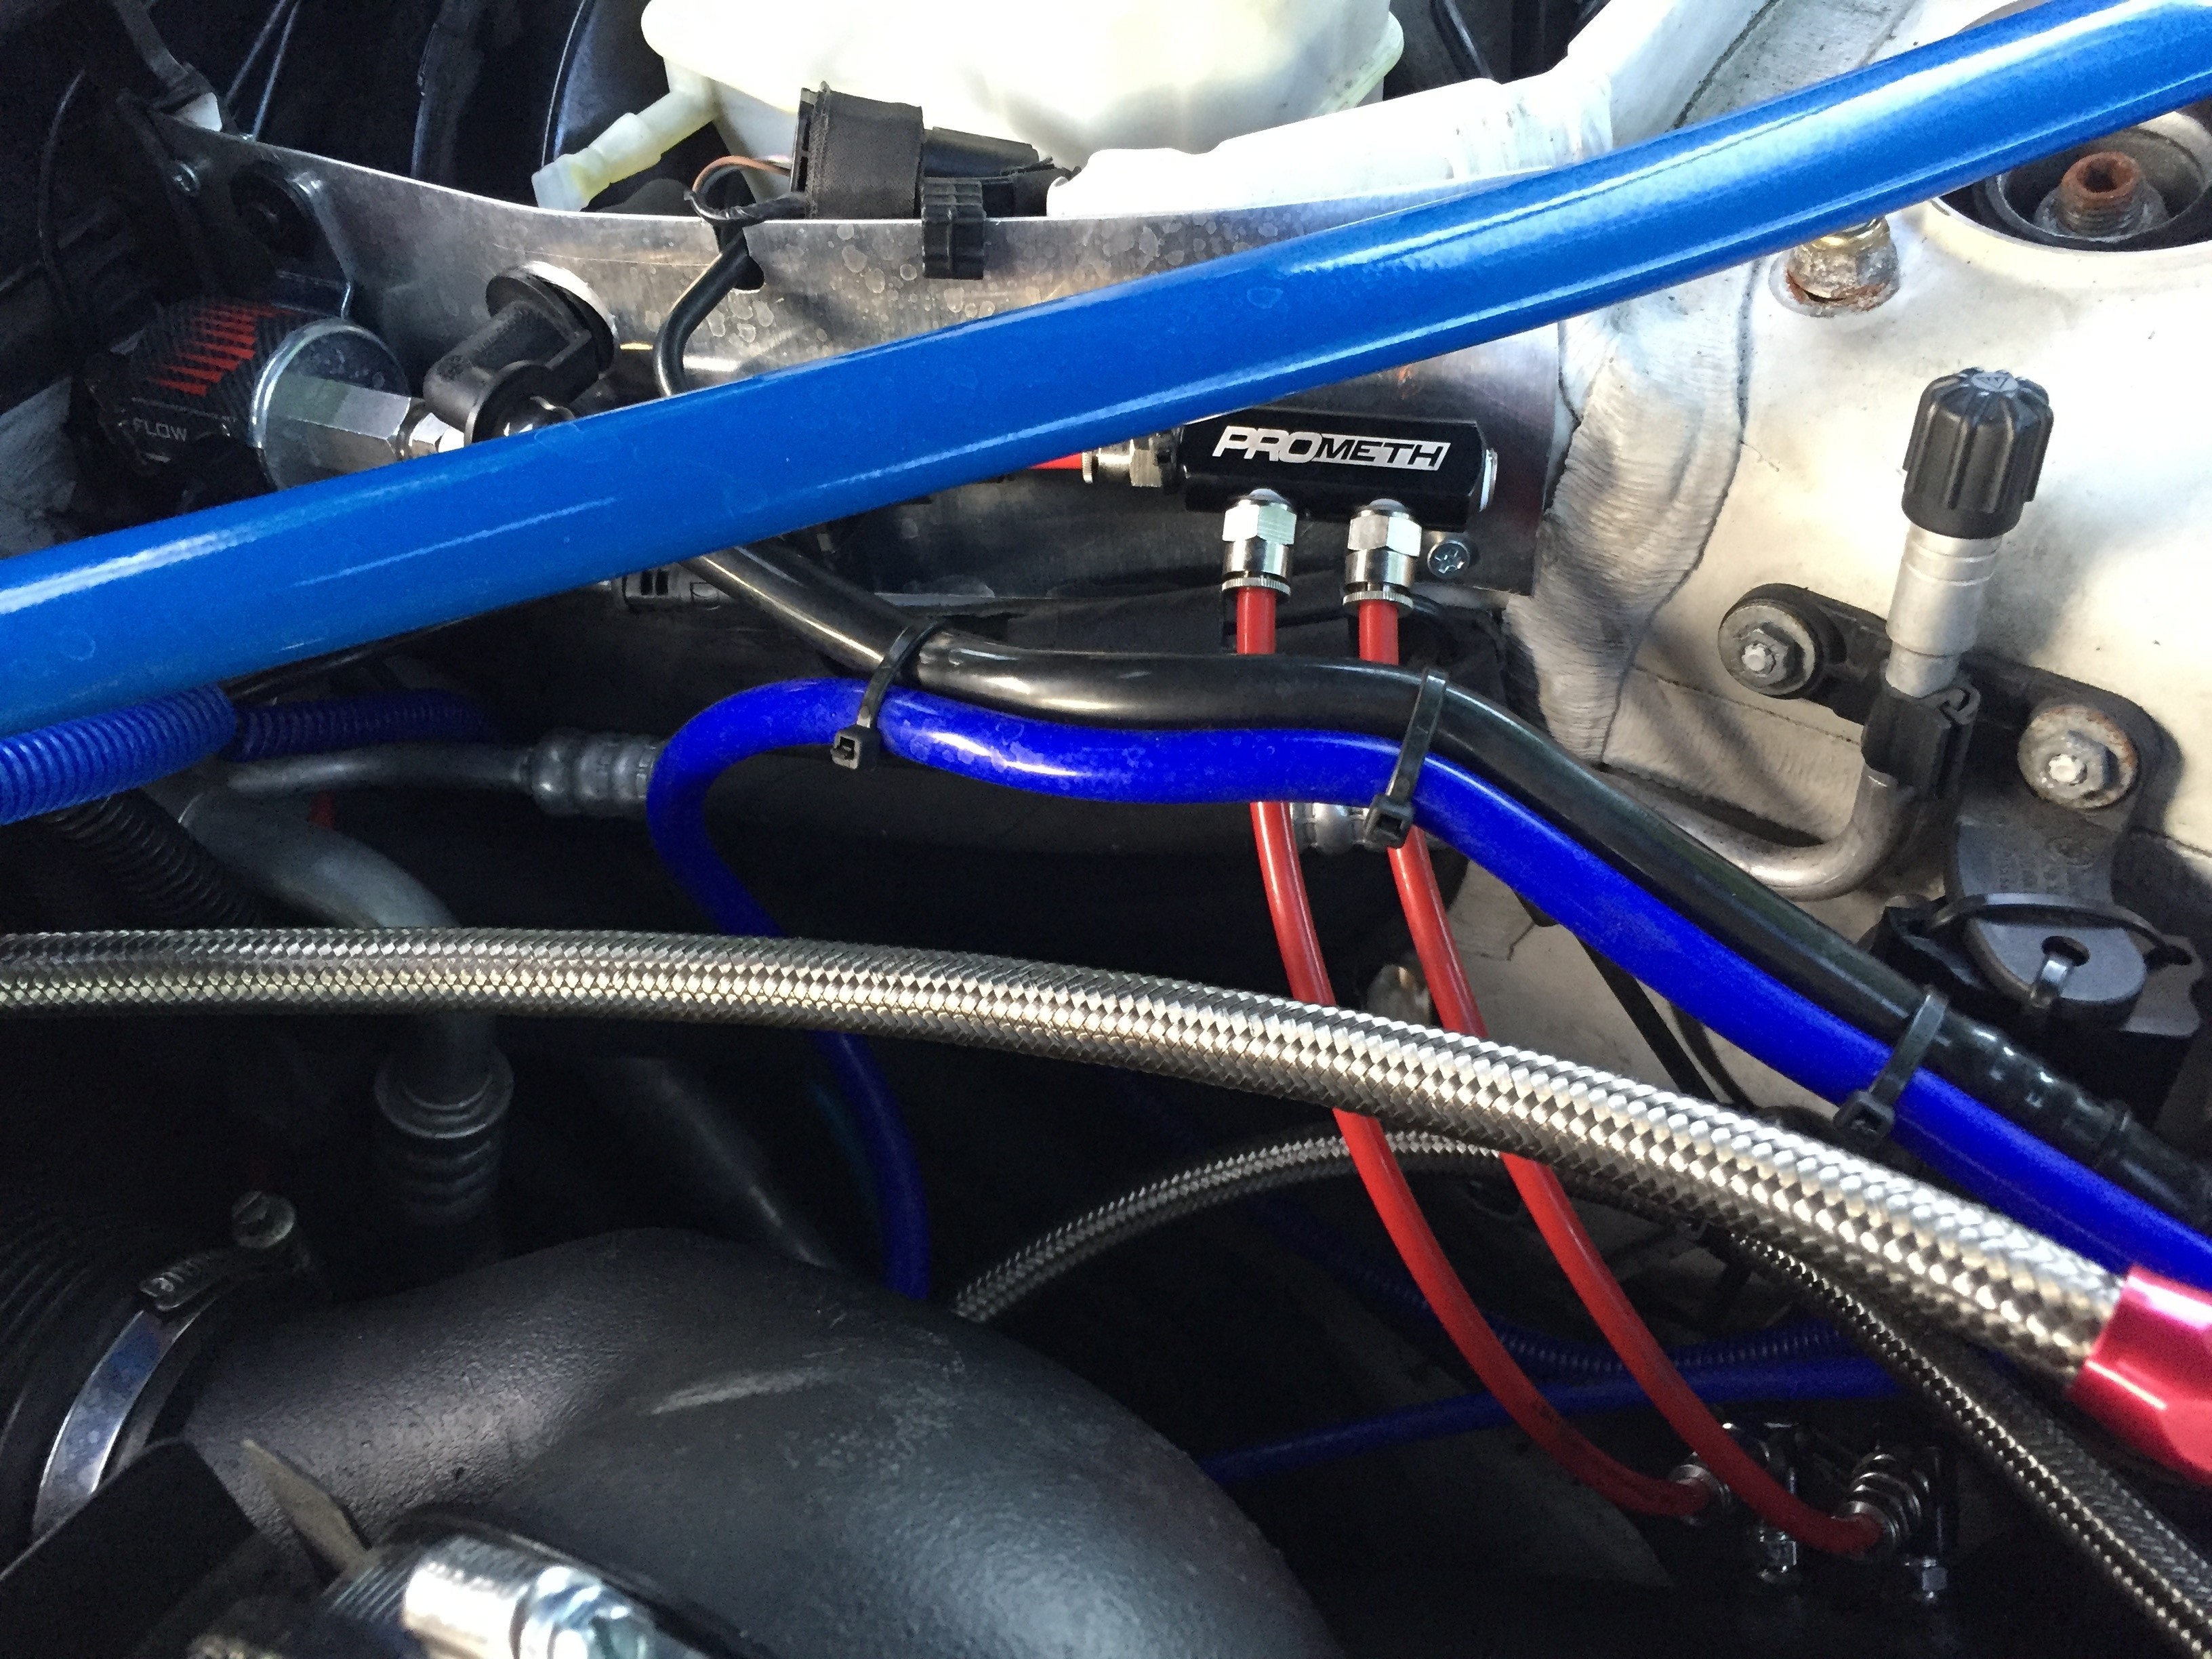 Next up, setup the torqtune controller, upload the WedgePerformance flash tune (back end flash), do some logs, get a revised tune, off to the dyno! Stay tuned Oh yeah and I got a vanity plate and chose my color for the wrap 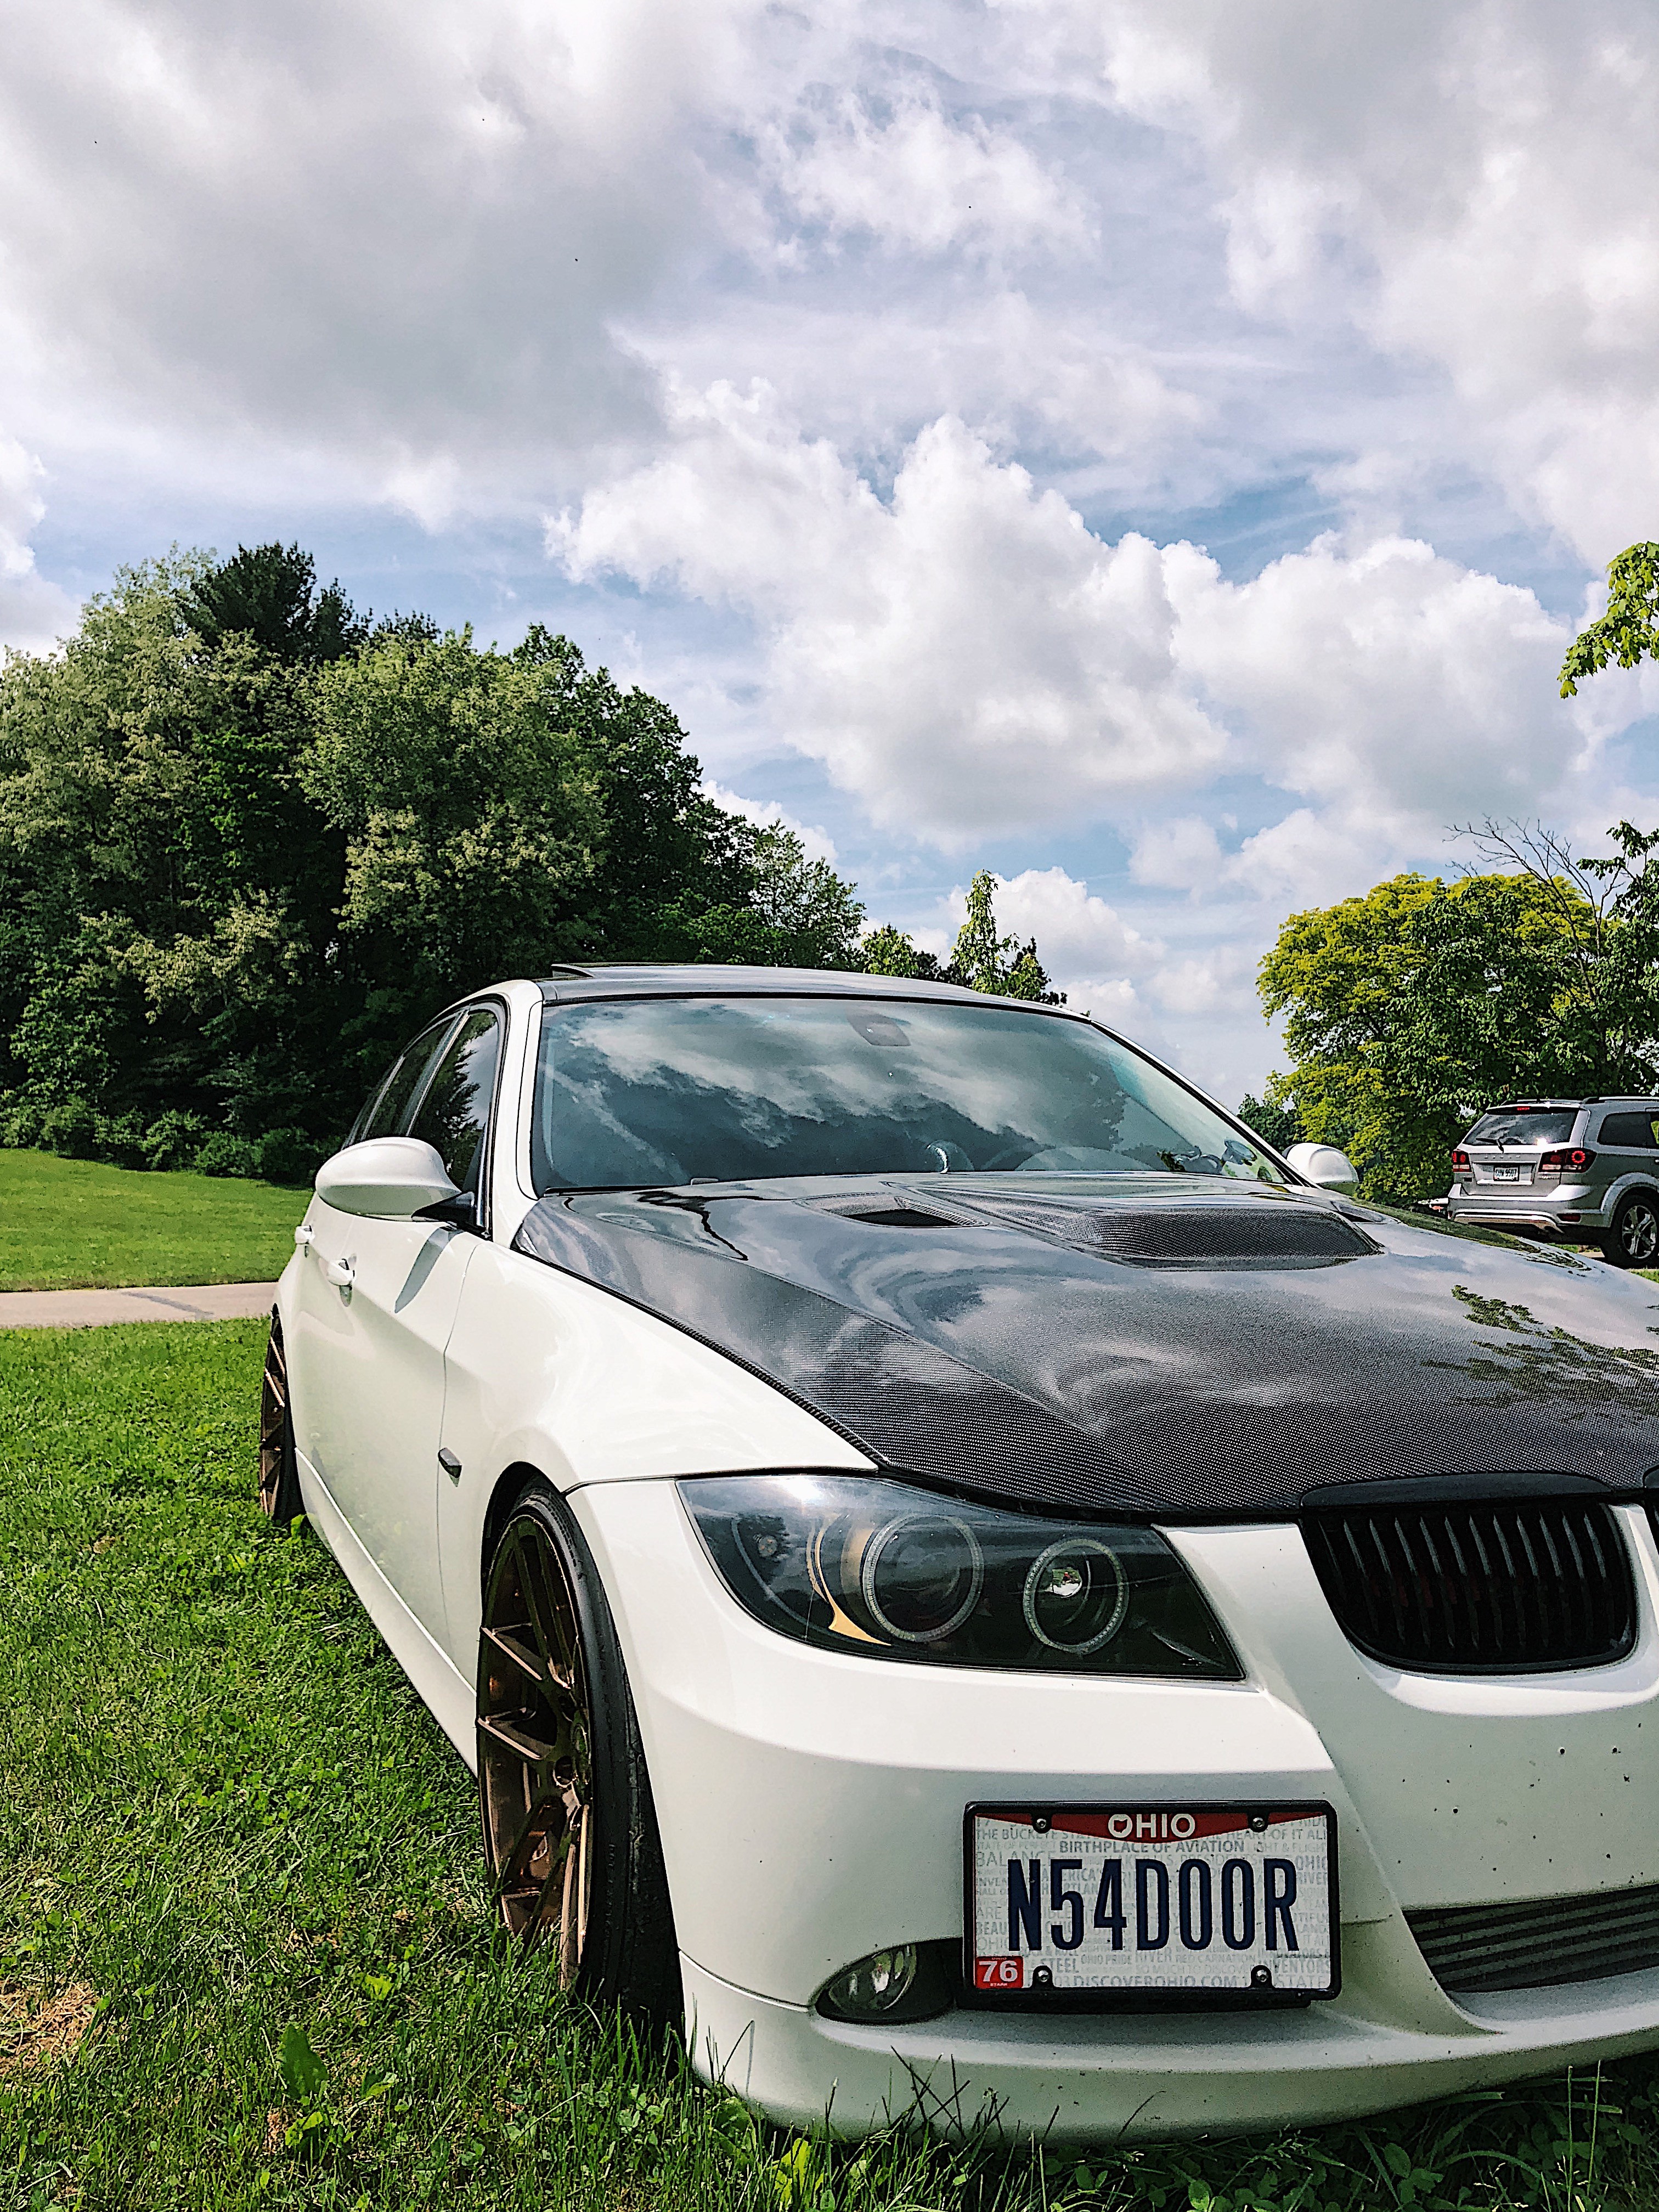   3M Gloss Cosmic Blue   5/3 e90 Custom Headlights and Fender Shaving (5/3 update) It may have taken me....forever, but they are finally done and came out amazing. I also finally got the rest of the tools to properly shave my rear fenders so I can space out the wheels and get a more flush look without rubbing. Check out my project progress below! More to come soon. 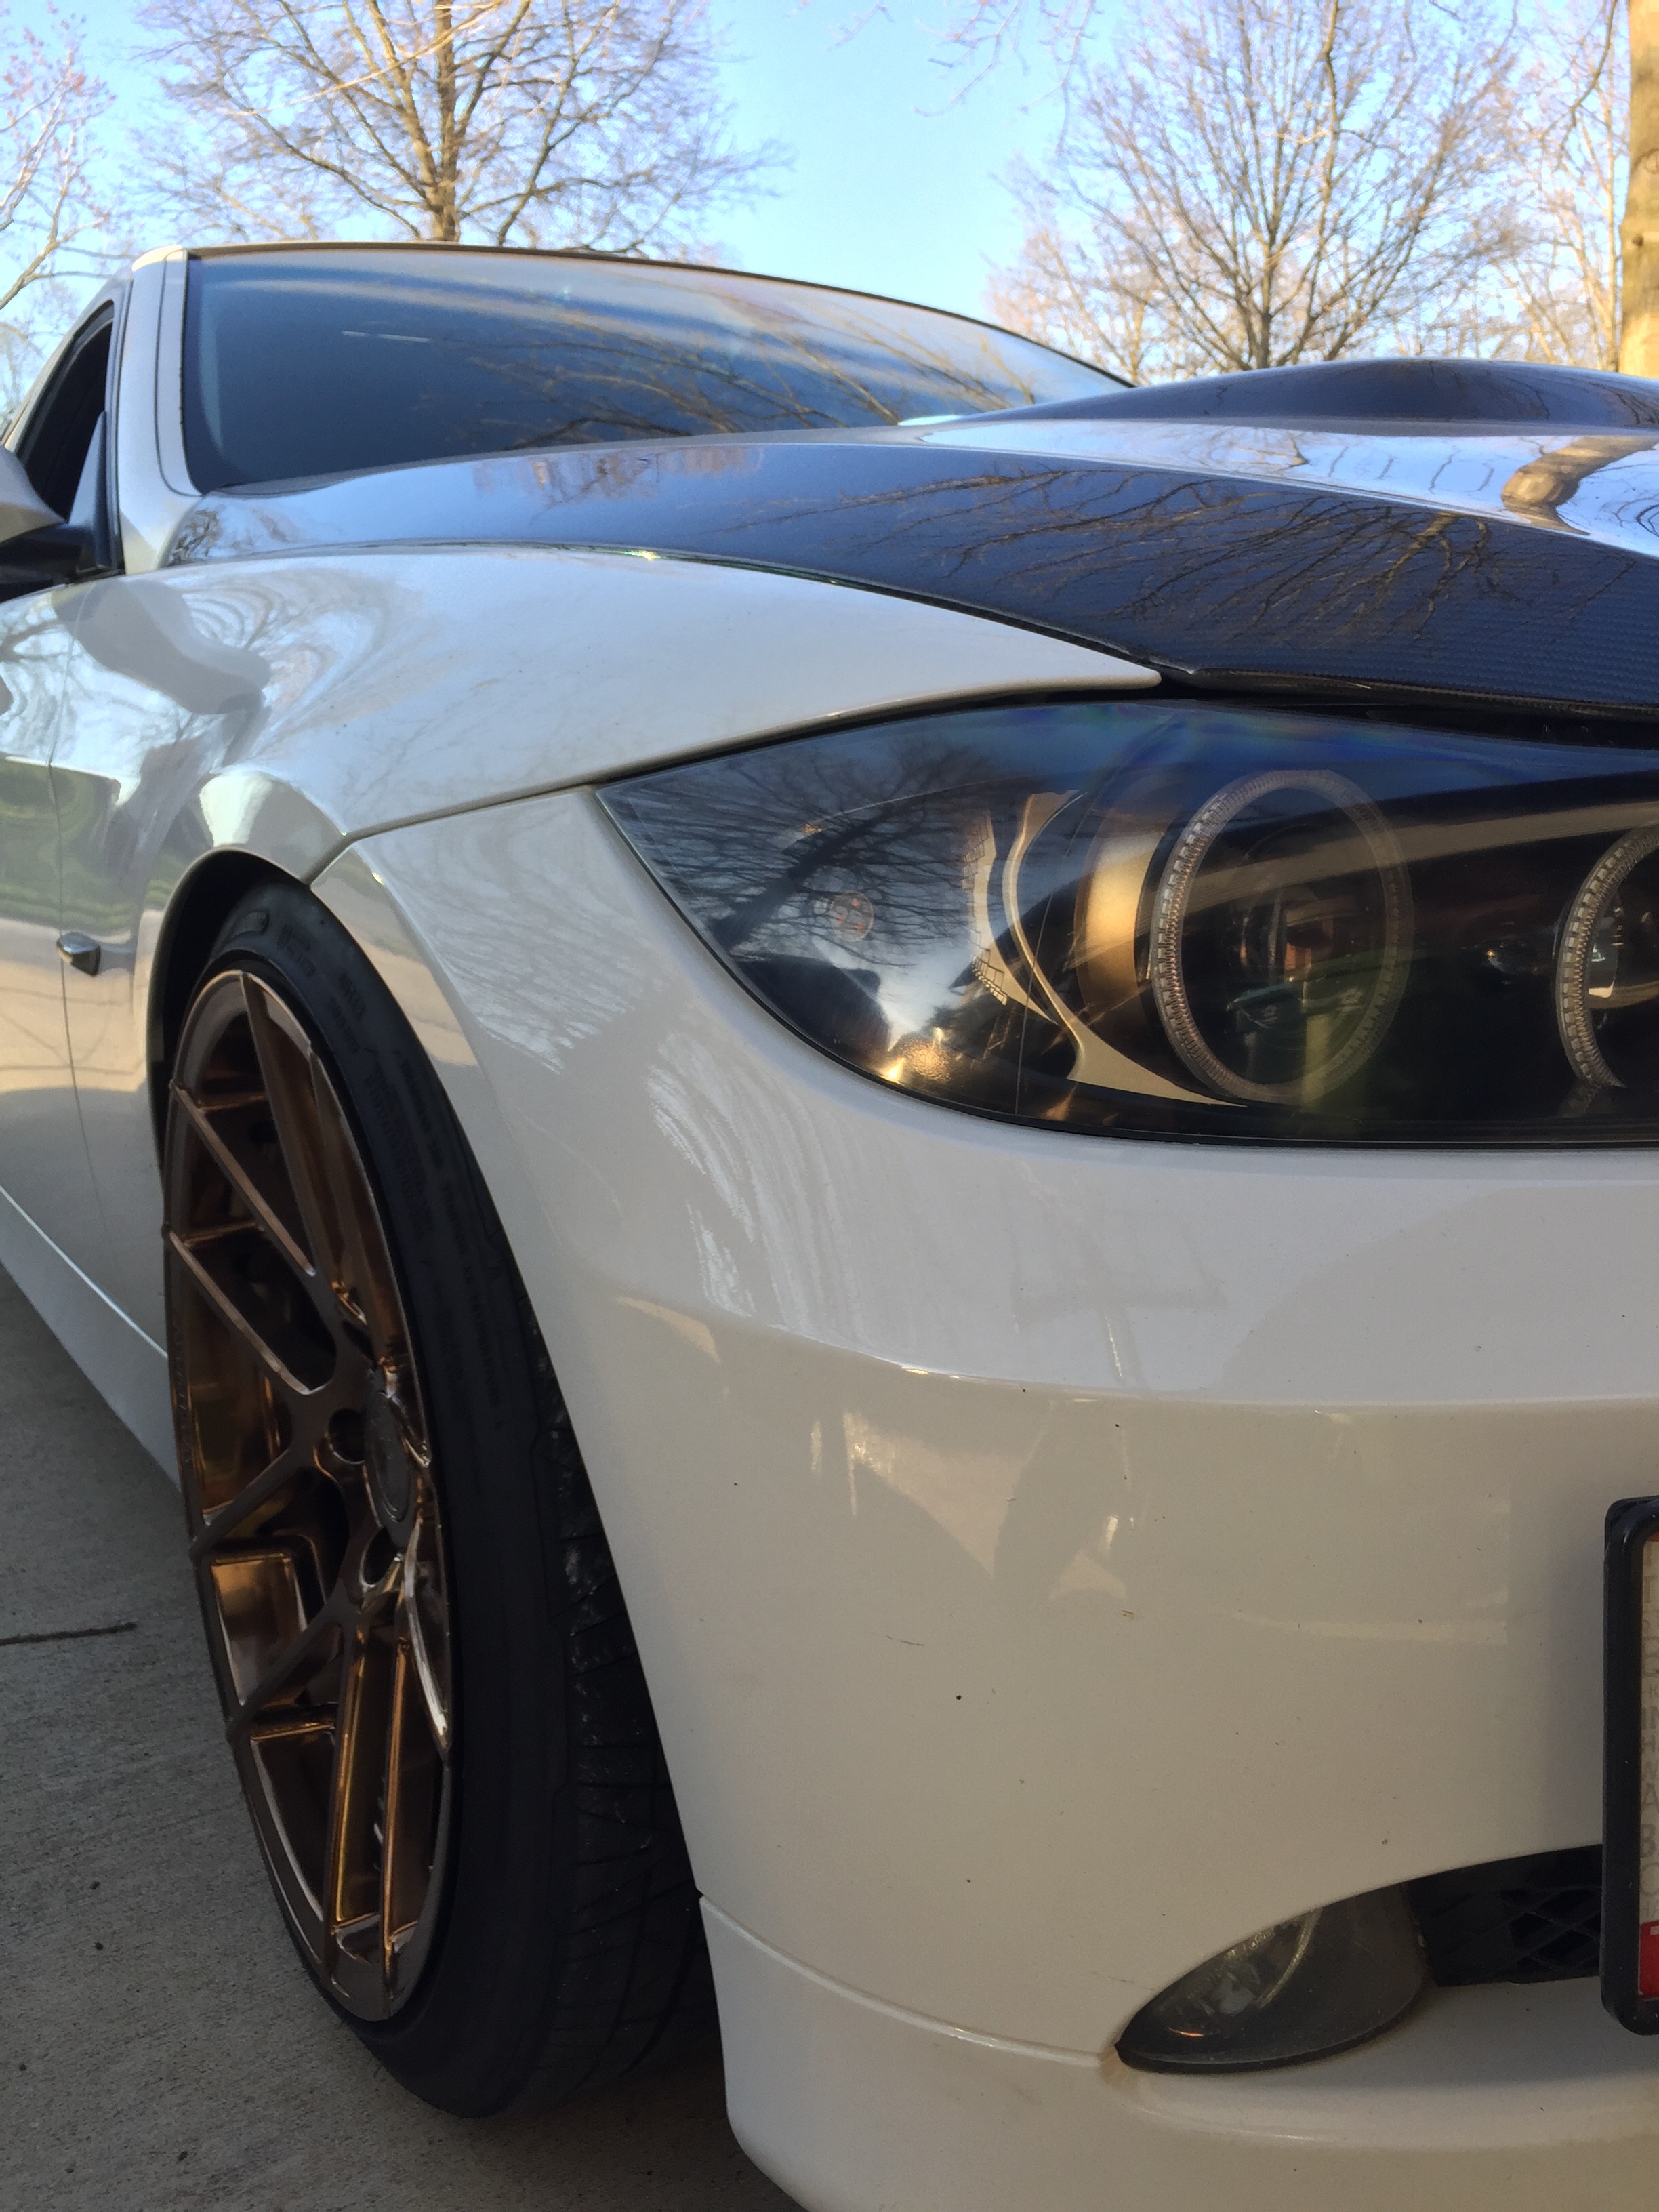 Front end dissembled, headlights removed  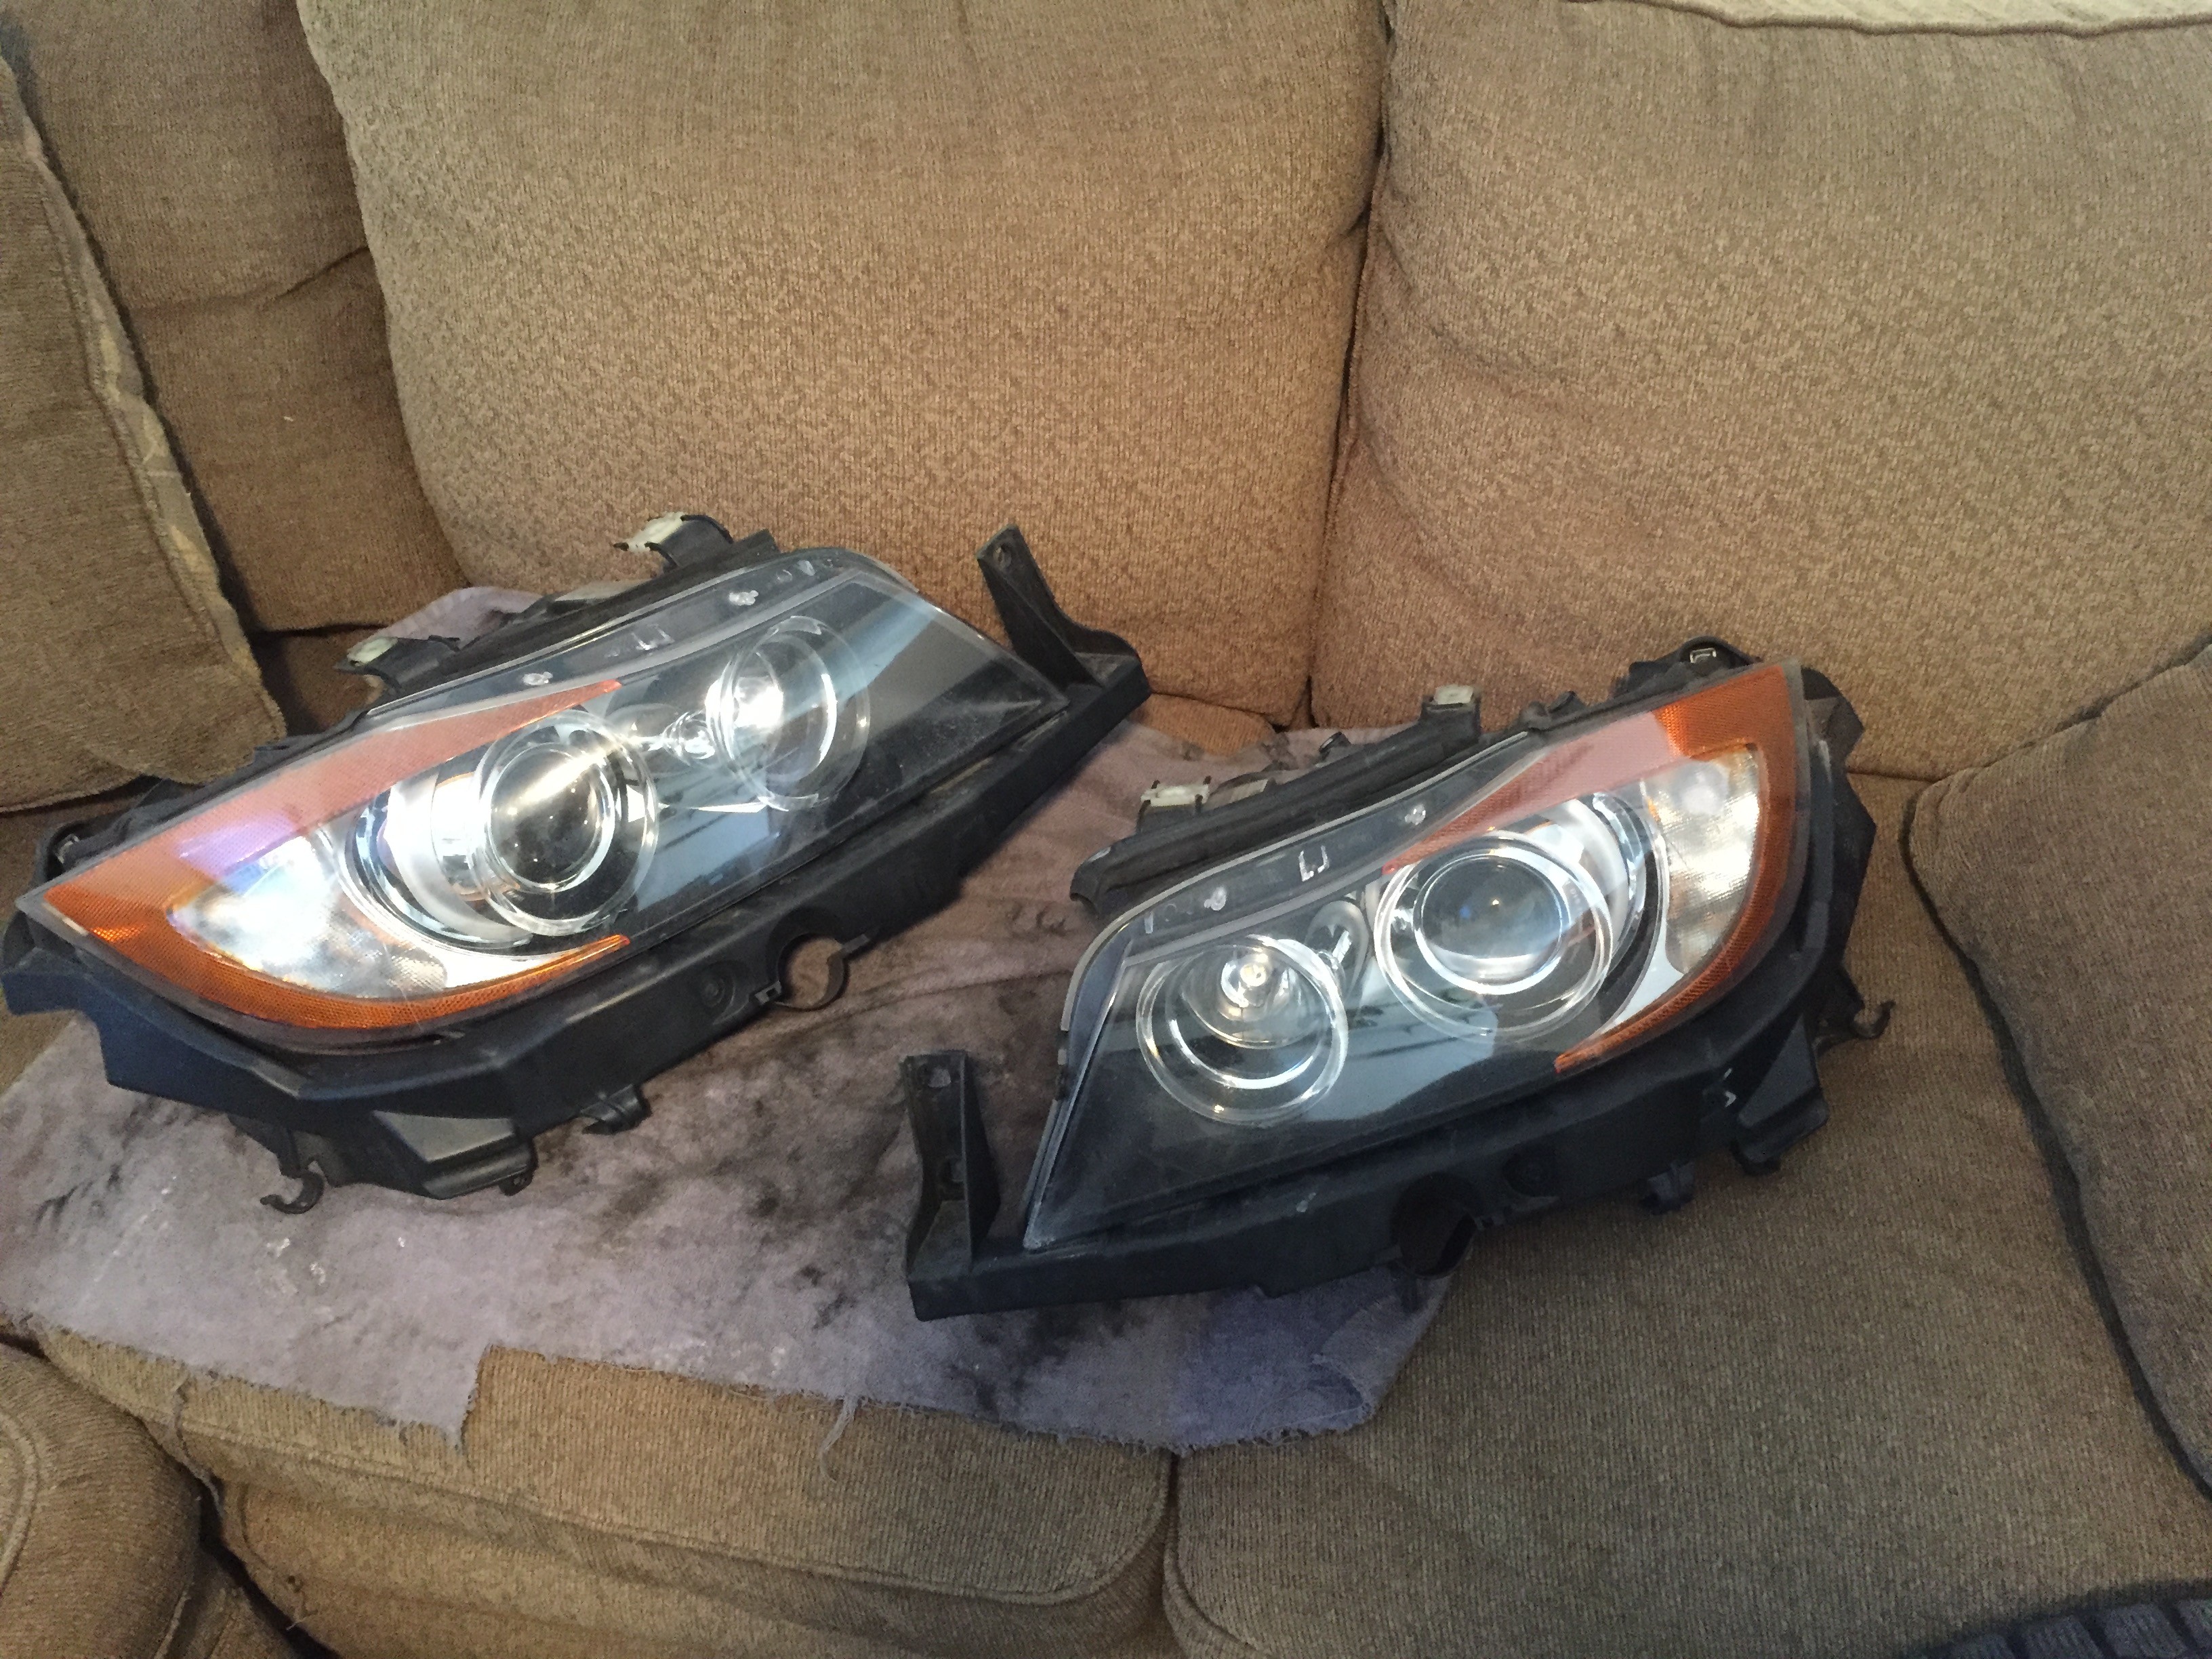 Since the spare headlight housings had some defects (one was cracked, the other's lens was severely scratched), I decided to just crack open my oem lights and swap in the painted parts. 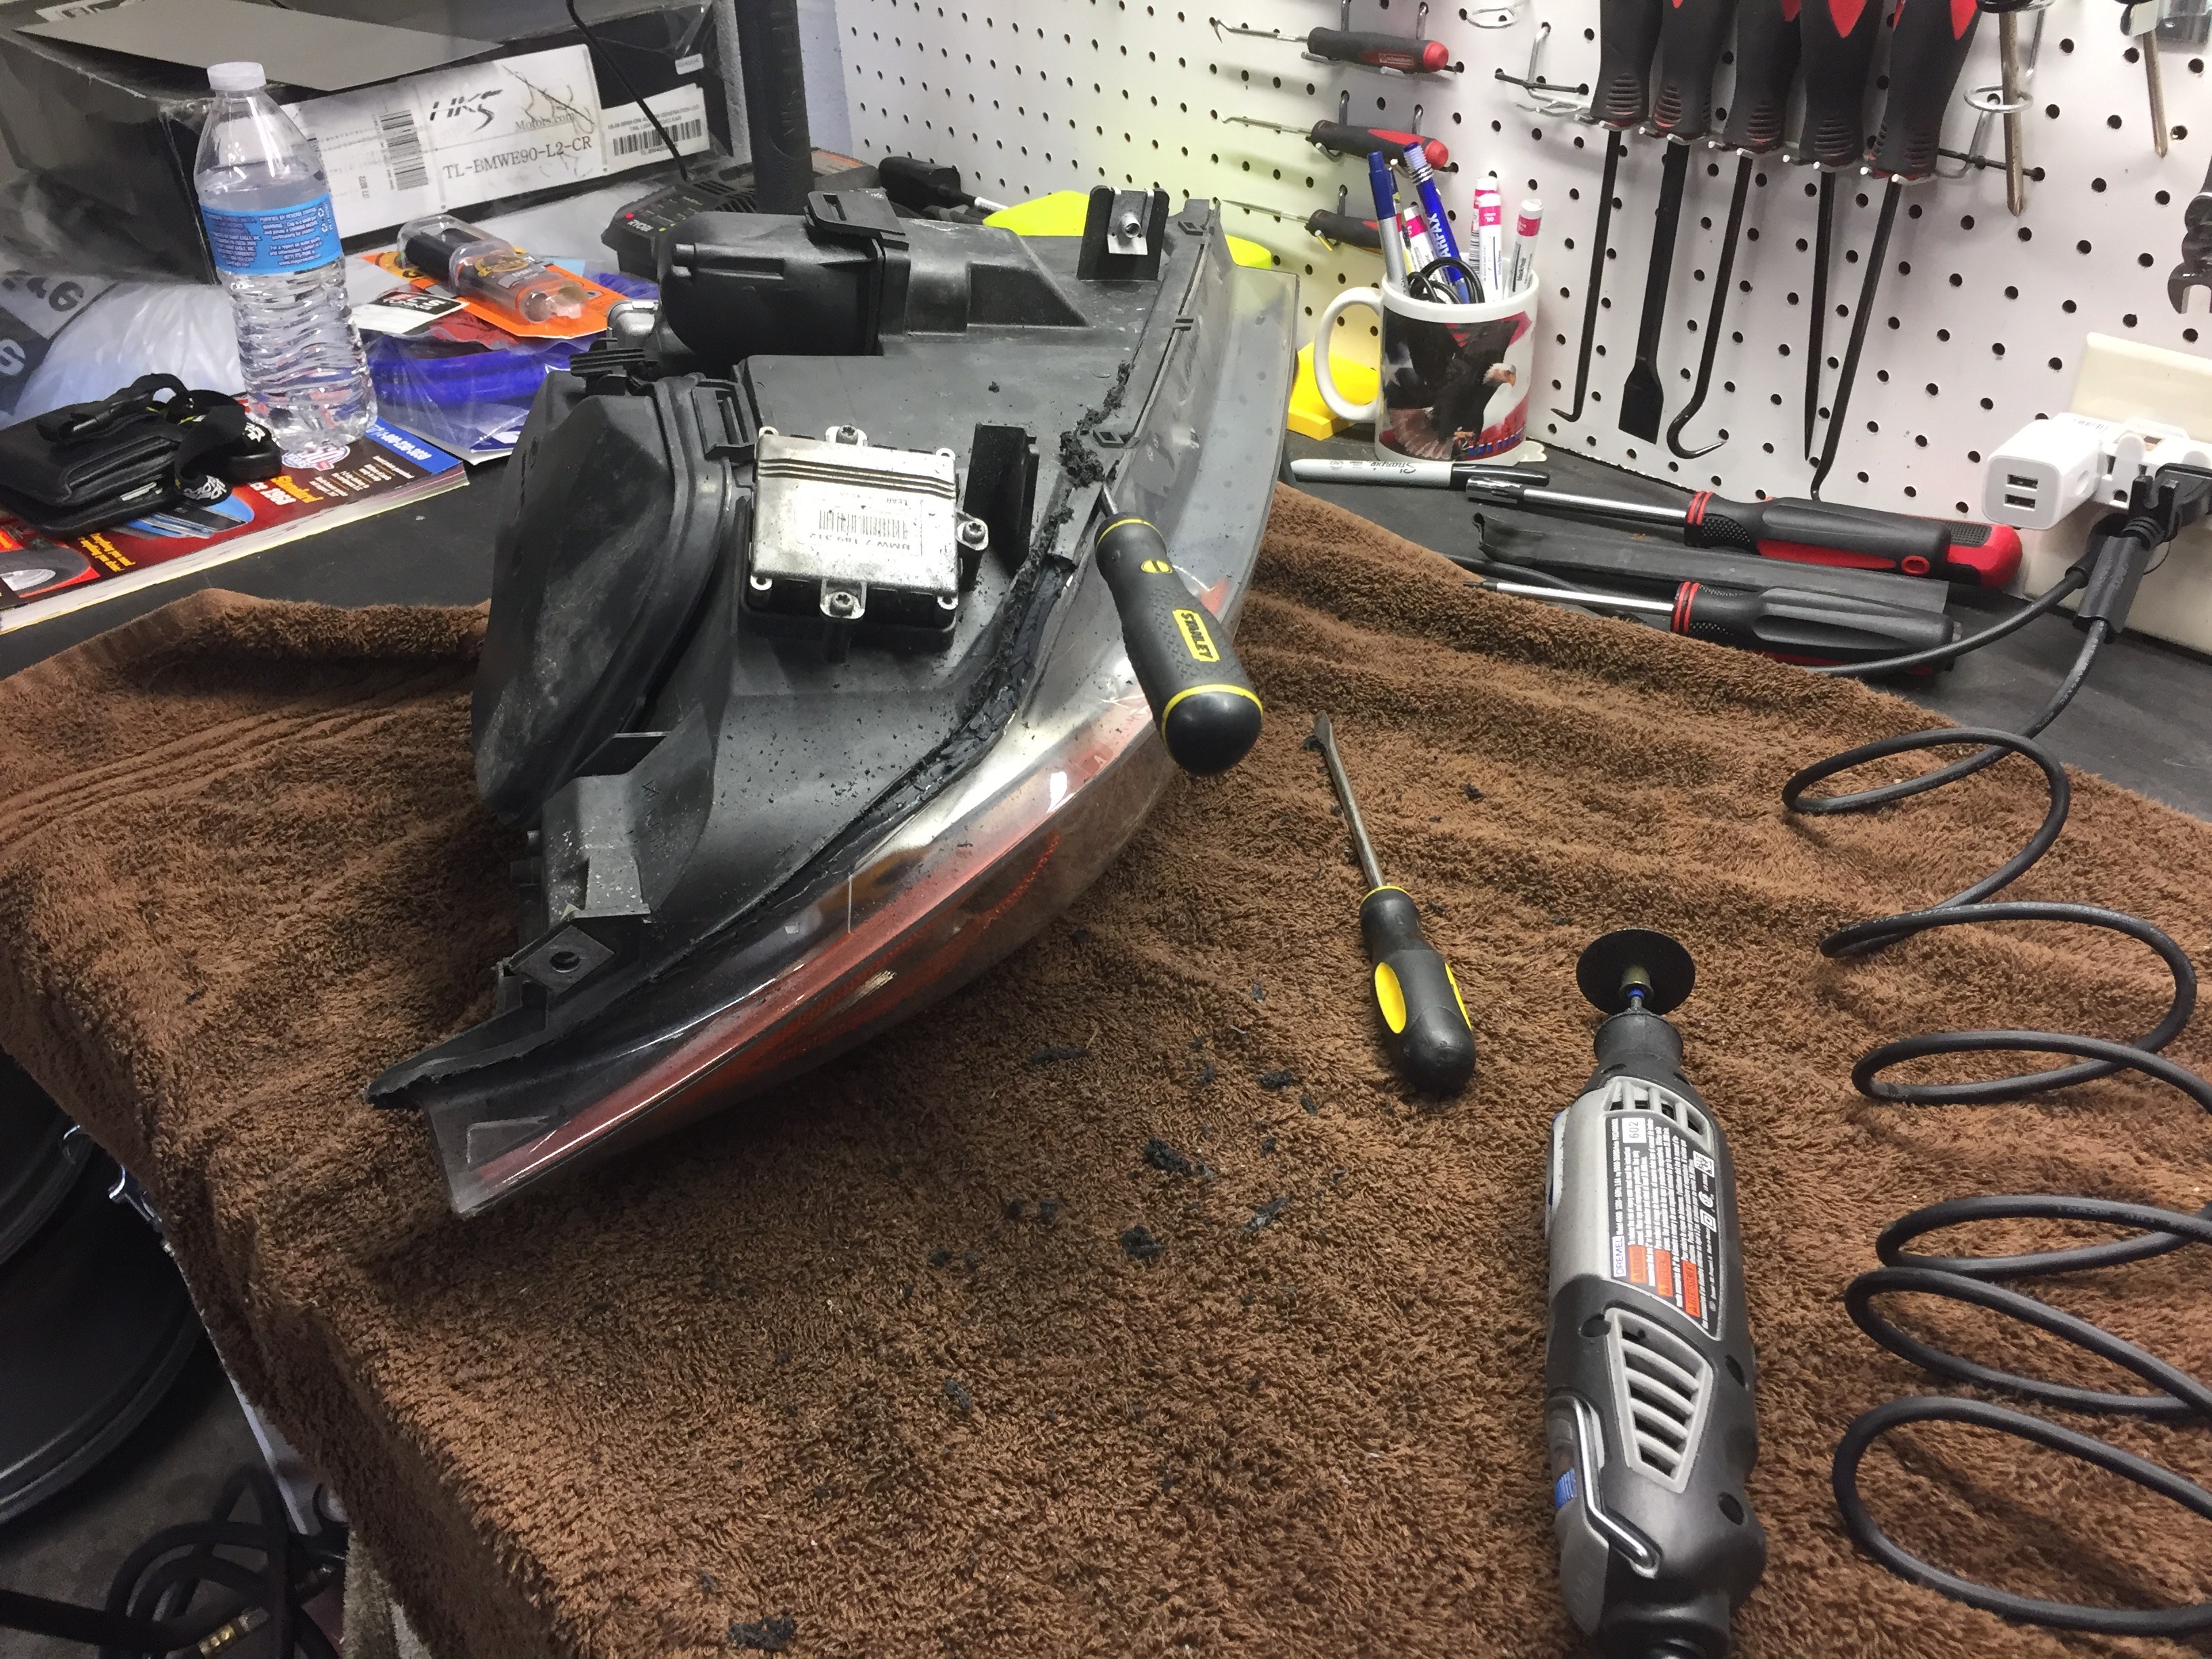 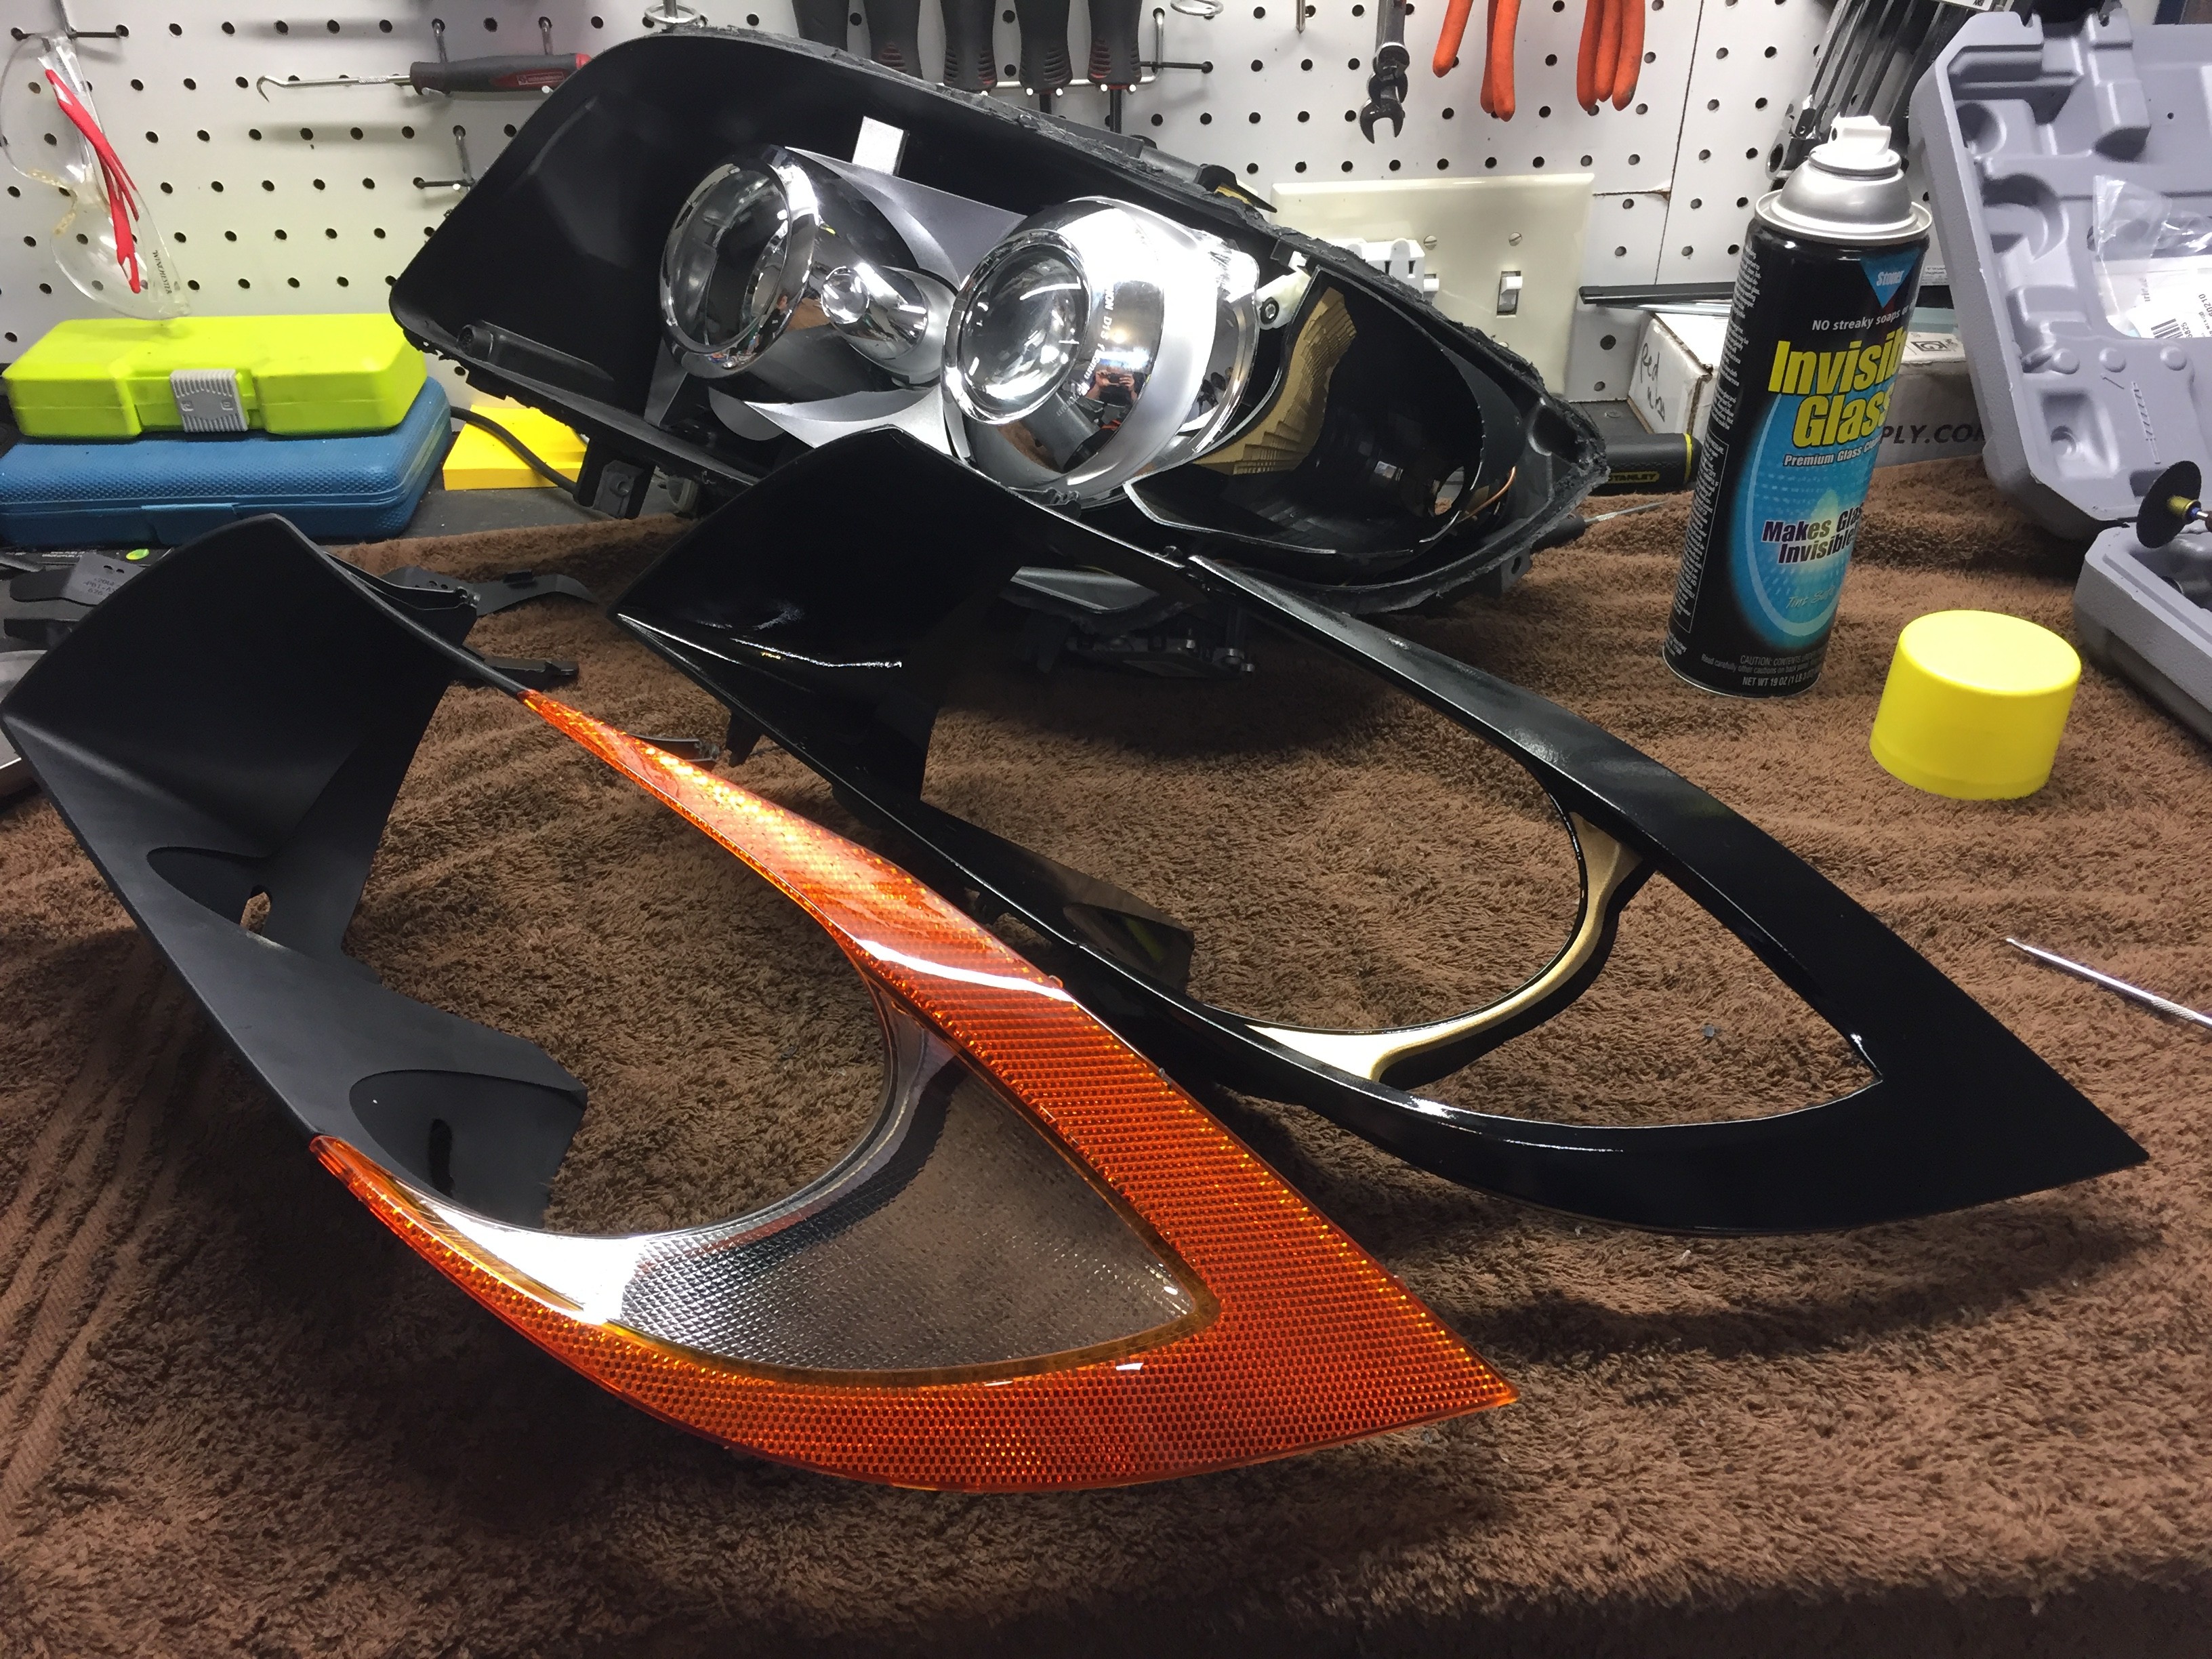 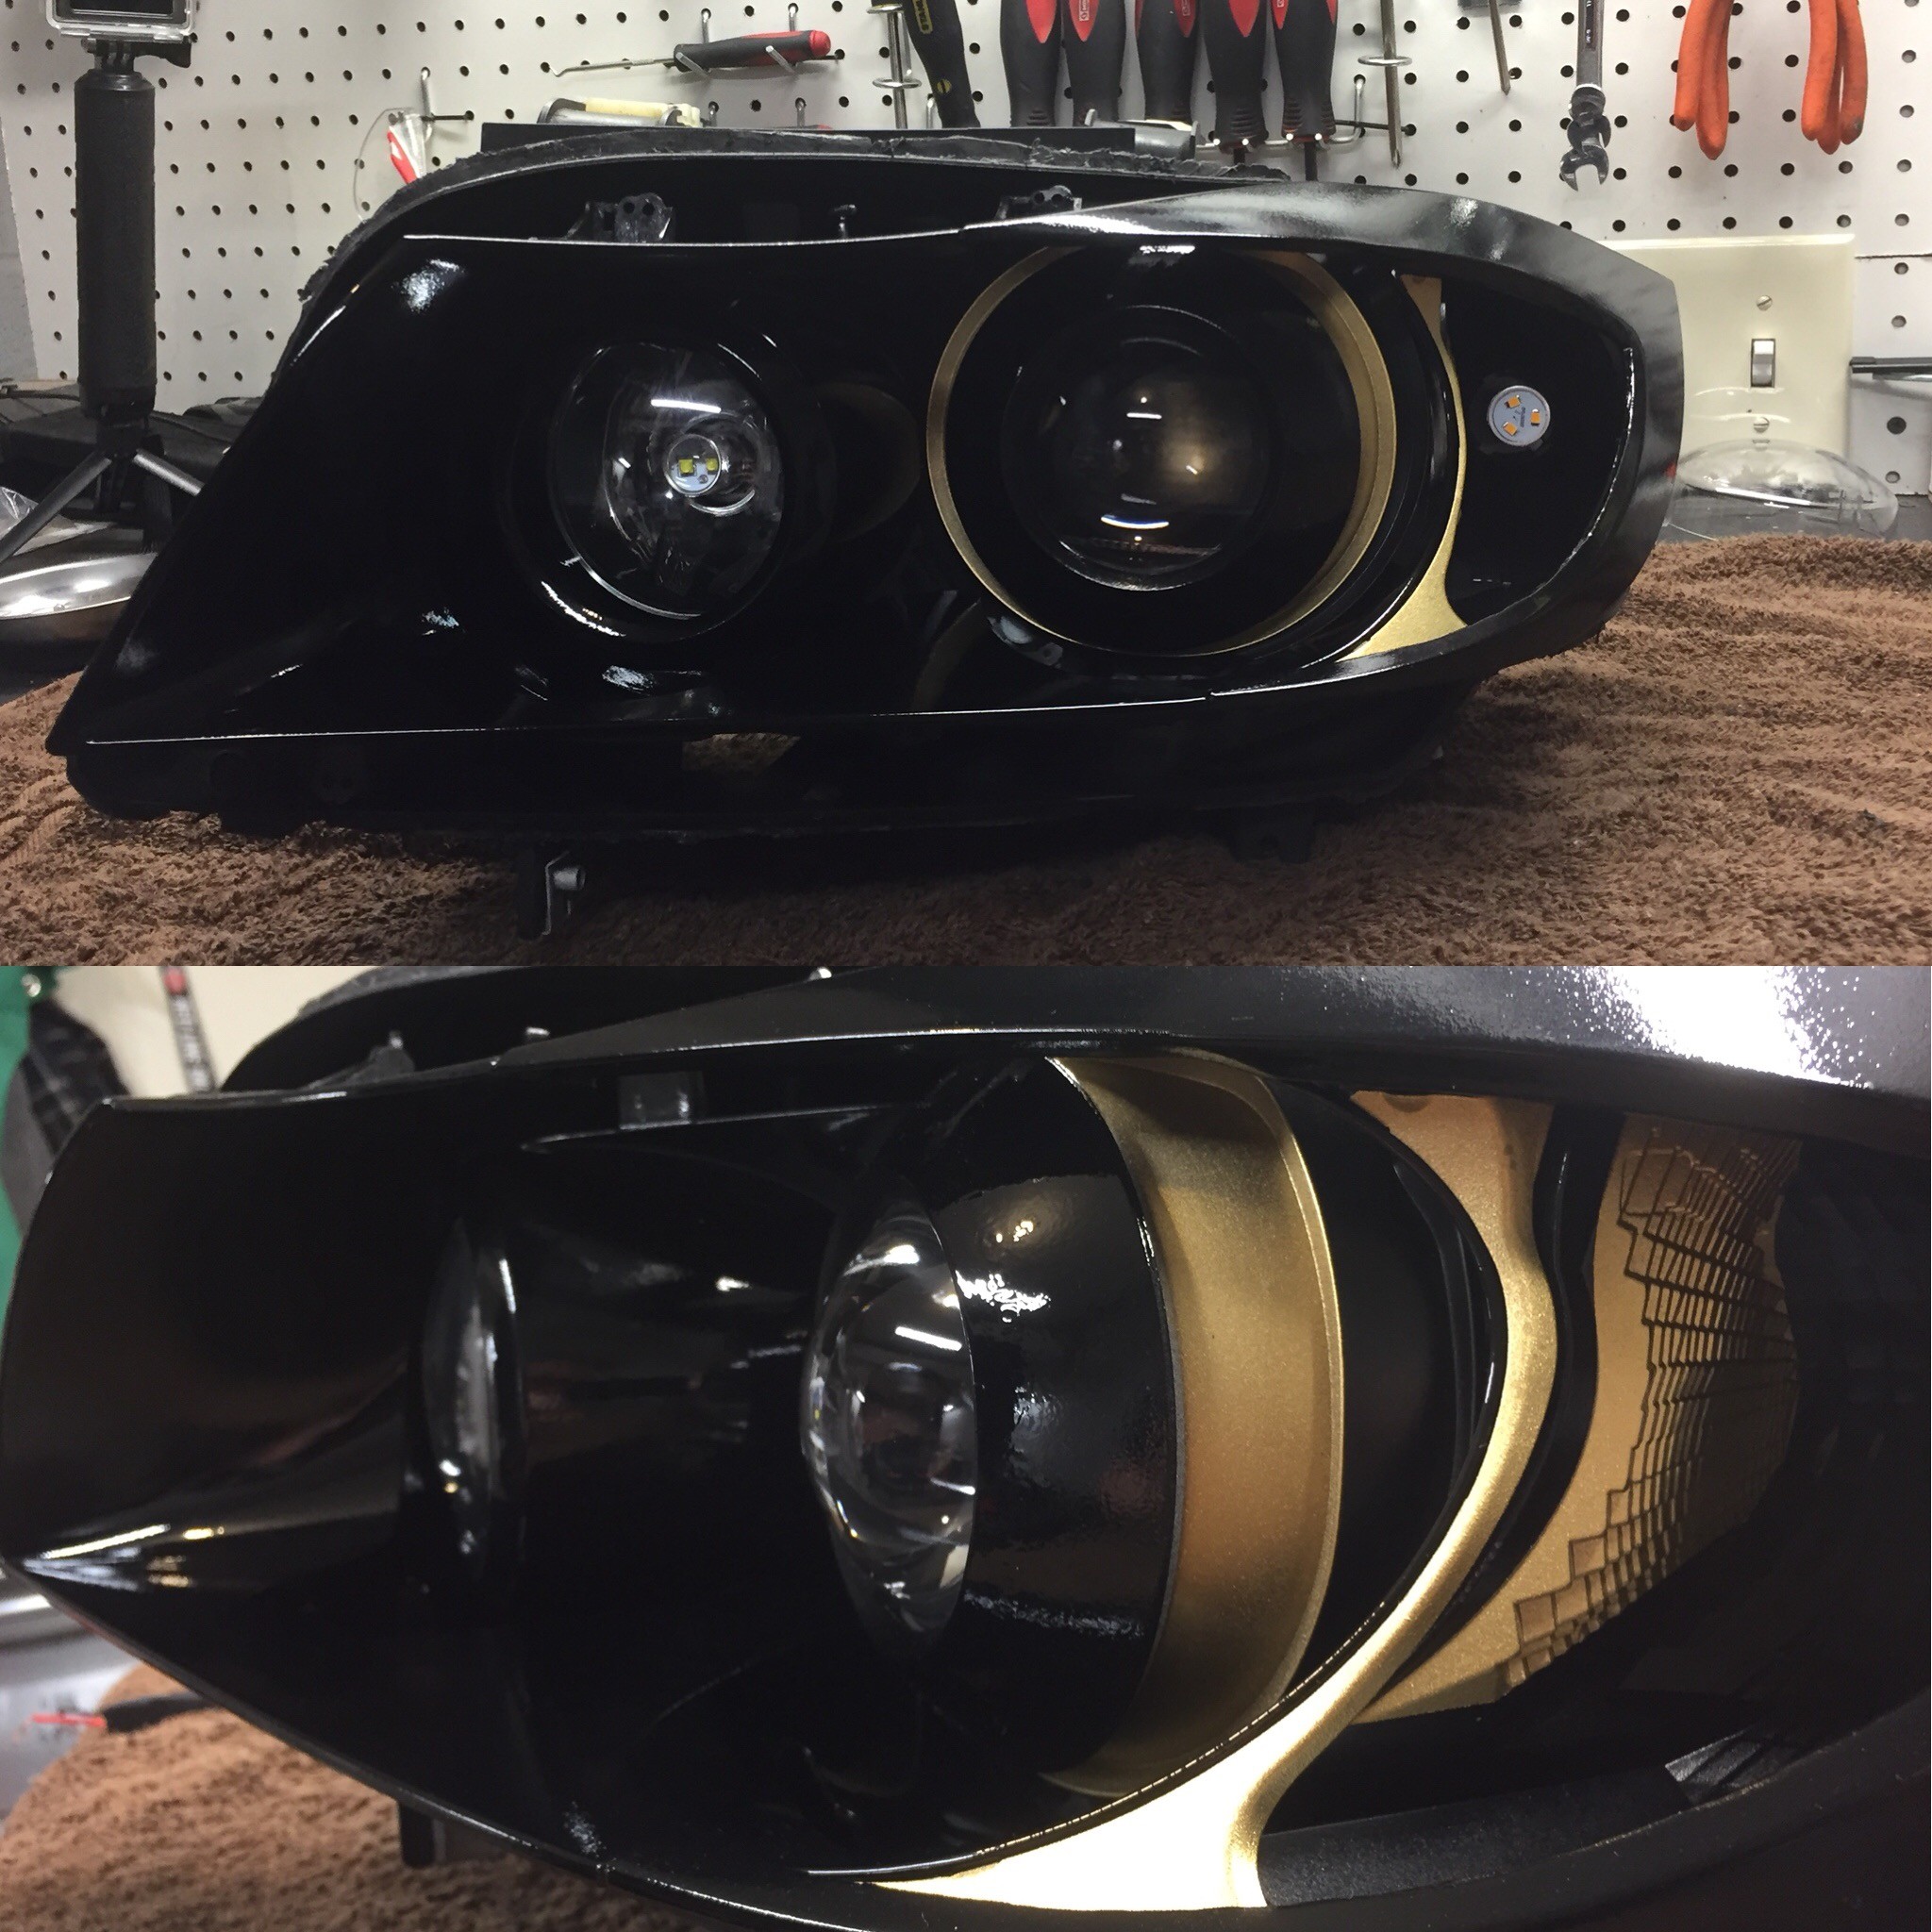 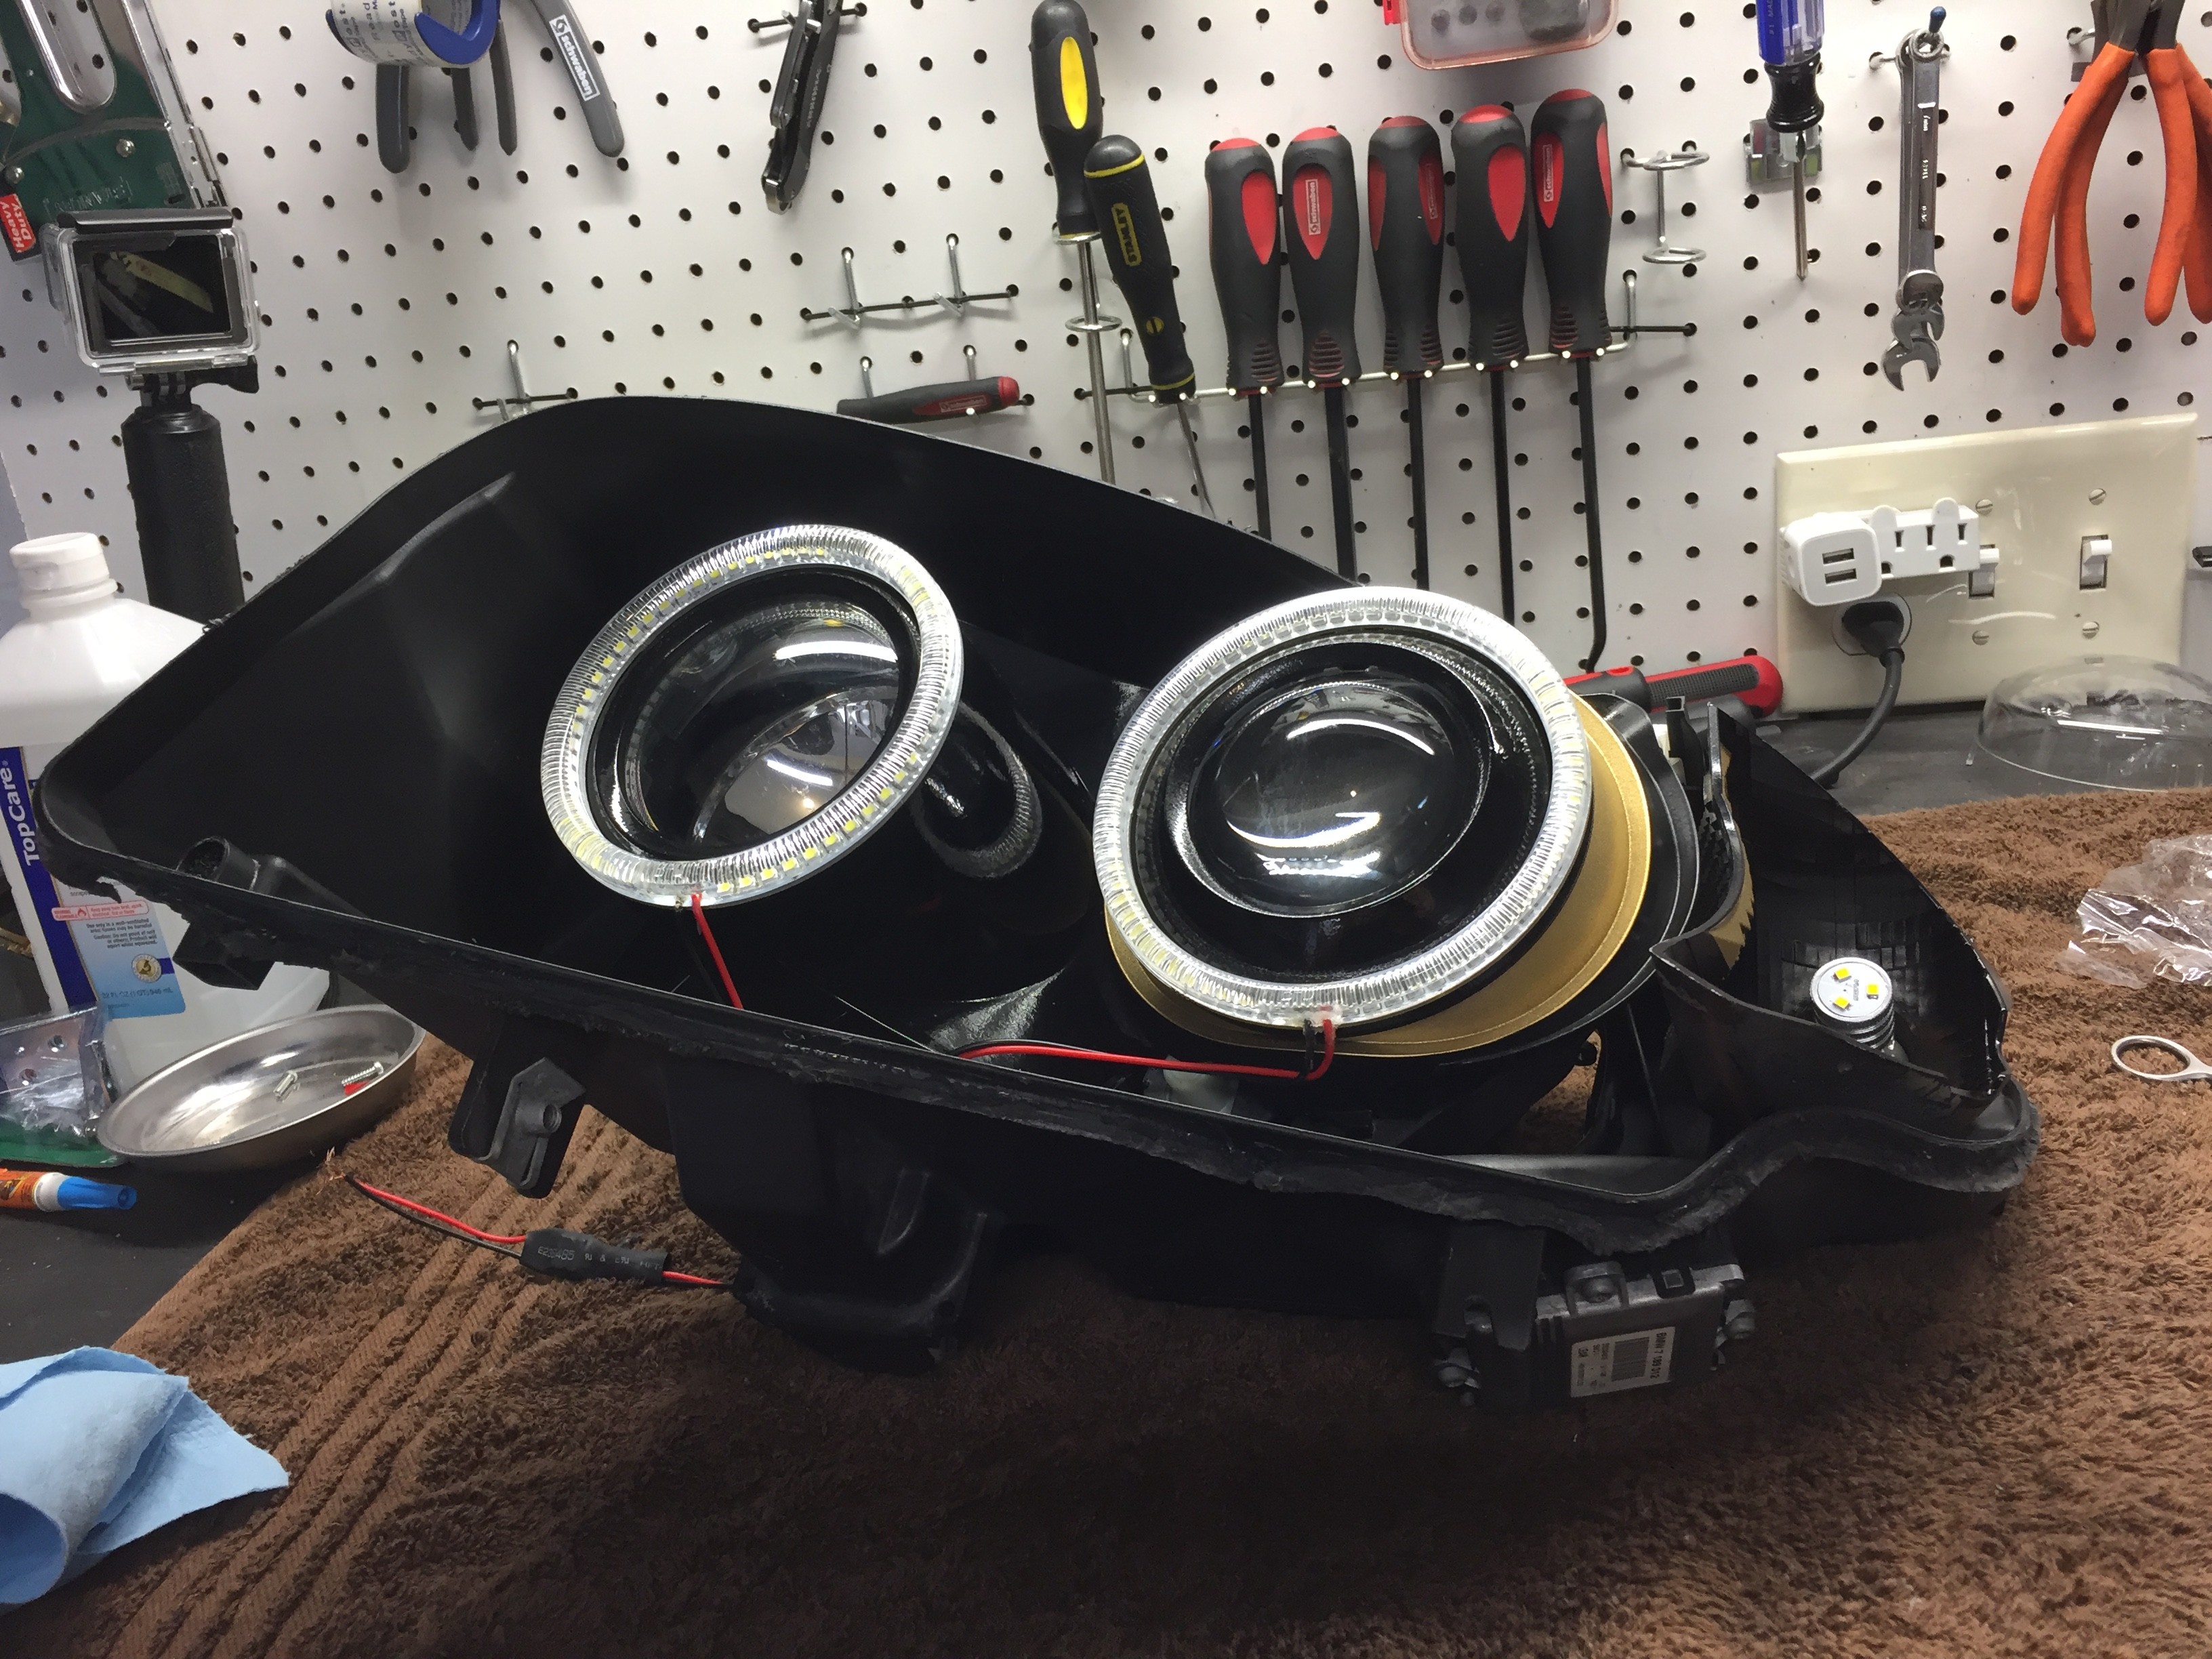 Now that everything is mounted, epoxied and wired up, time to clean up the lenses (badly pitted) and seal em up! Before and After. Mothers NuLense Kit for the win! (https://www.amazon.com/Mothers-07251.../dp/B00GZLMEPM) 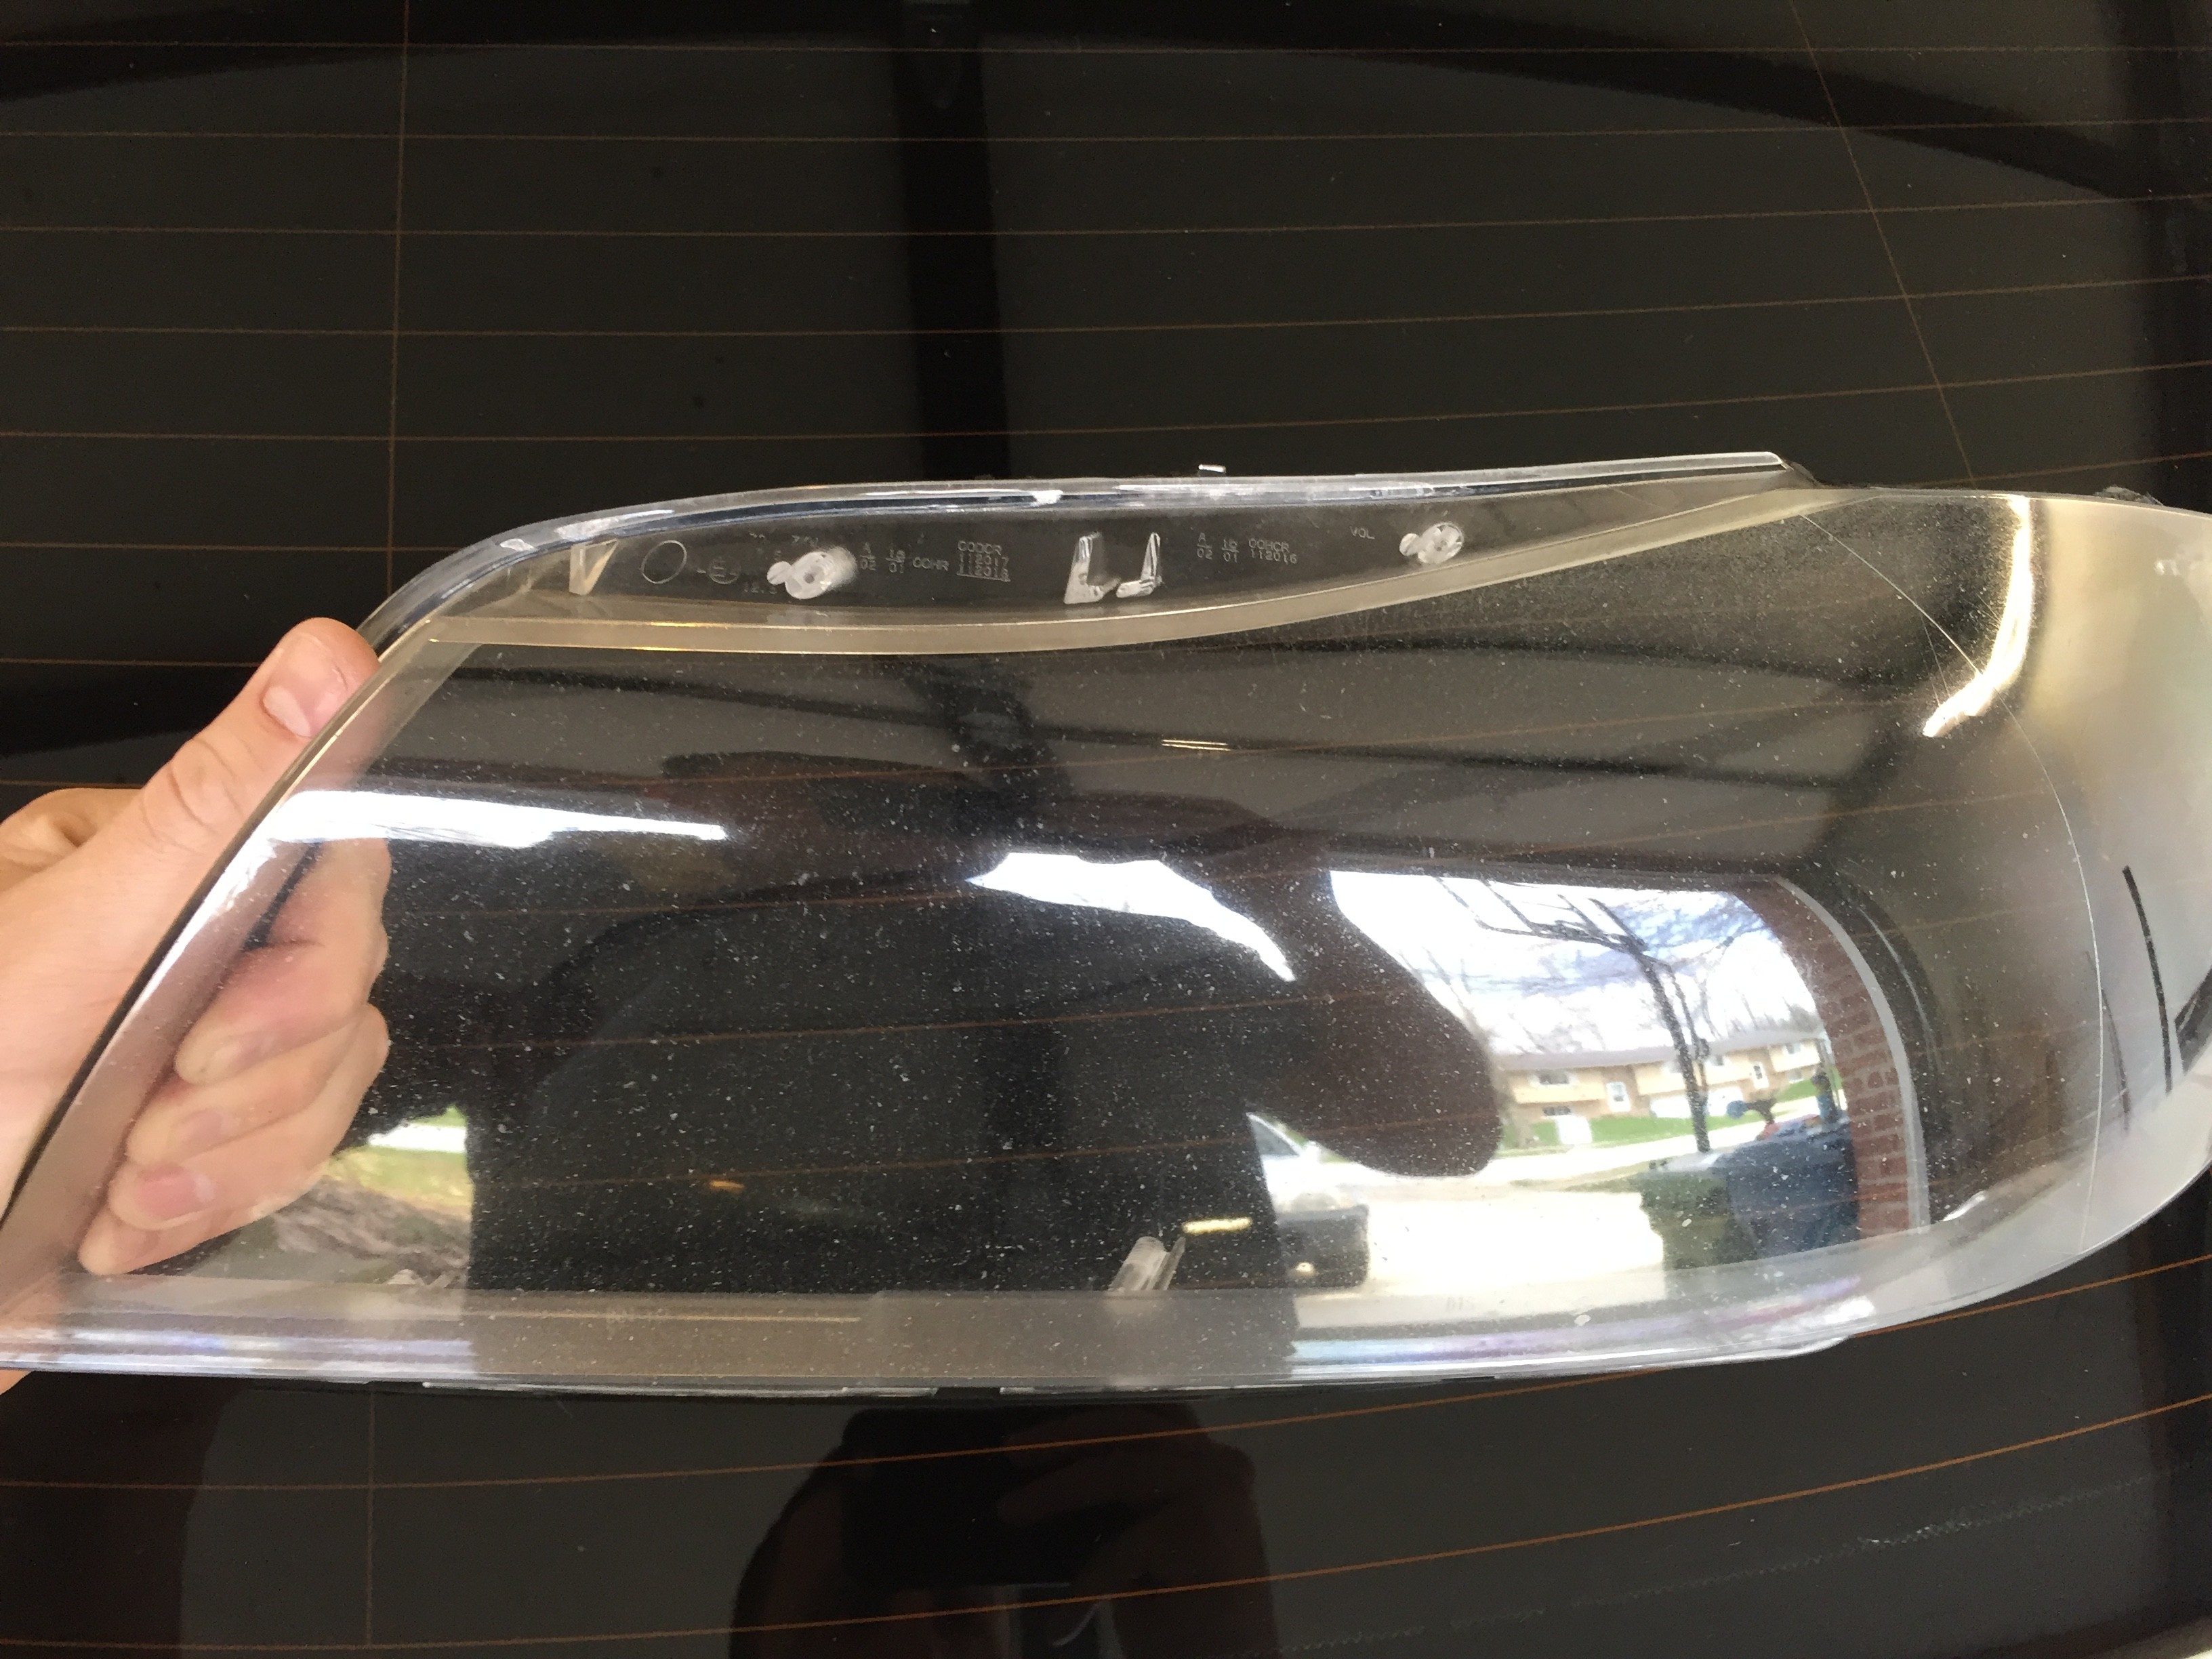  Final sealing with some butyl rubber sealant. 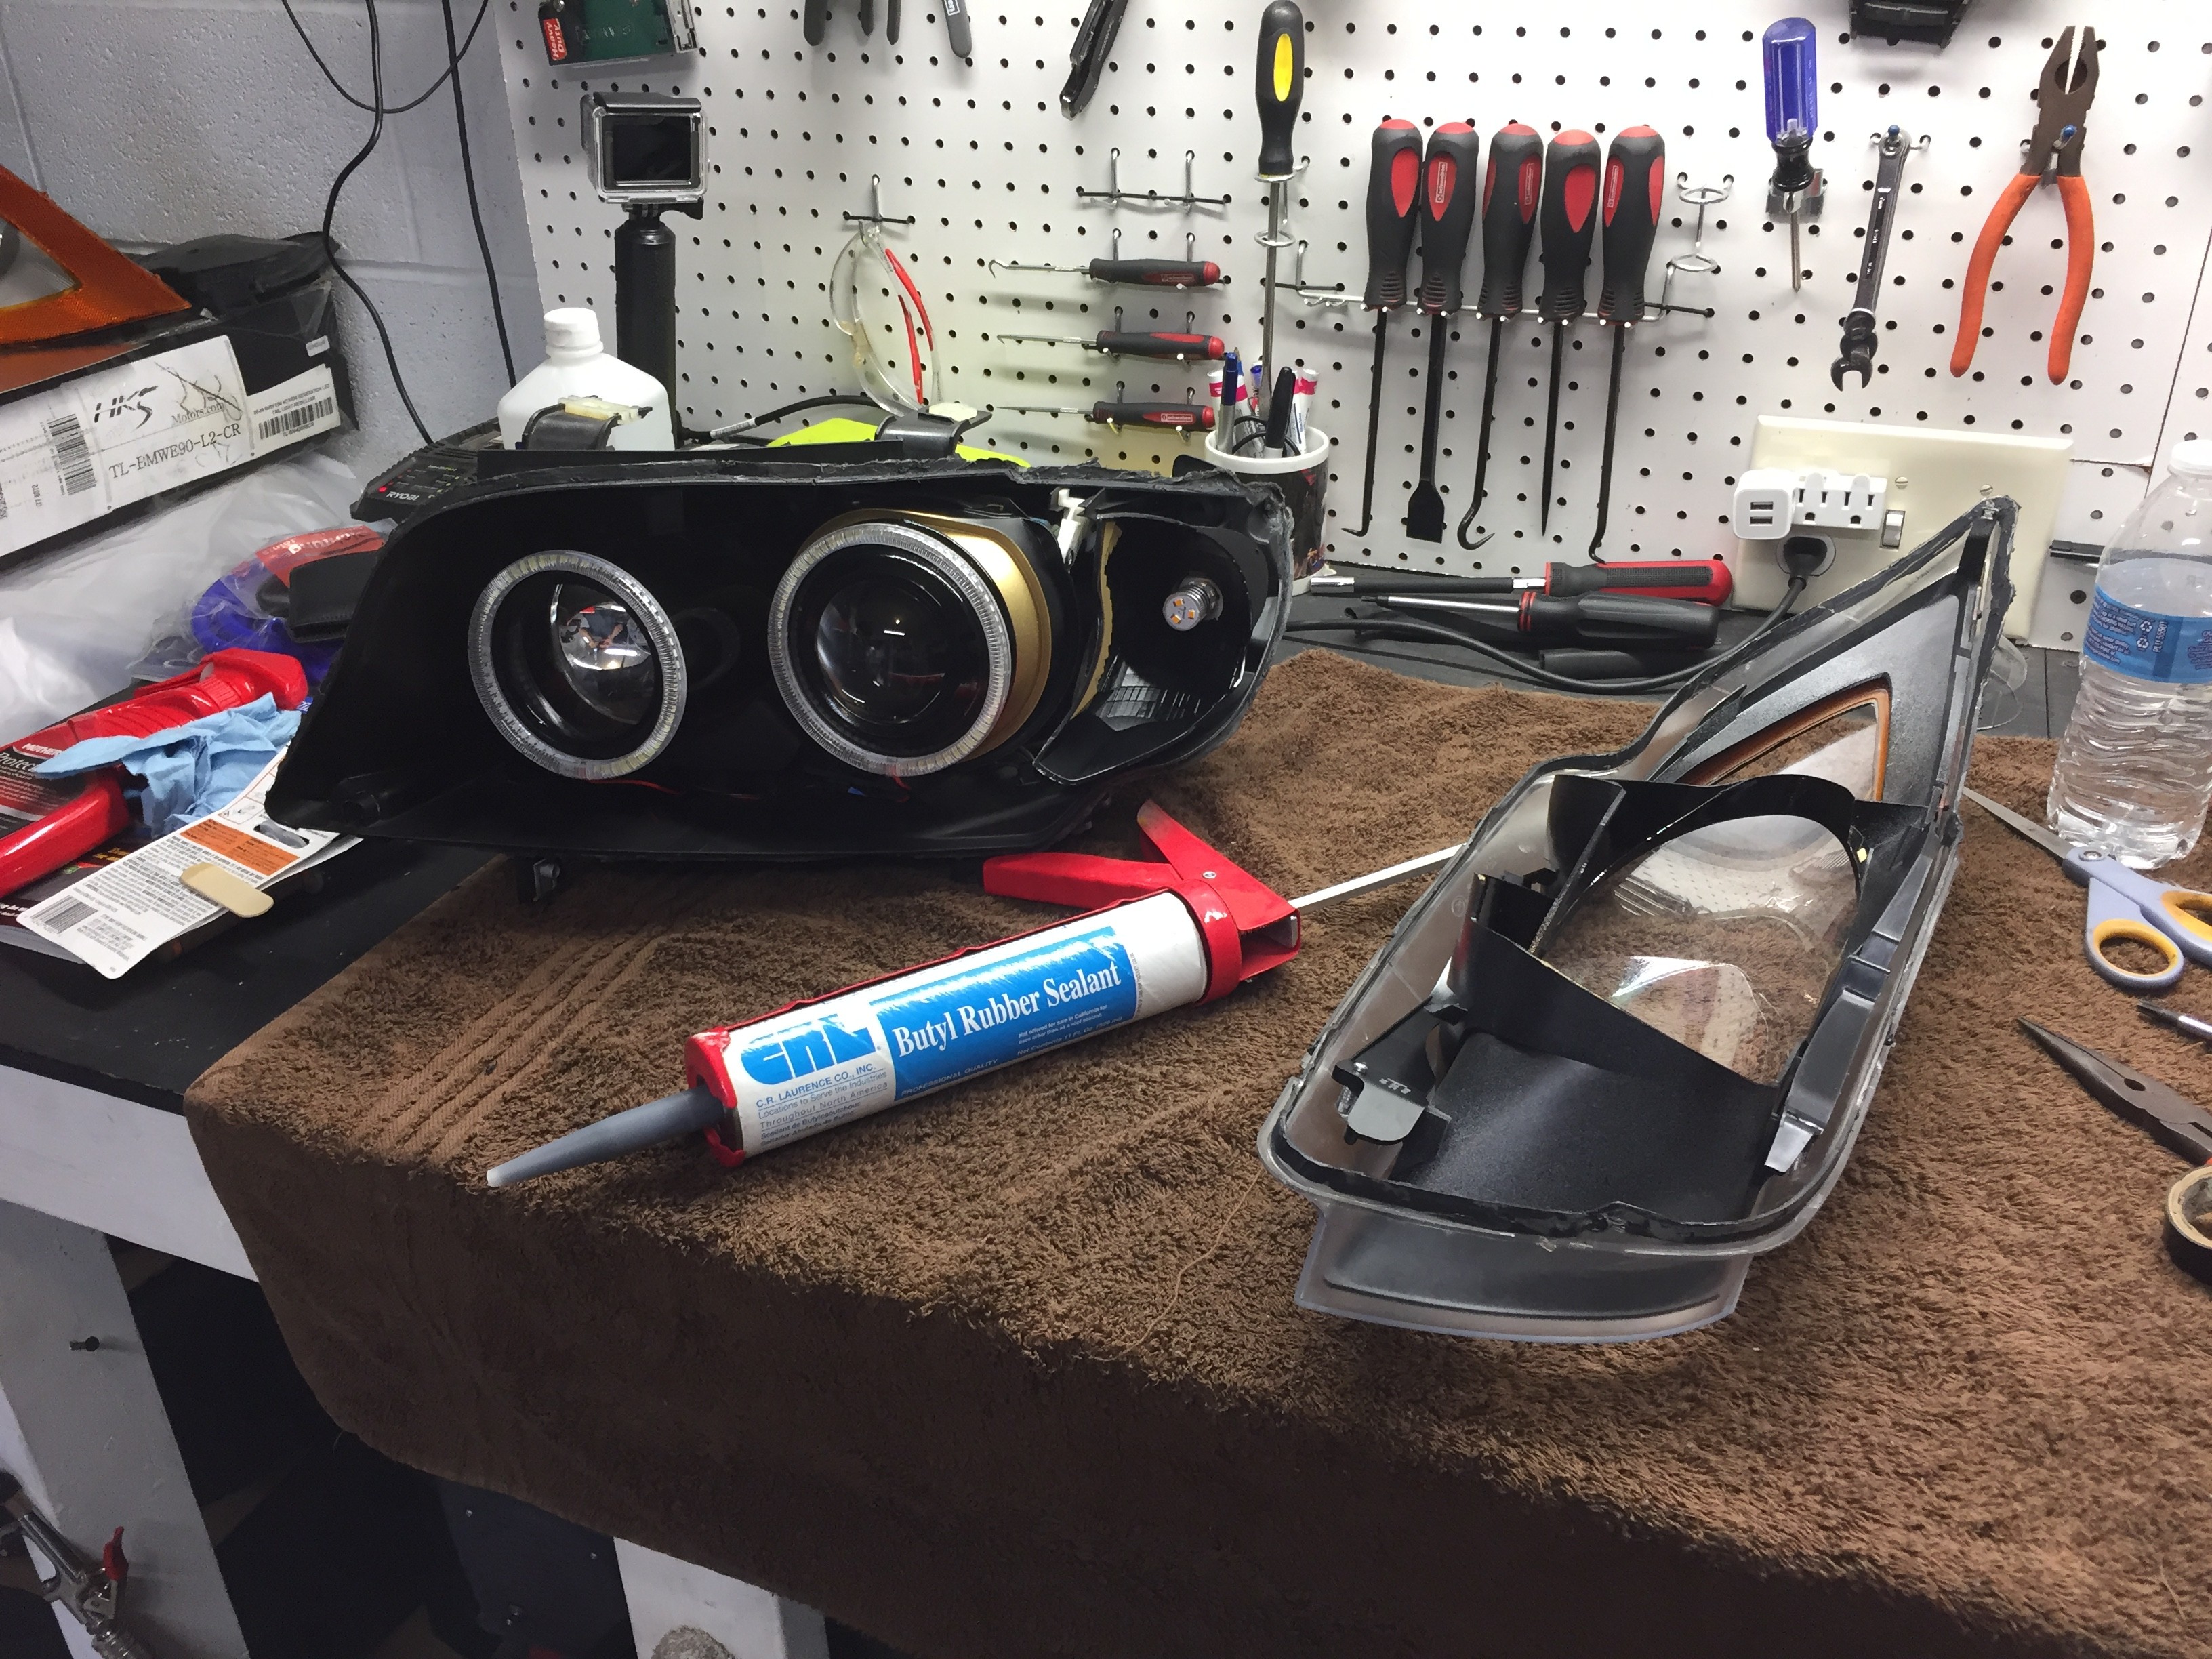 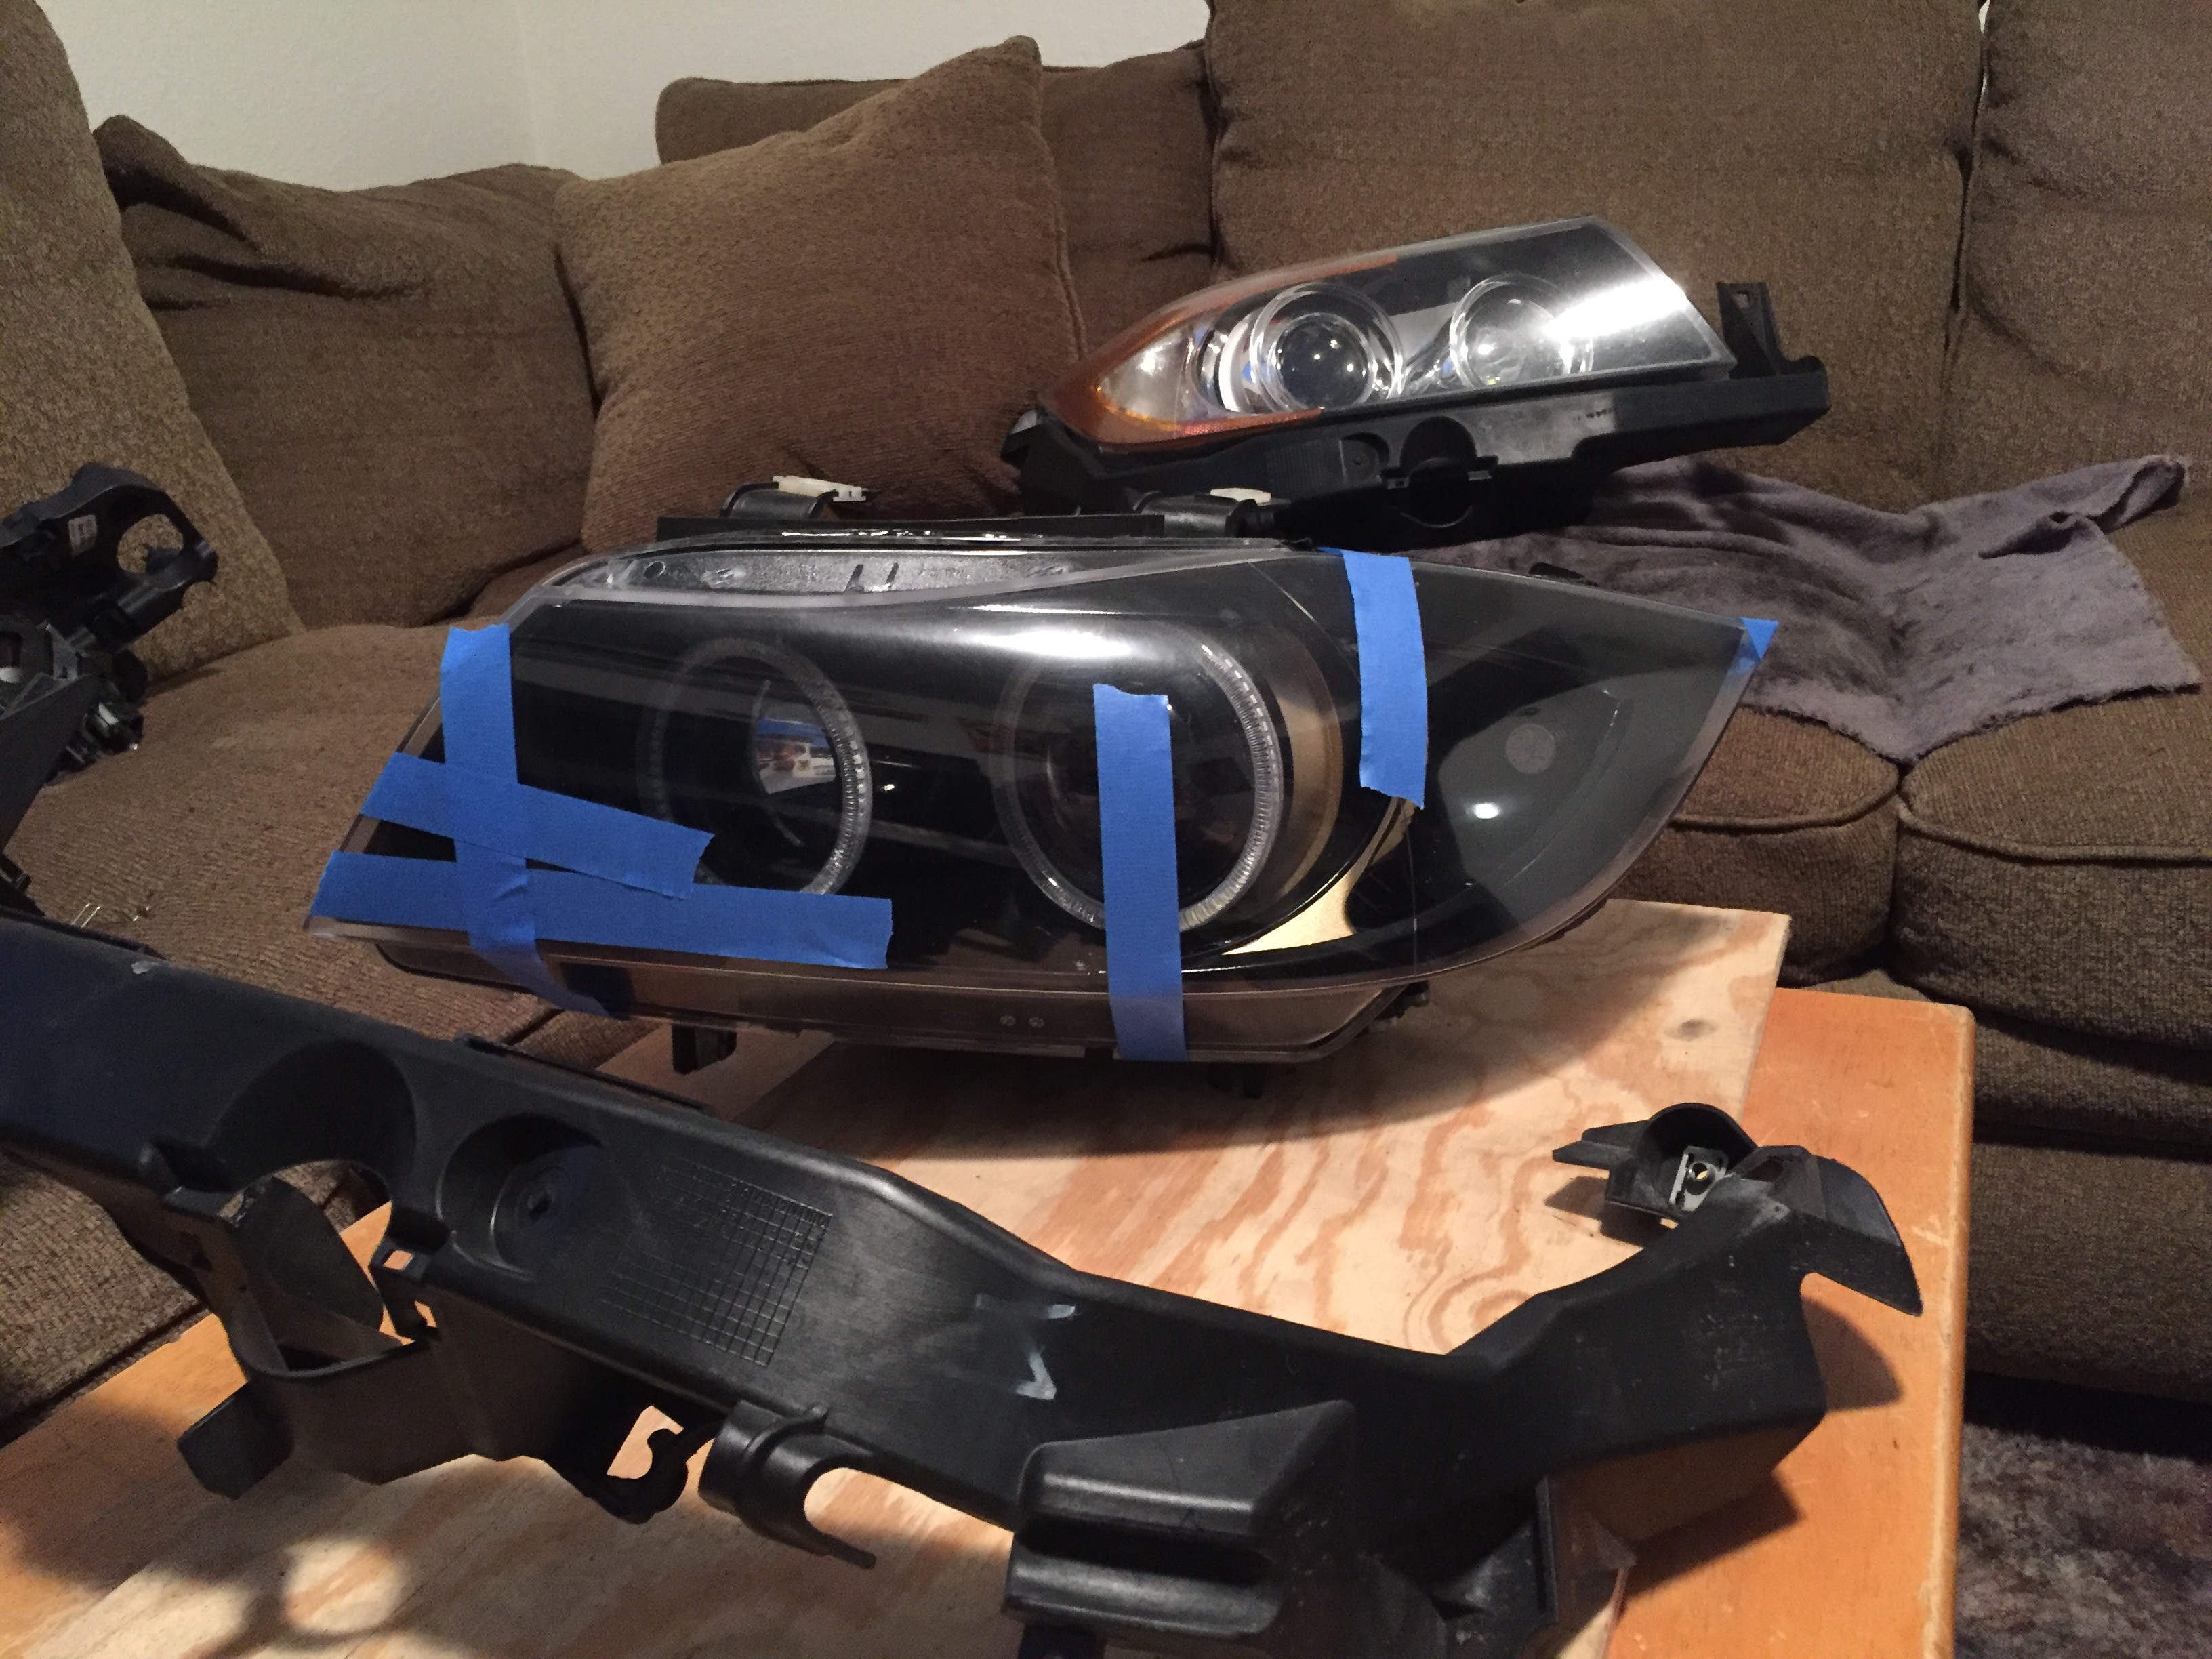 Test fit and reassemble! 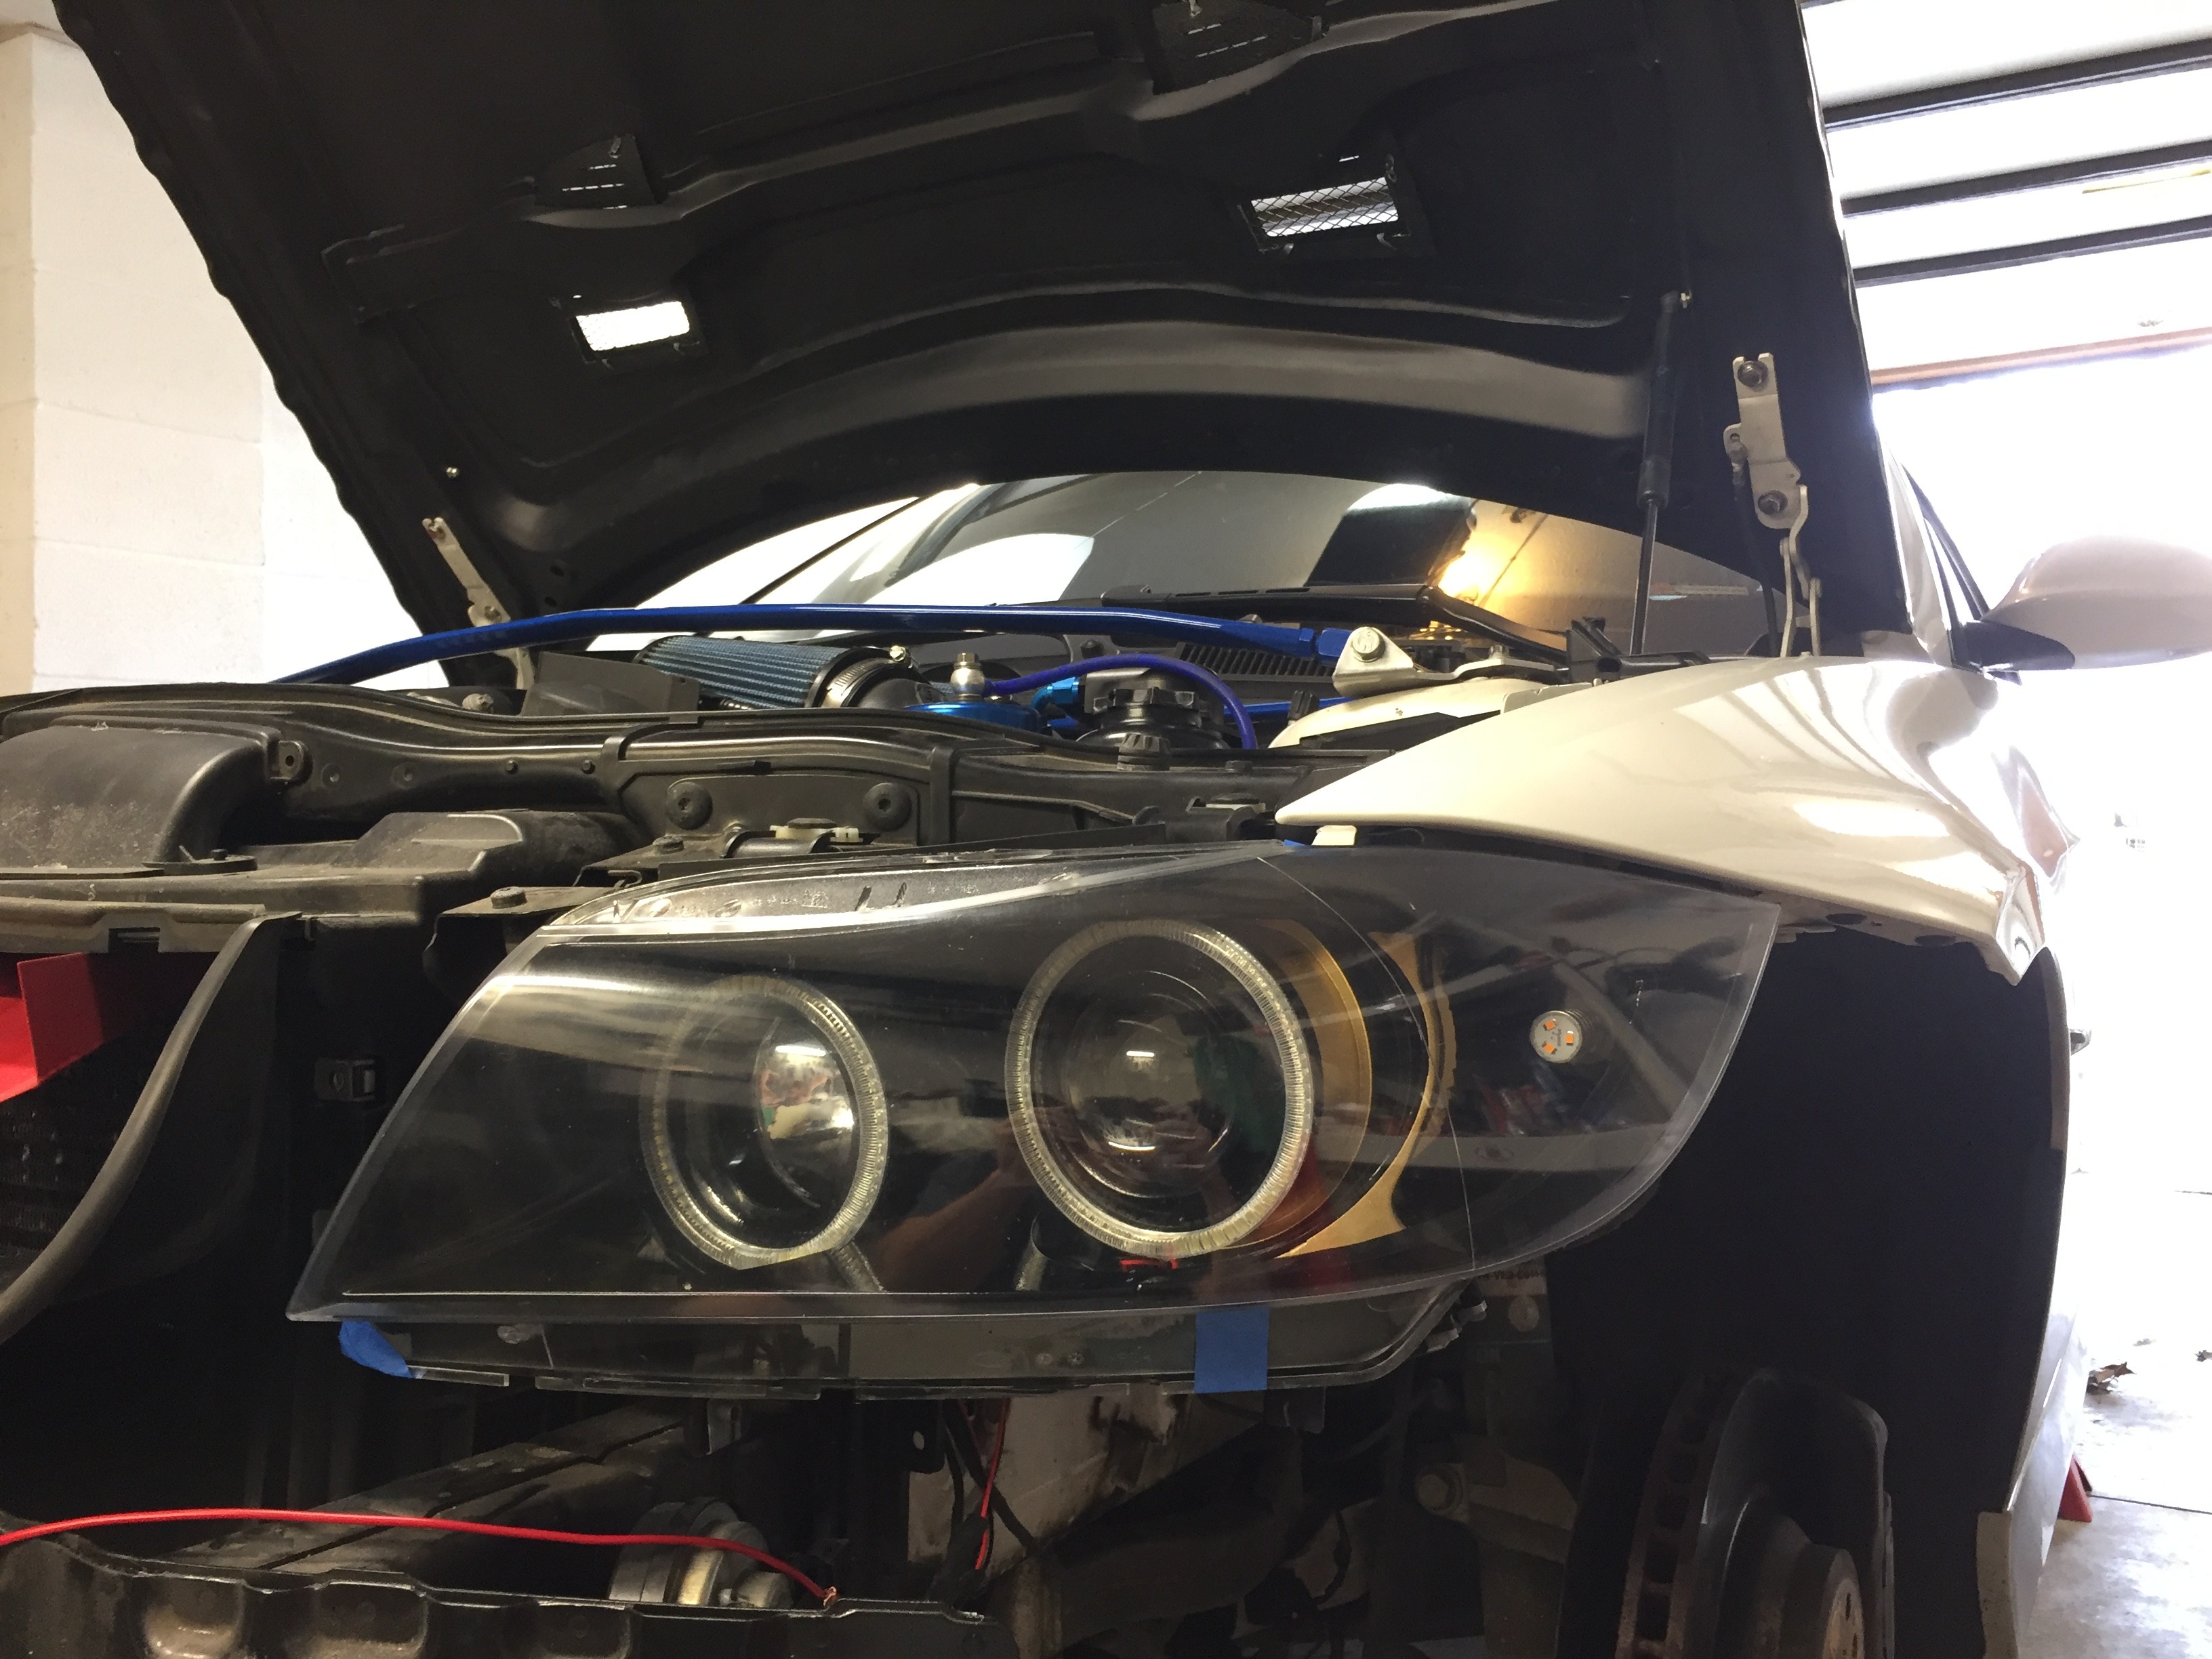   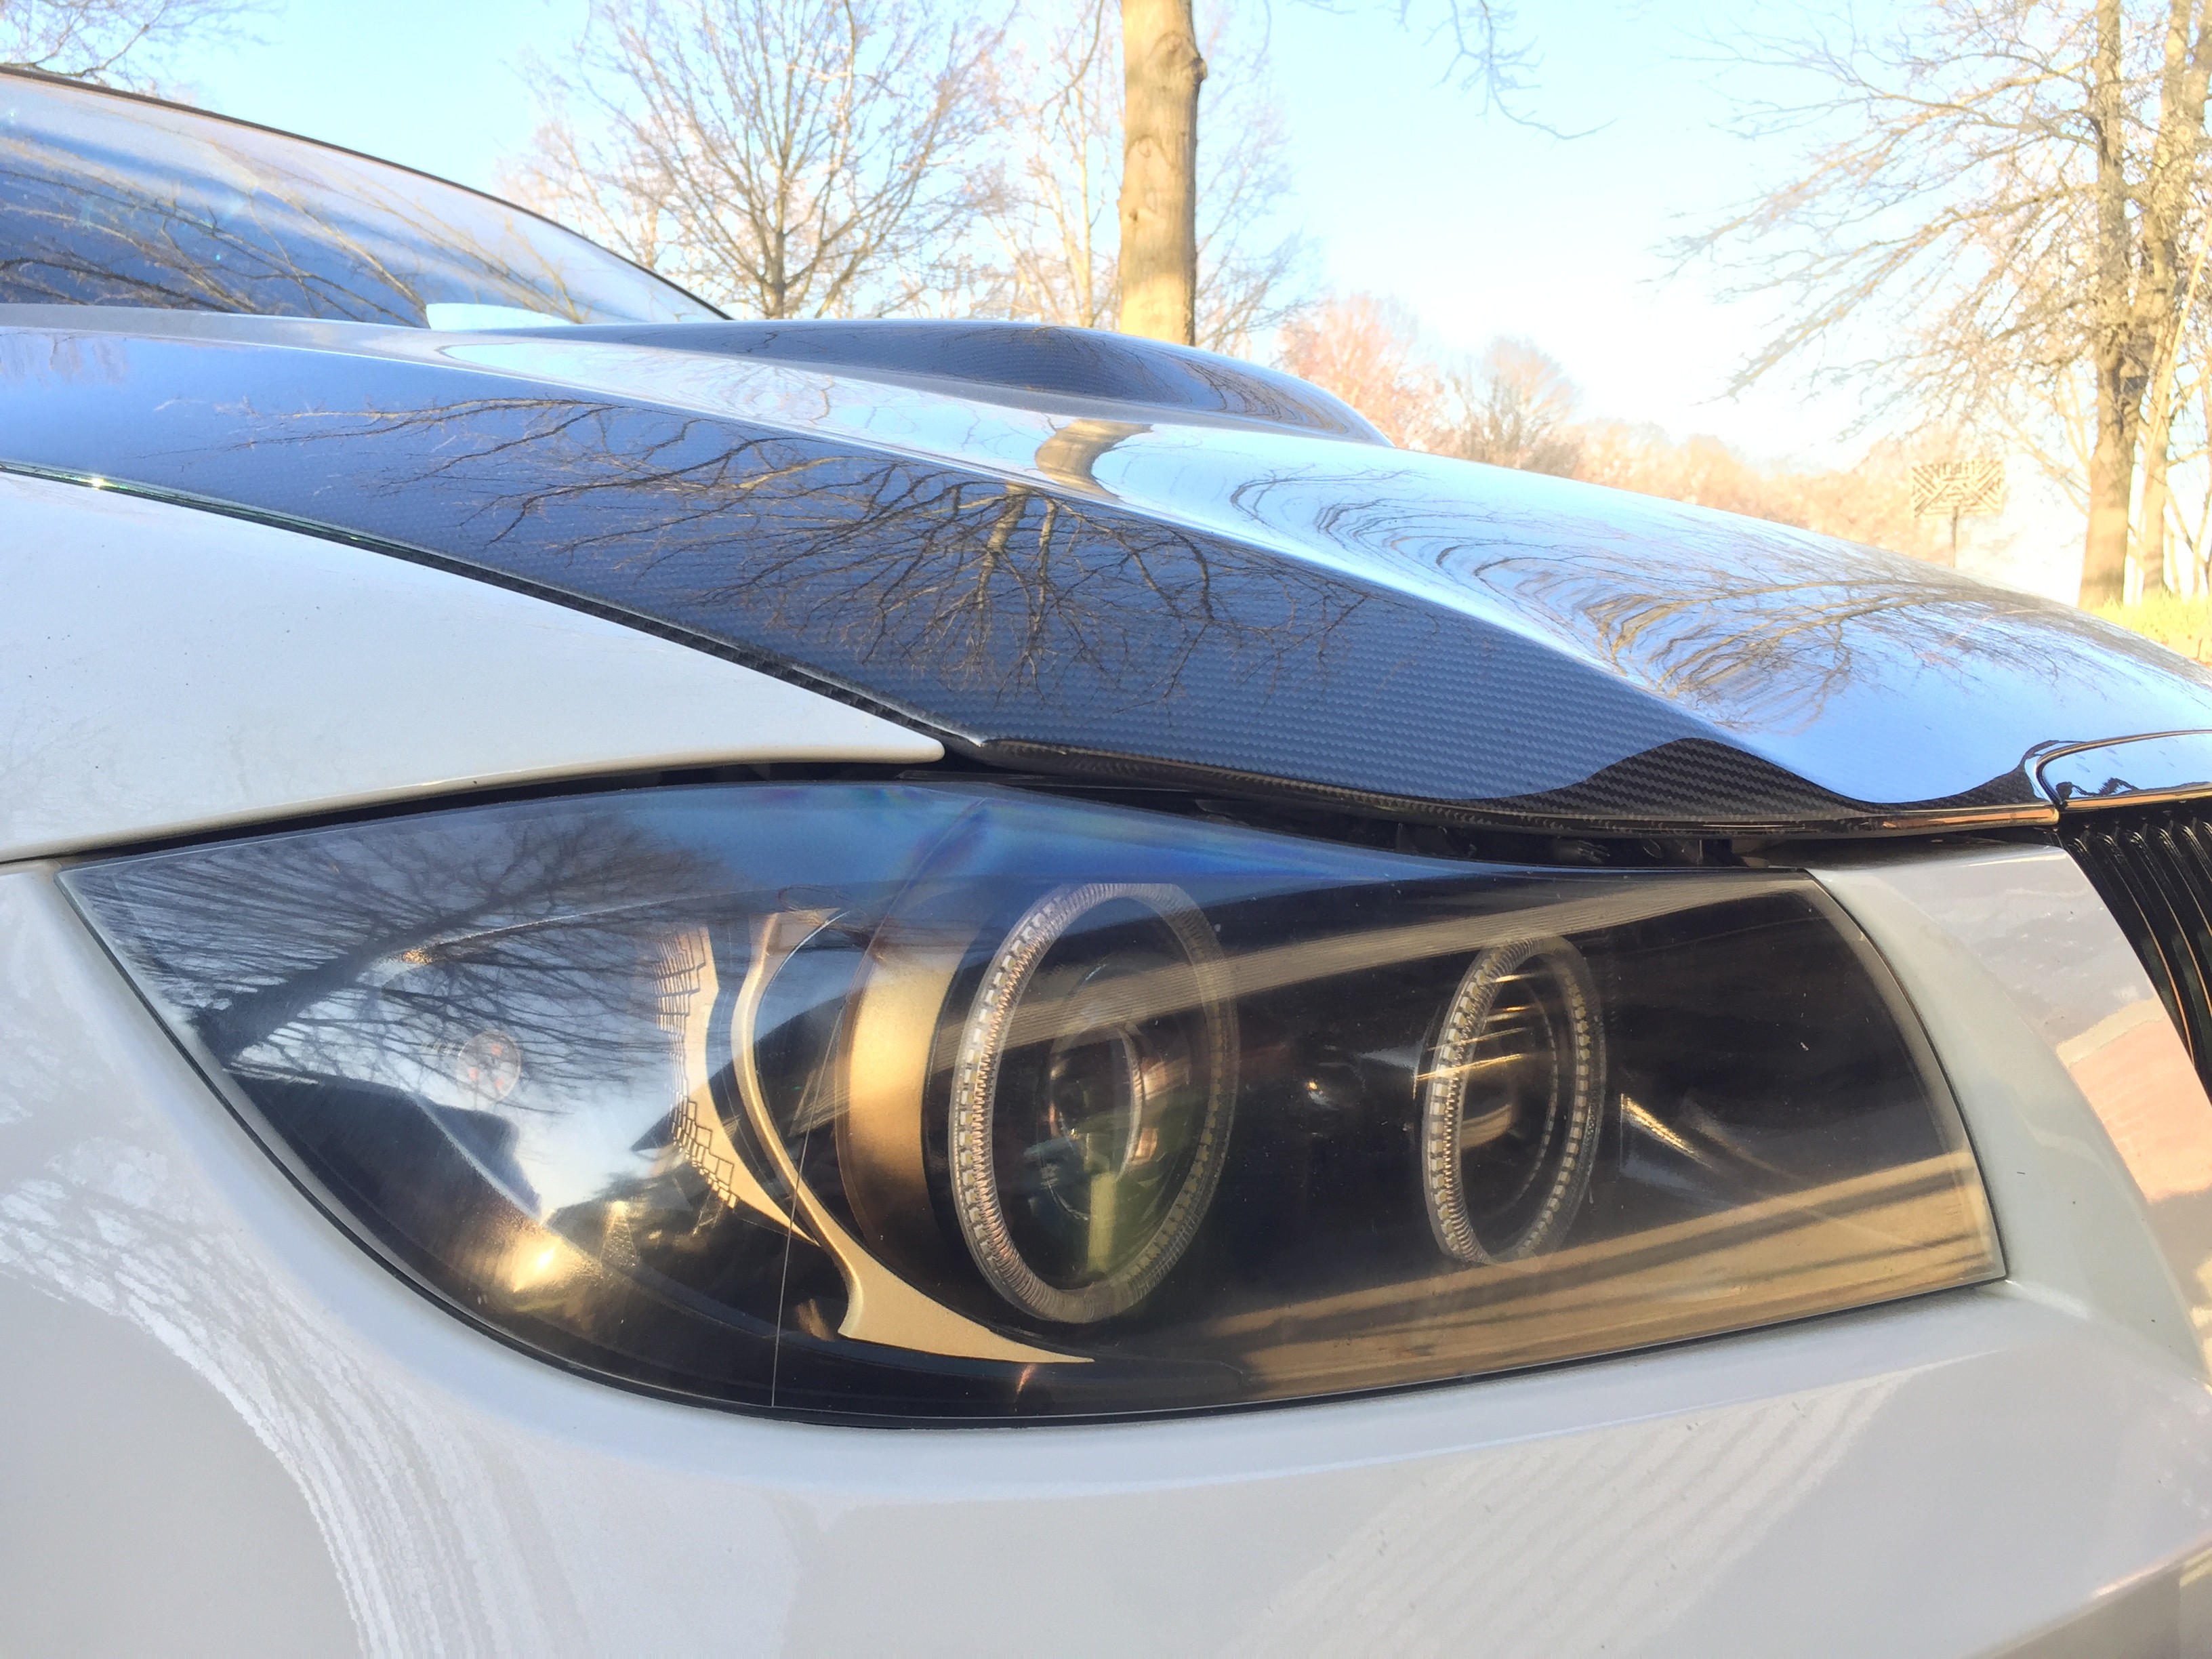  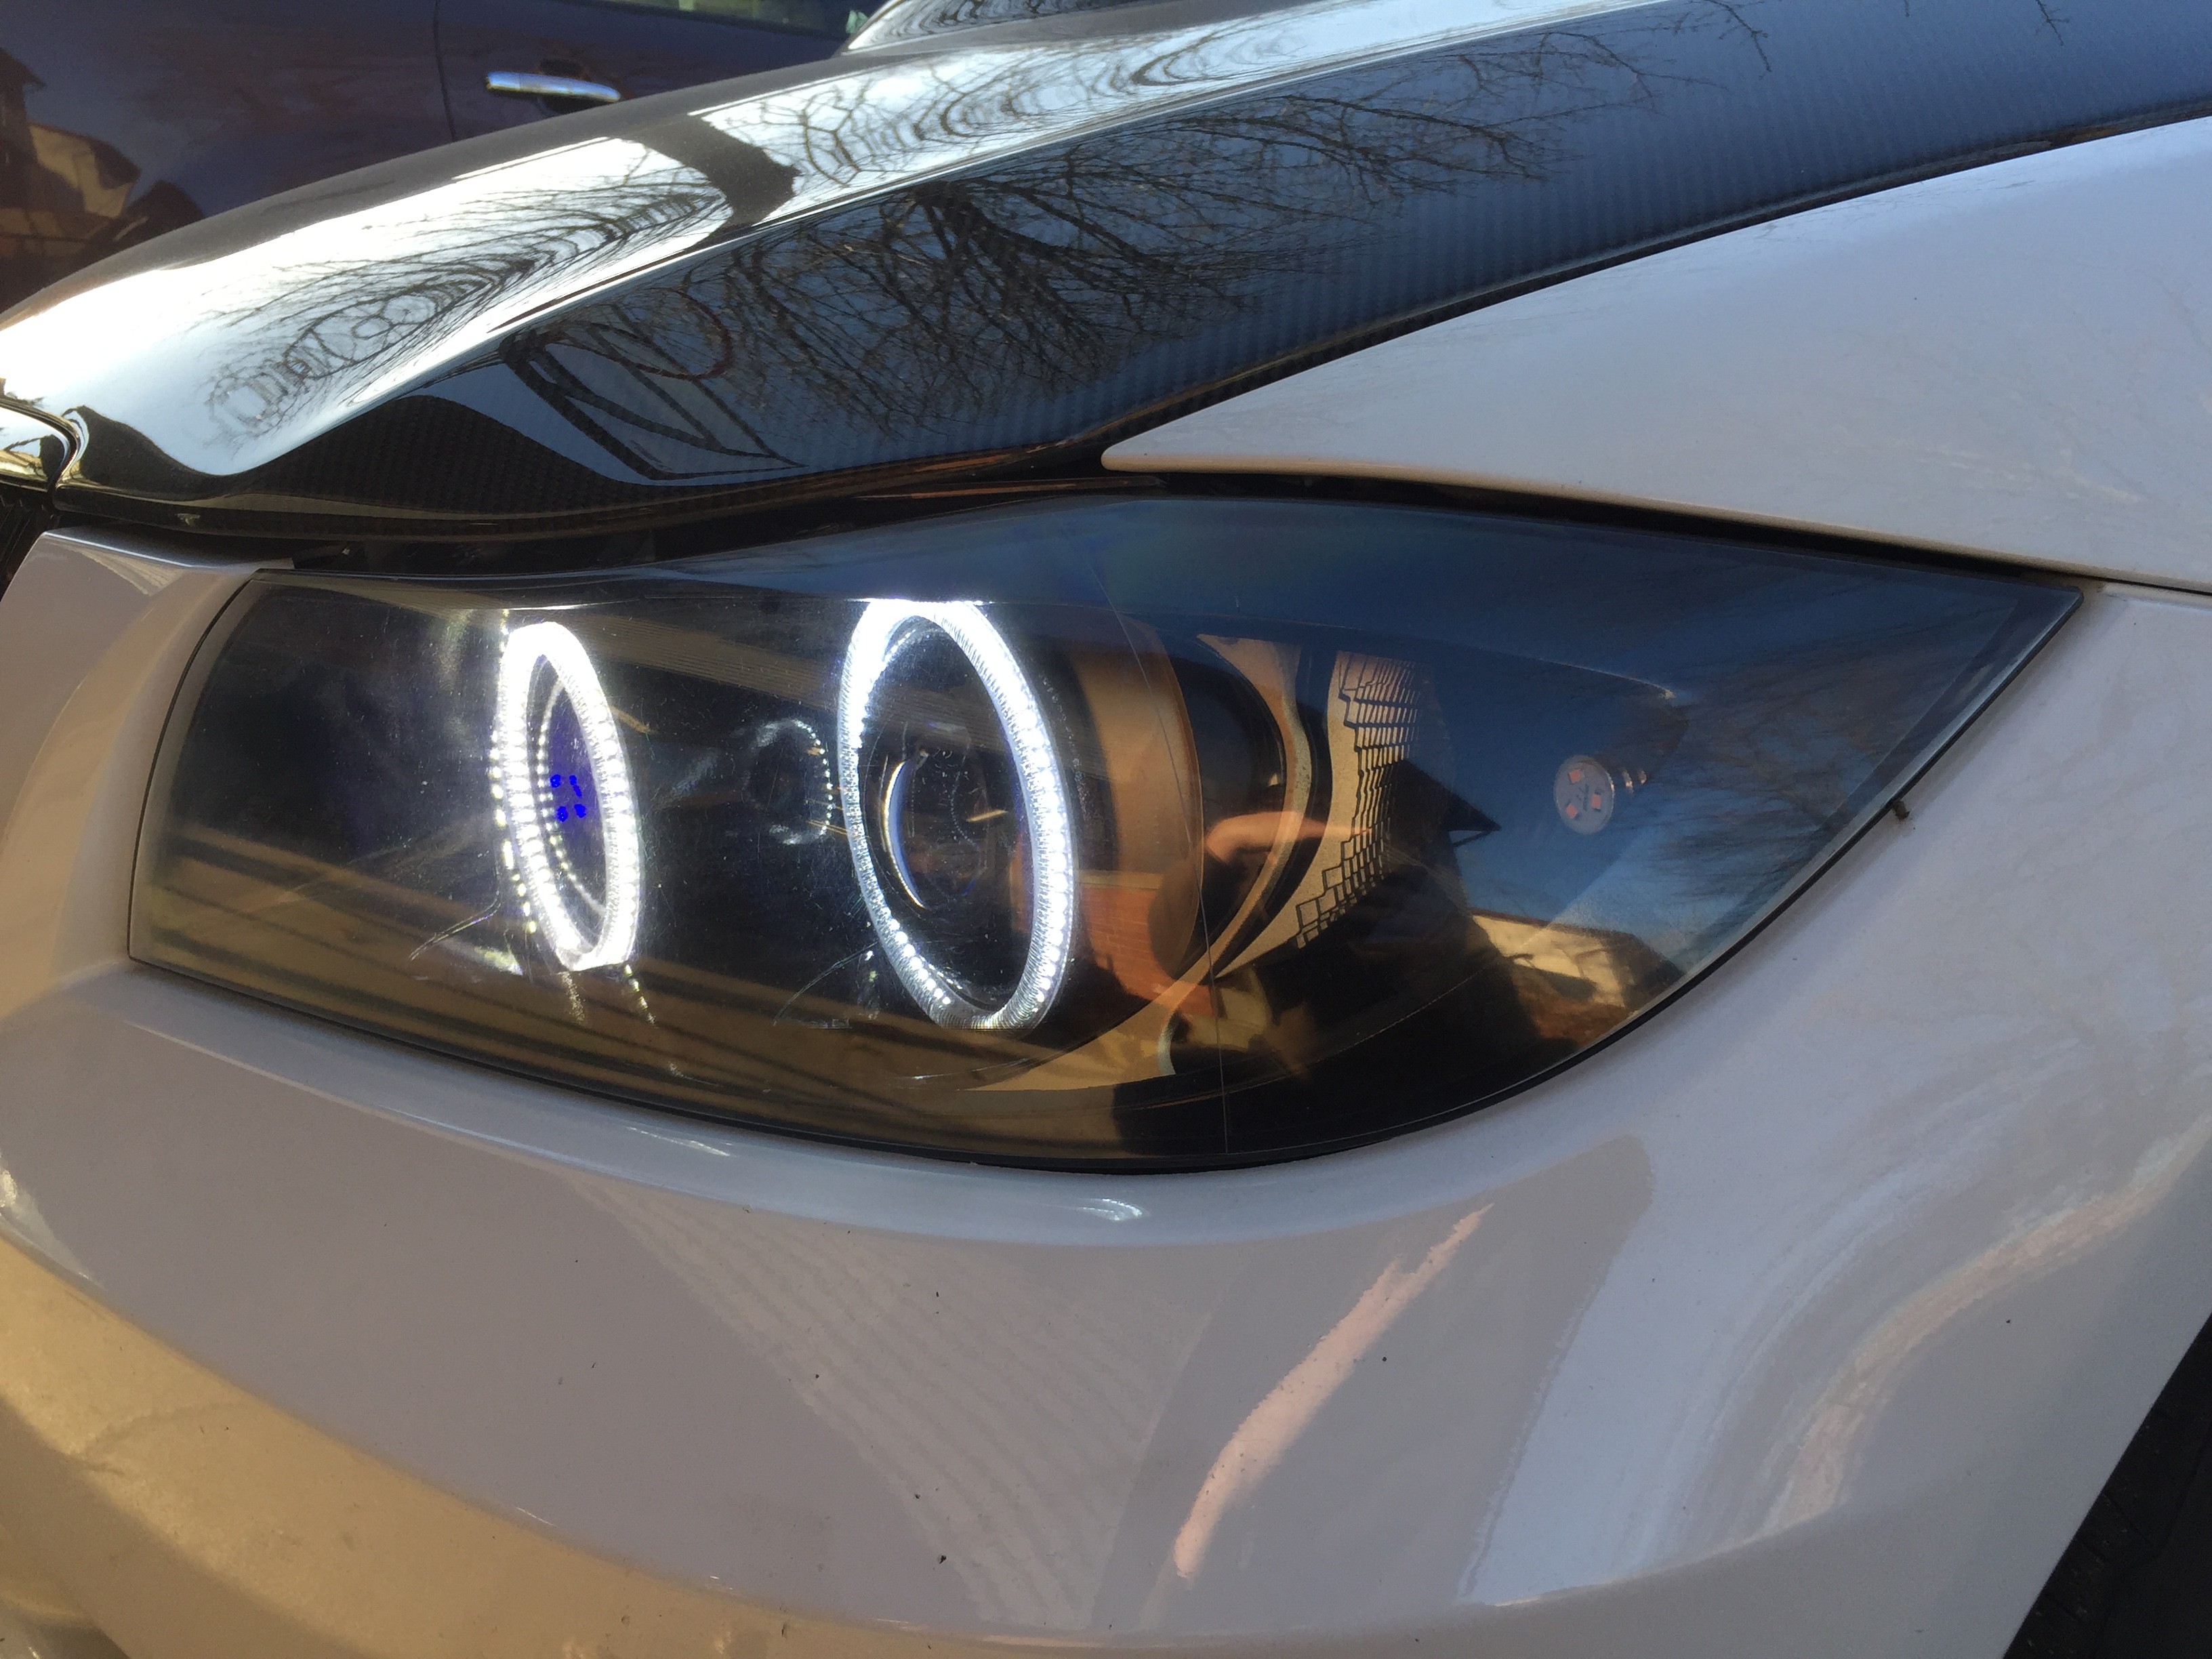 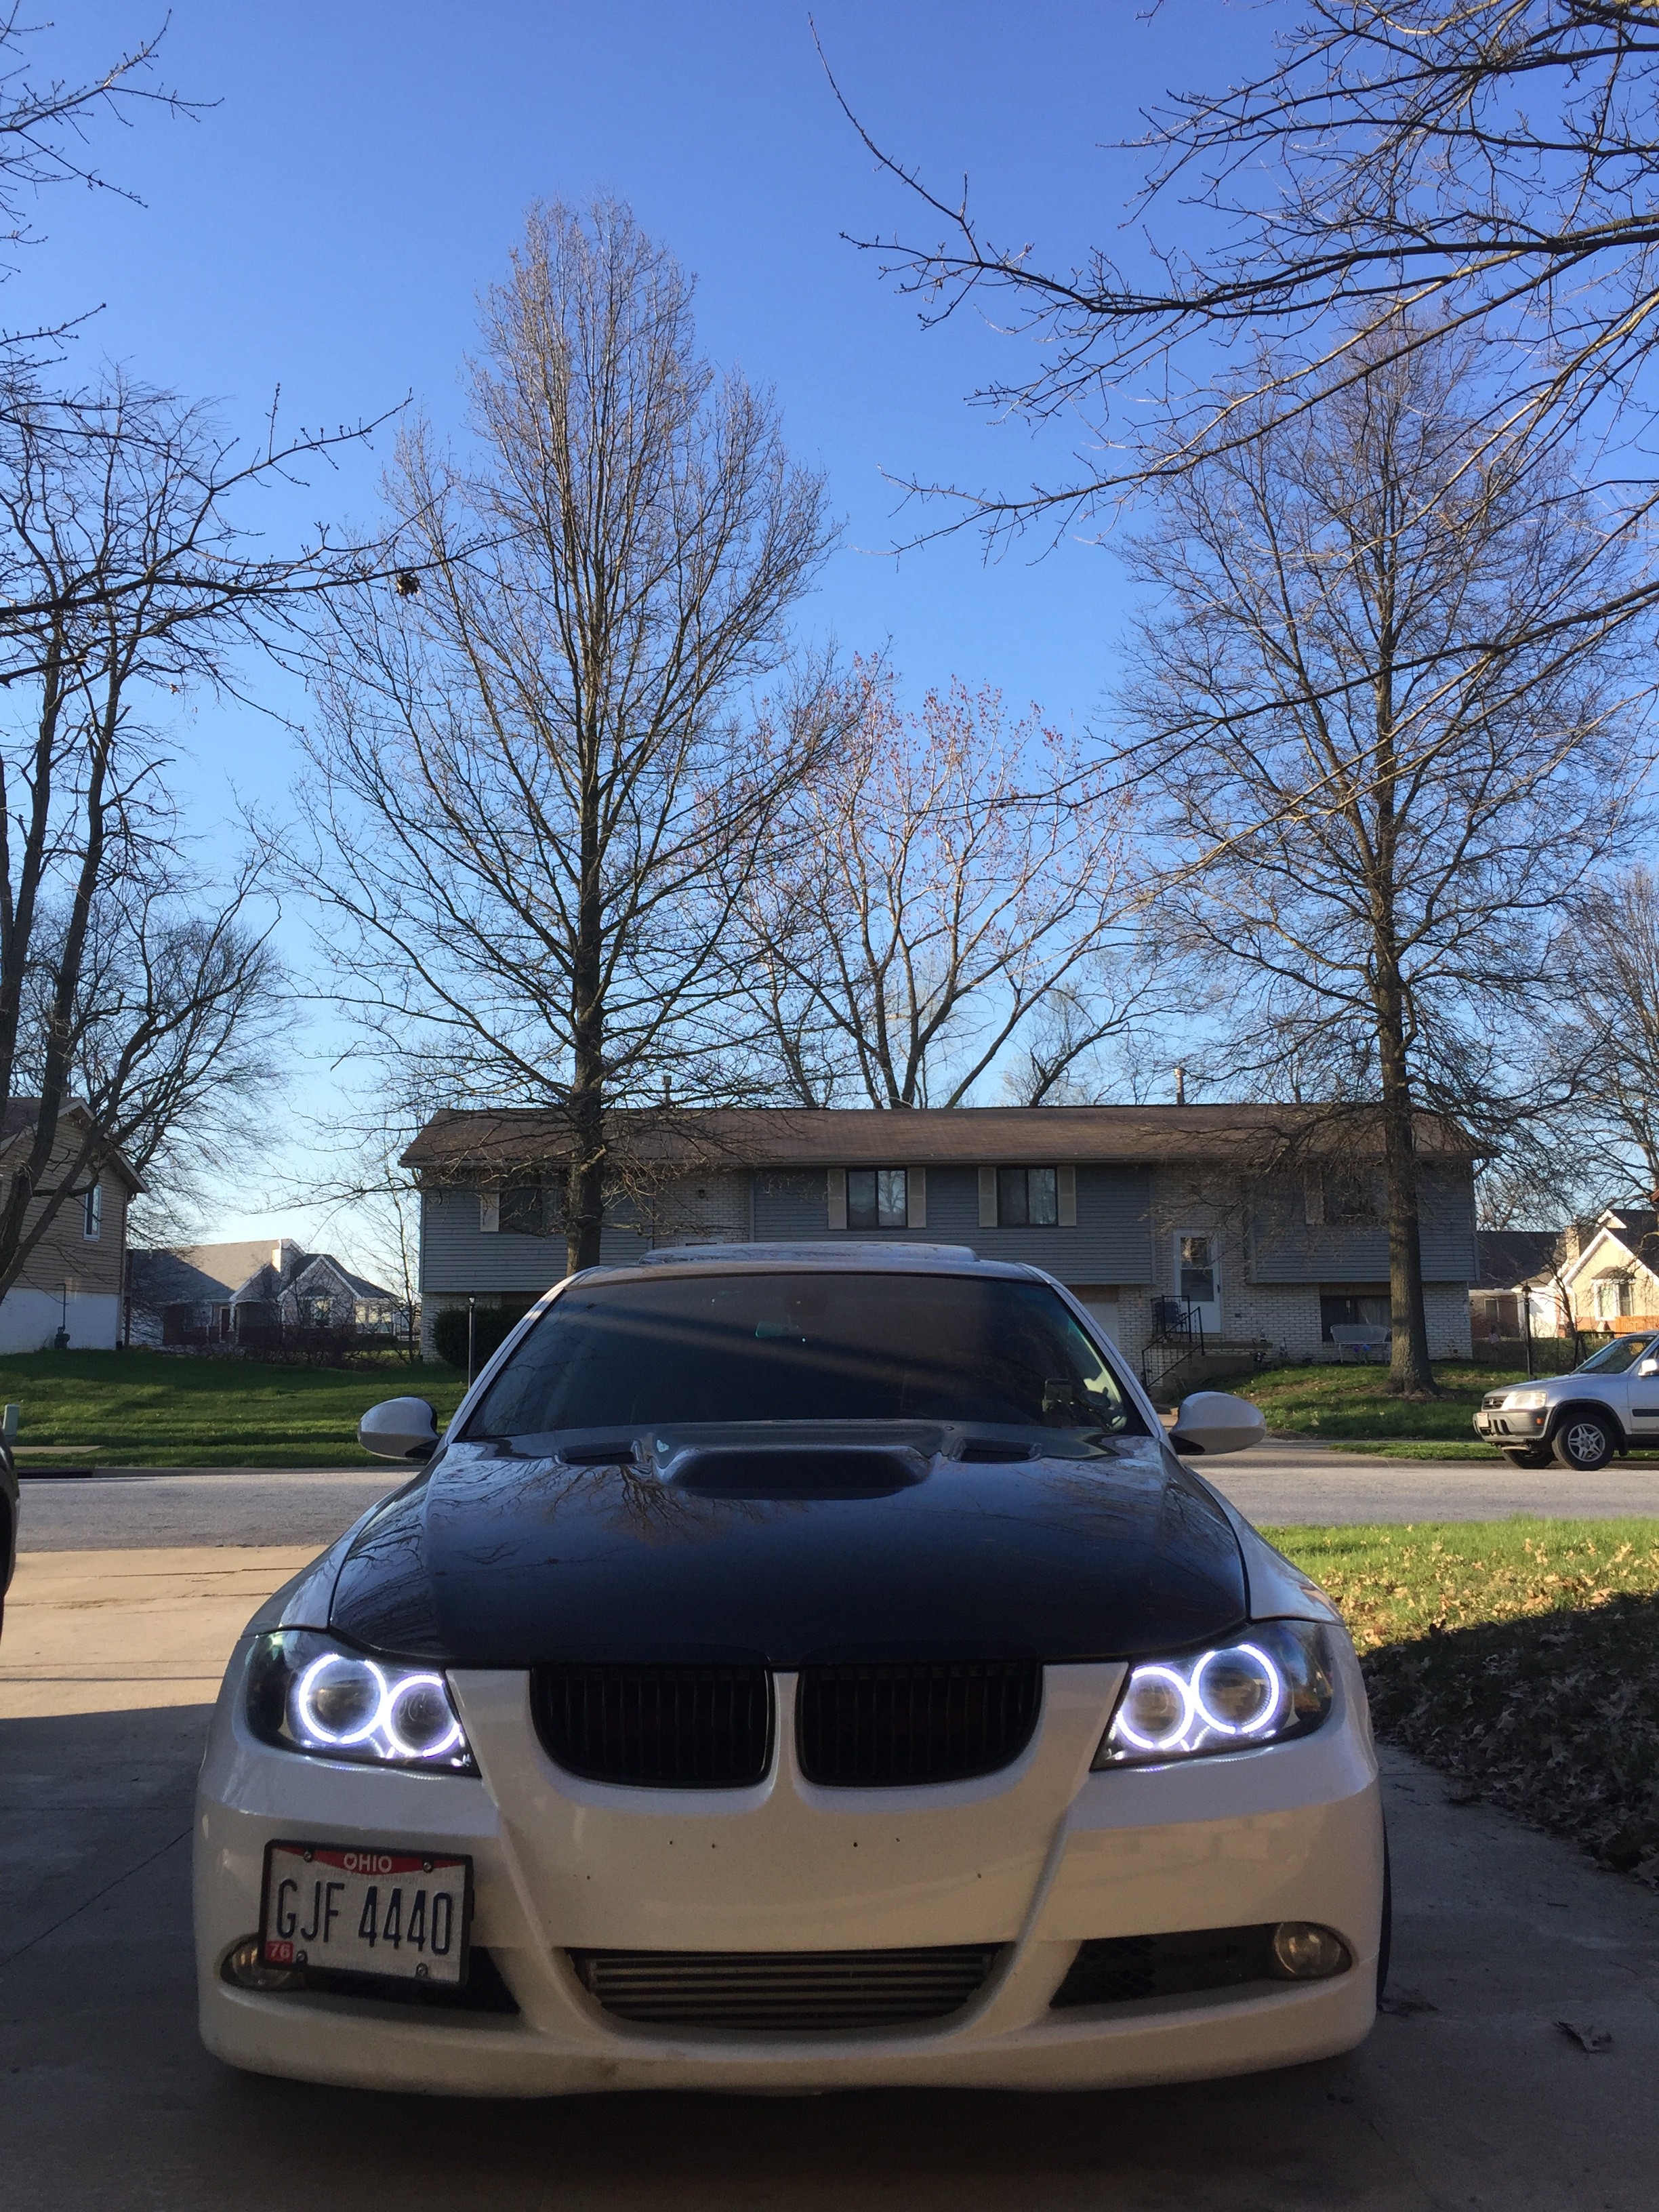 Next thing I did was small but annoying, my floor mats keep sliding forward. There was no real solution out there for the screw in style hooks (just velcro options??) so I made my own The mats now are quite literally screwed into the floor anchors 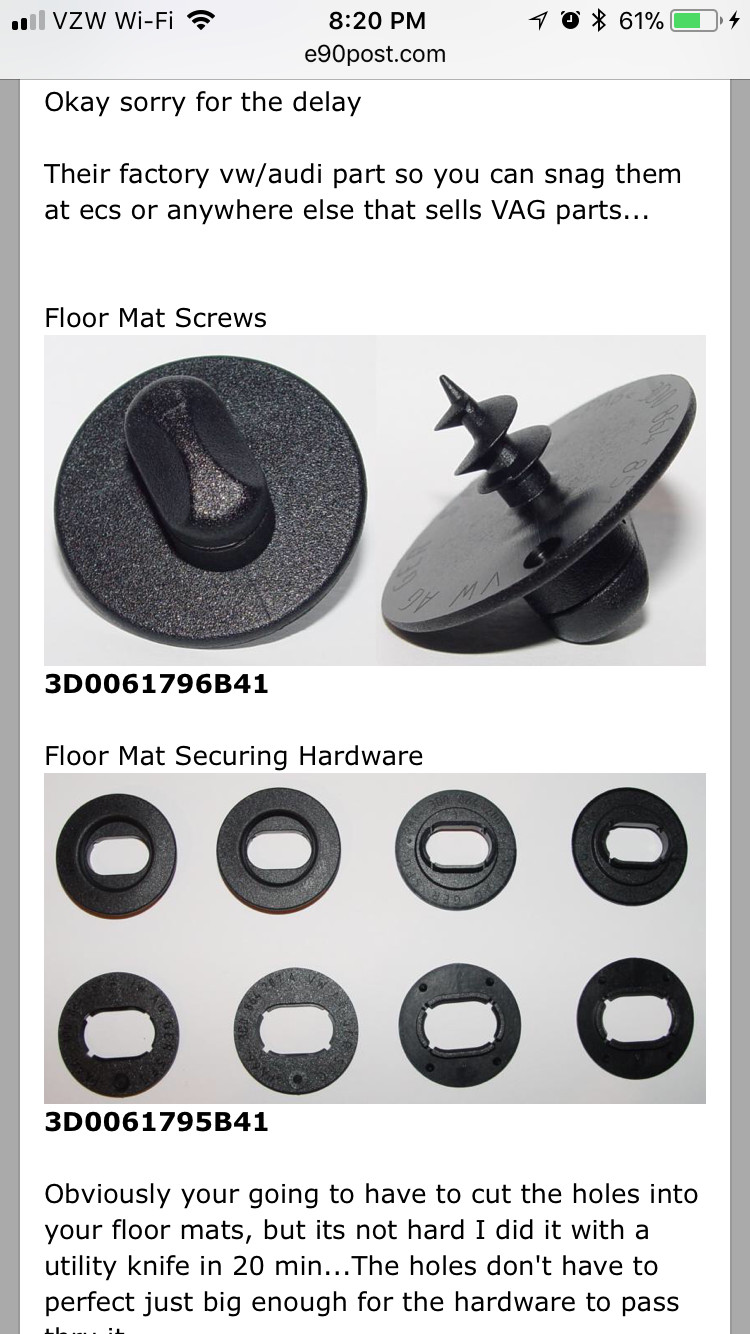  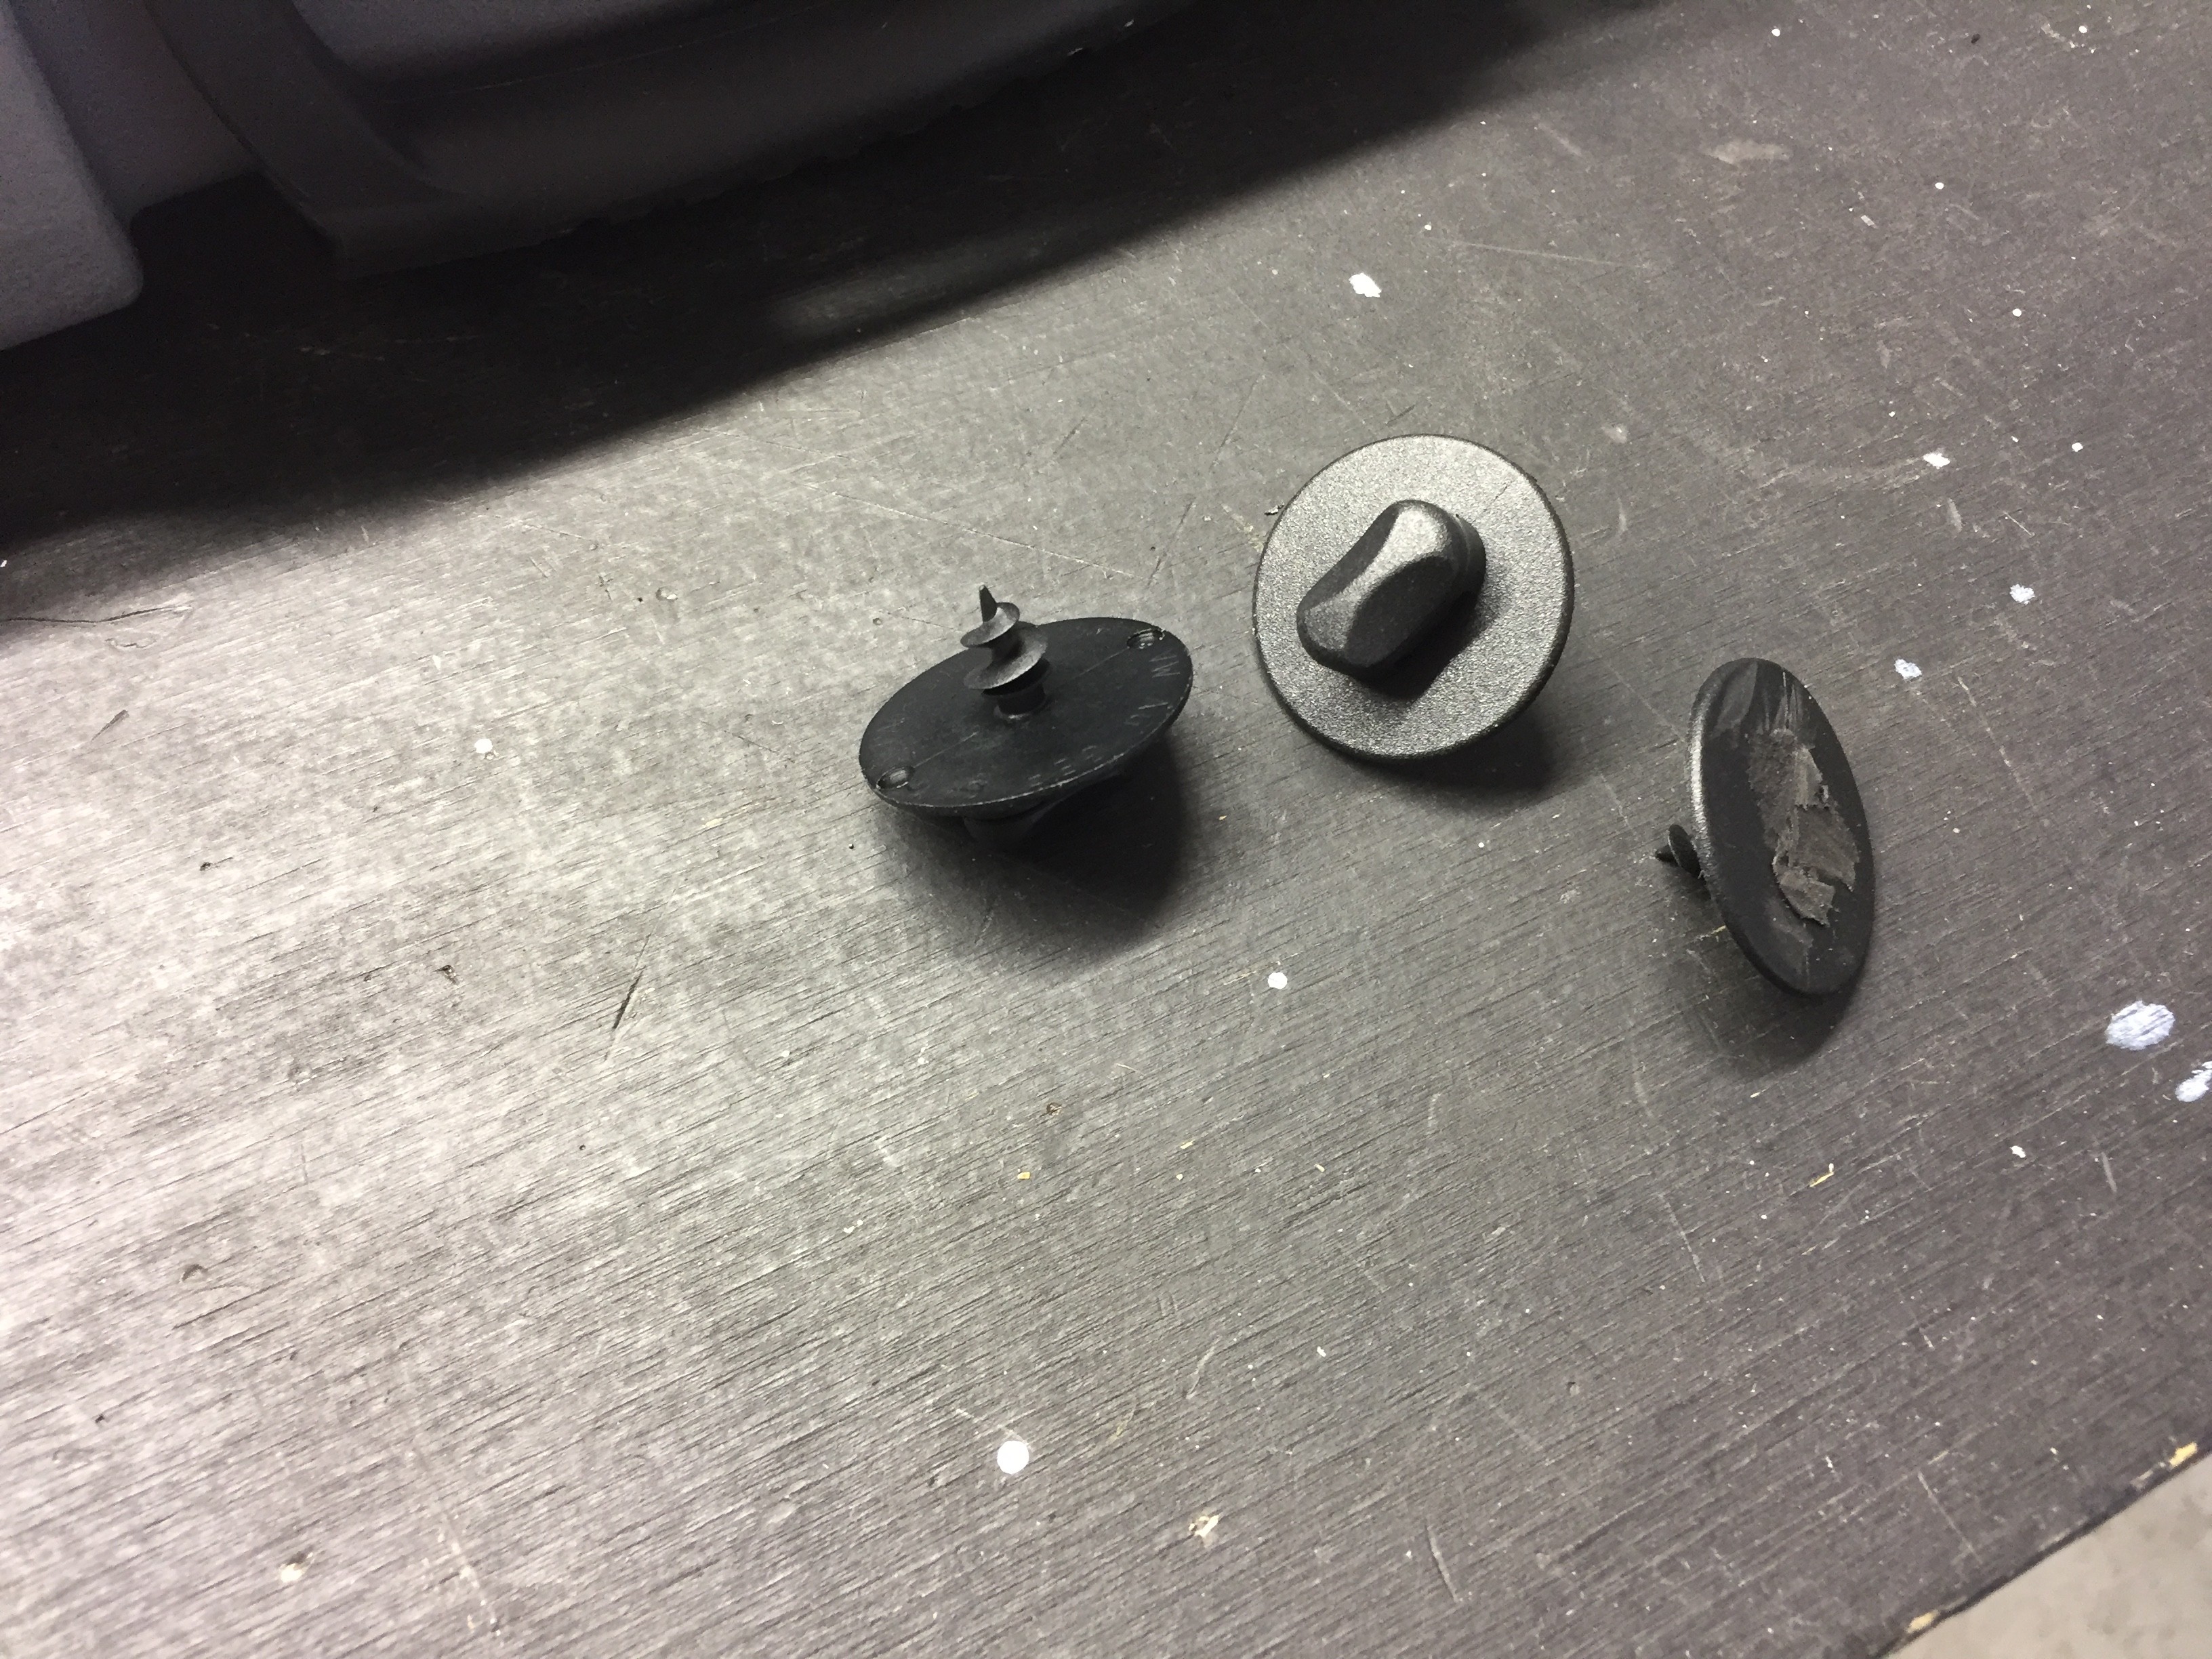  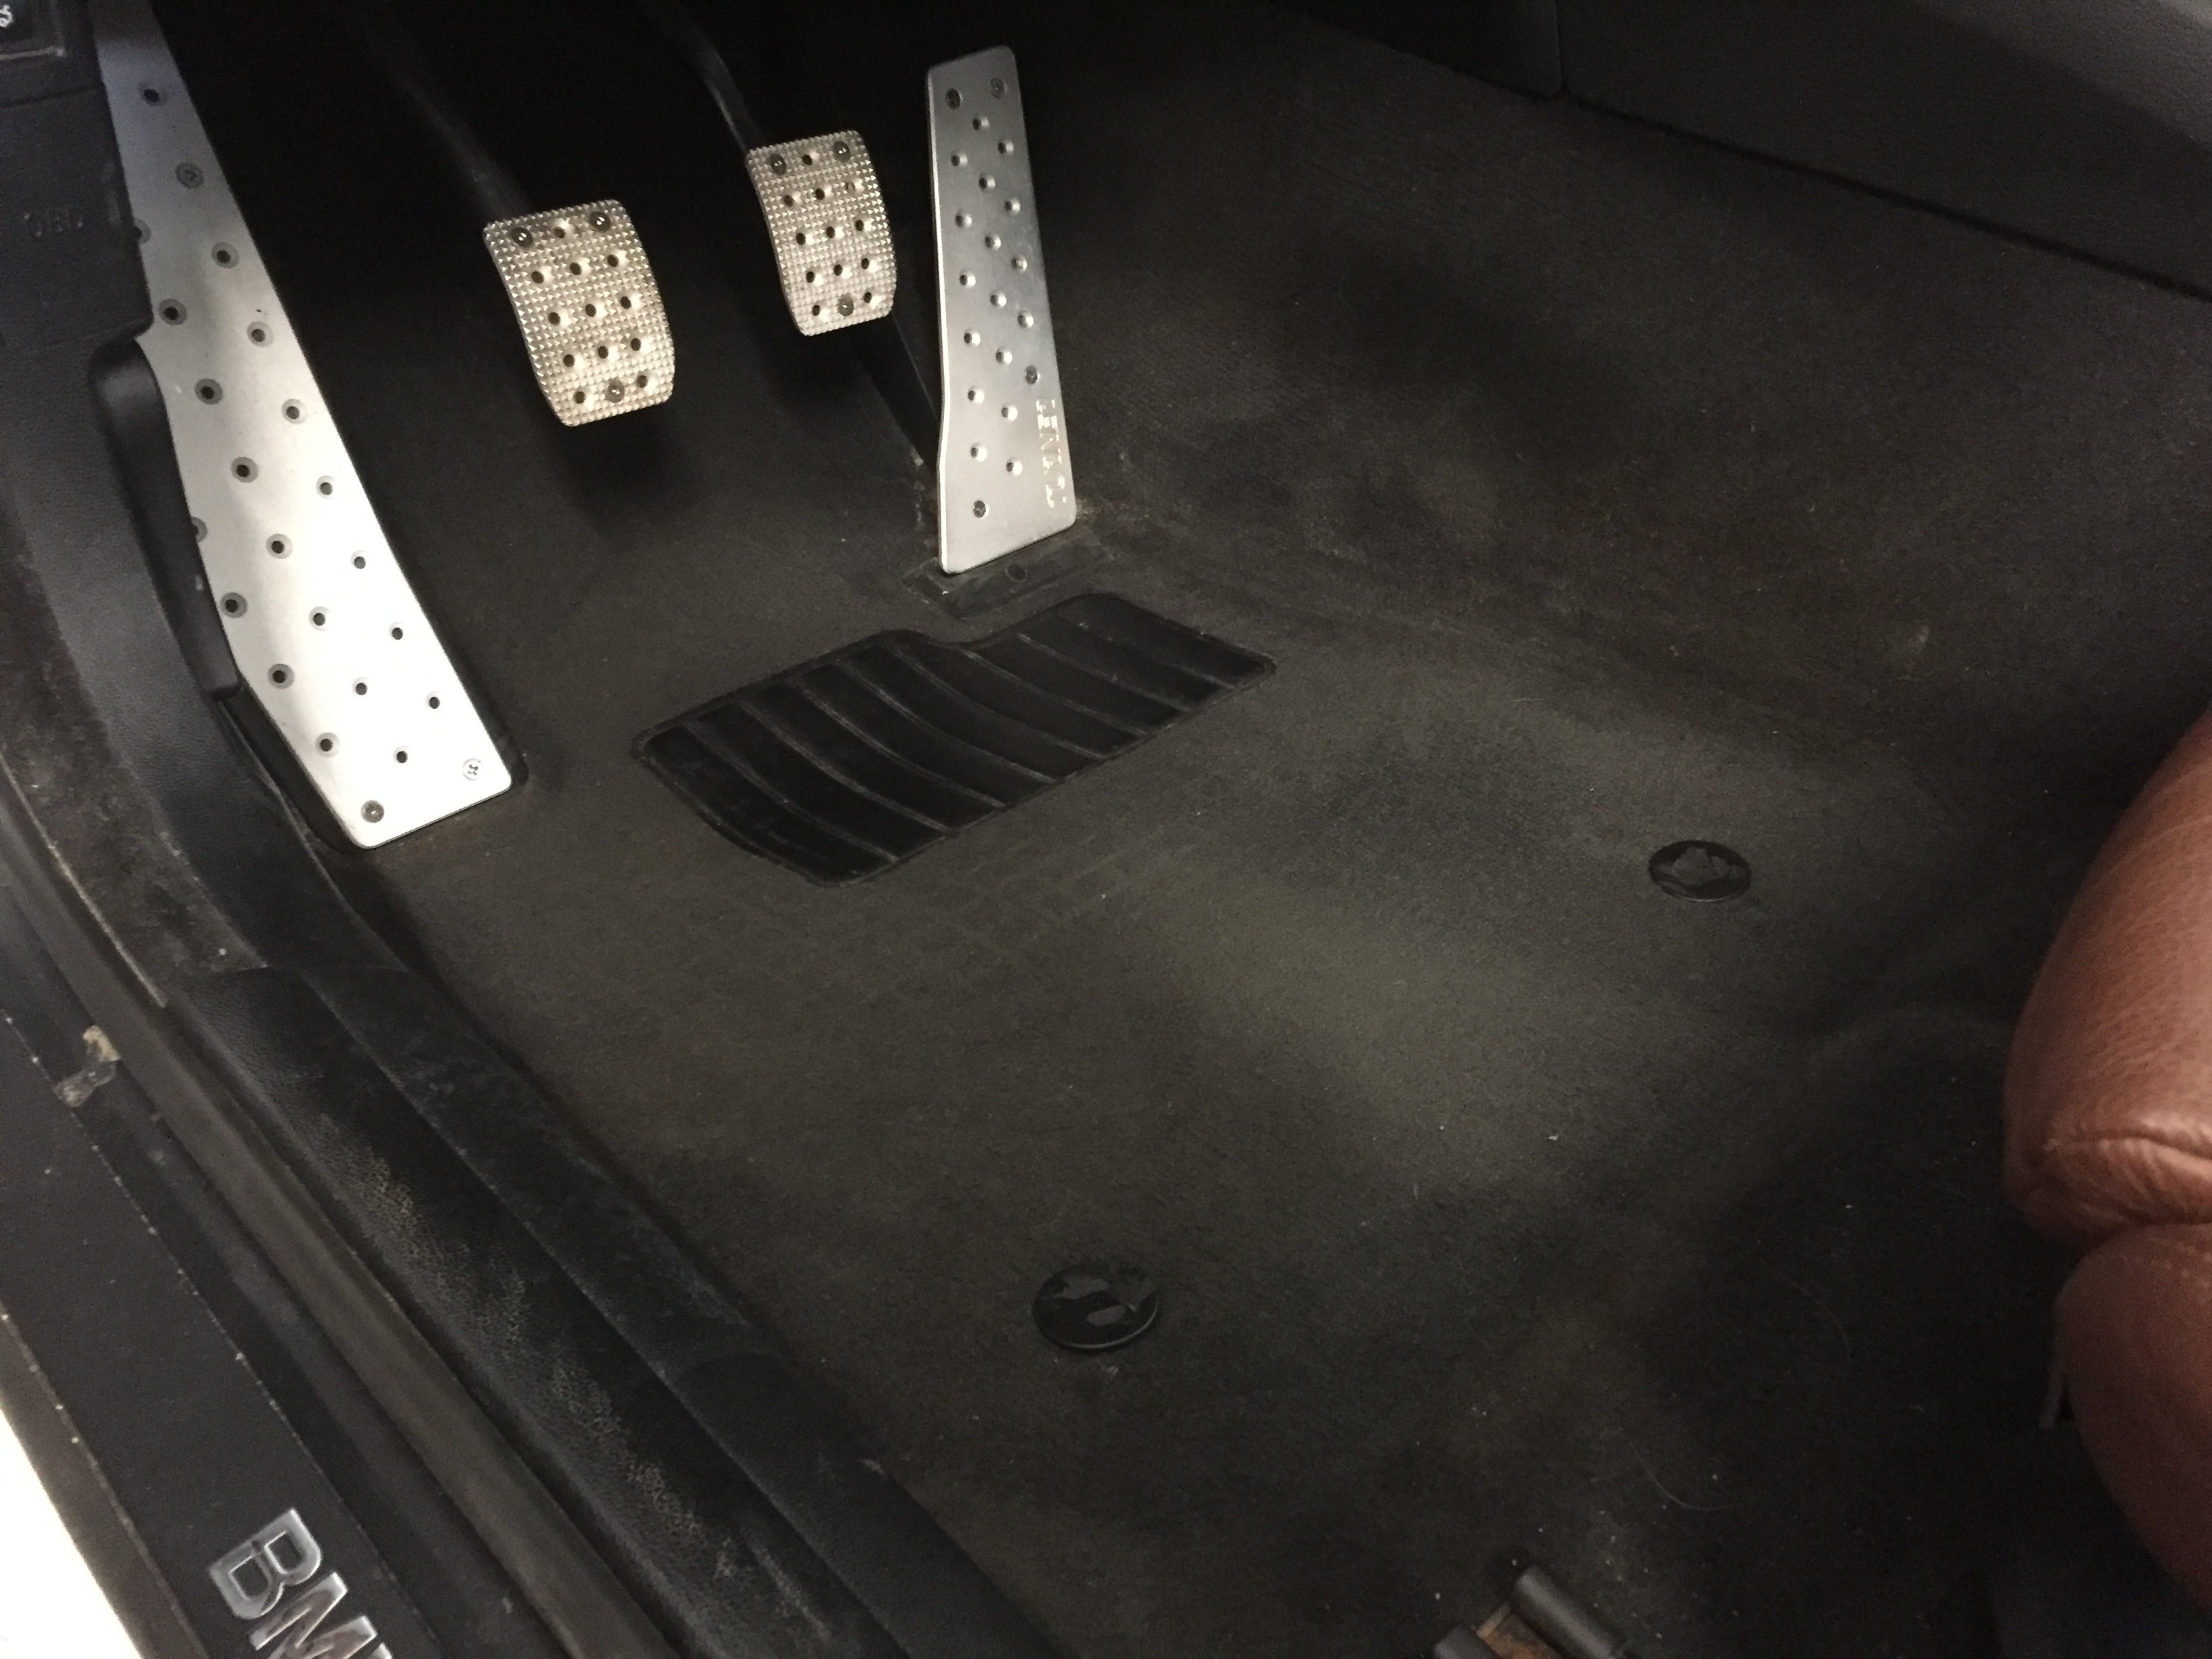 ------ Comments ------ Next up is the fender shaving project. Naturally I had to get a bunch of tools  and off to the races and off to the races 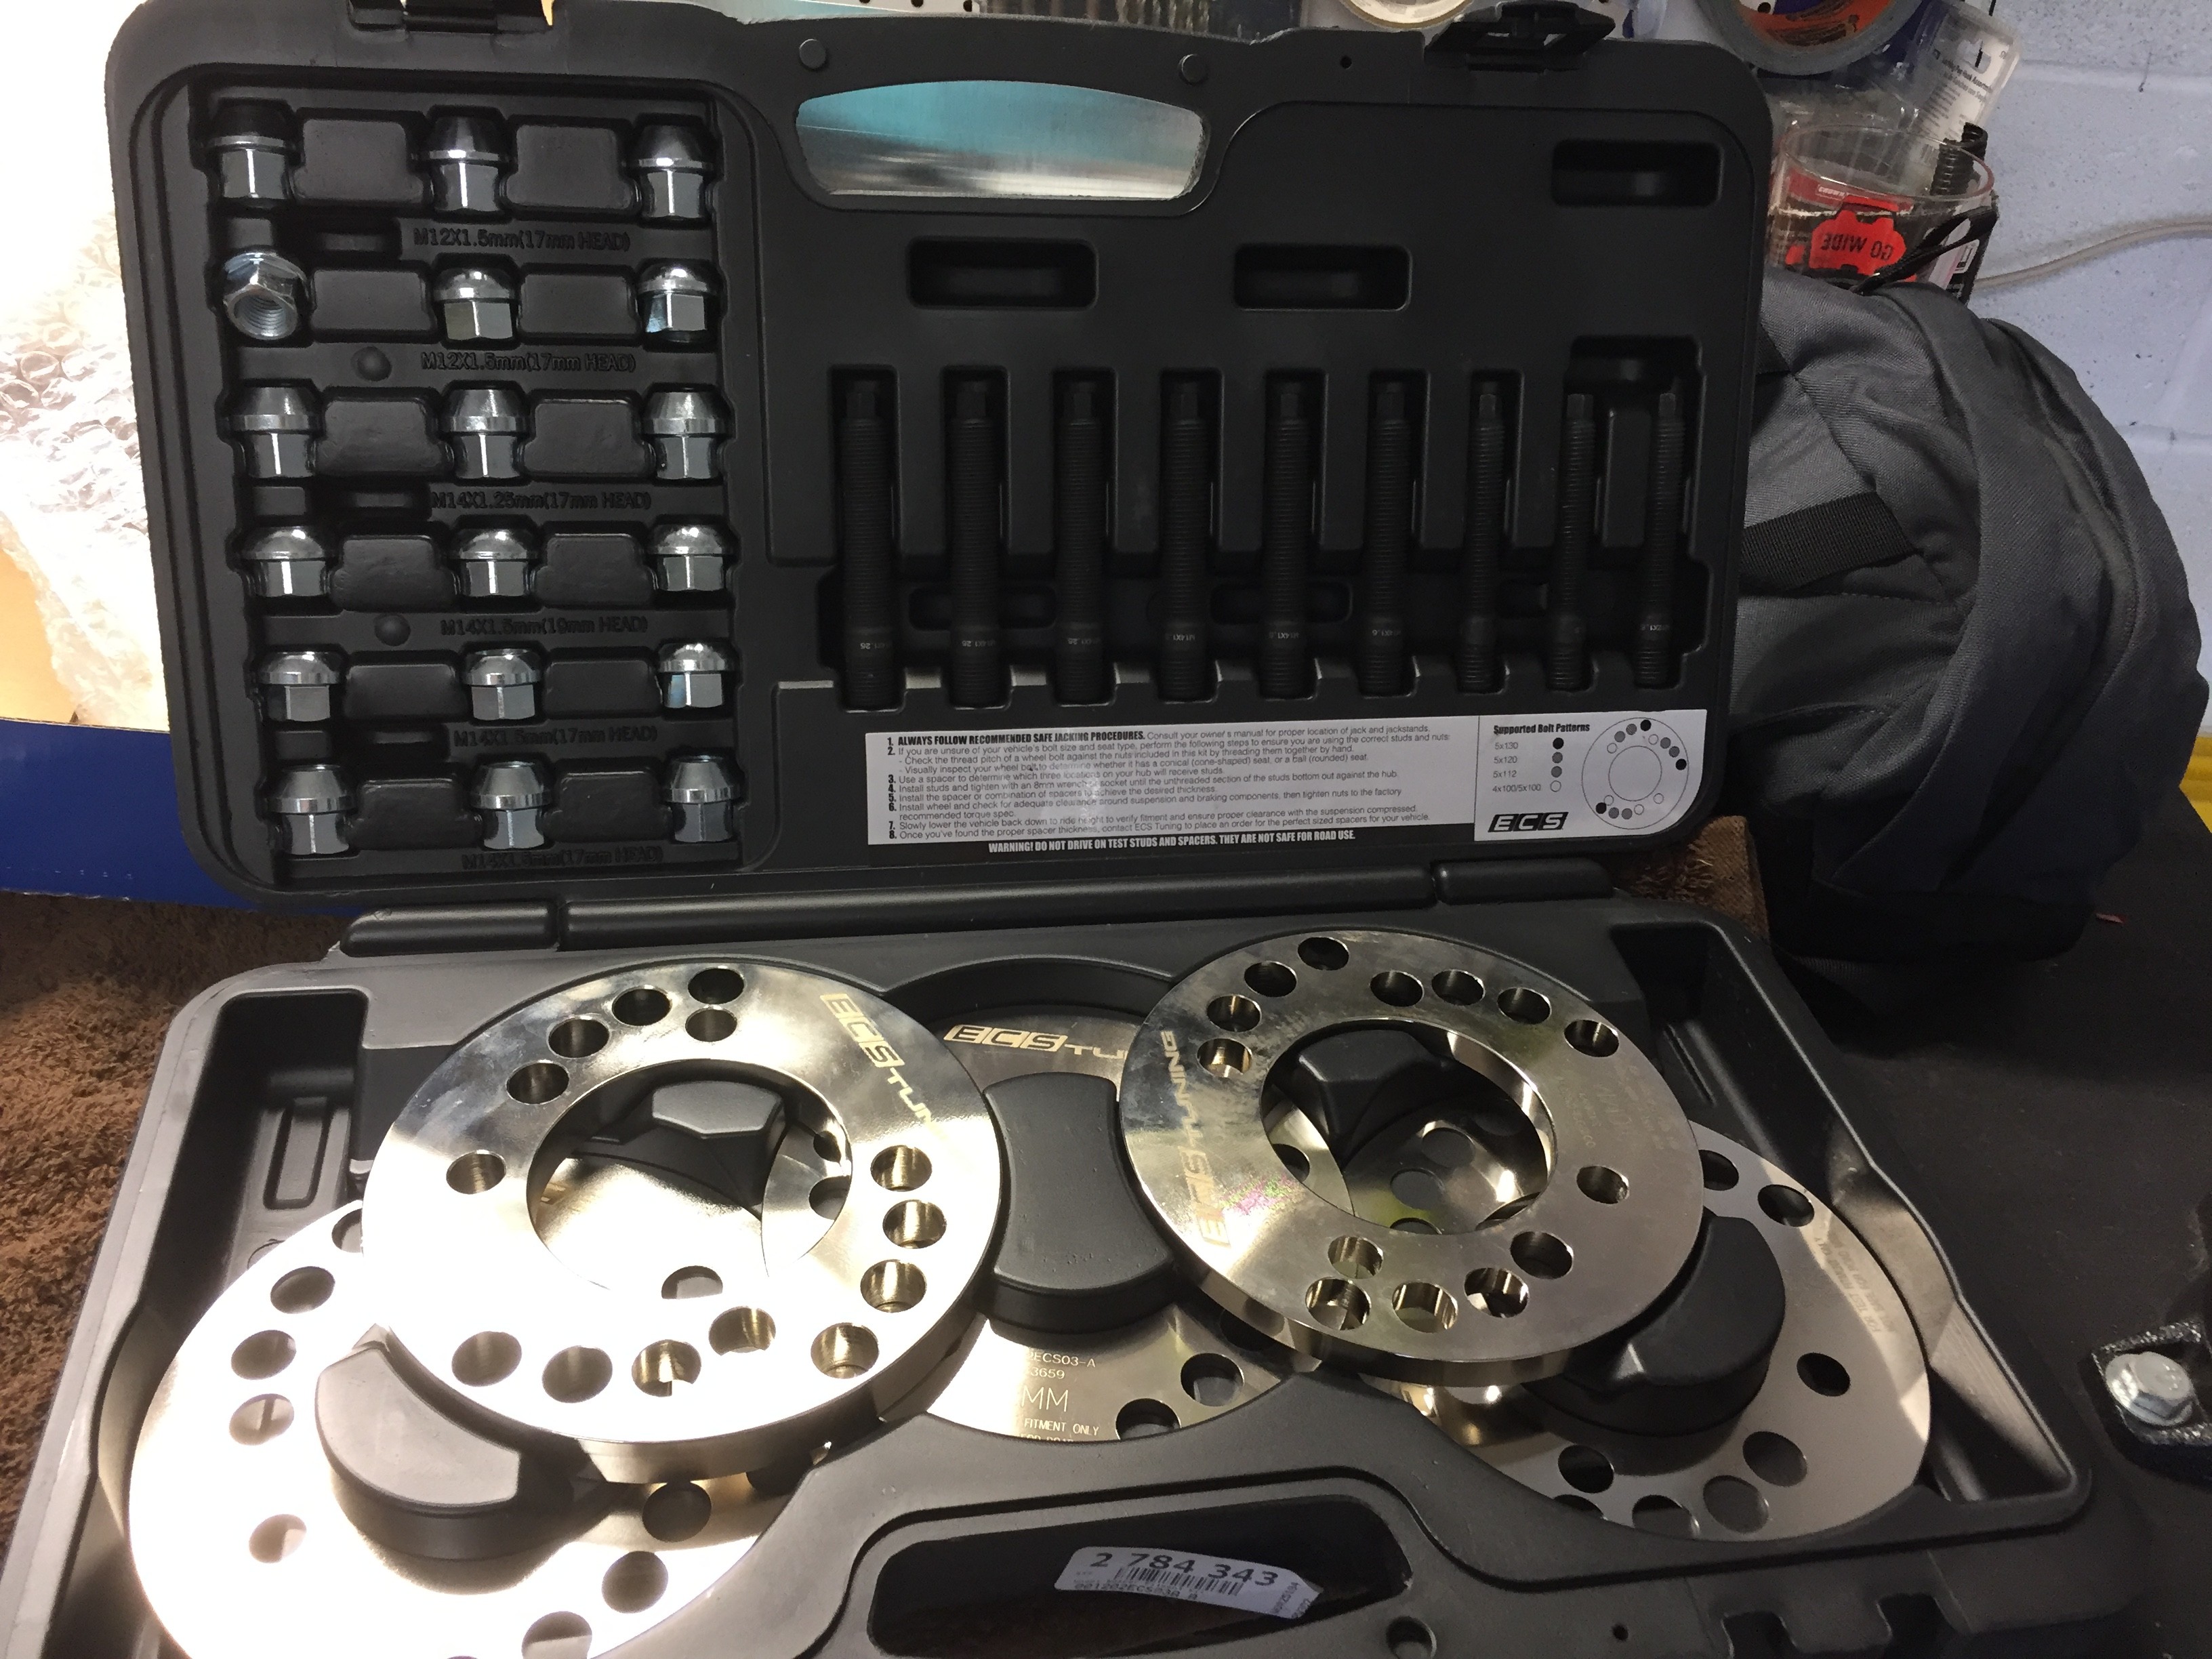  Before and after measurement   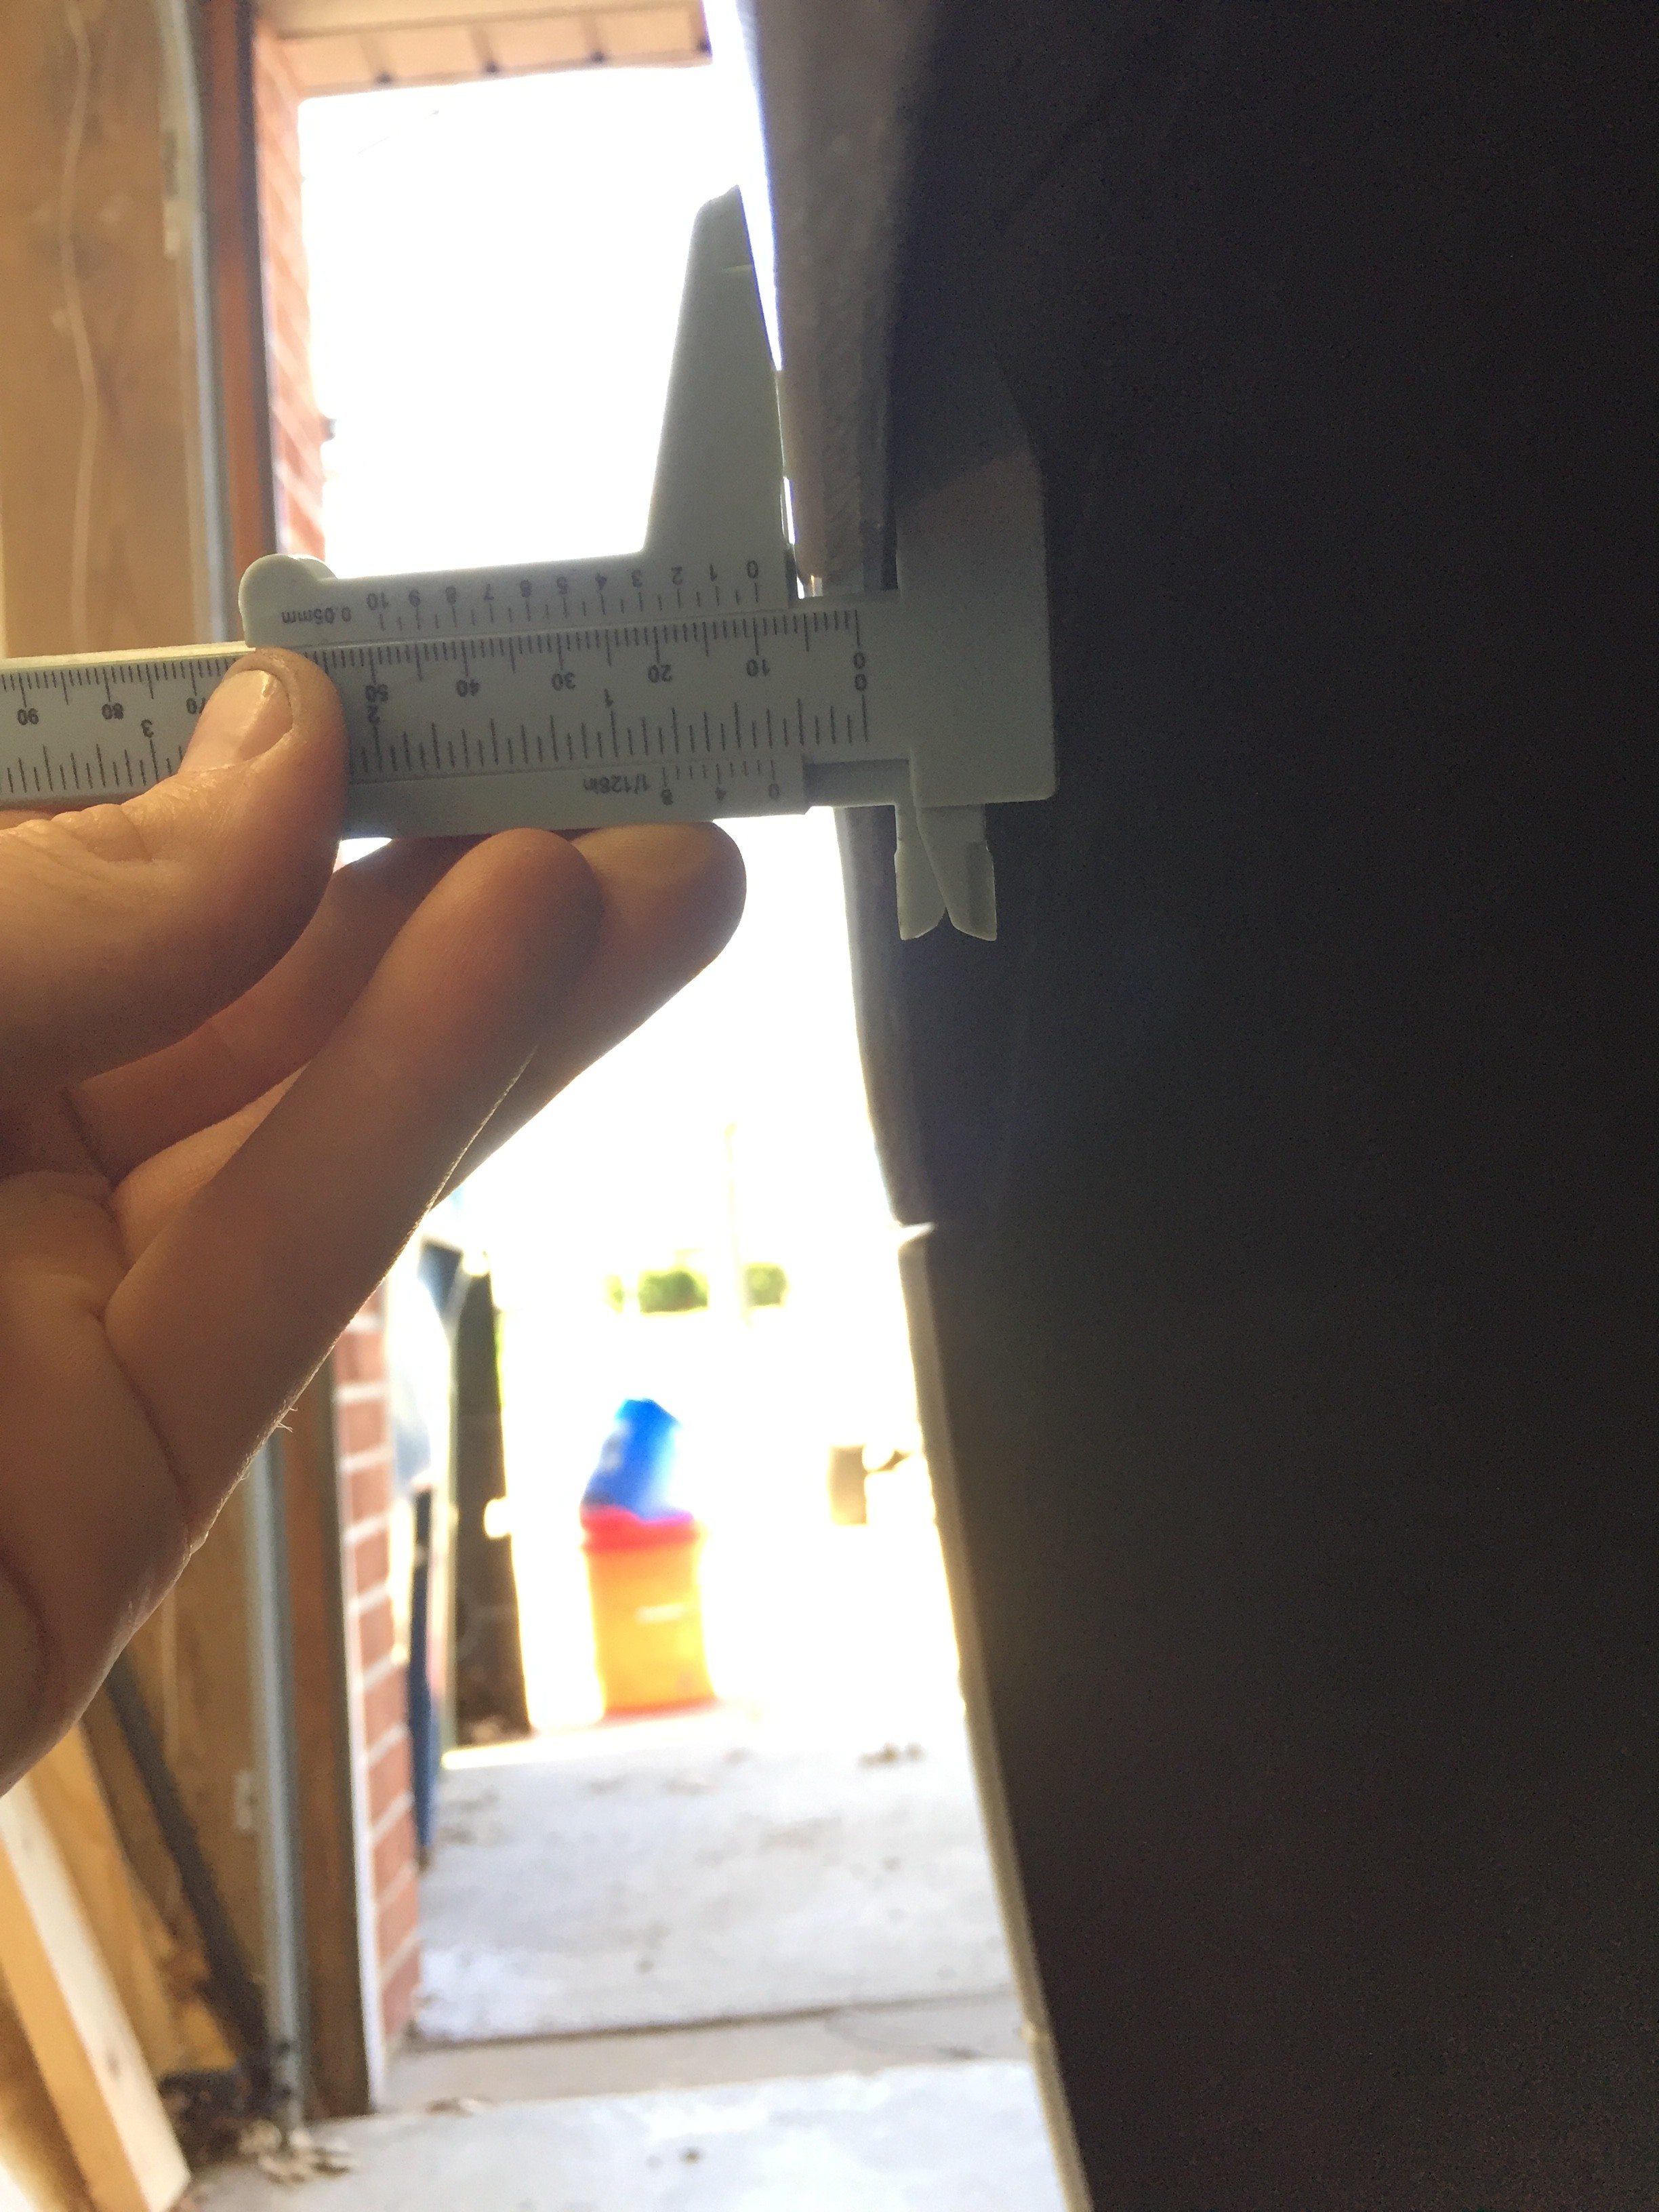 First I marked where I would be cutting the fender, then cut back the liner. 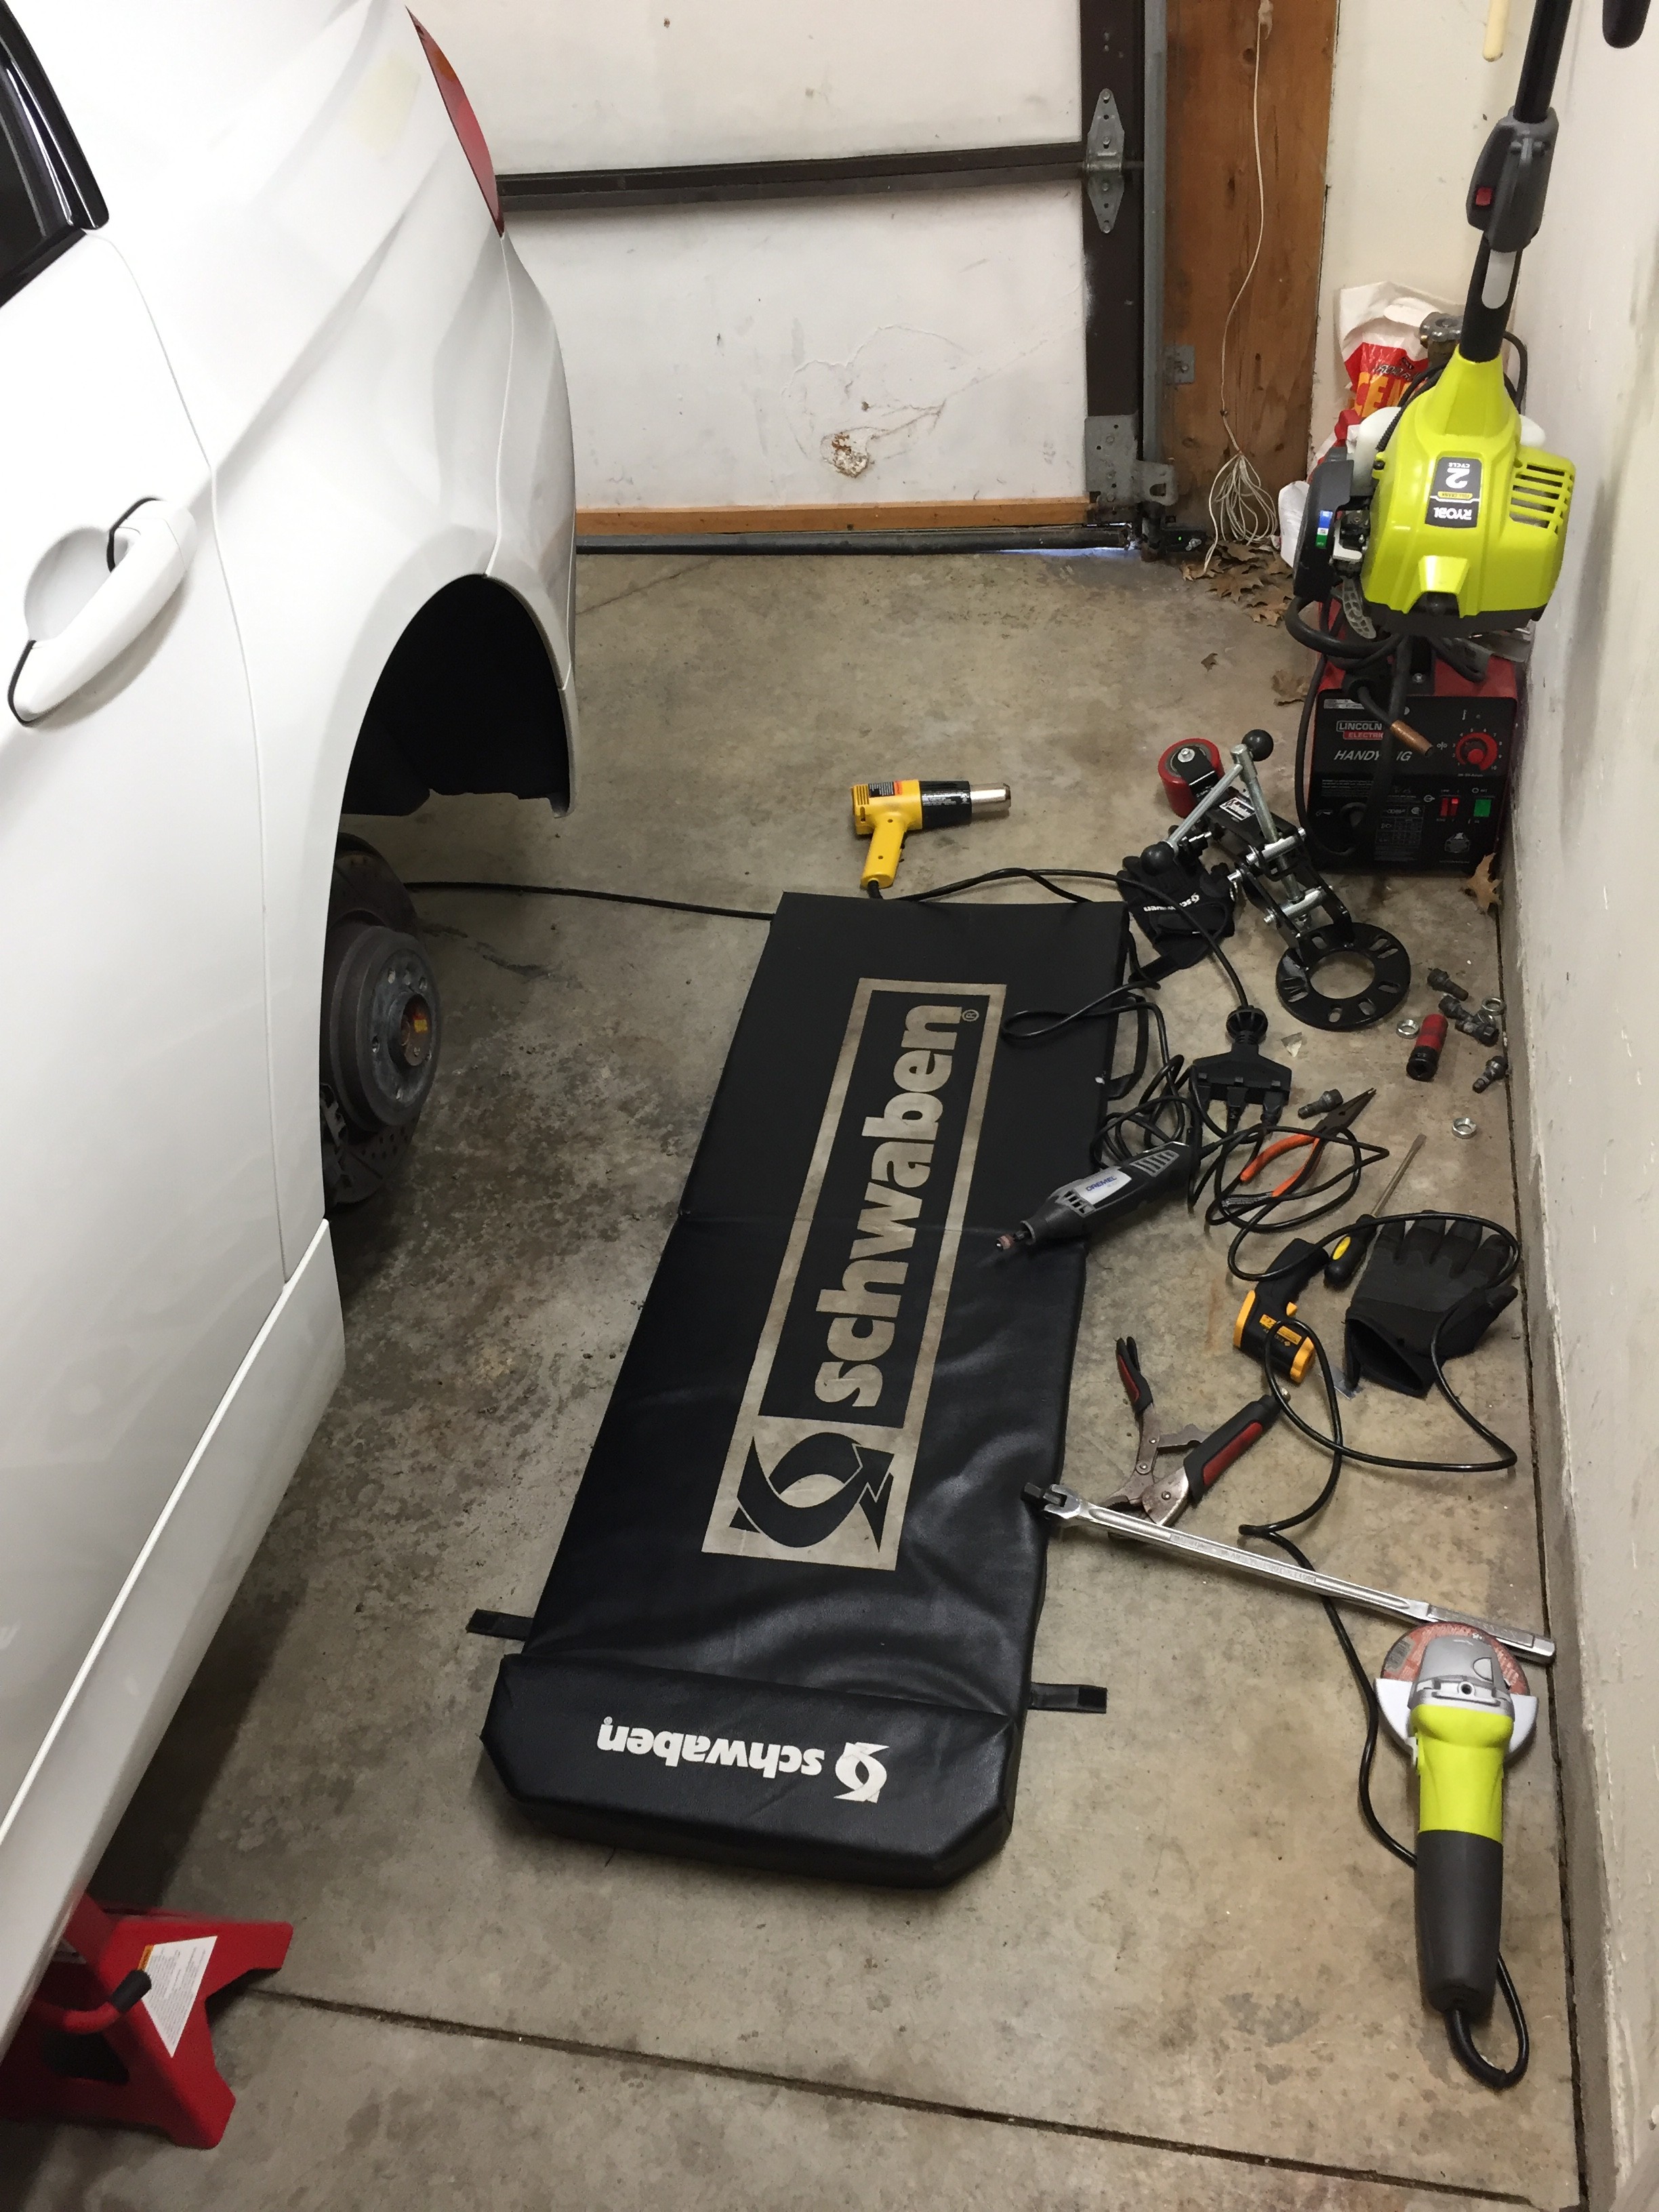 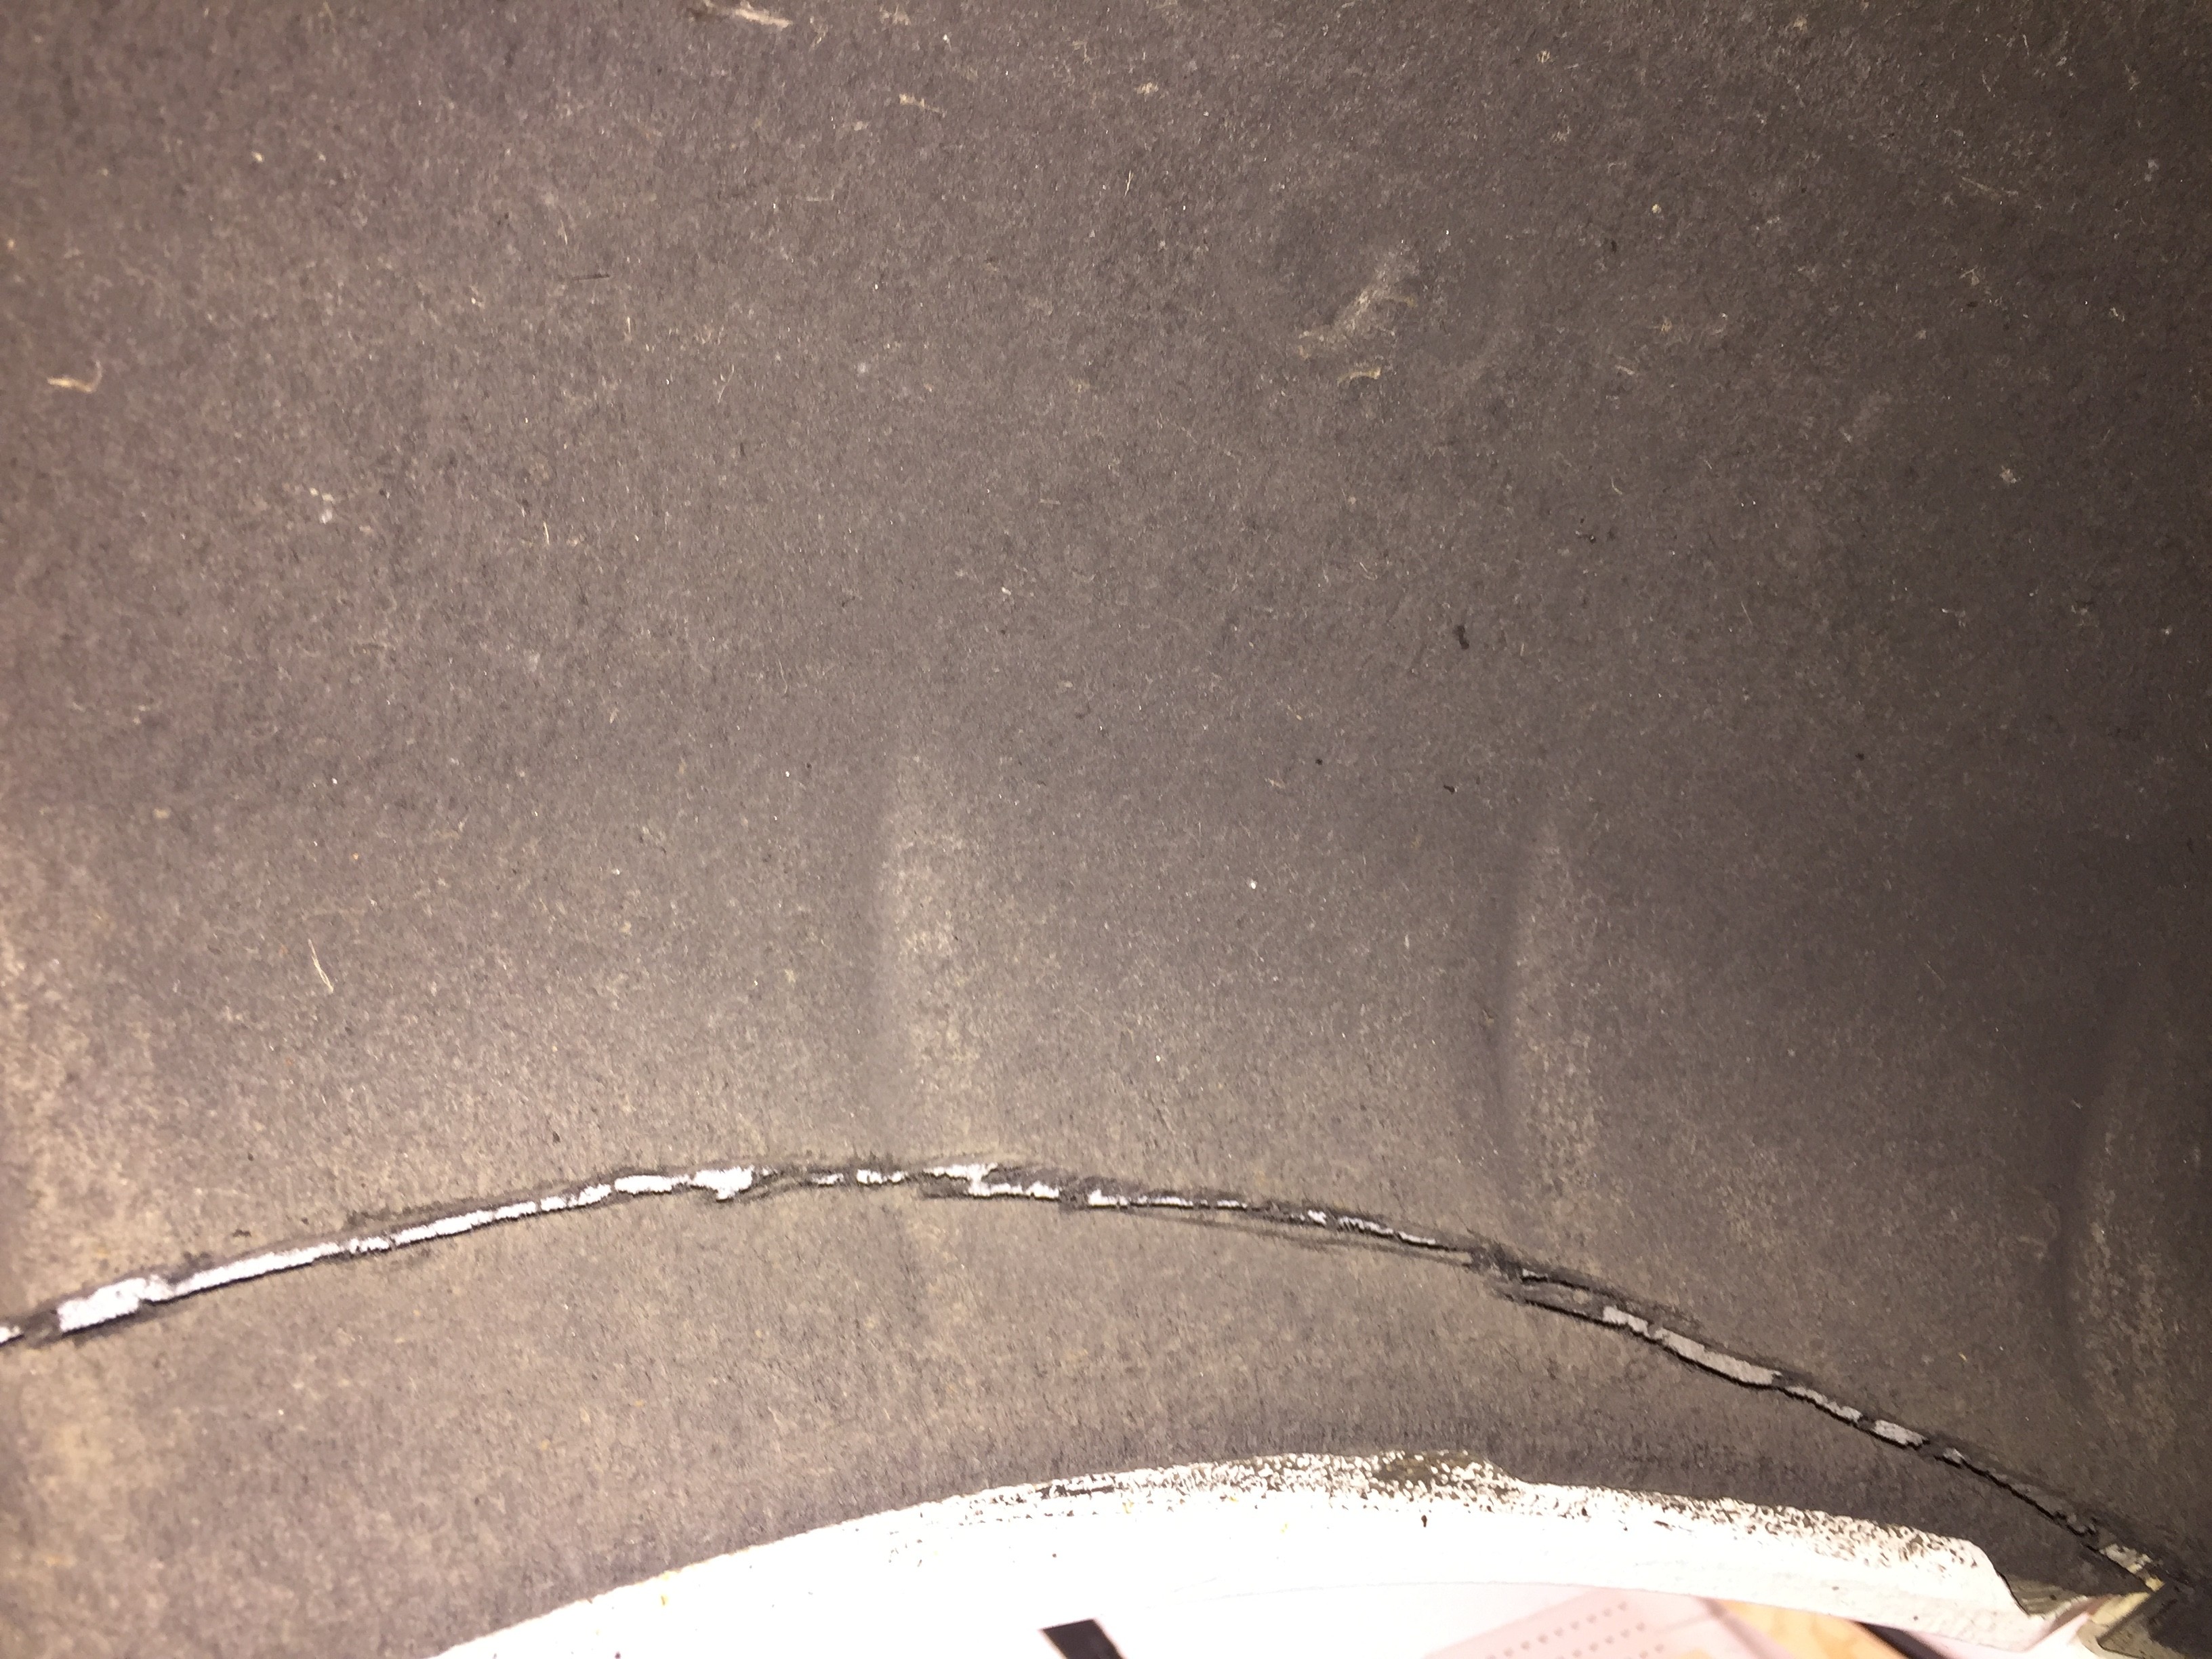 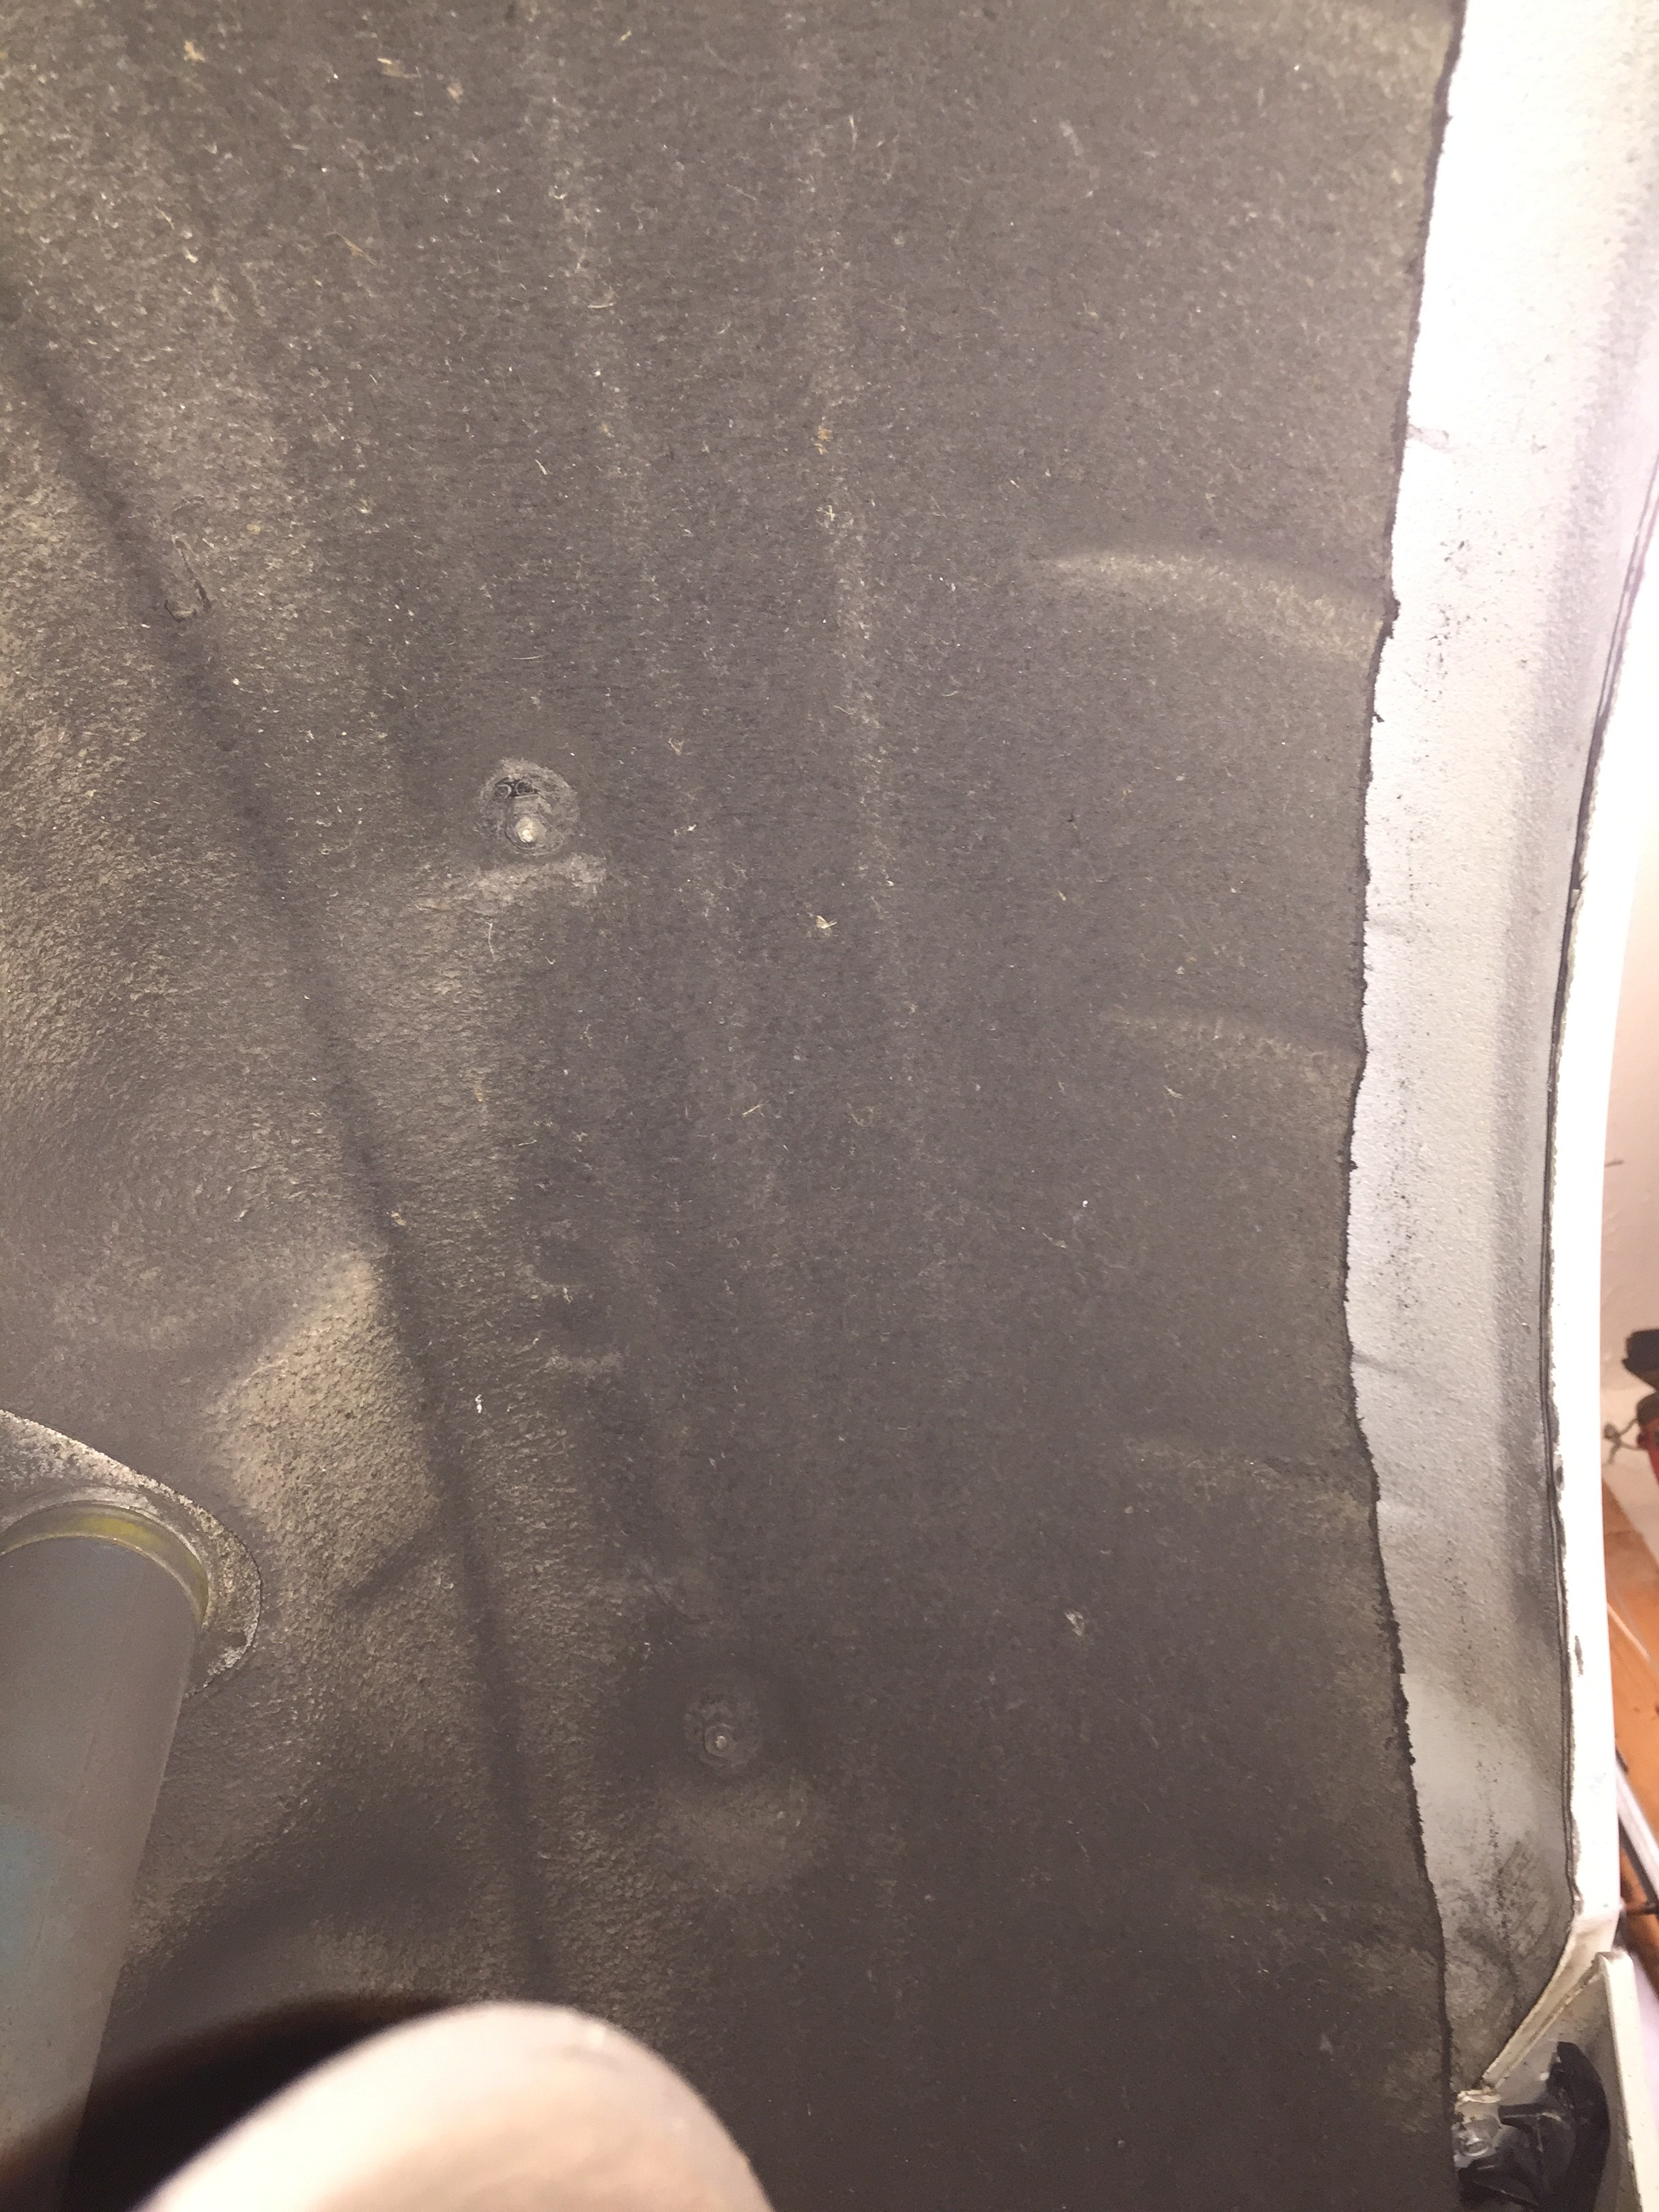 Once I finished cutting, I had to heat up the paint to temp (between 120 and 140 degrees f) so I could start rolling. Now there was alot of this body adhesive behind the lip that I had to shave off with the dremel otherwise it would've stopped the fender lip from rolling in. I had a little separation of the two sheet metals one side but ended up cutting back the inner sheet metal and rolling the outer sheet metal over it so they wouldn't continue to separate. 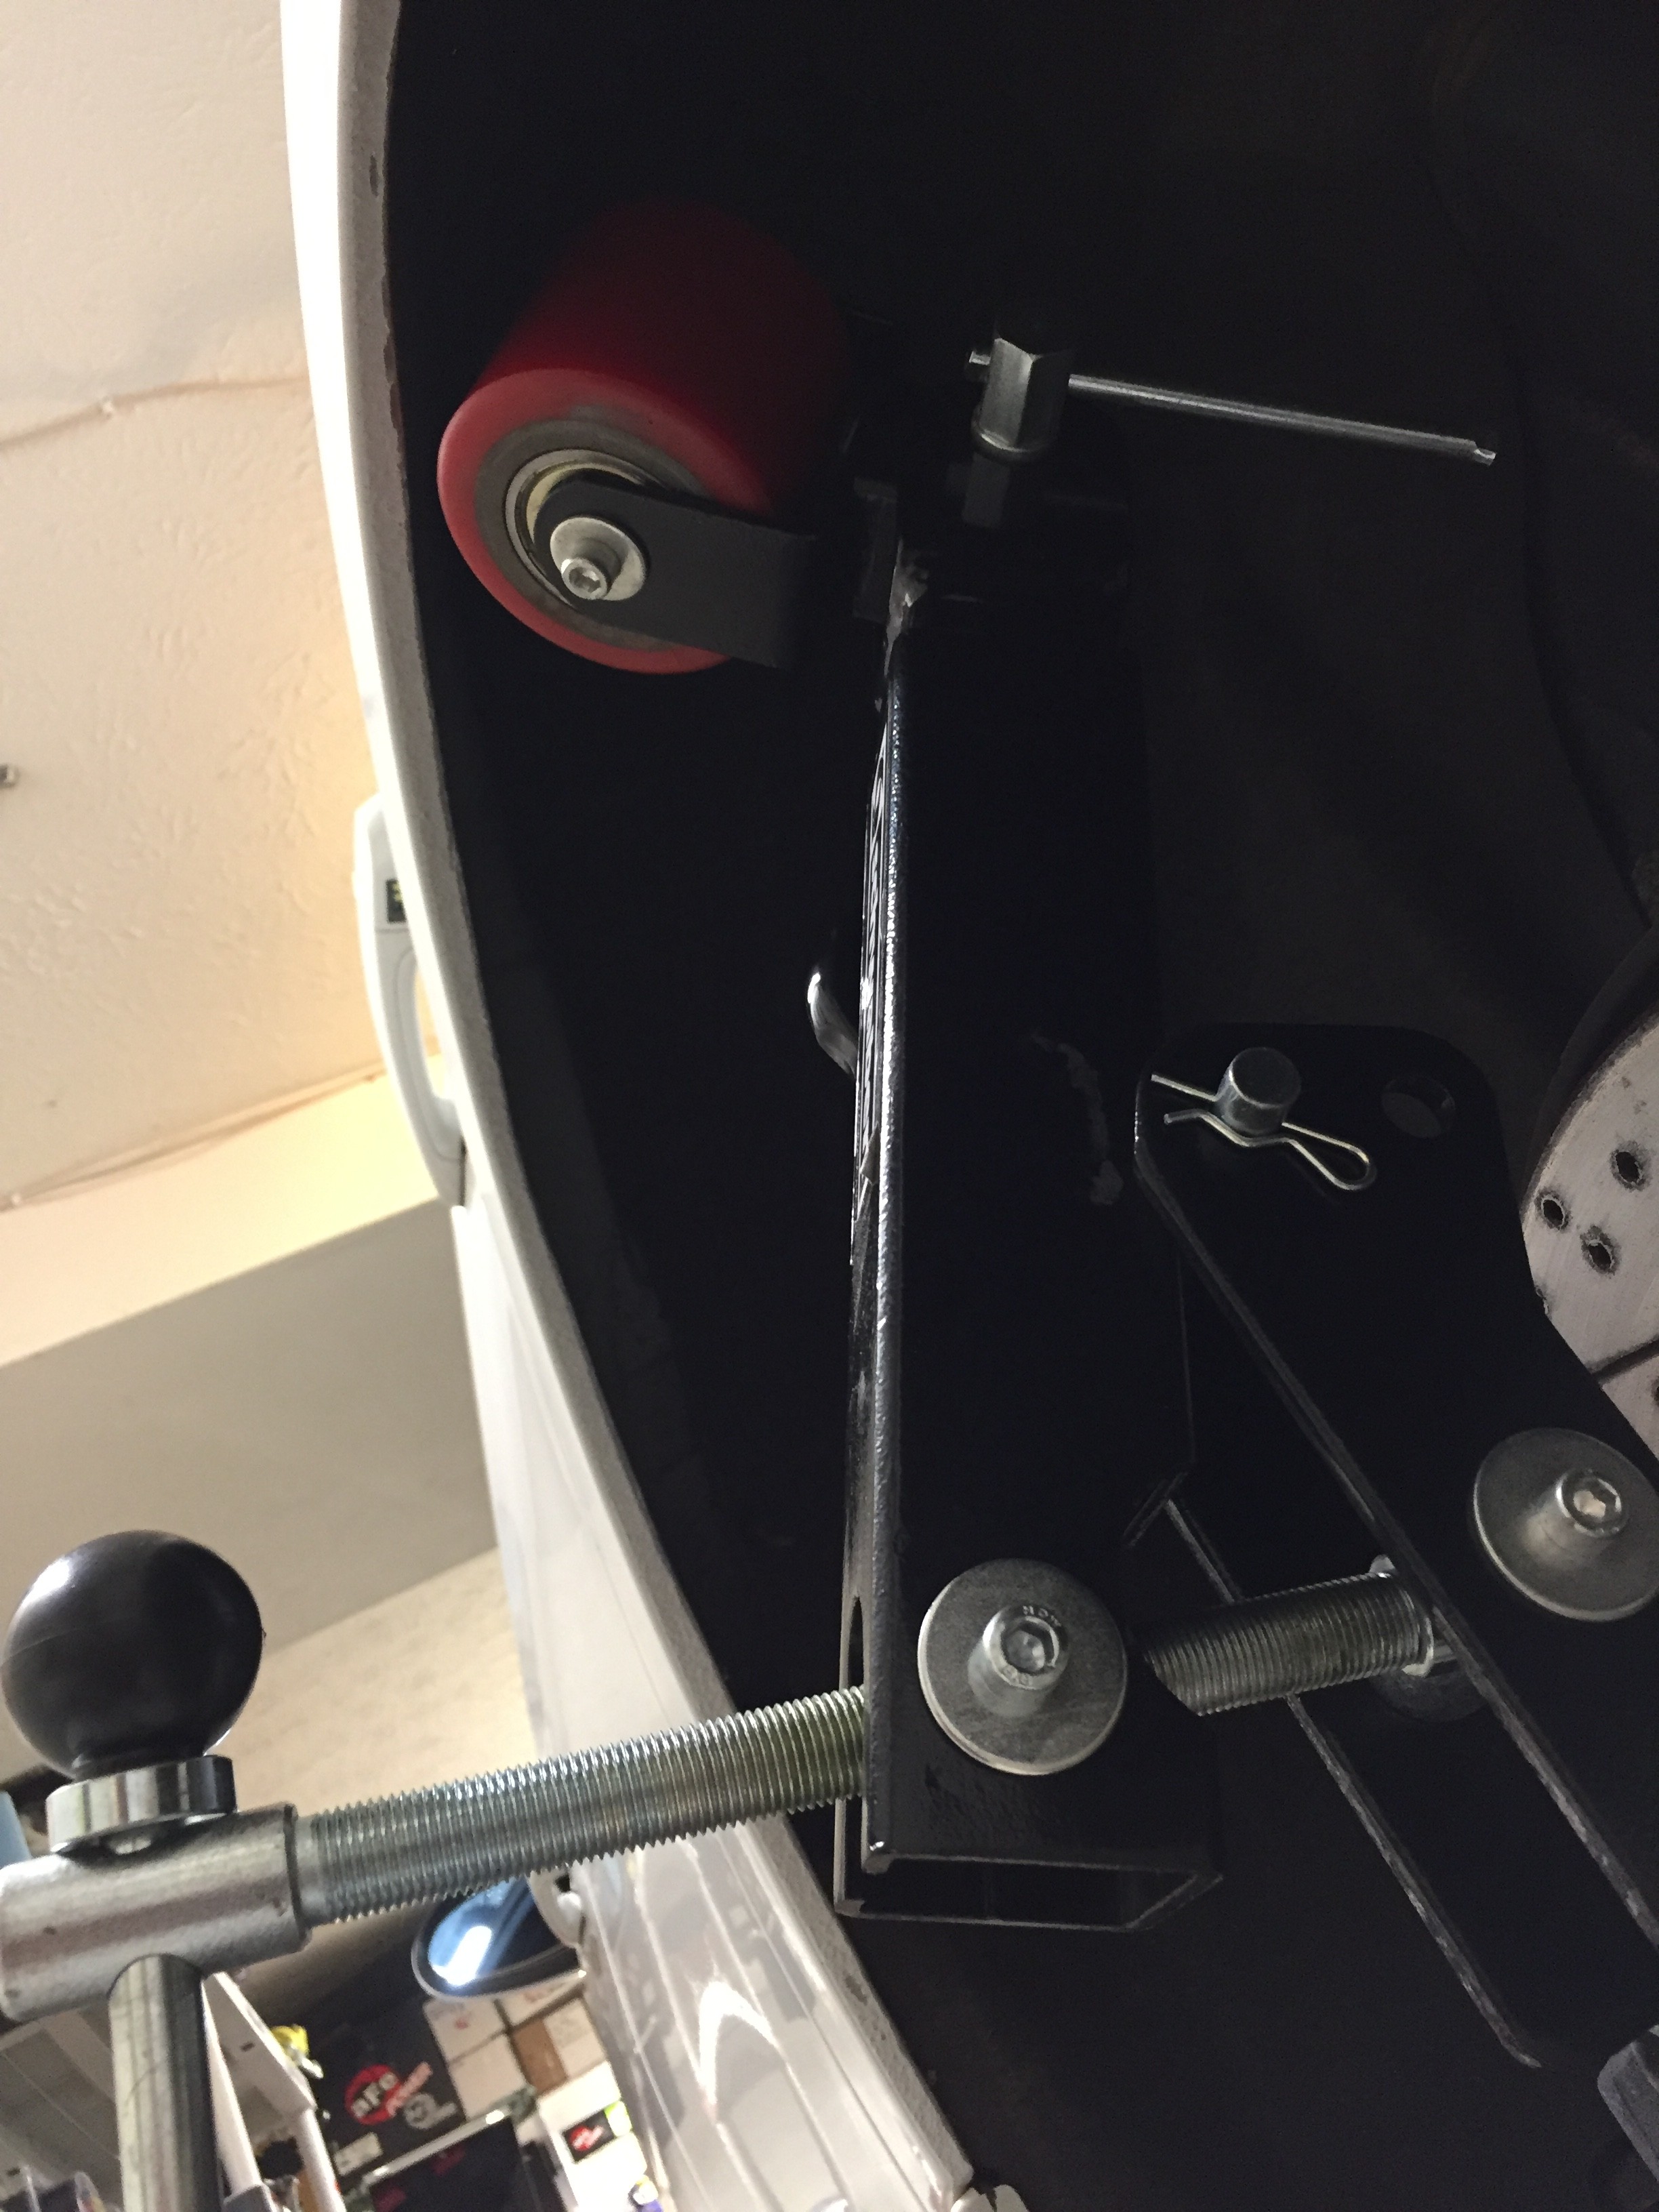 After that is done, I cleaned up the sharp metal with a dremel tool, made it nice and smooth and then primed and cleared over it to avoid any rusting. 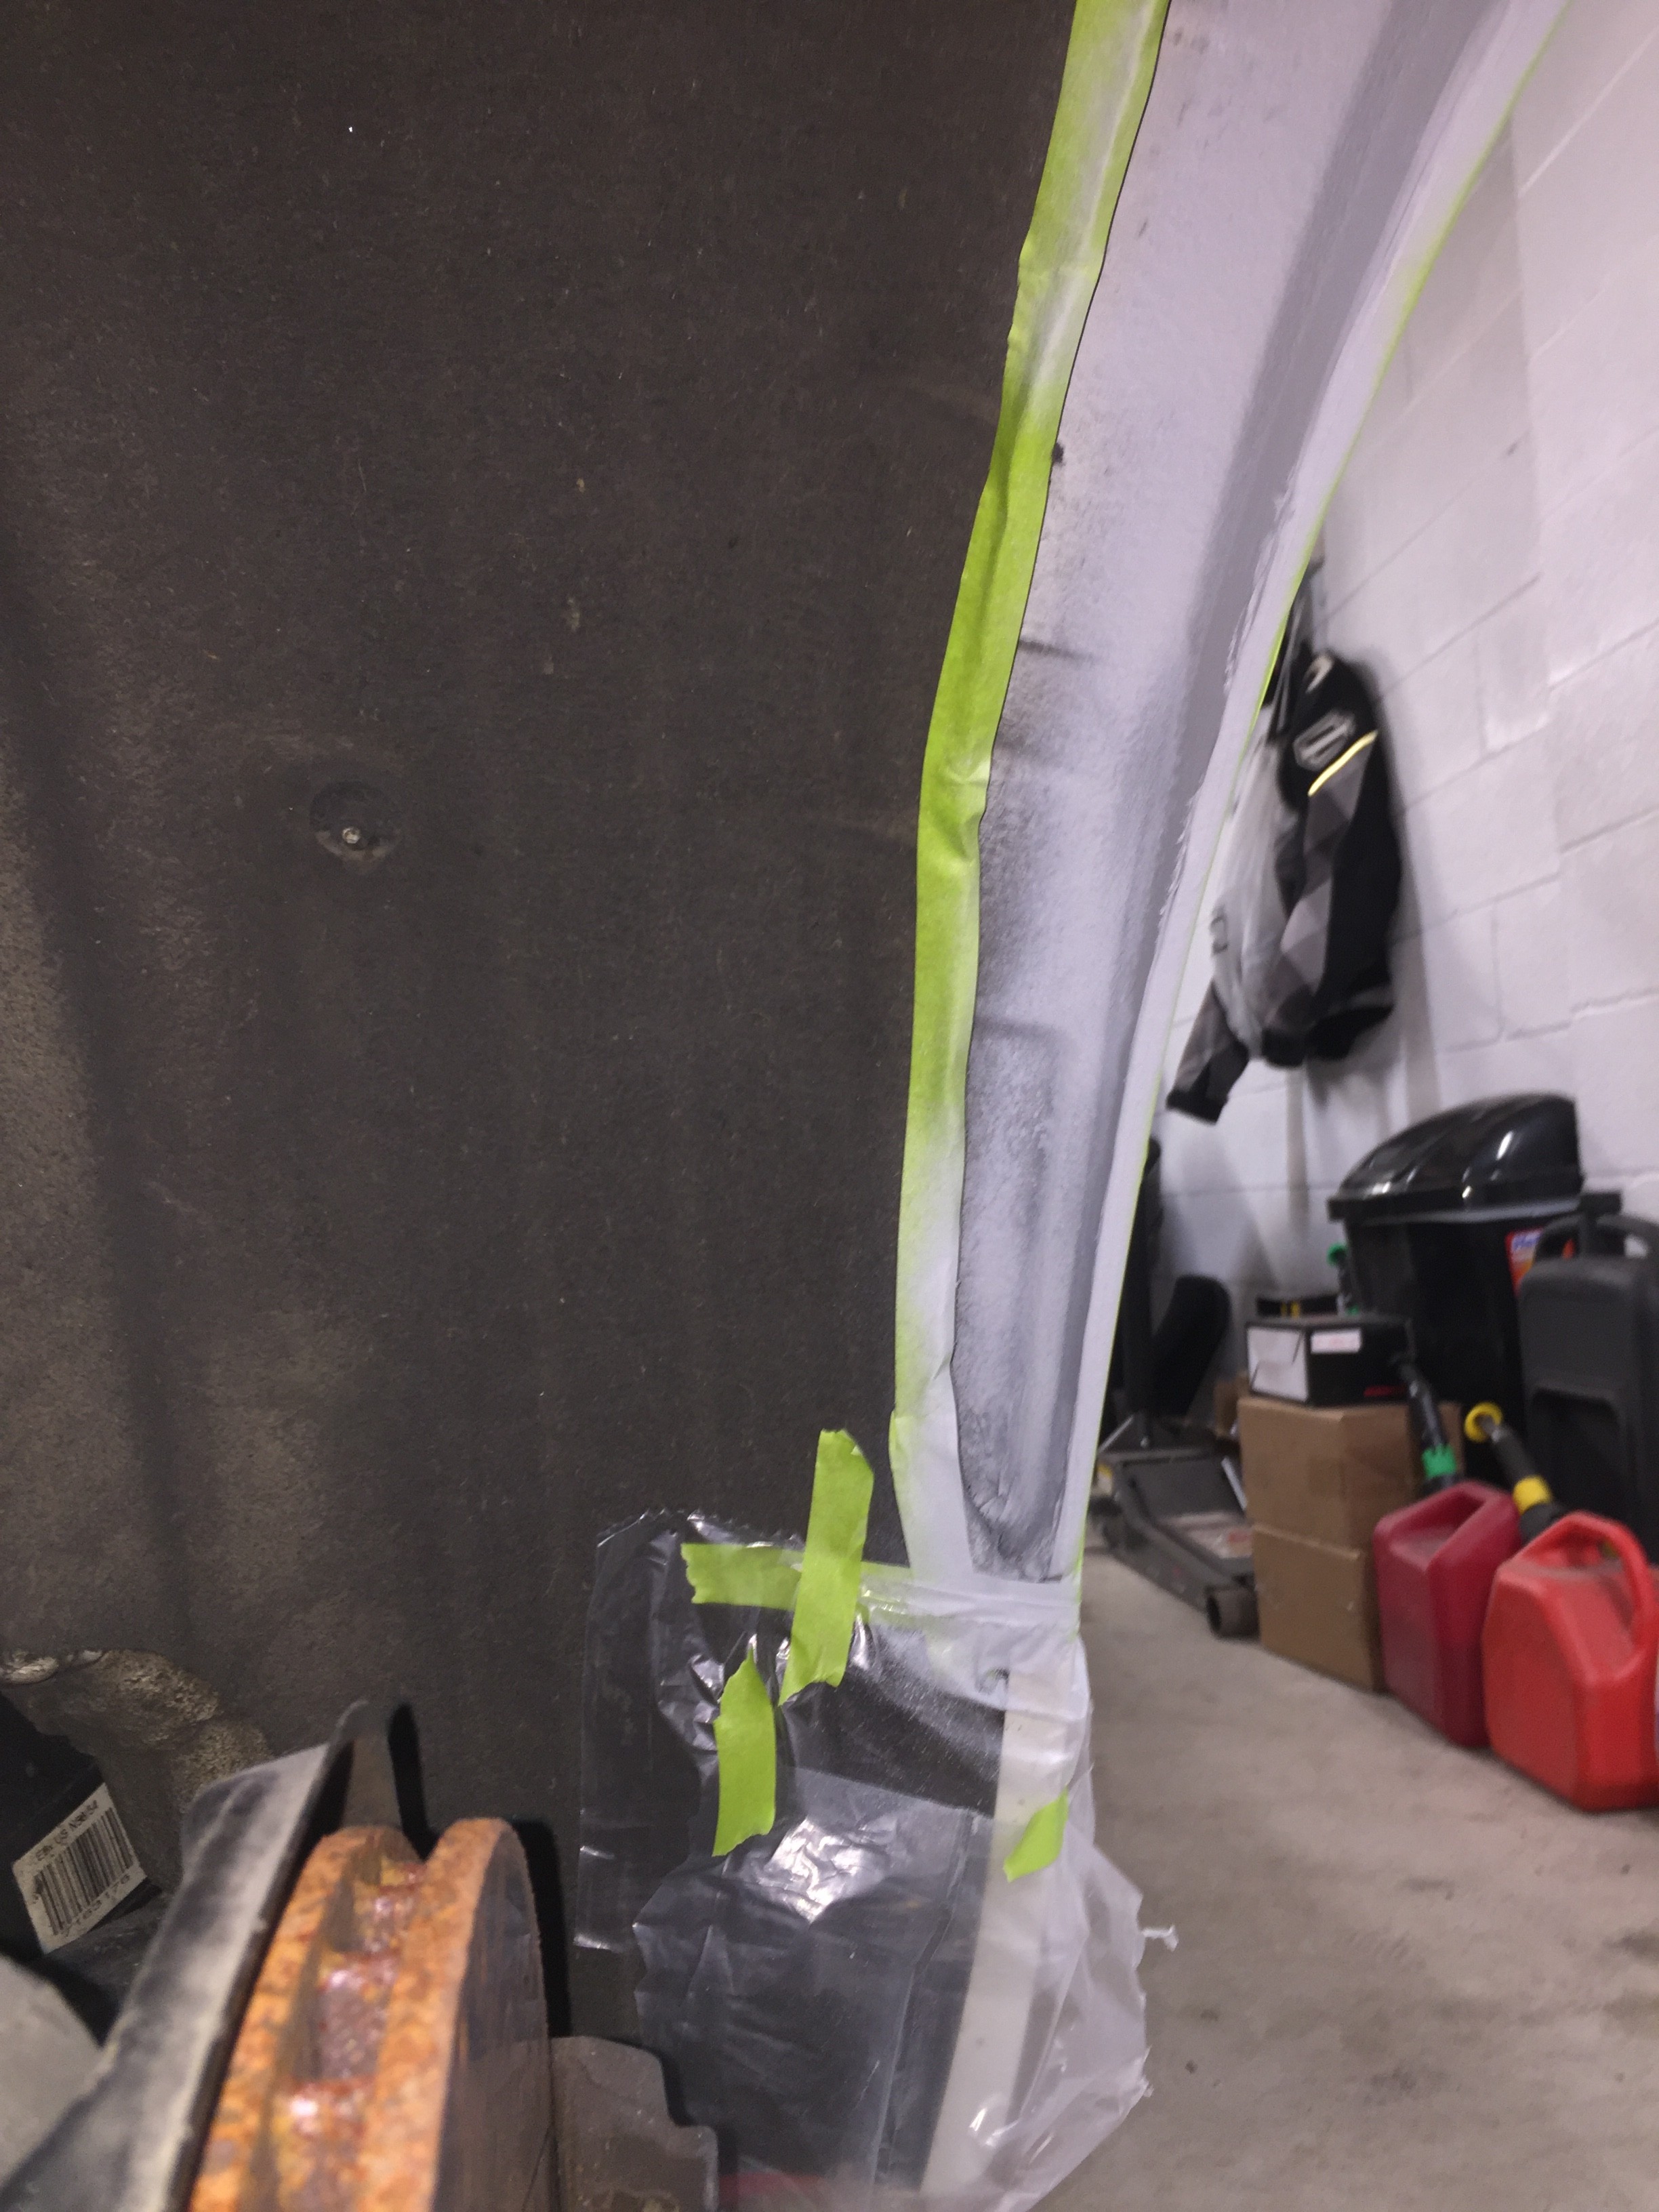  Sooo much more clearance now 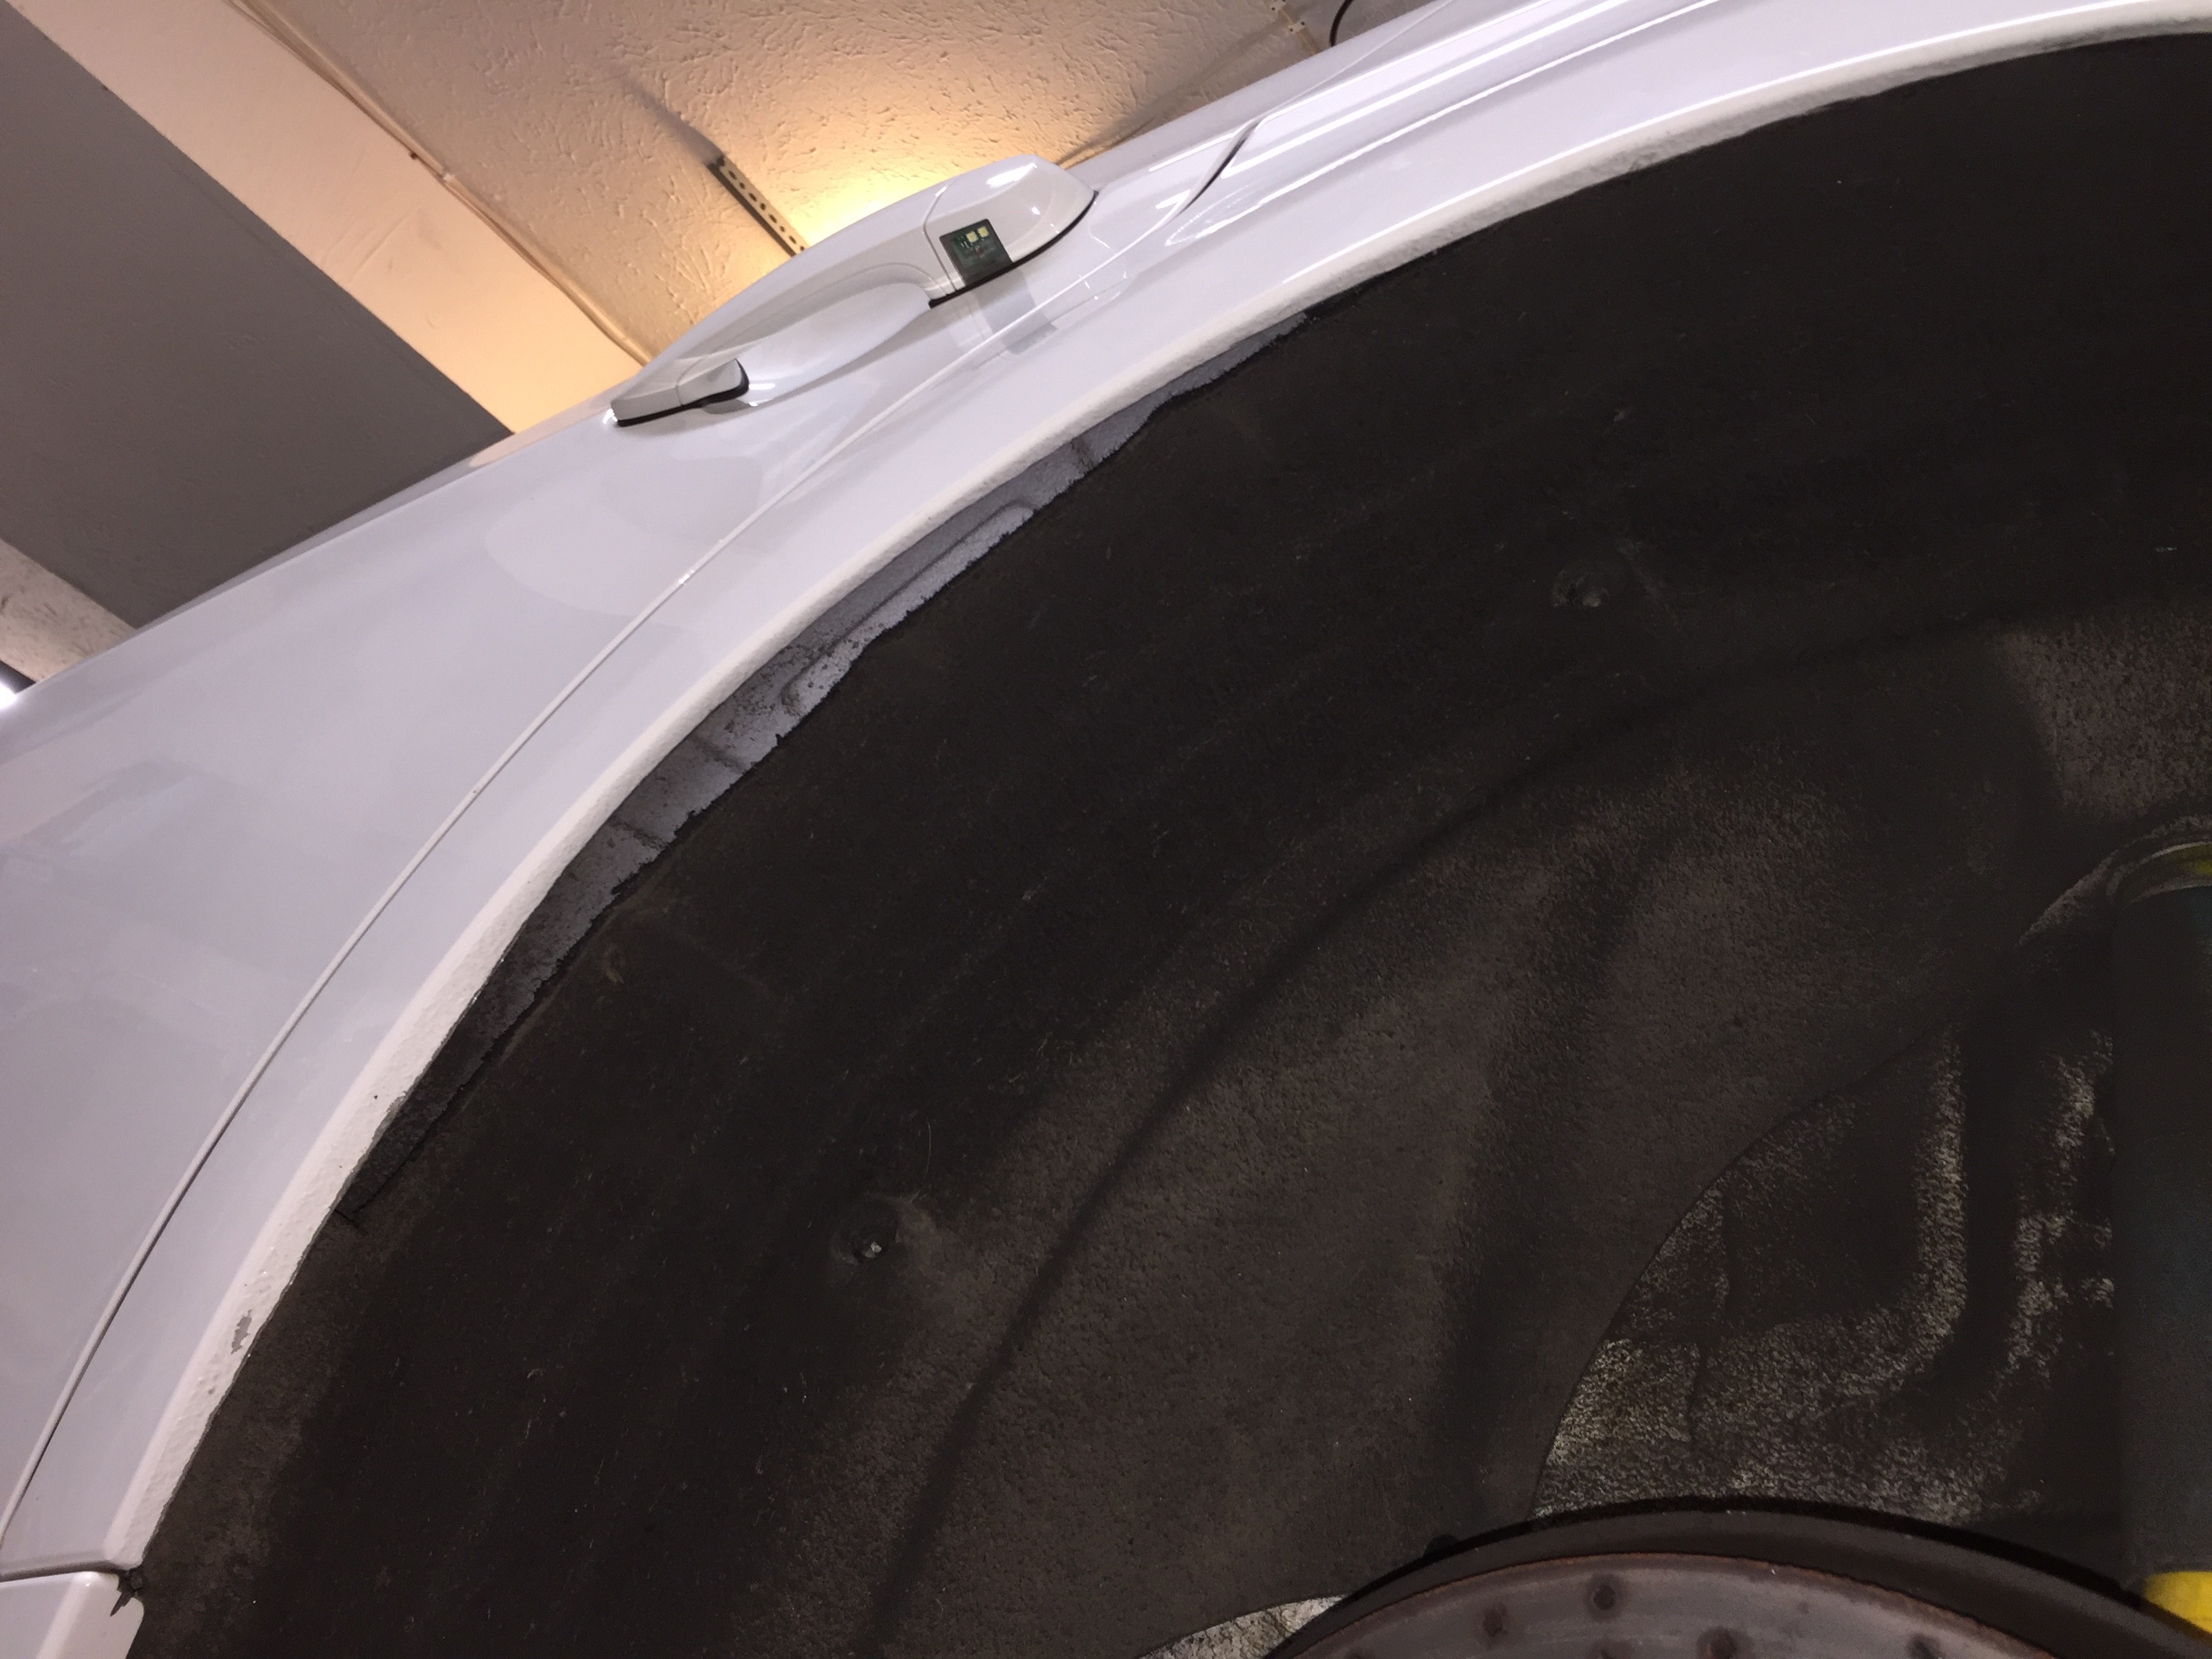 The 20mm spacers ended up being a little to wide with my current alignement so it does rub but once I get my toe brought in to spec it should fix it. 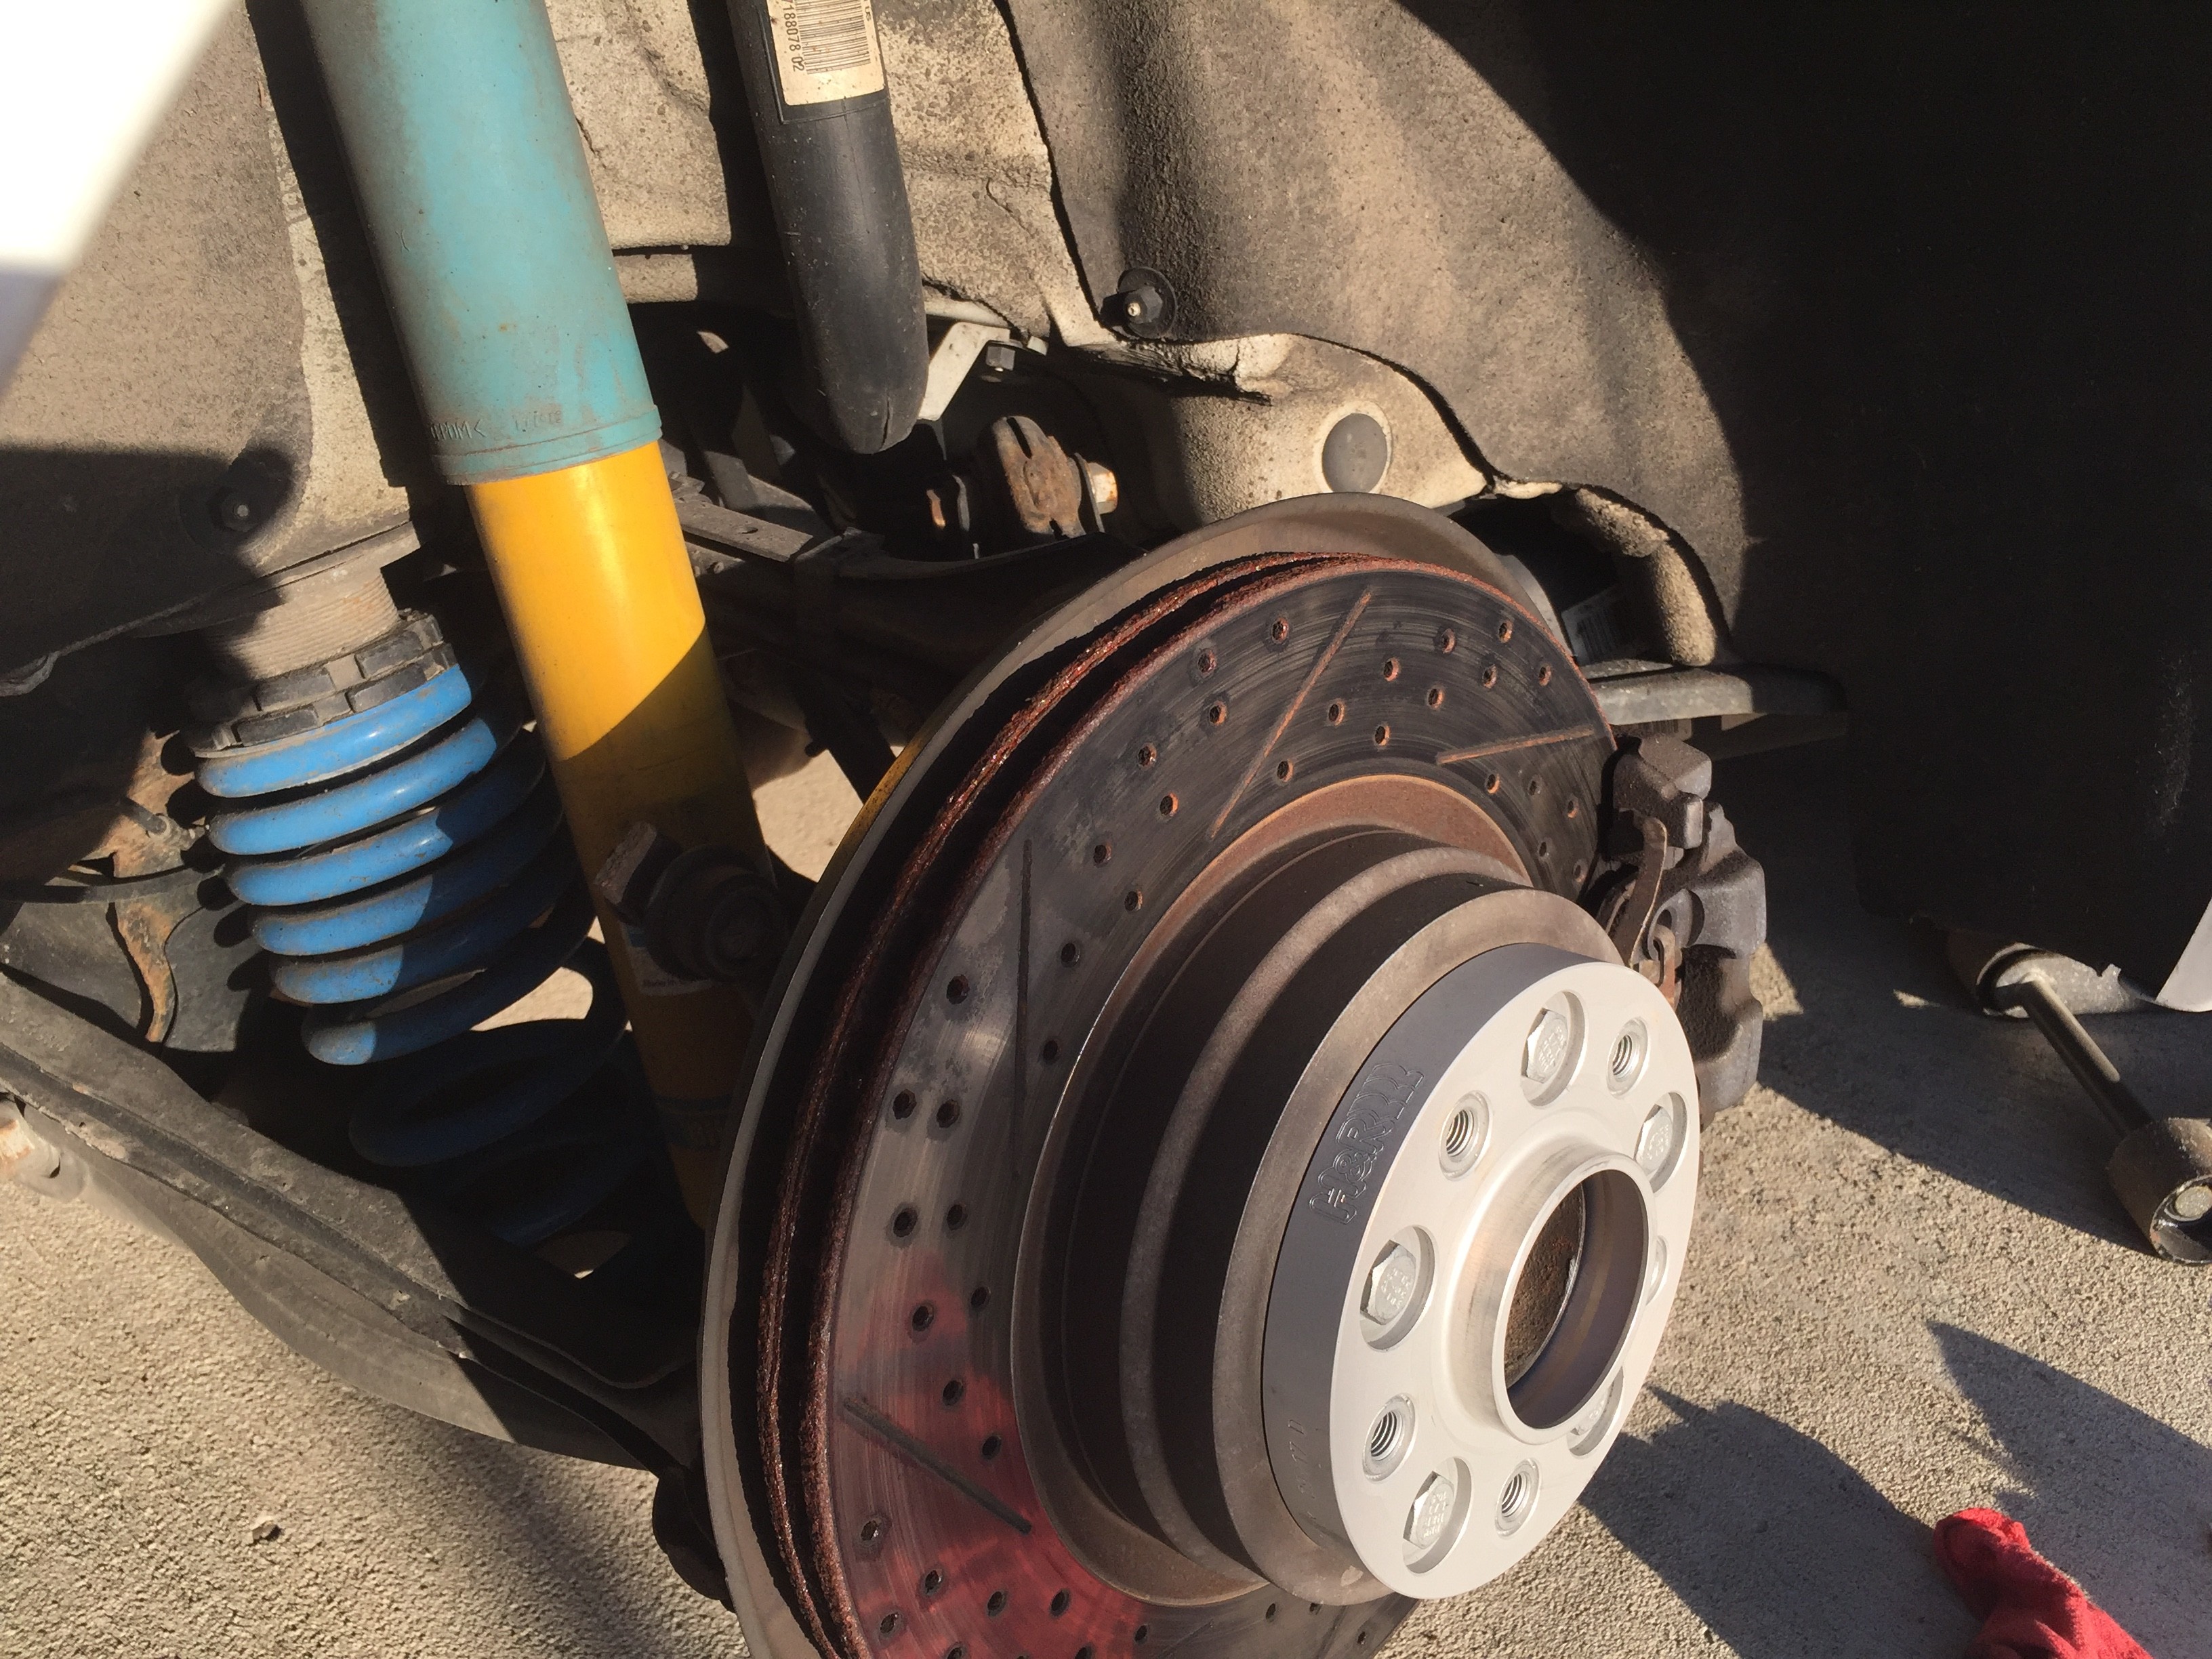  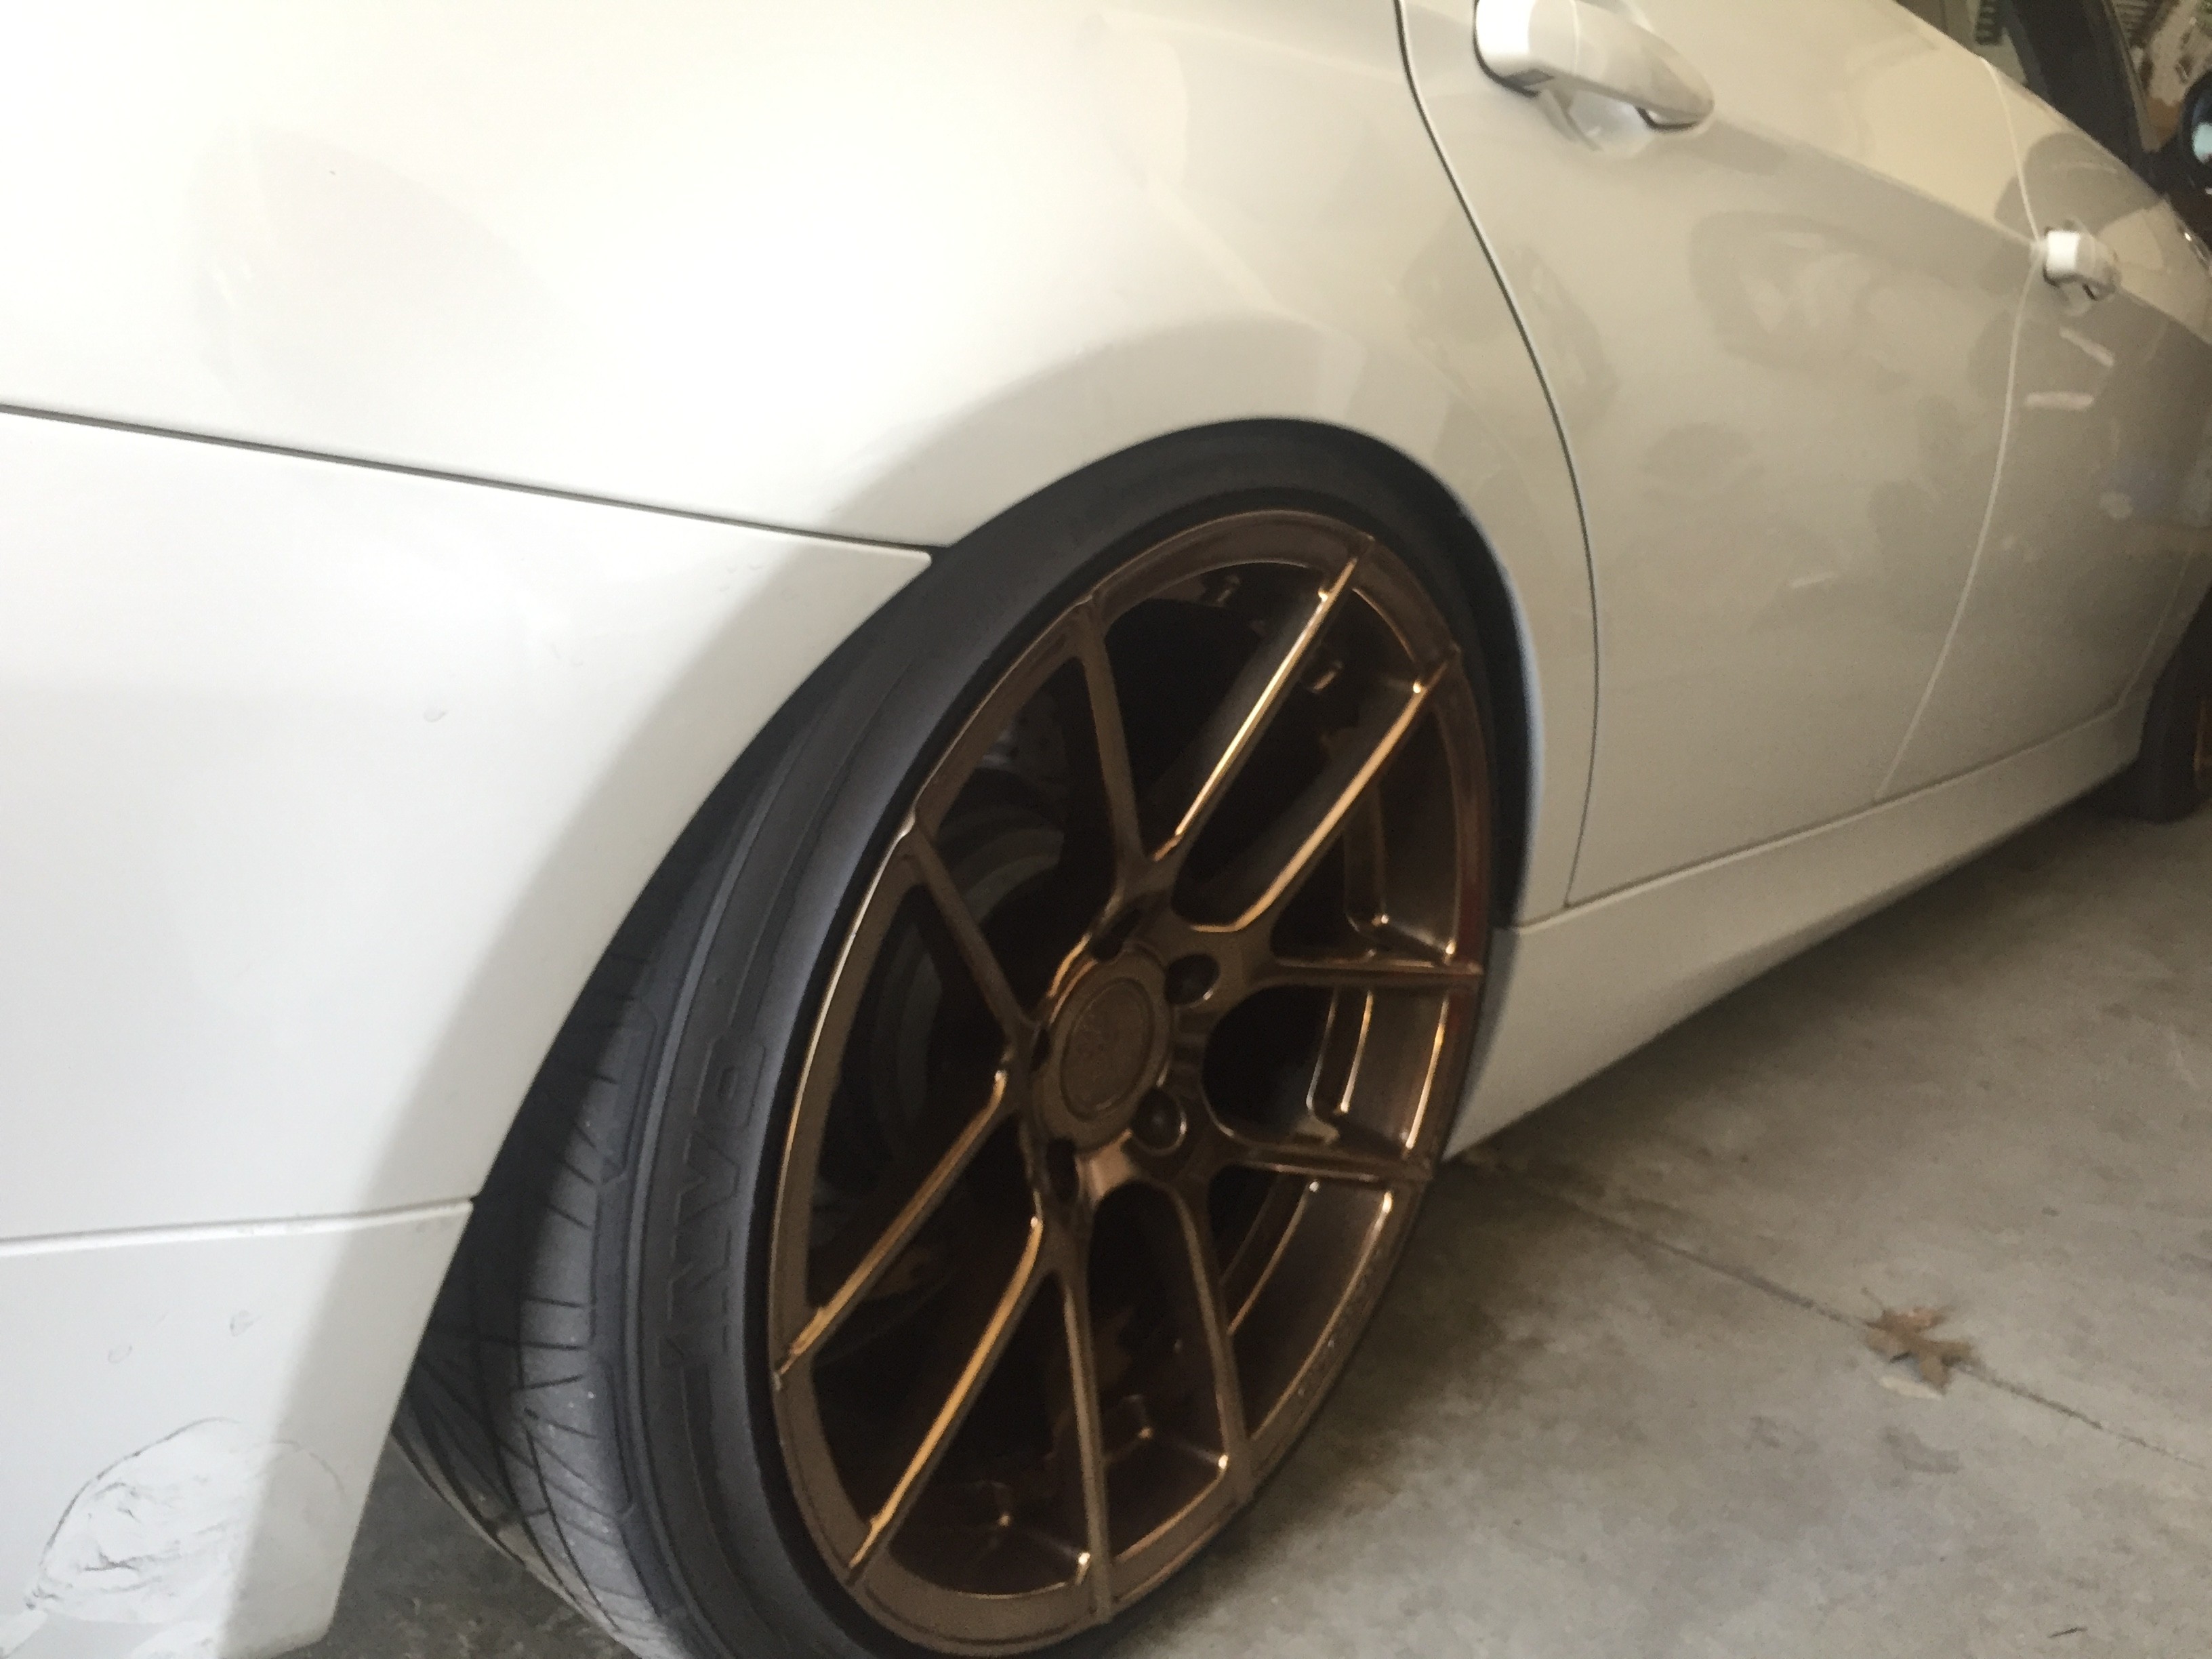 I decided to drop down to 15mm for the time being, still looks good 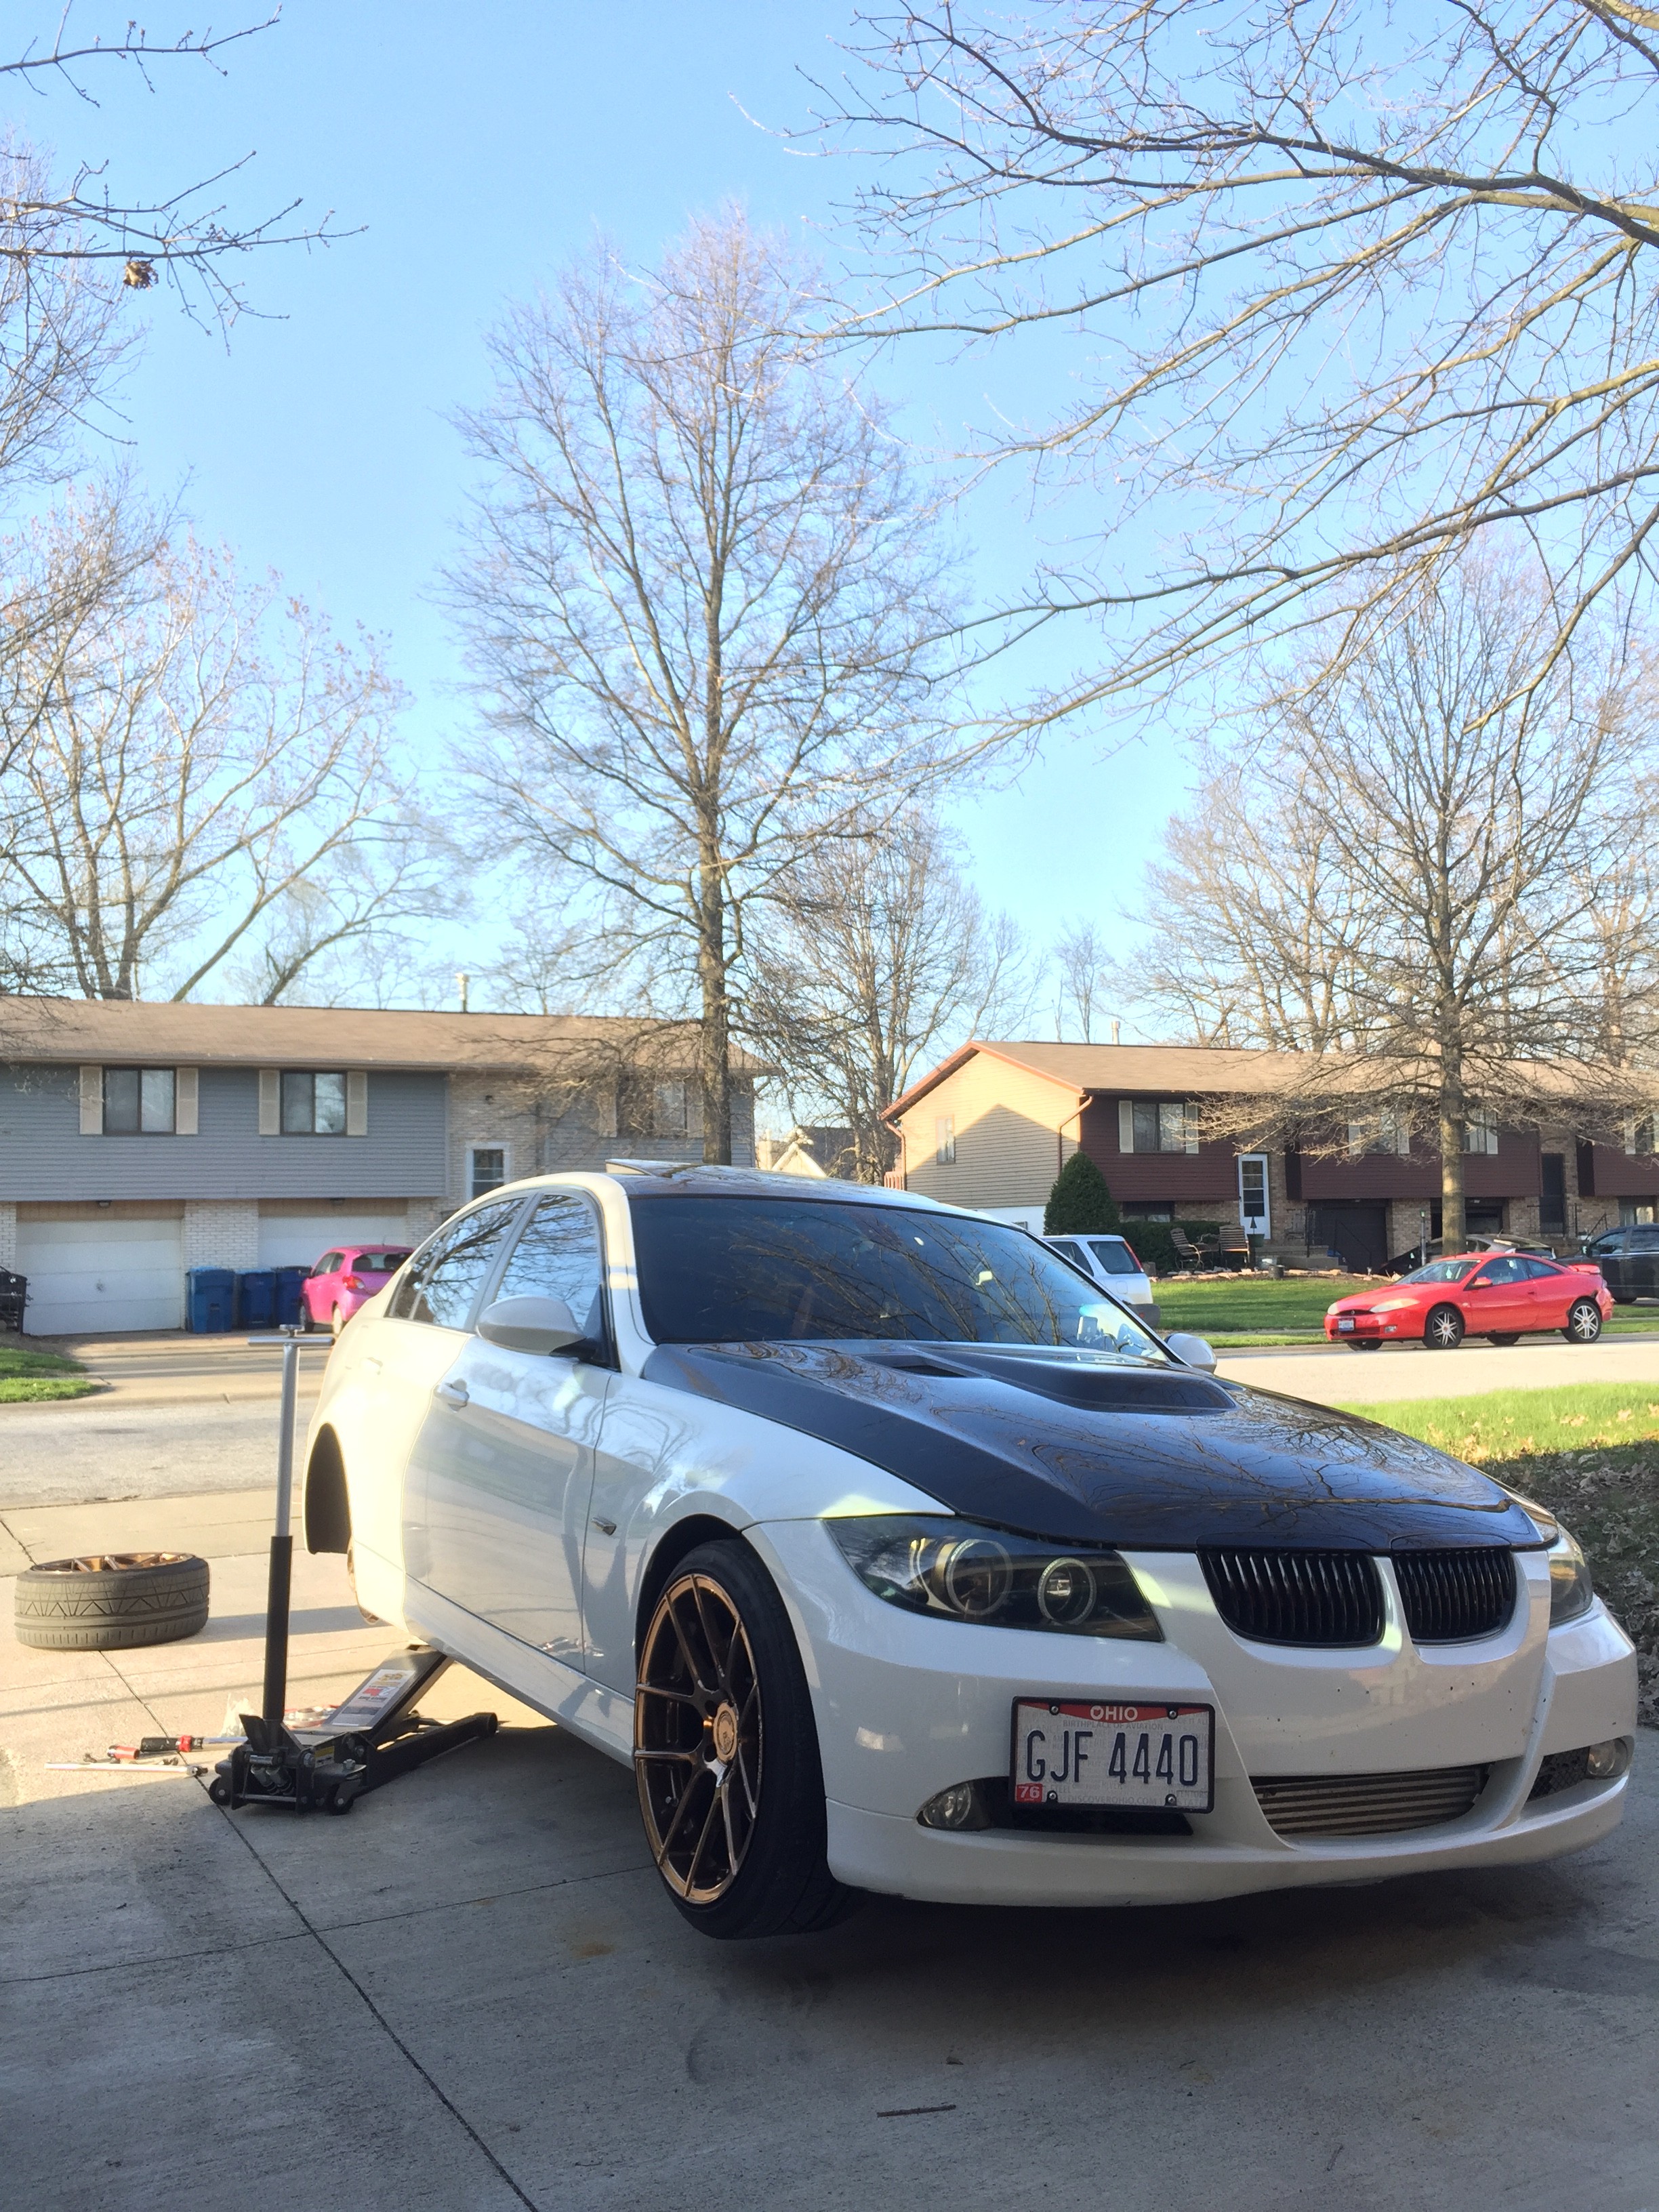   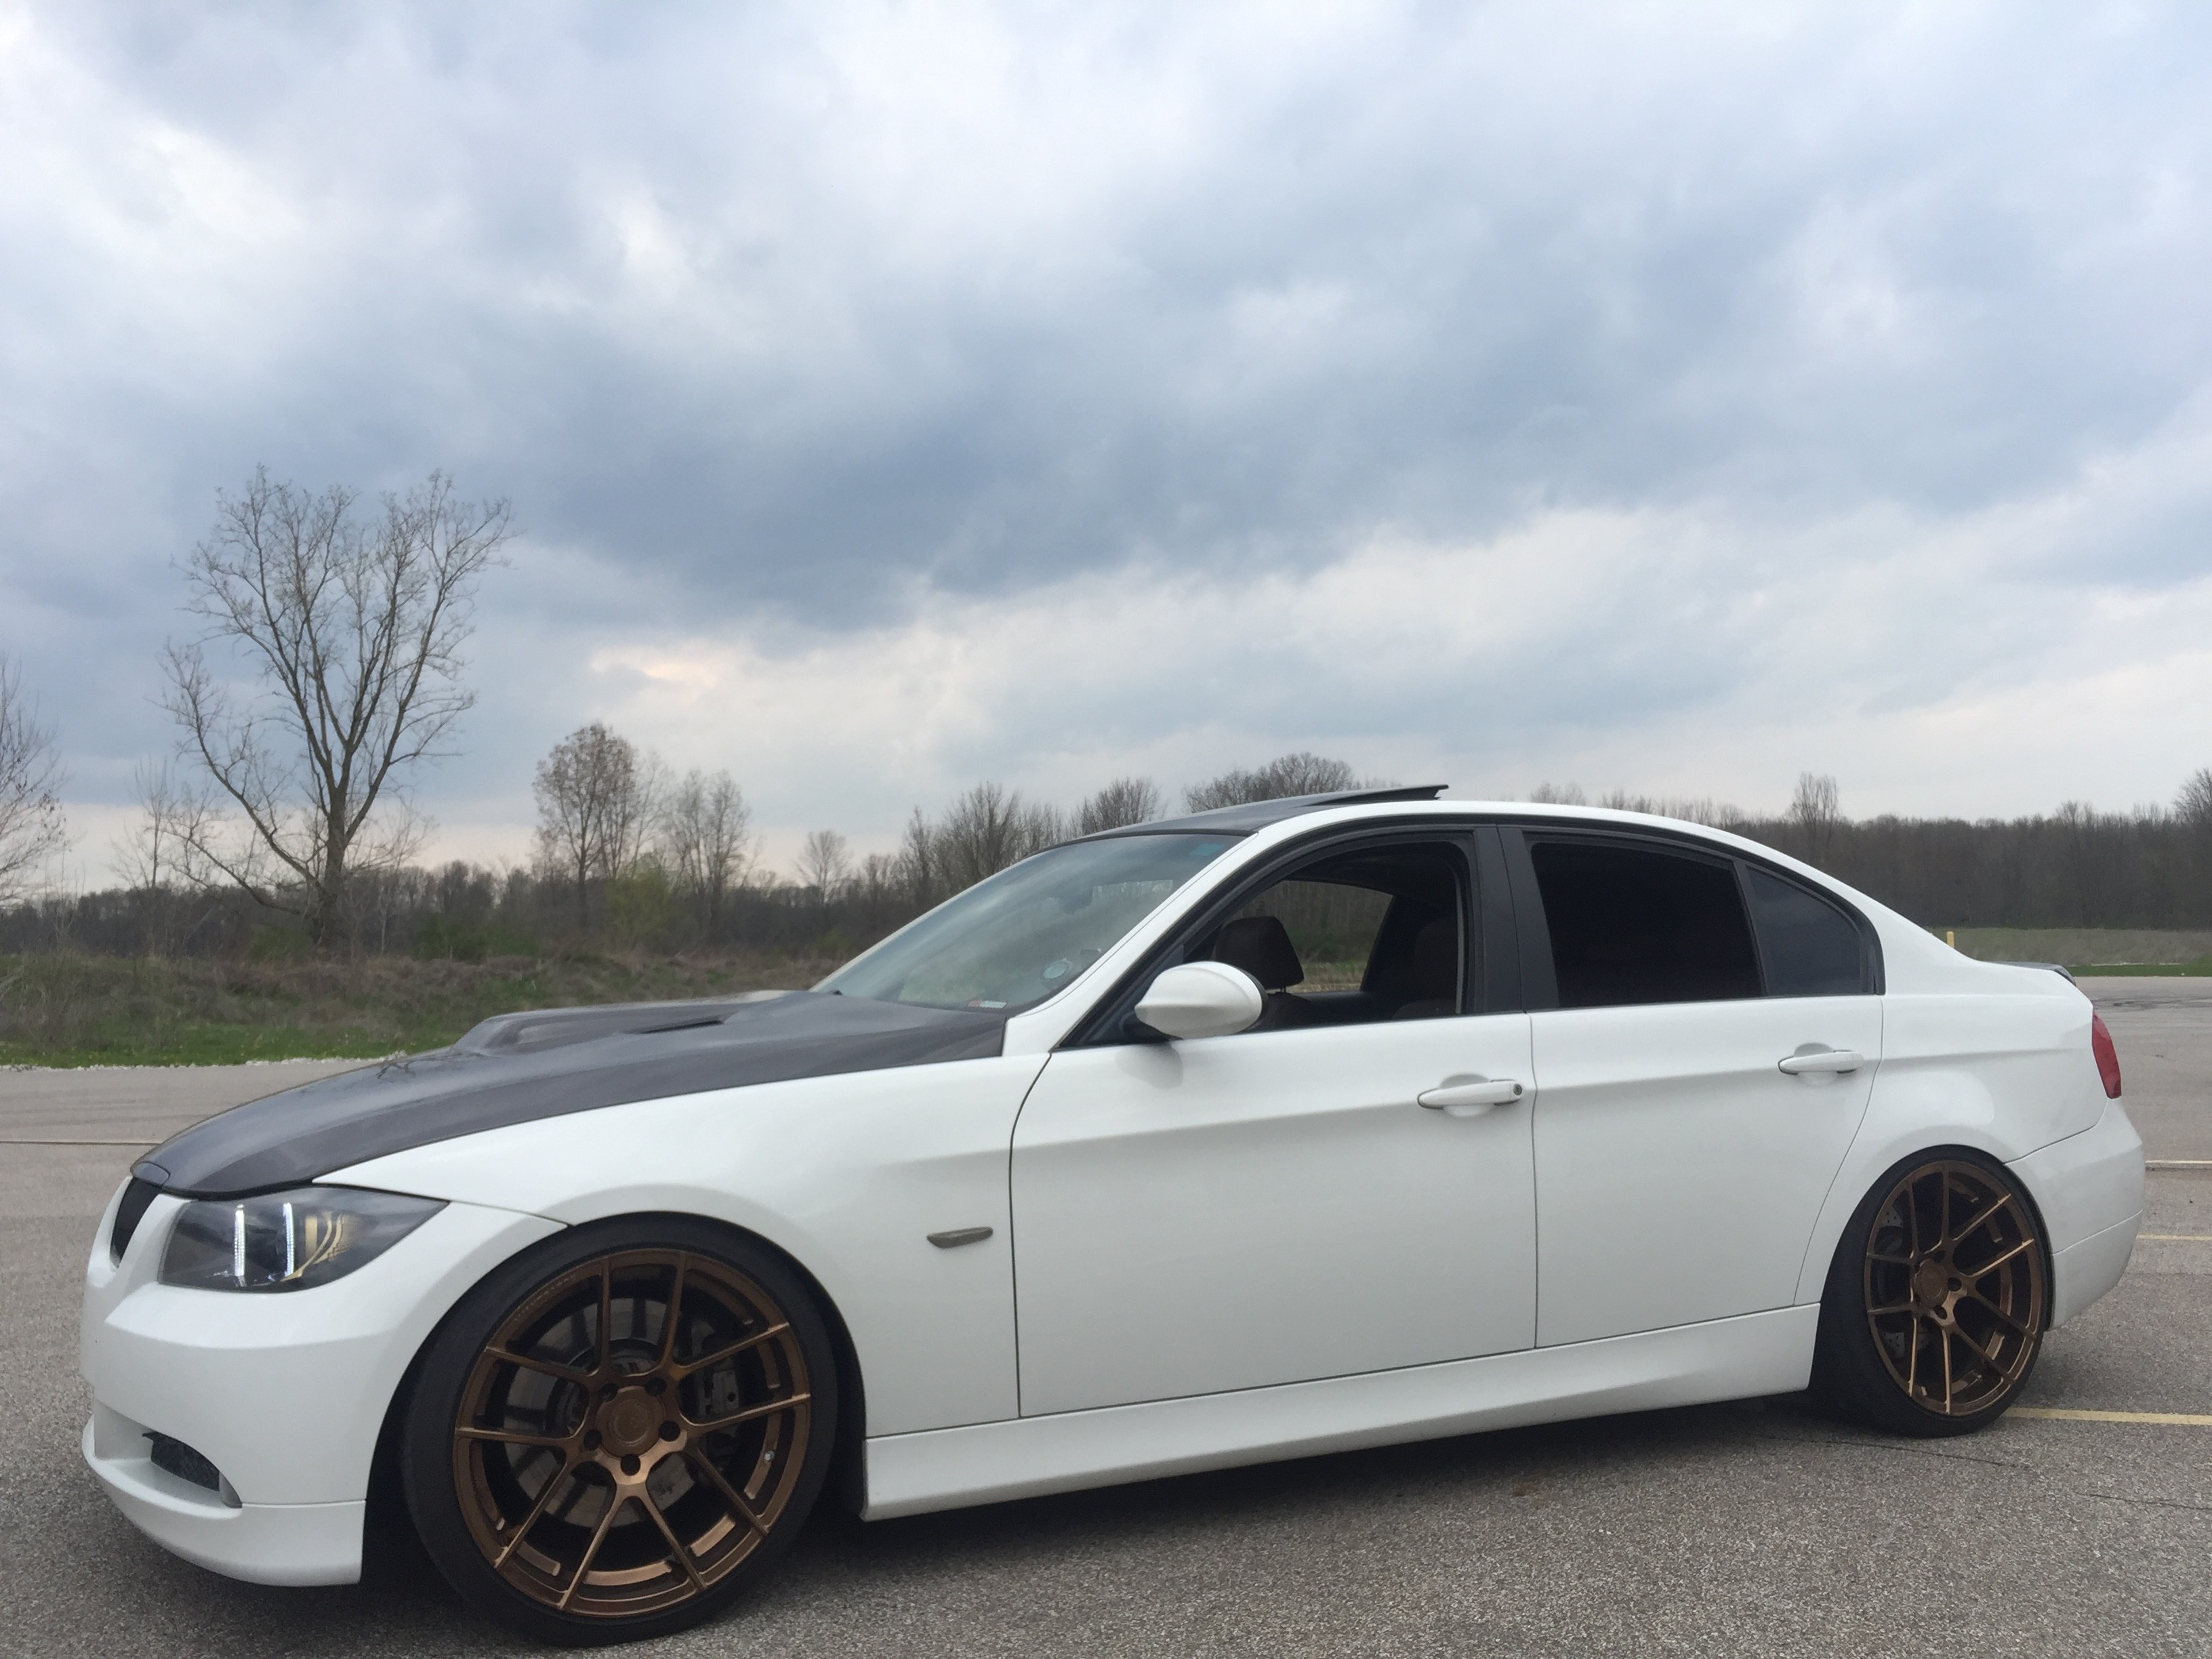 Coming soon....WMI and a custom dash pod w/ wmi flow gauge First prototype to test fitment Stay tuned! ------ Comments ------ 4/9 Spring 2018 Update - AN fittings ftw What up guys, even though it snowed a couple days ago I am not putting off car mods any longer. Spring is upon us and its time to get back to action. First up I had to fix my blower motor wiring due to the recall with no solution?? Well the fix is pretty simple and my blower motor died so I'll be in there anyways. Then some walnut blasting and installing my 2nd catch can on the high side. With both catch cans and WMI soon to come, dirty valves should be a thing of the past Lastly I re-did the Turner sticker on my strut bar and installed my CF hood! I will be wrapping it when I wrap the whole car so may as well run it naked for a little bit. Enjoy!  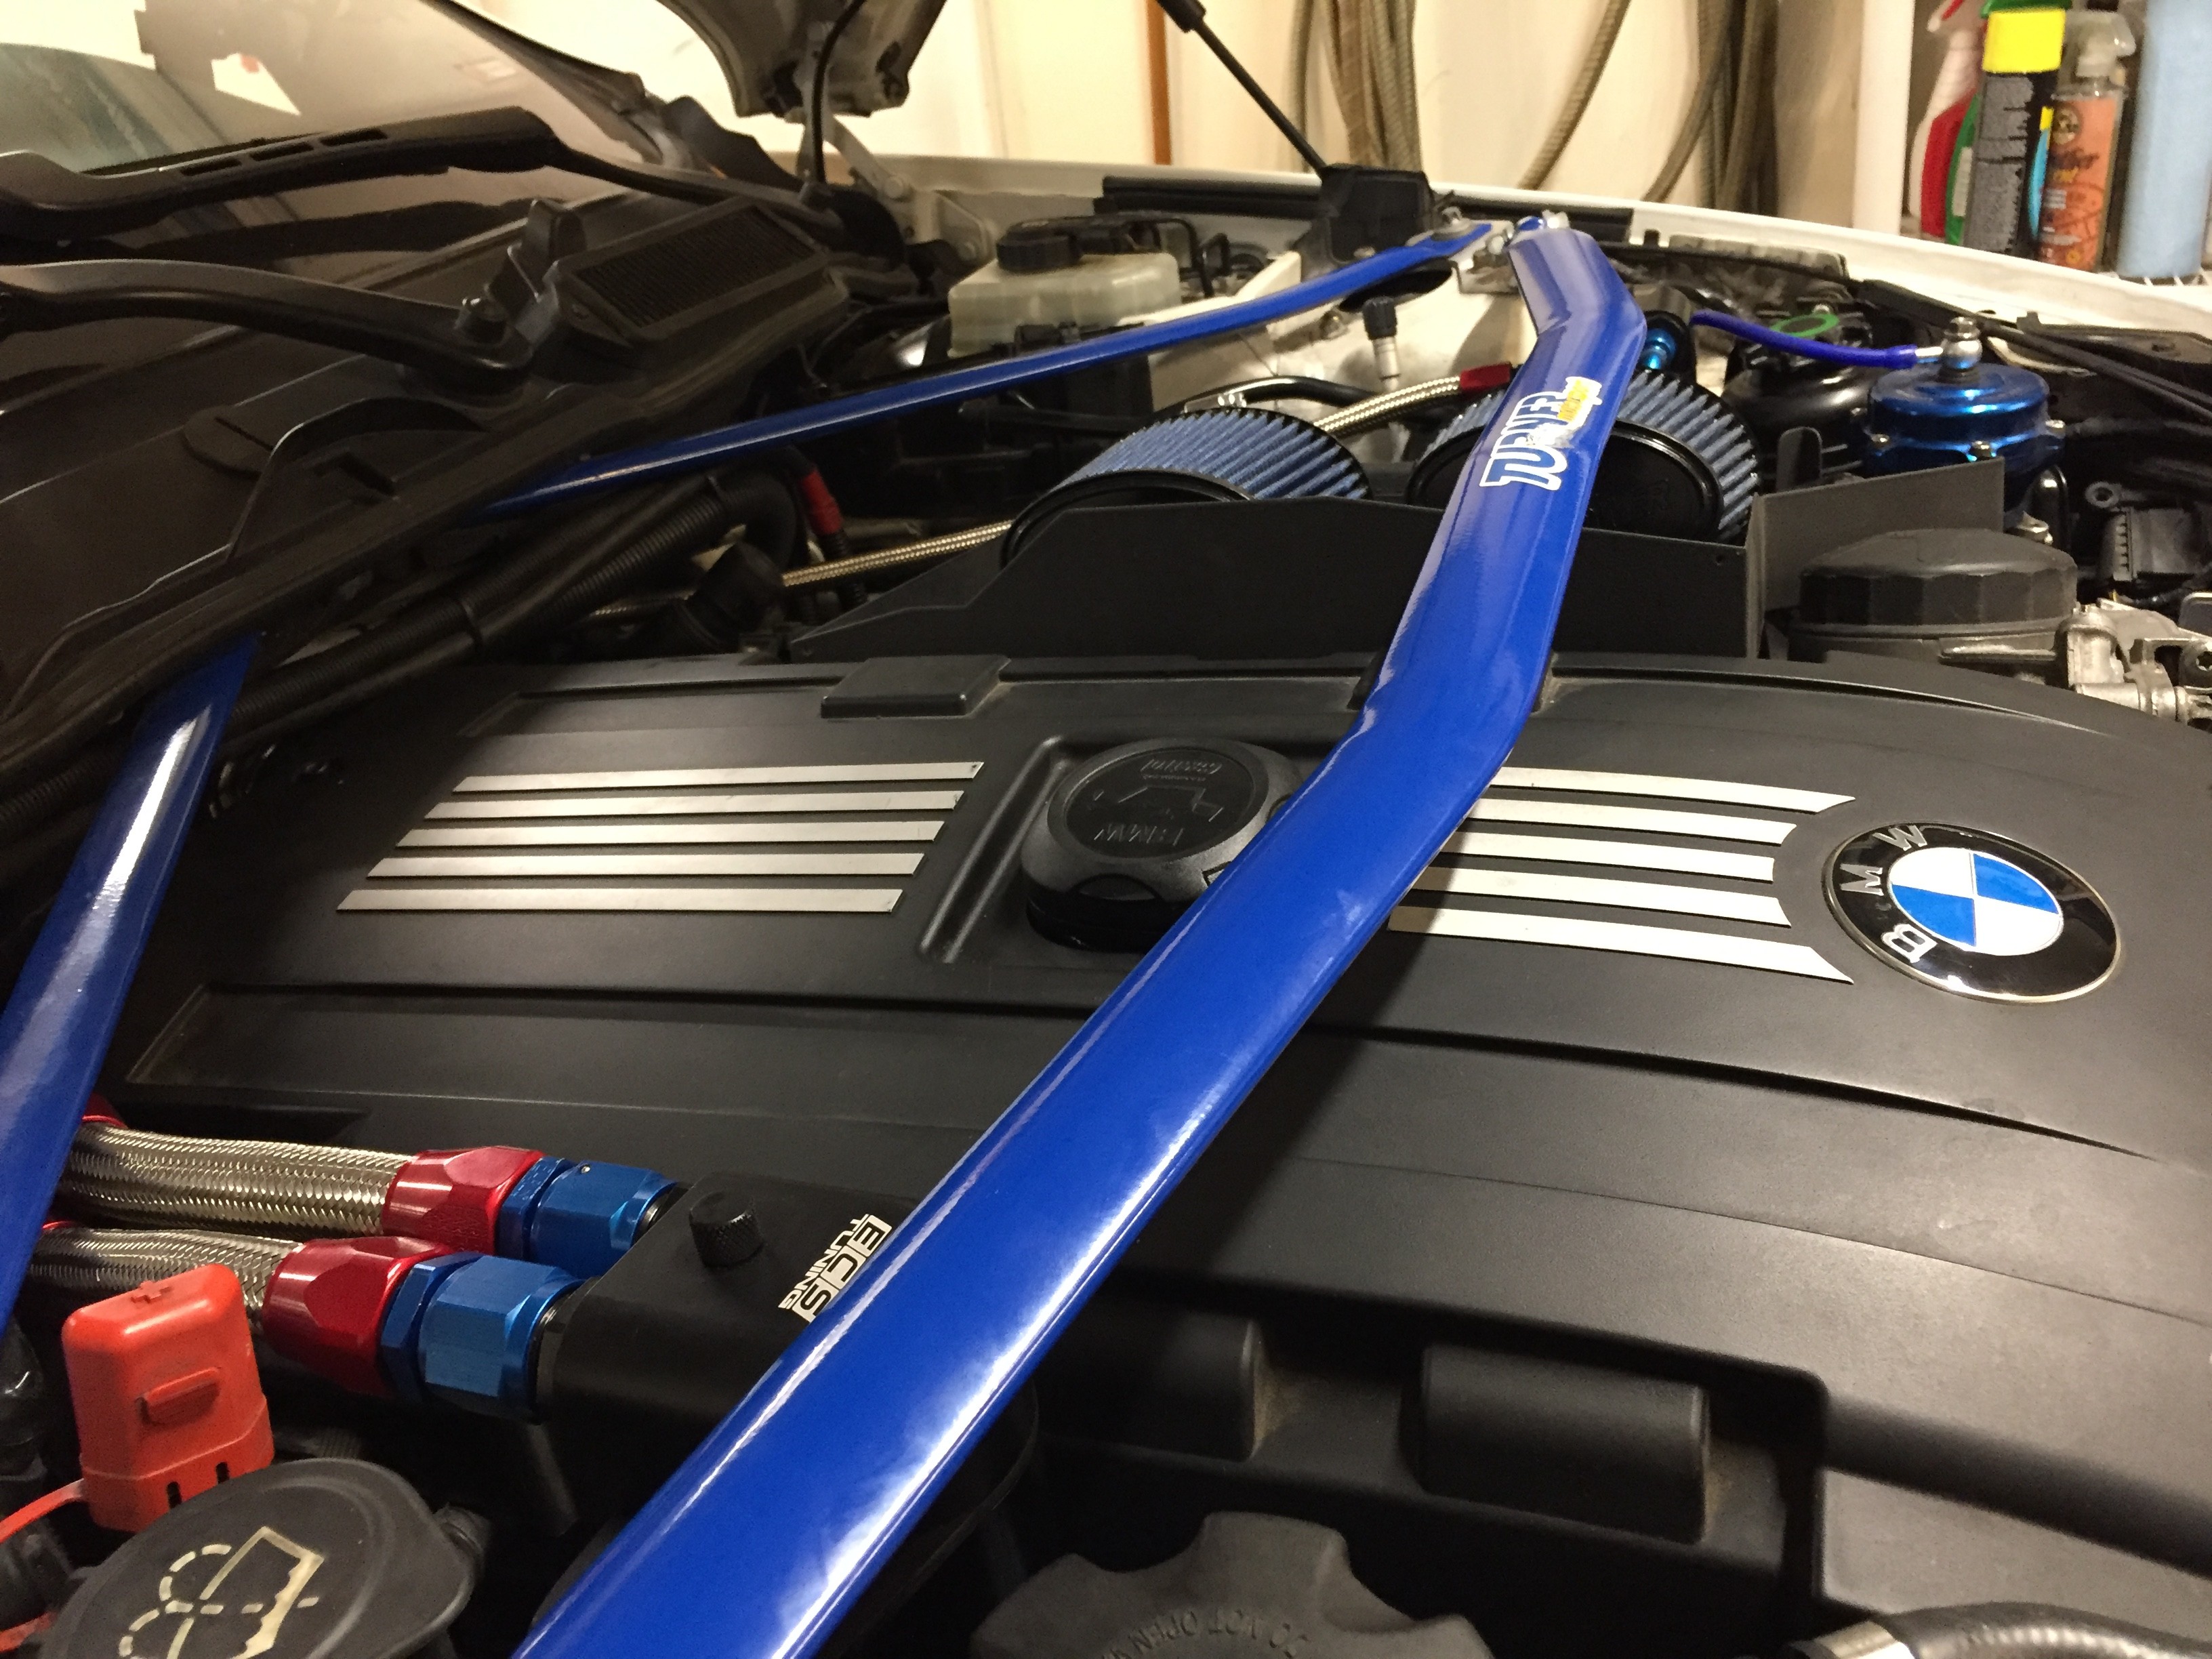 ------ Comments ------ Some dis-assembly and new parts 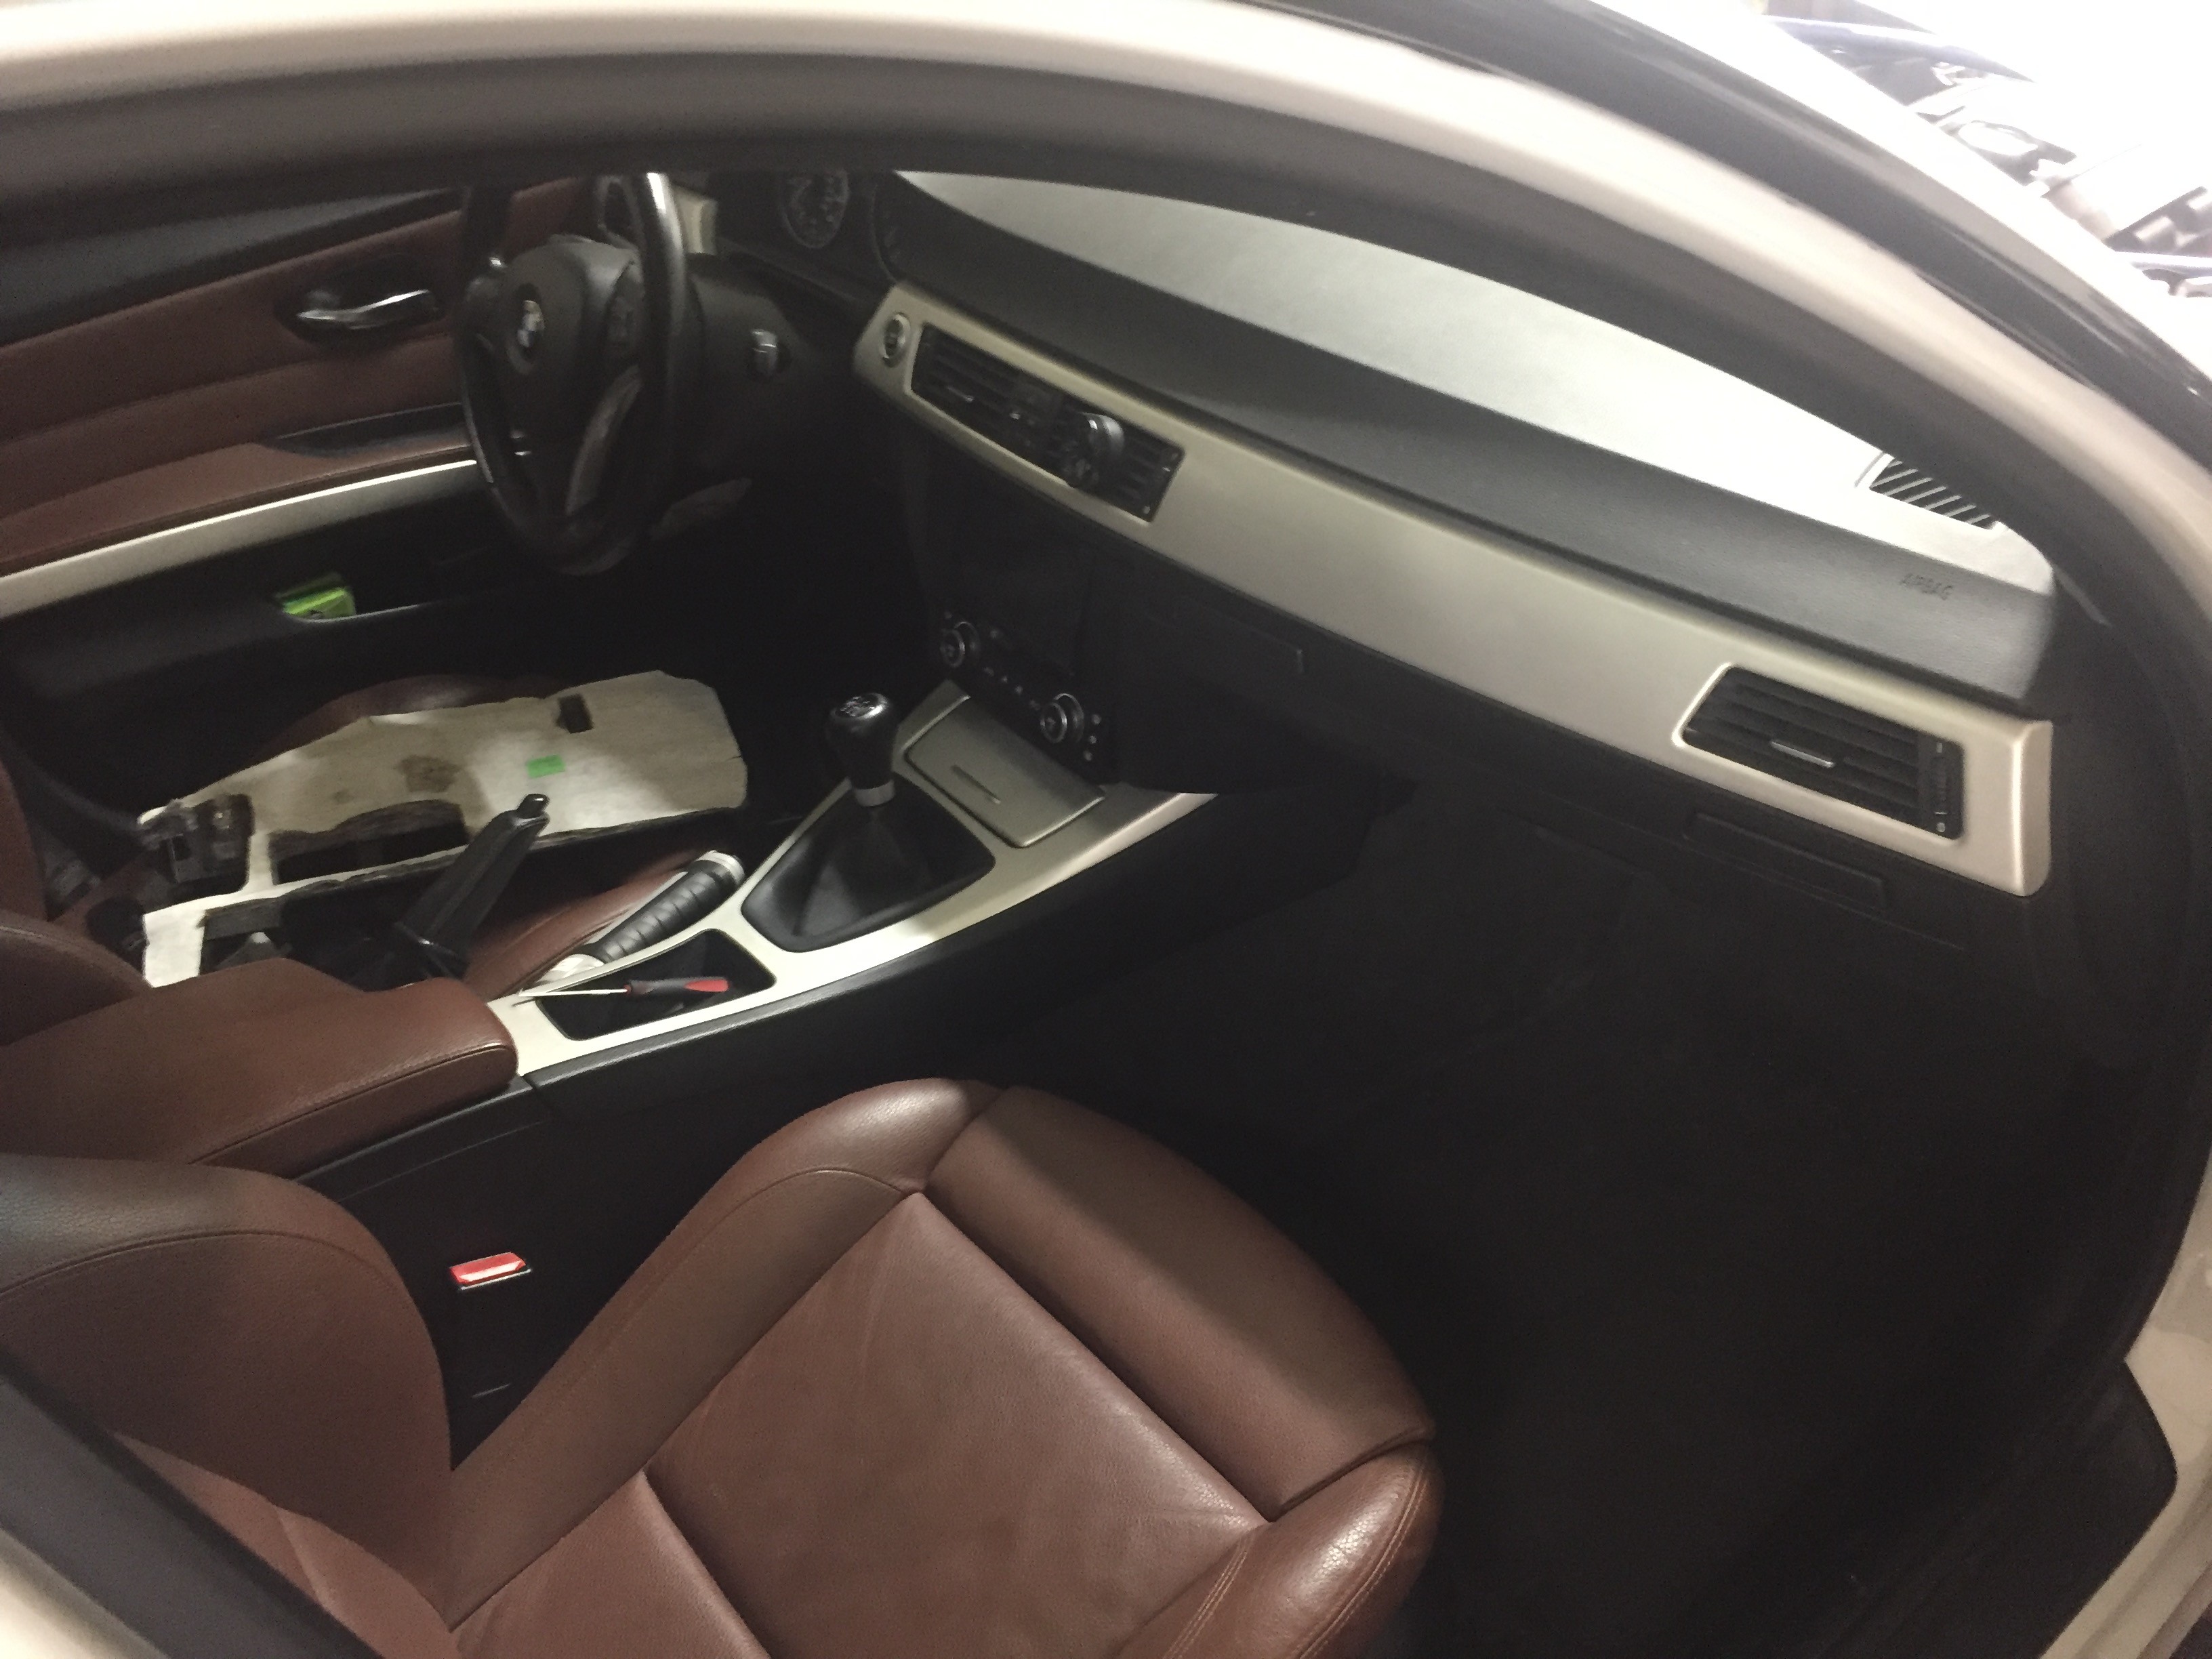 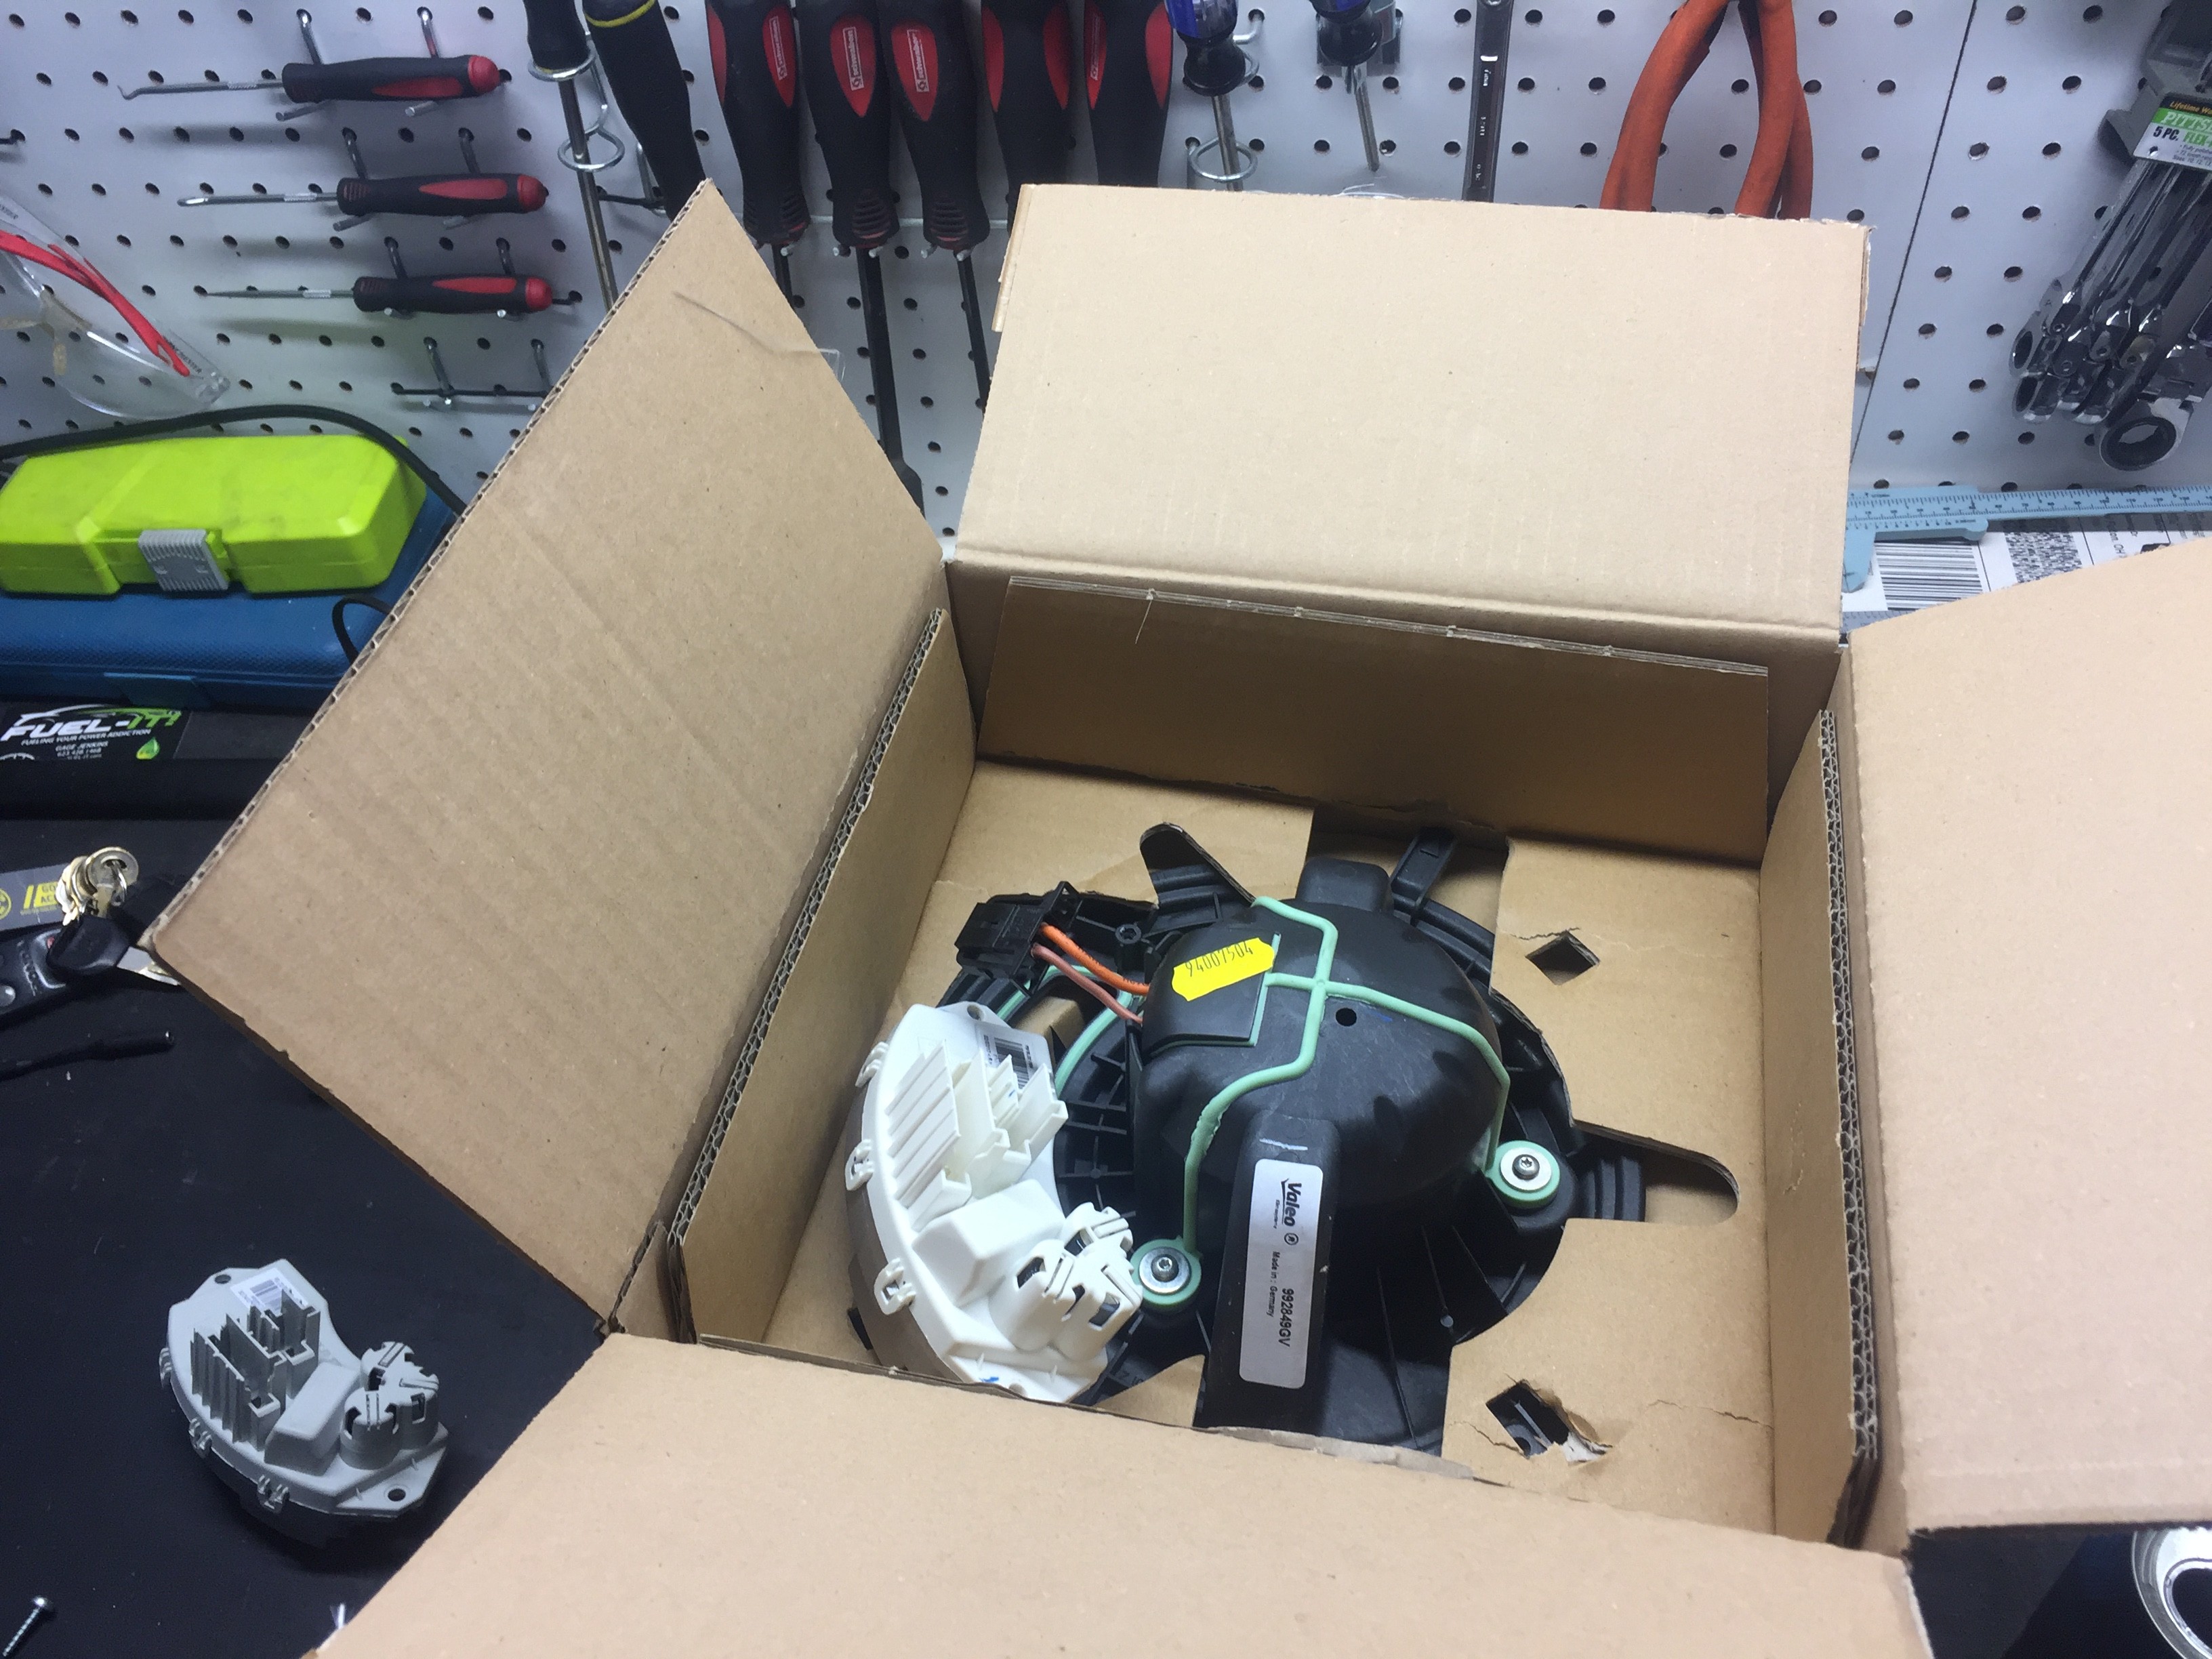 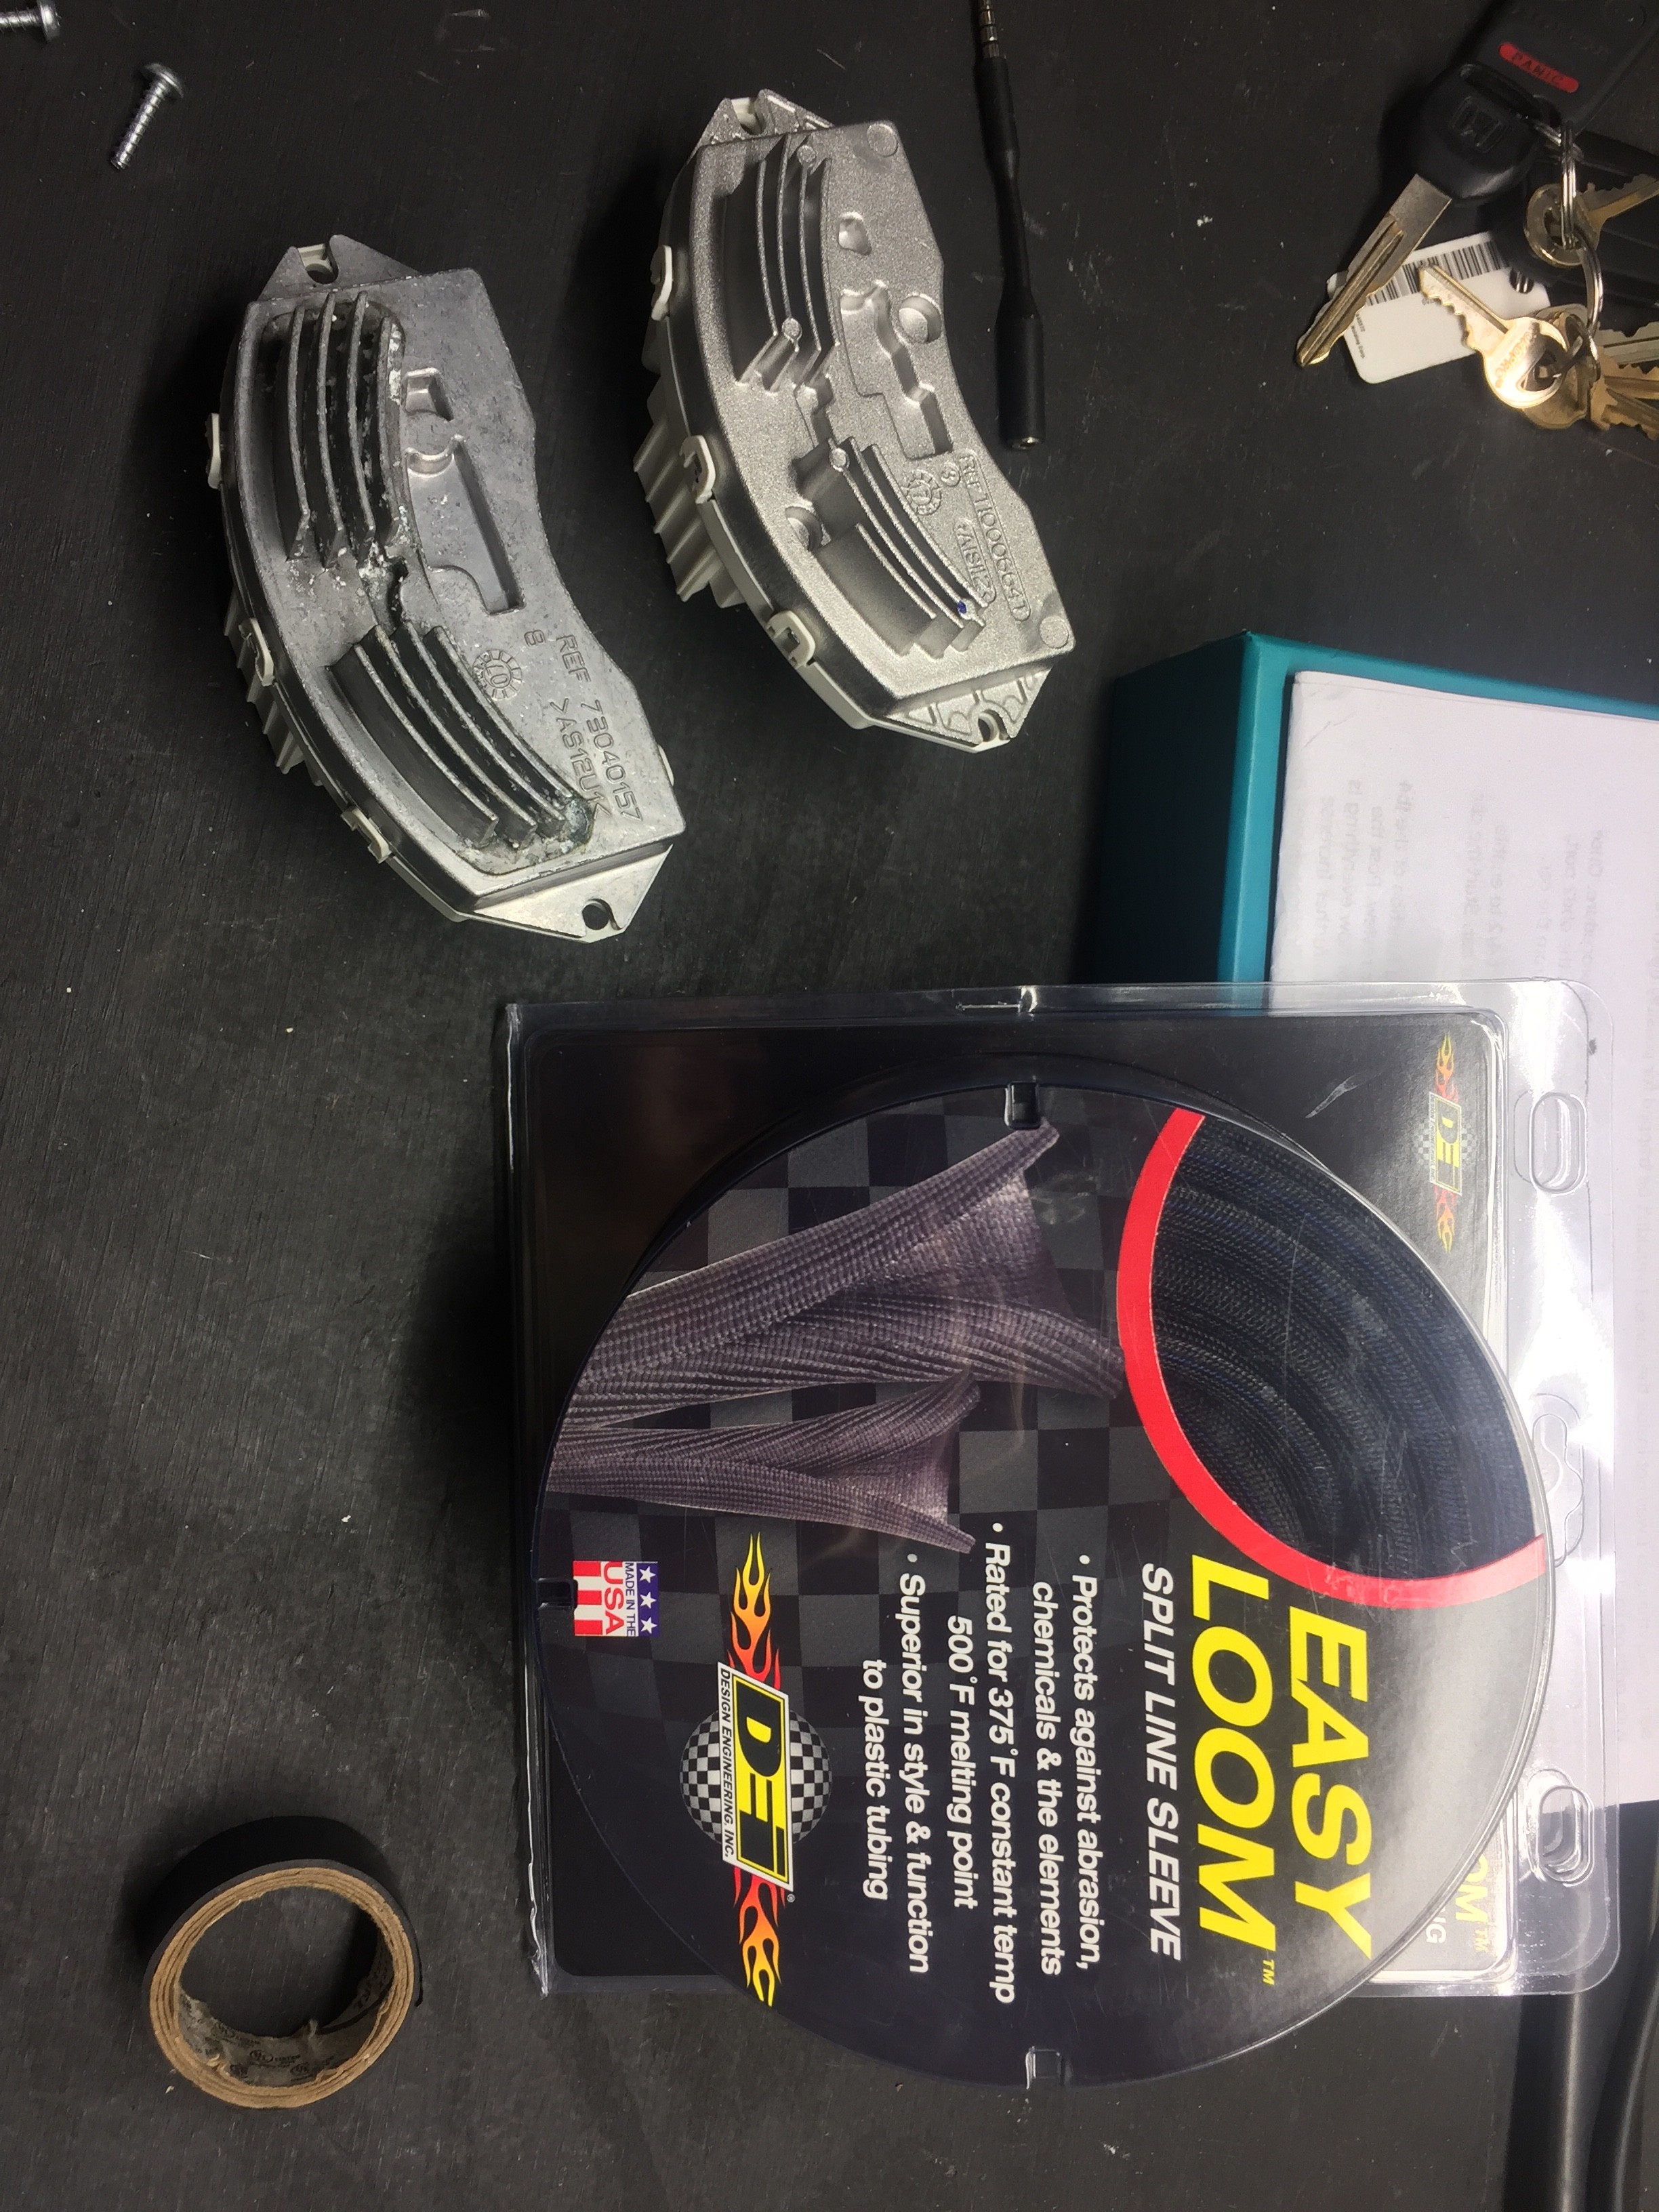 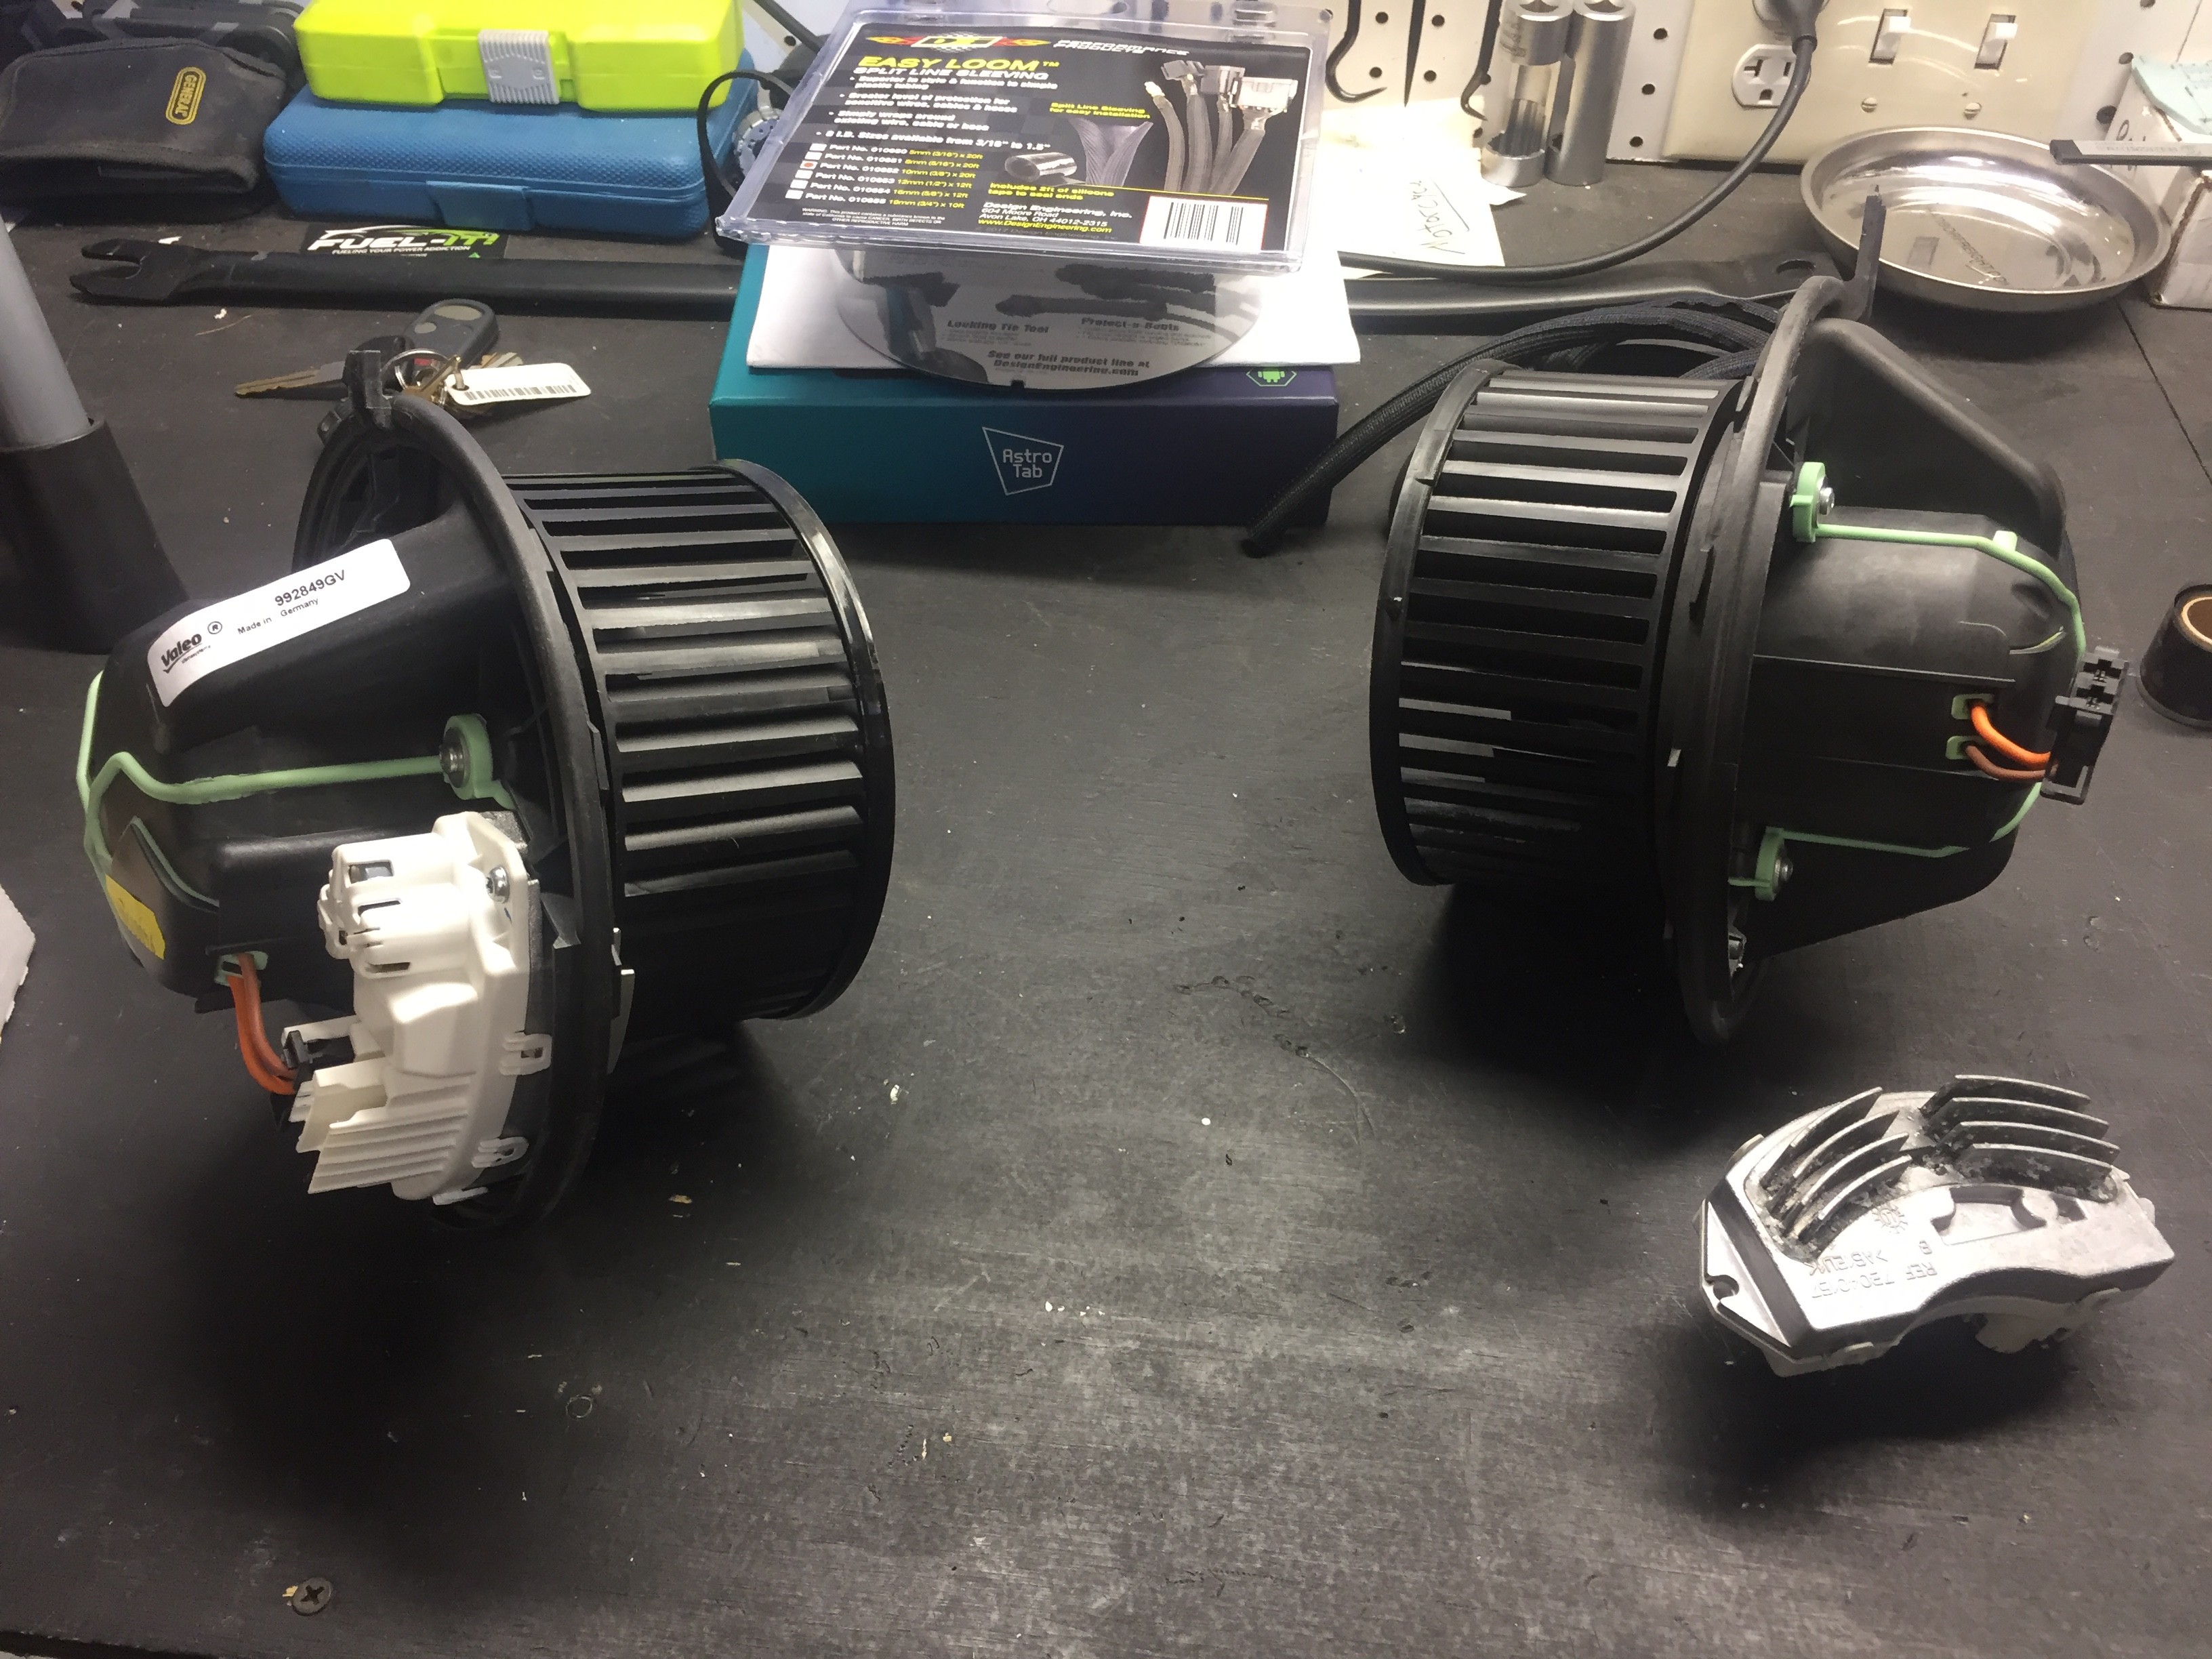 Looks like a pretty good solution to me 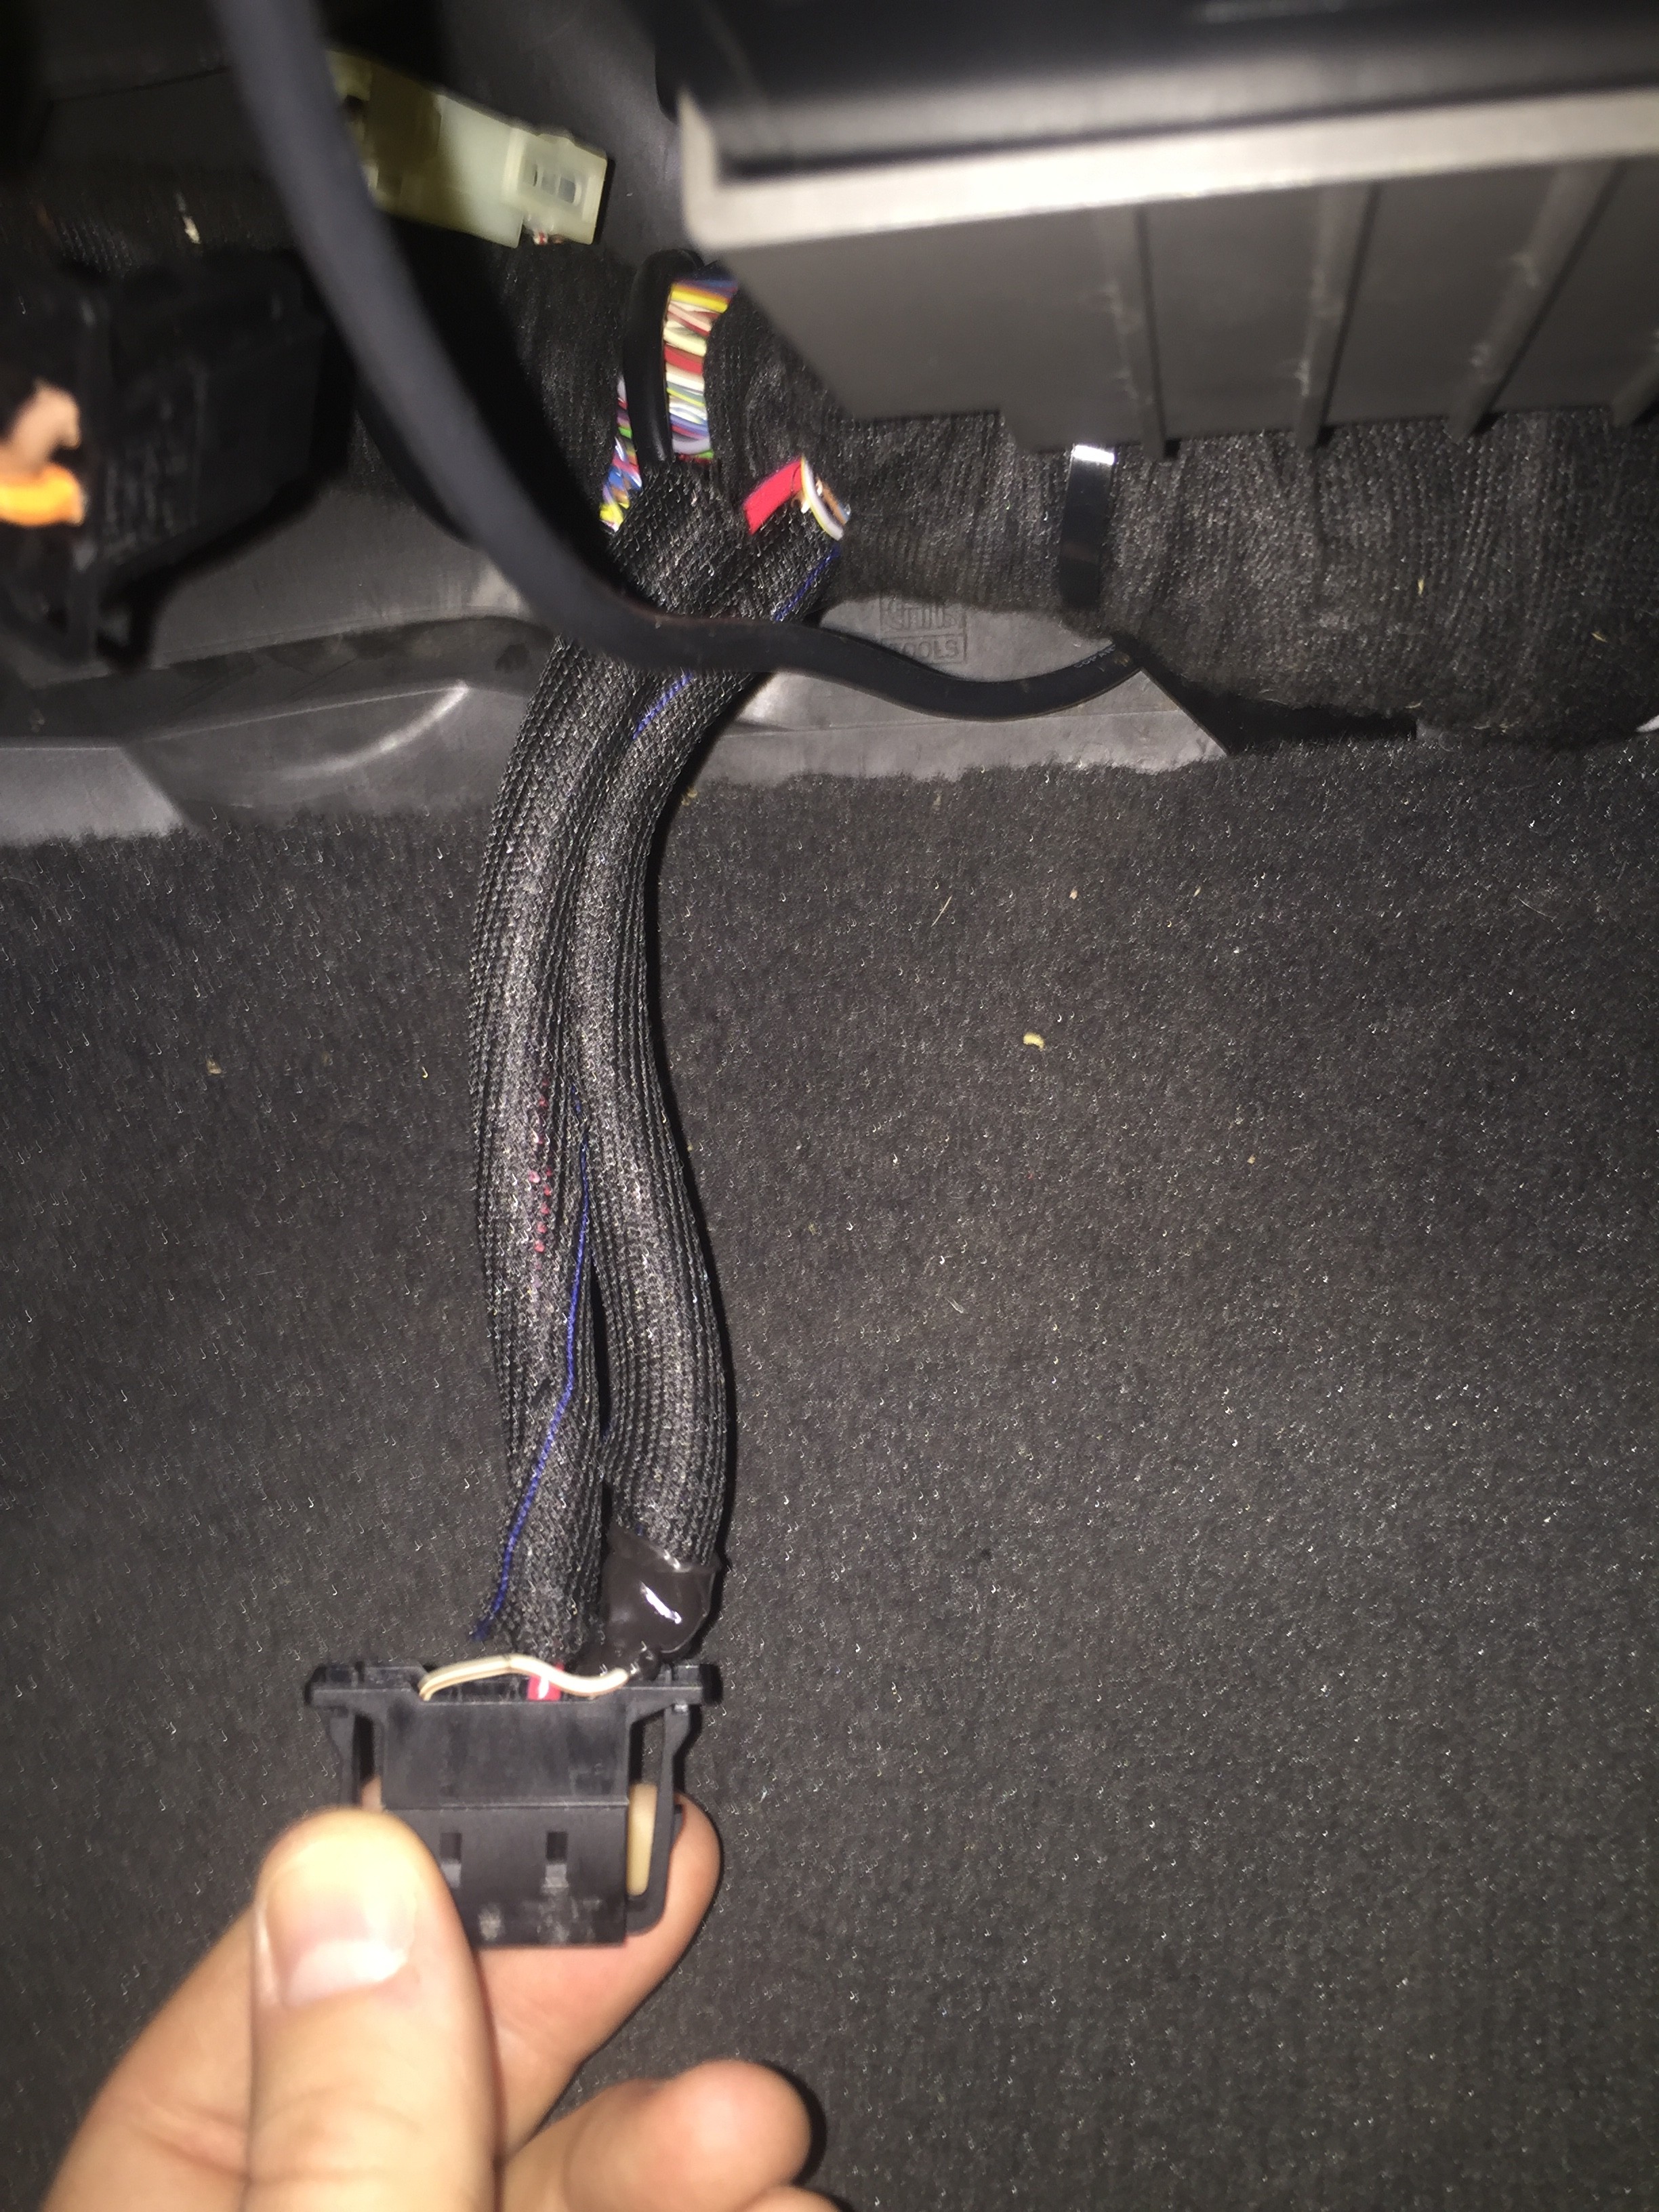 Harbor Freight blaster, oem vac adapter and nozzle, rigid shop vac, ready to go  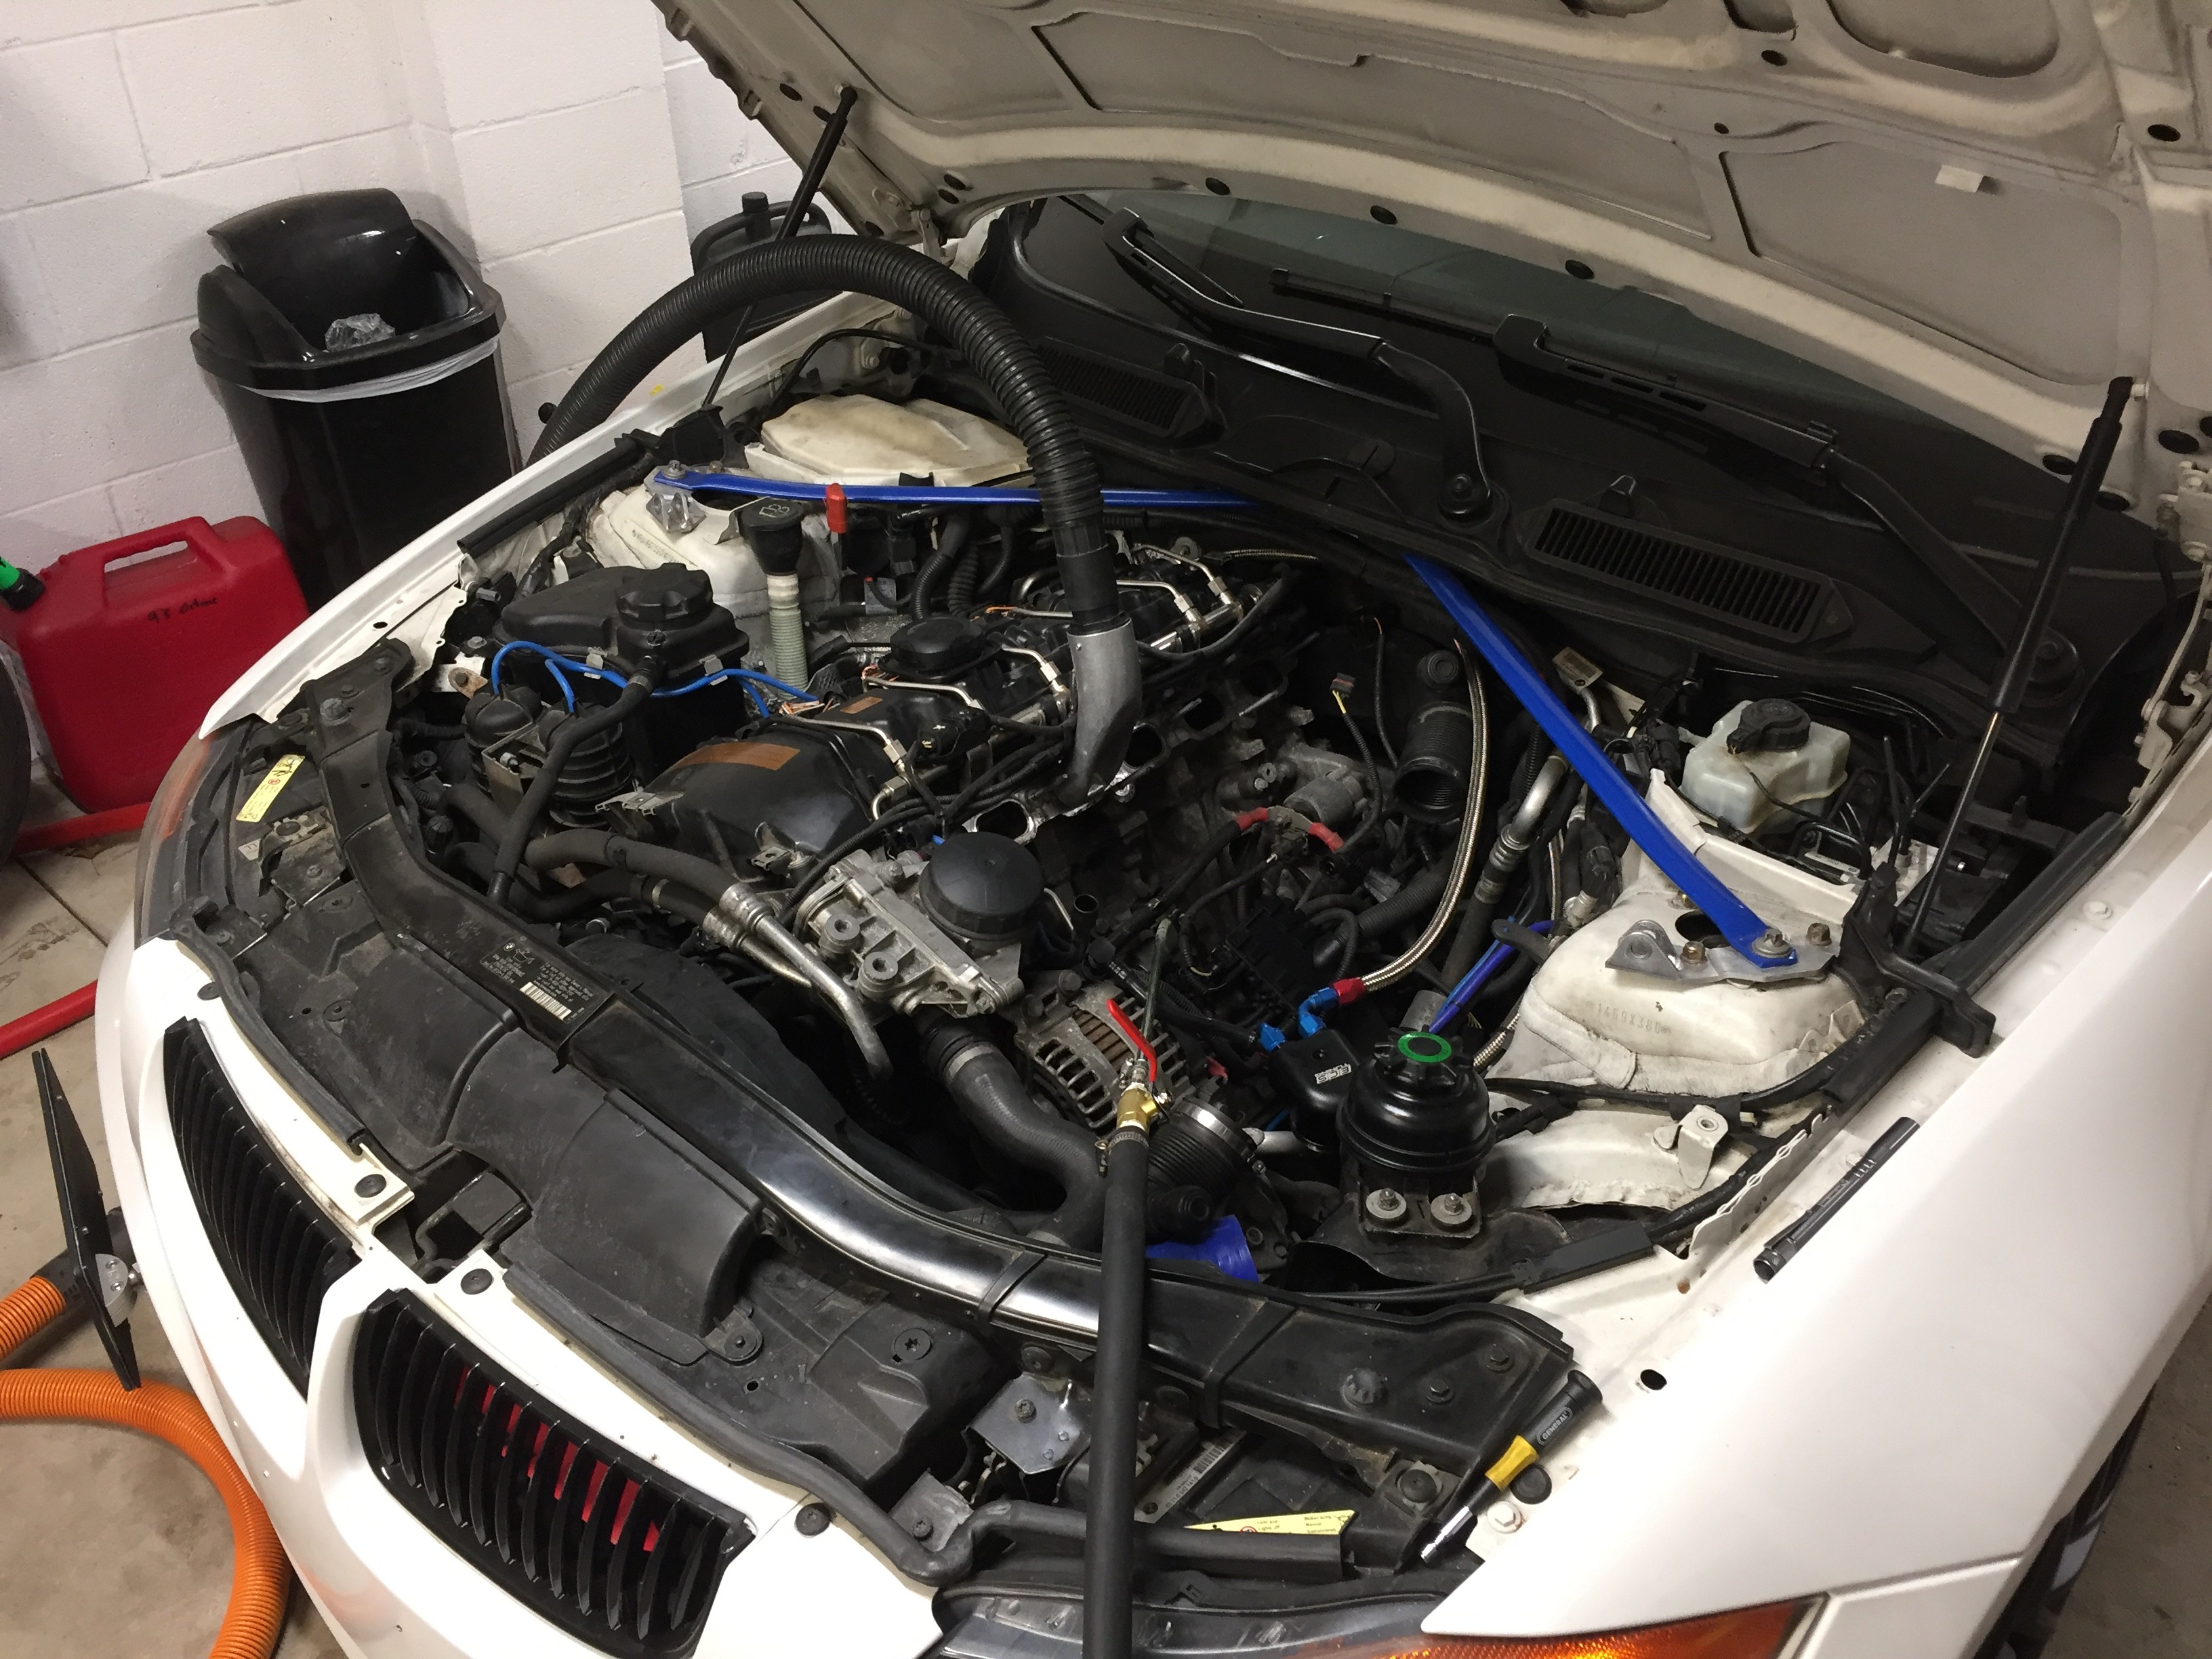  Now to fit a ECS Catch Can and add some -AN lines/ fittings 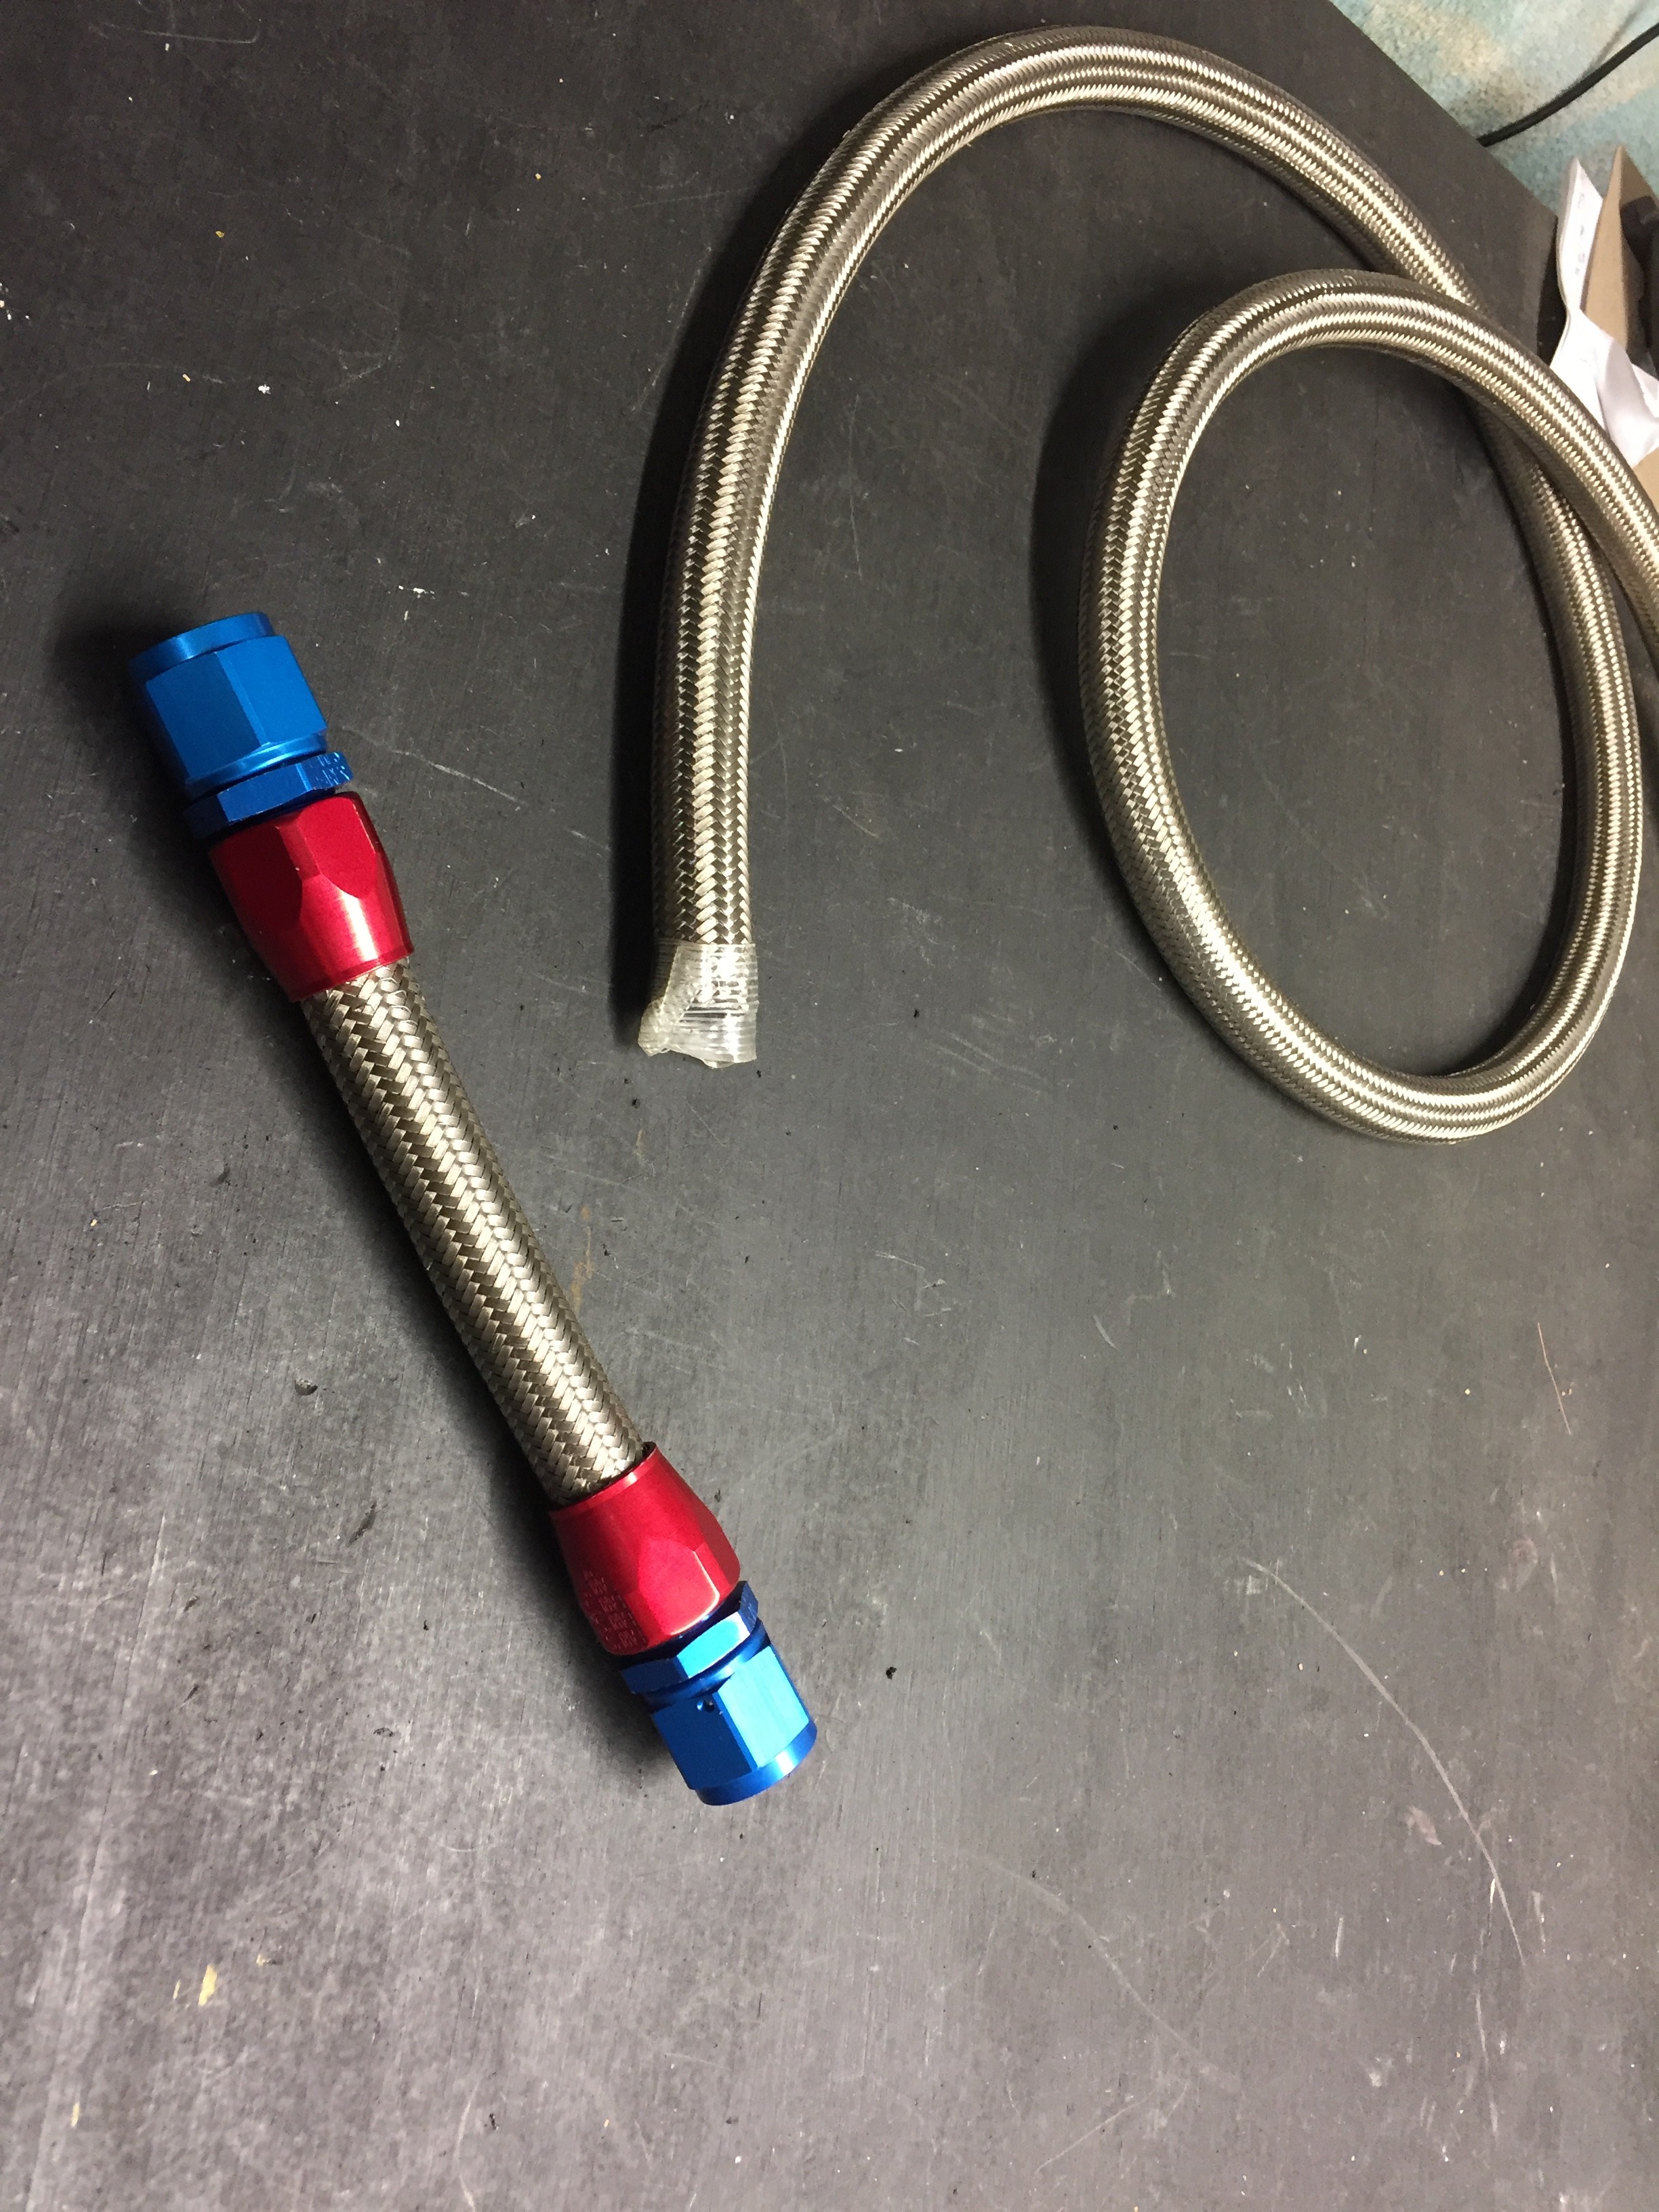  Stock valve still in place with silicone hose to adapt the catch can. Quickly converted the silicon to -AN which I will admit is more form over function lol love the look though  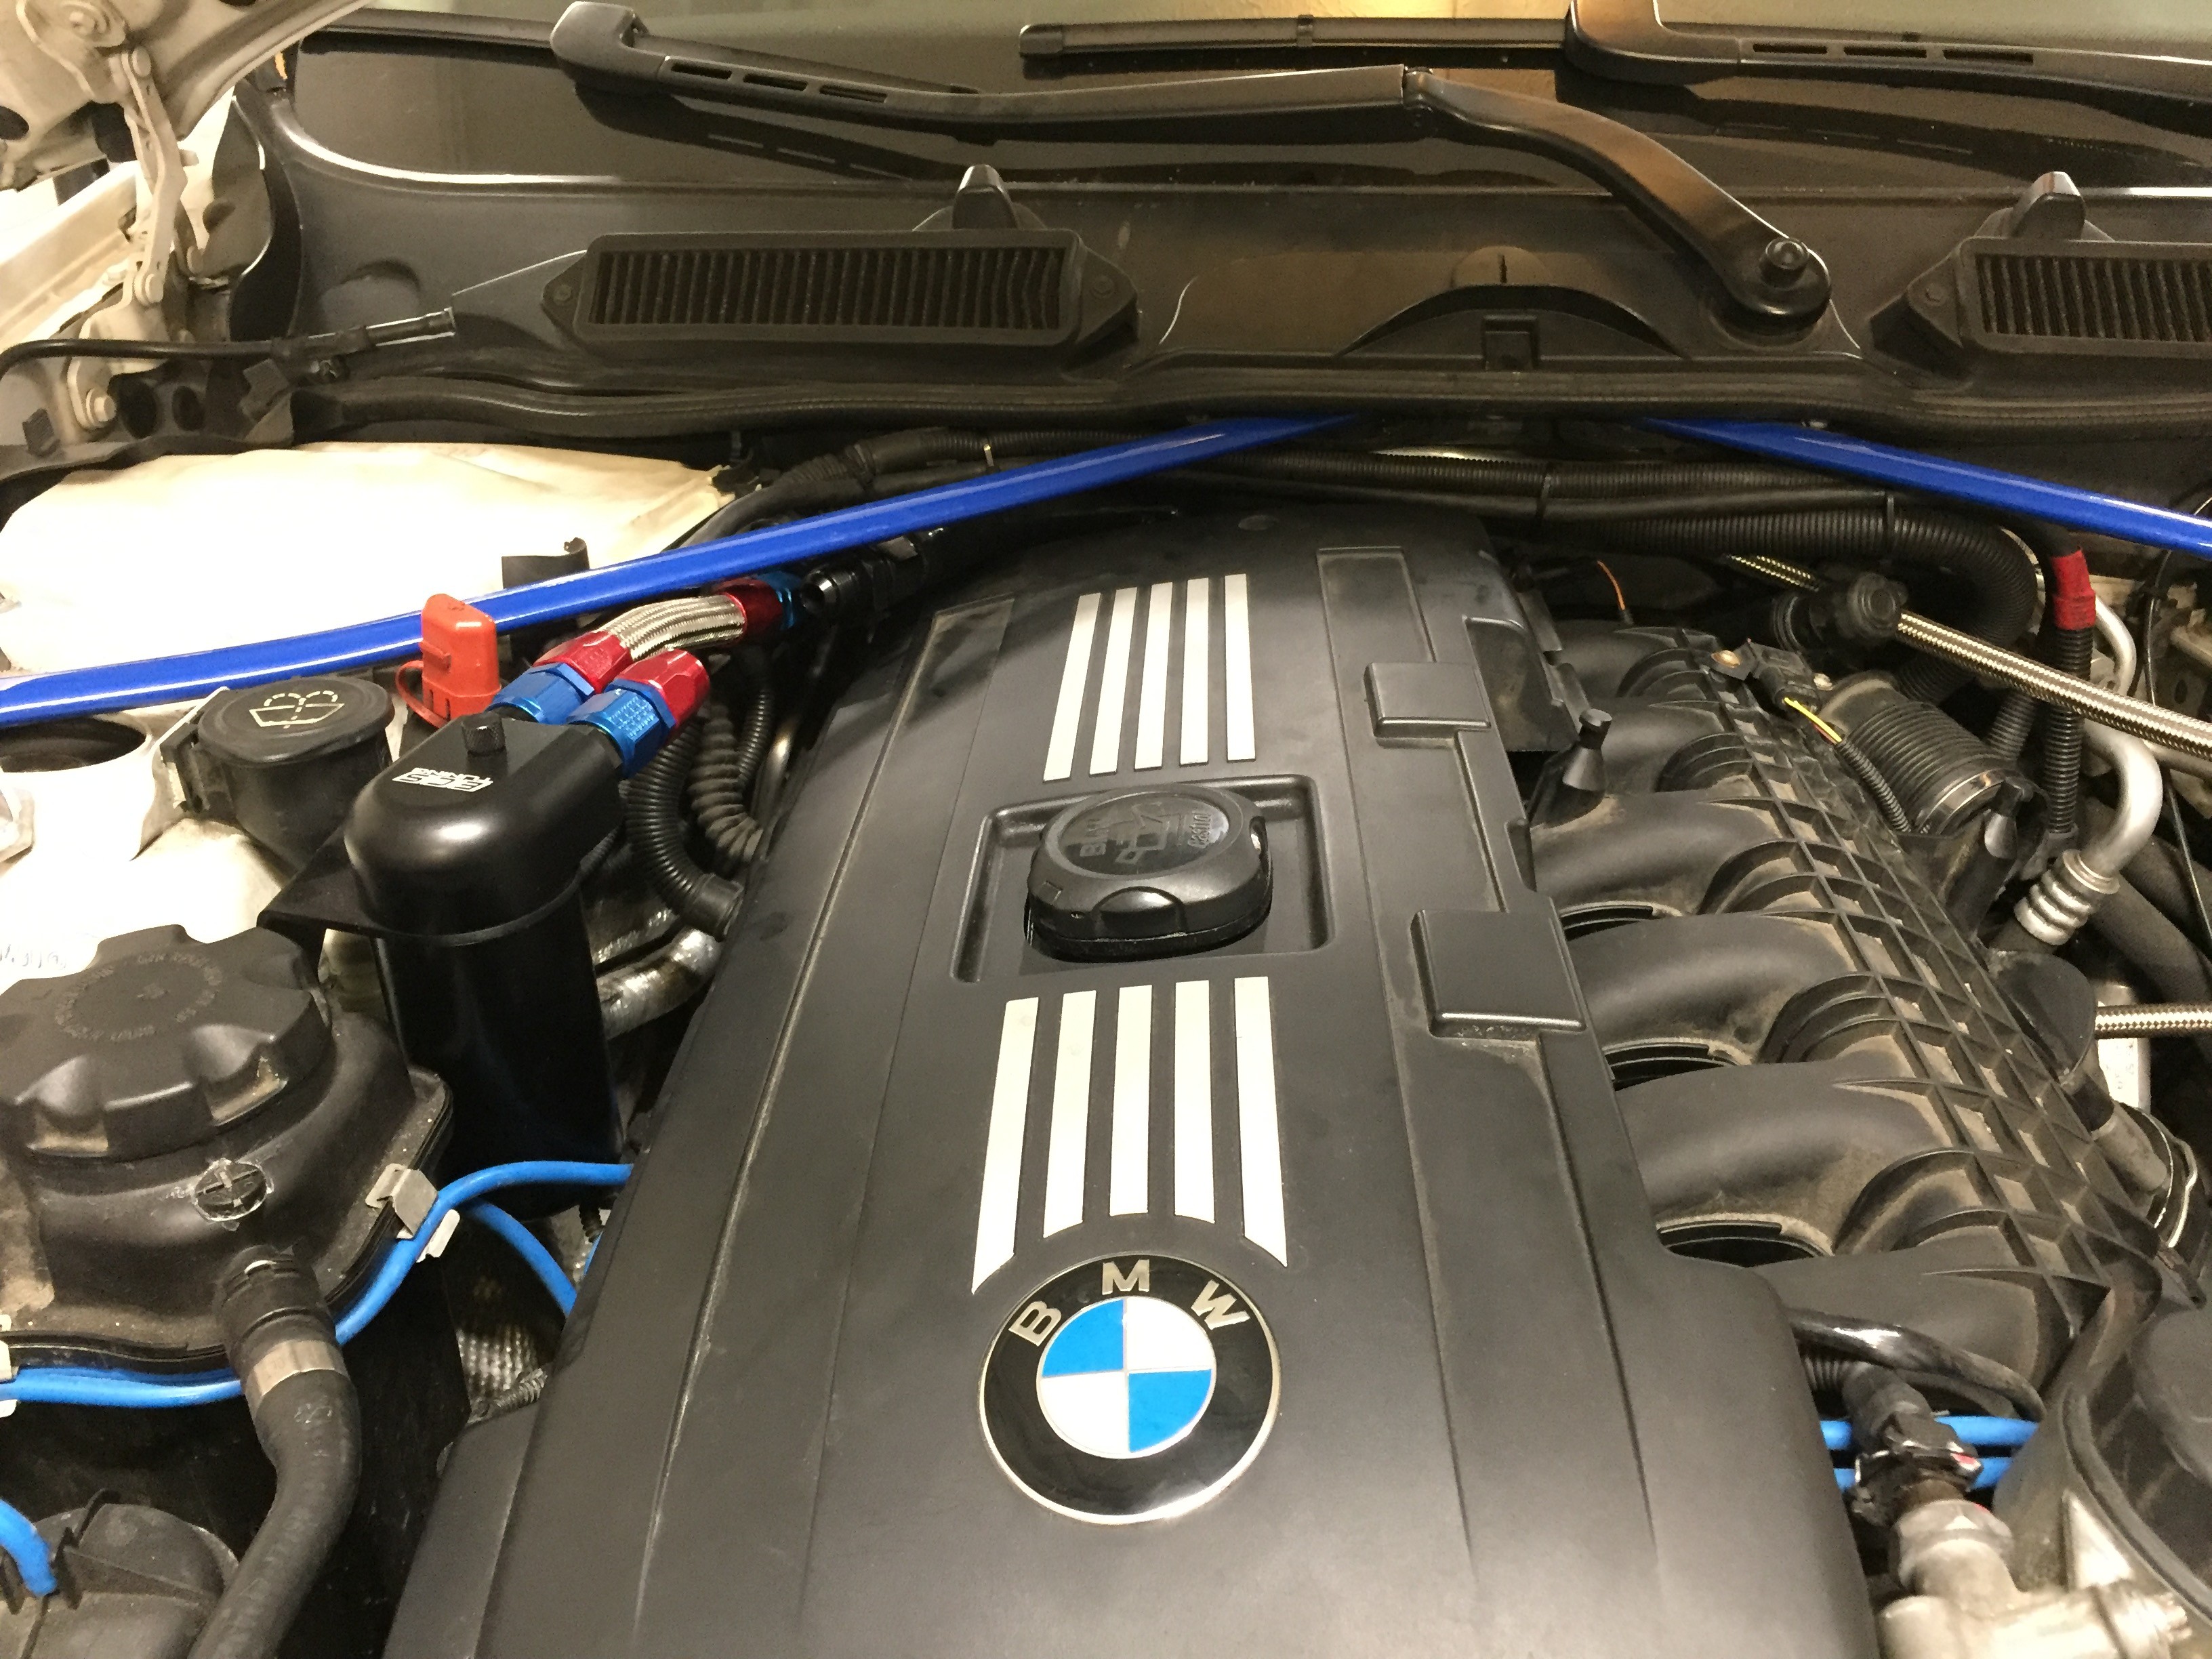  *Some Trimming Required*  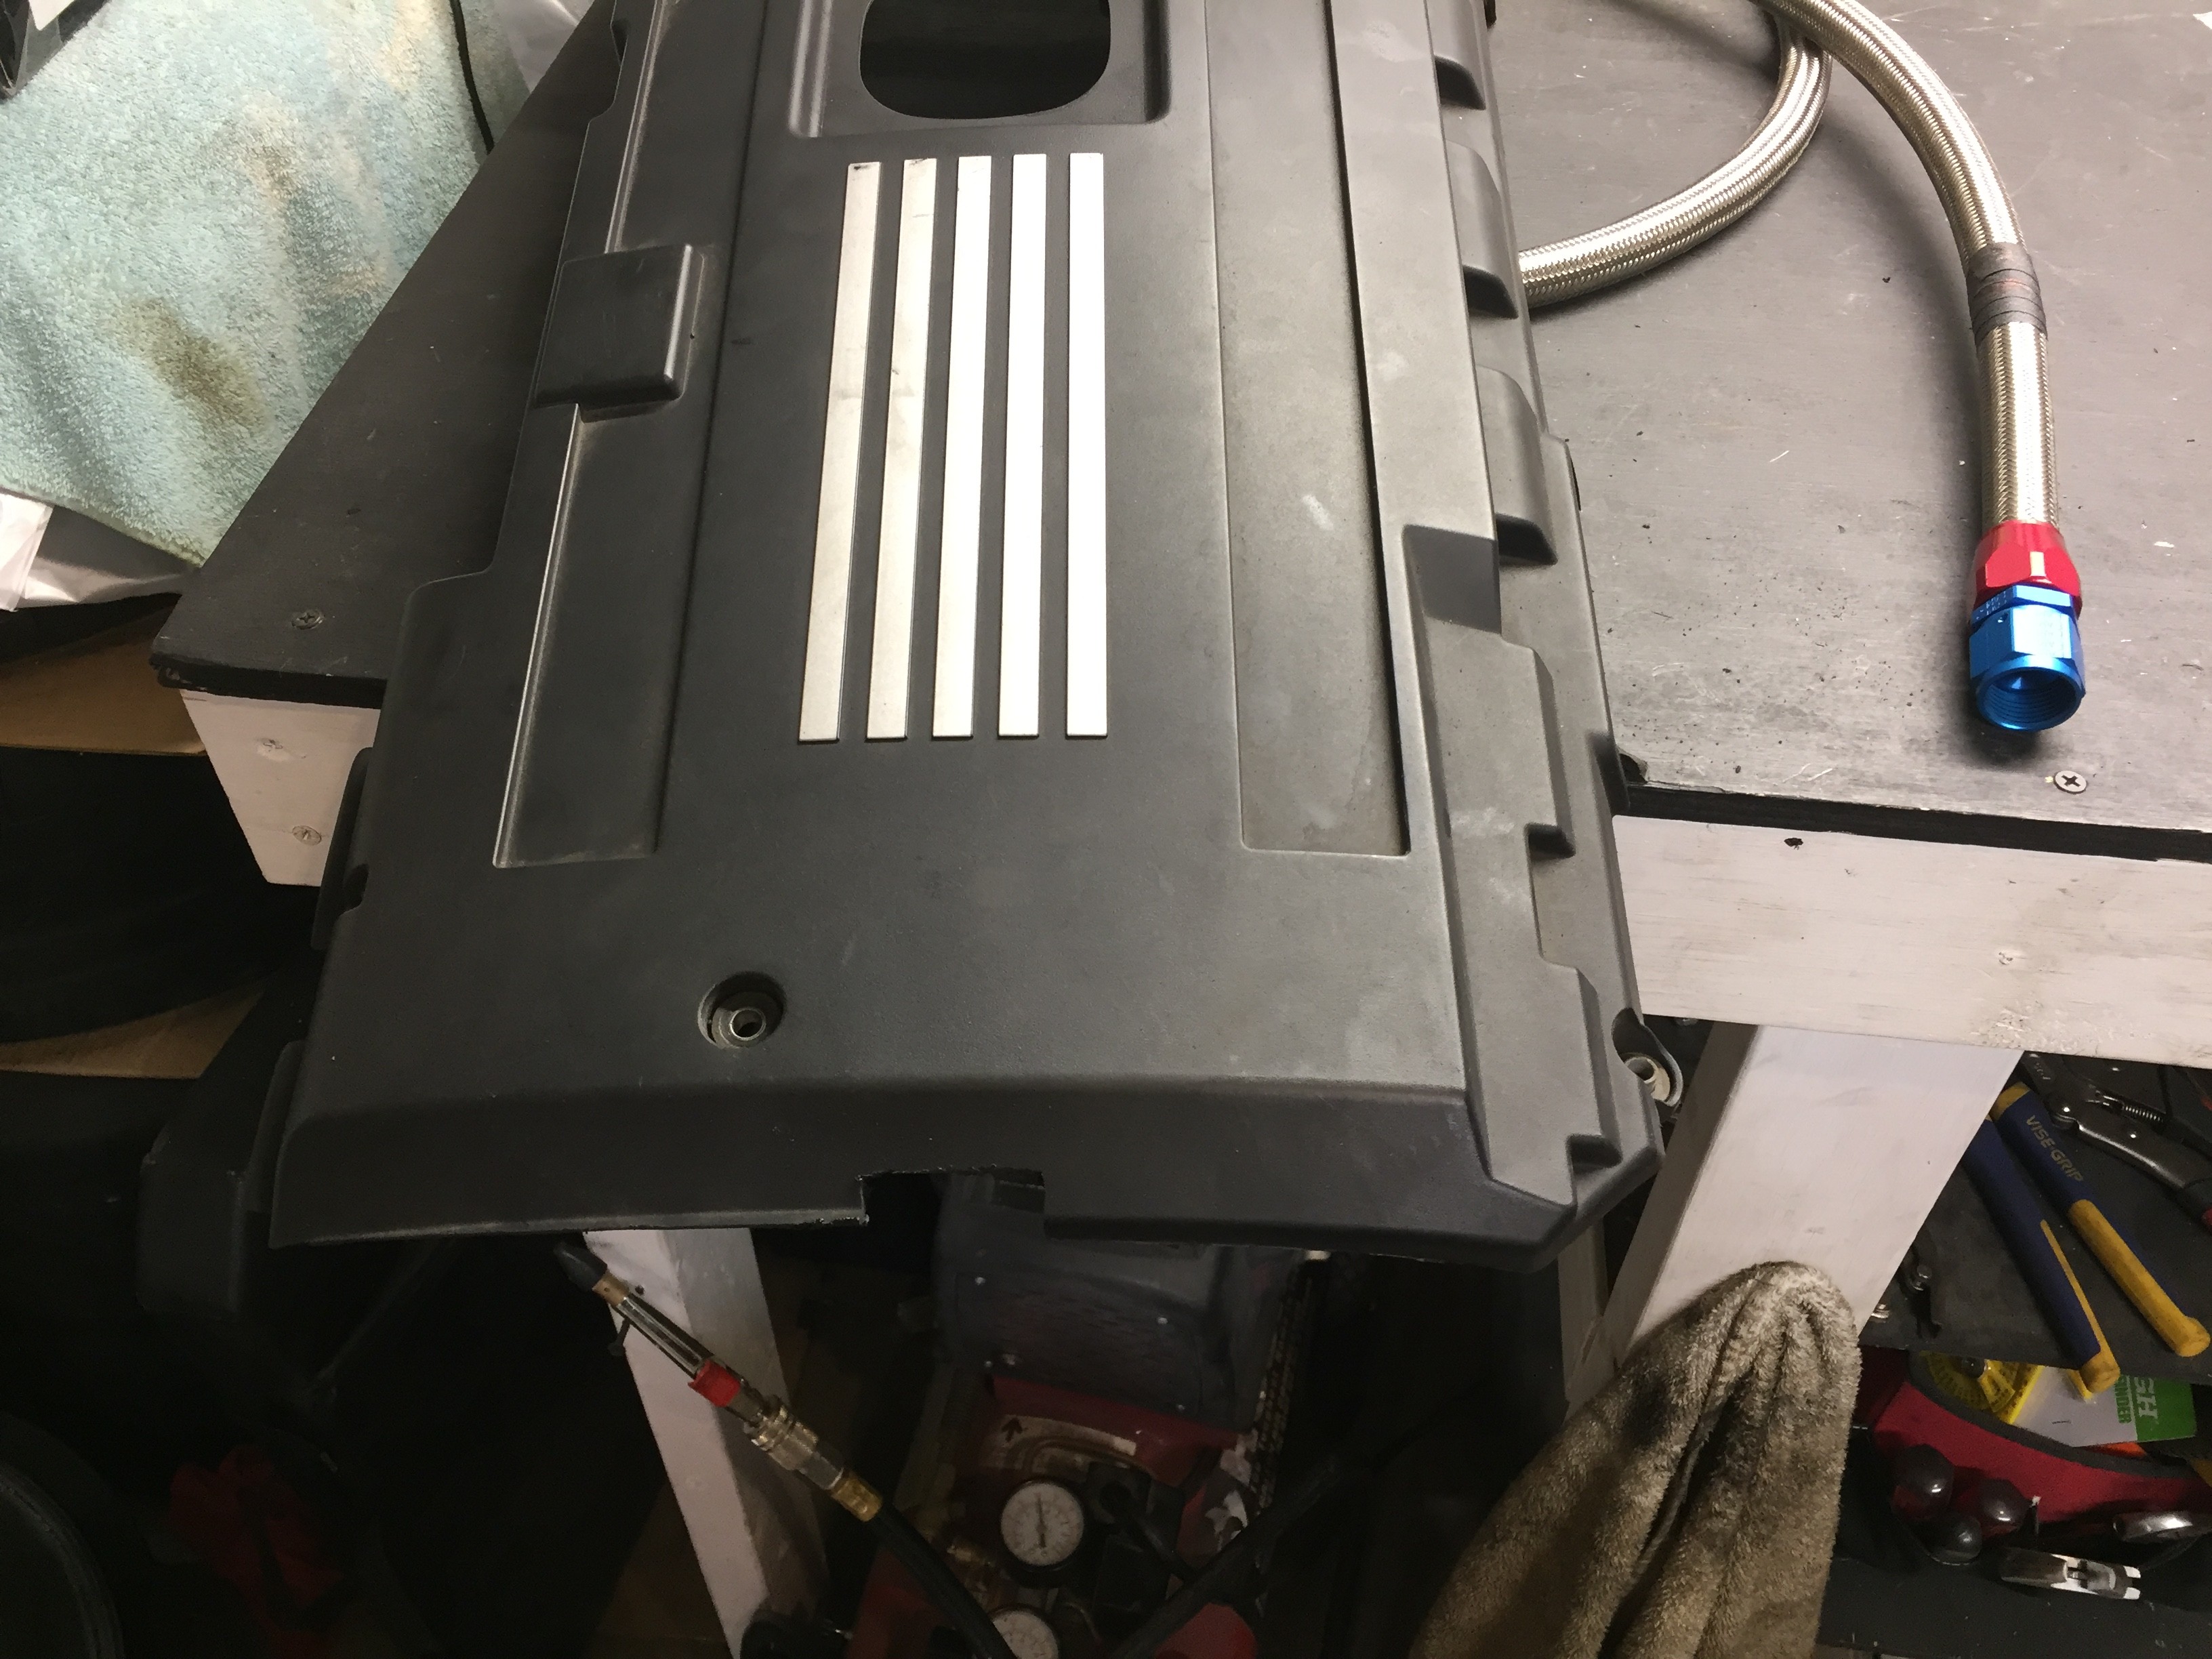 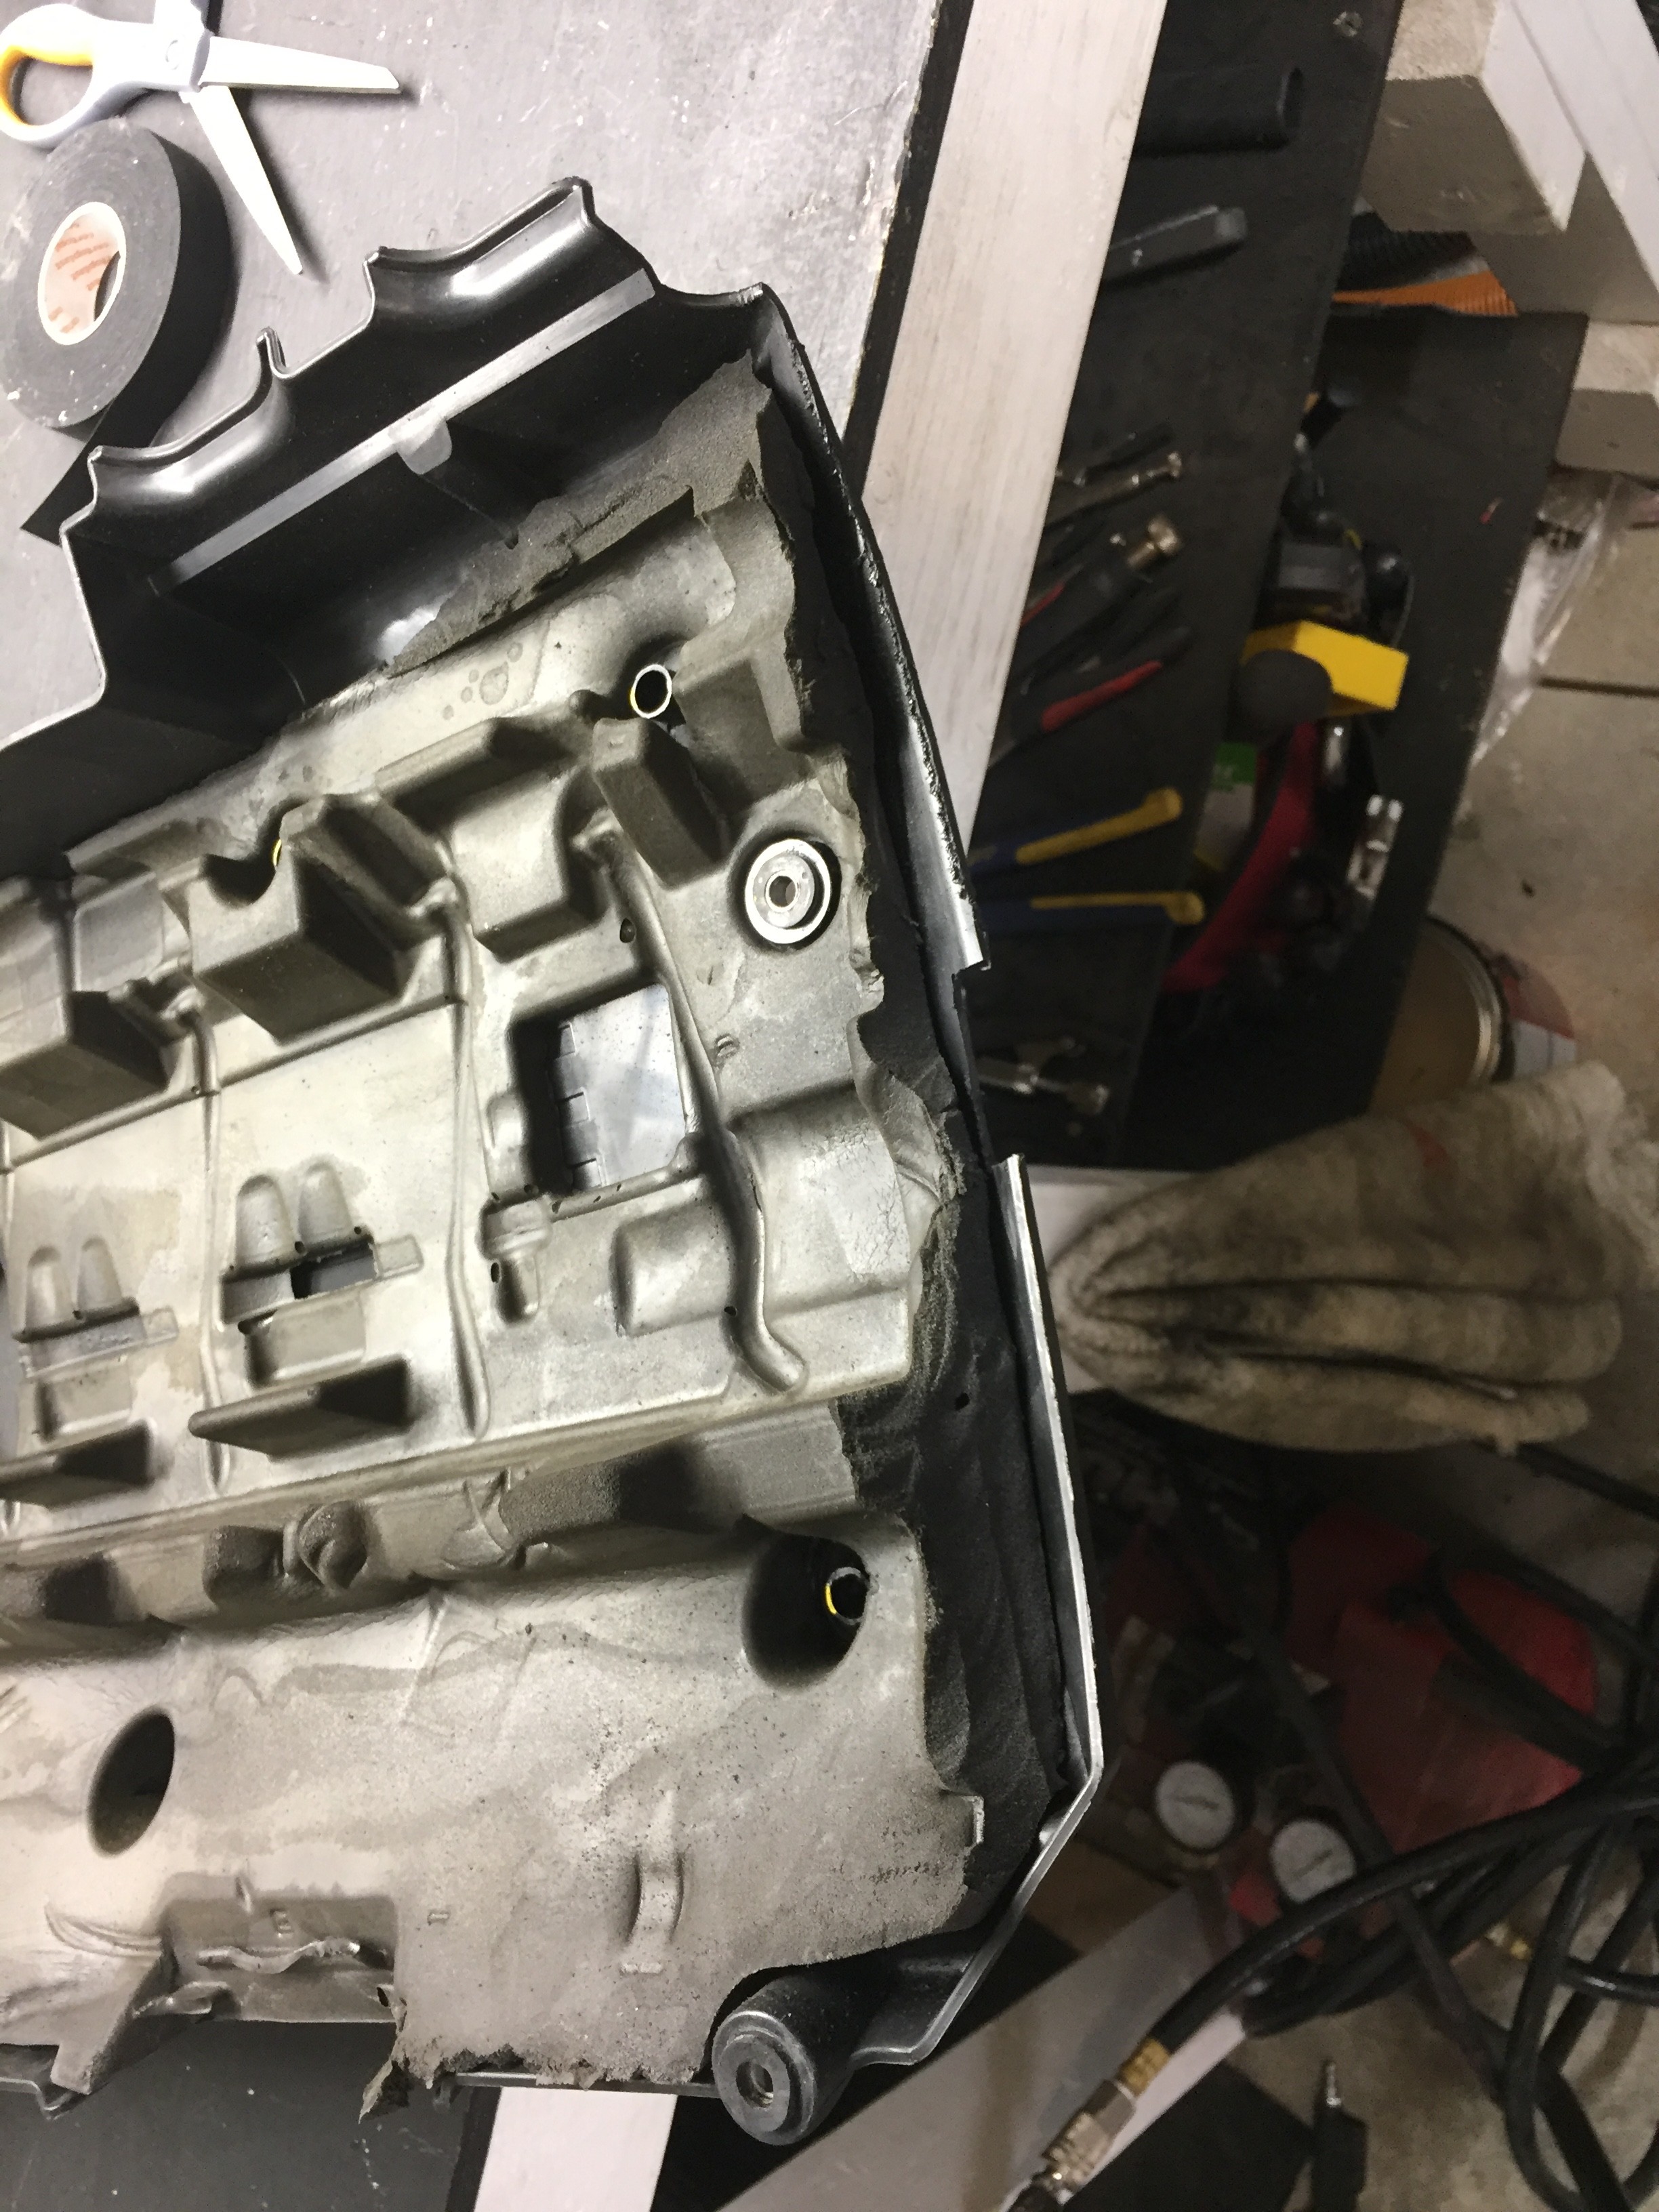 Finished up! 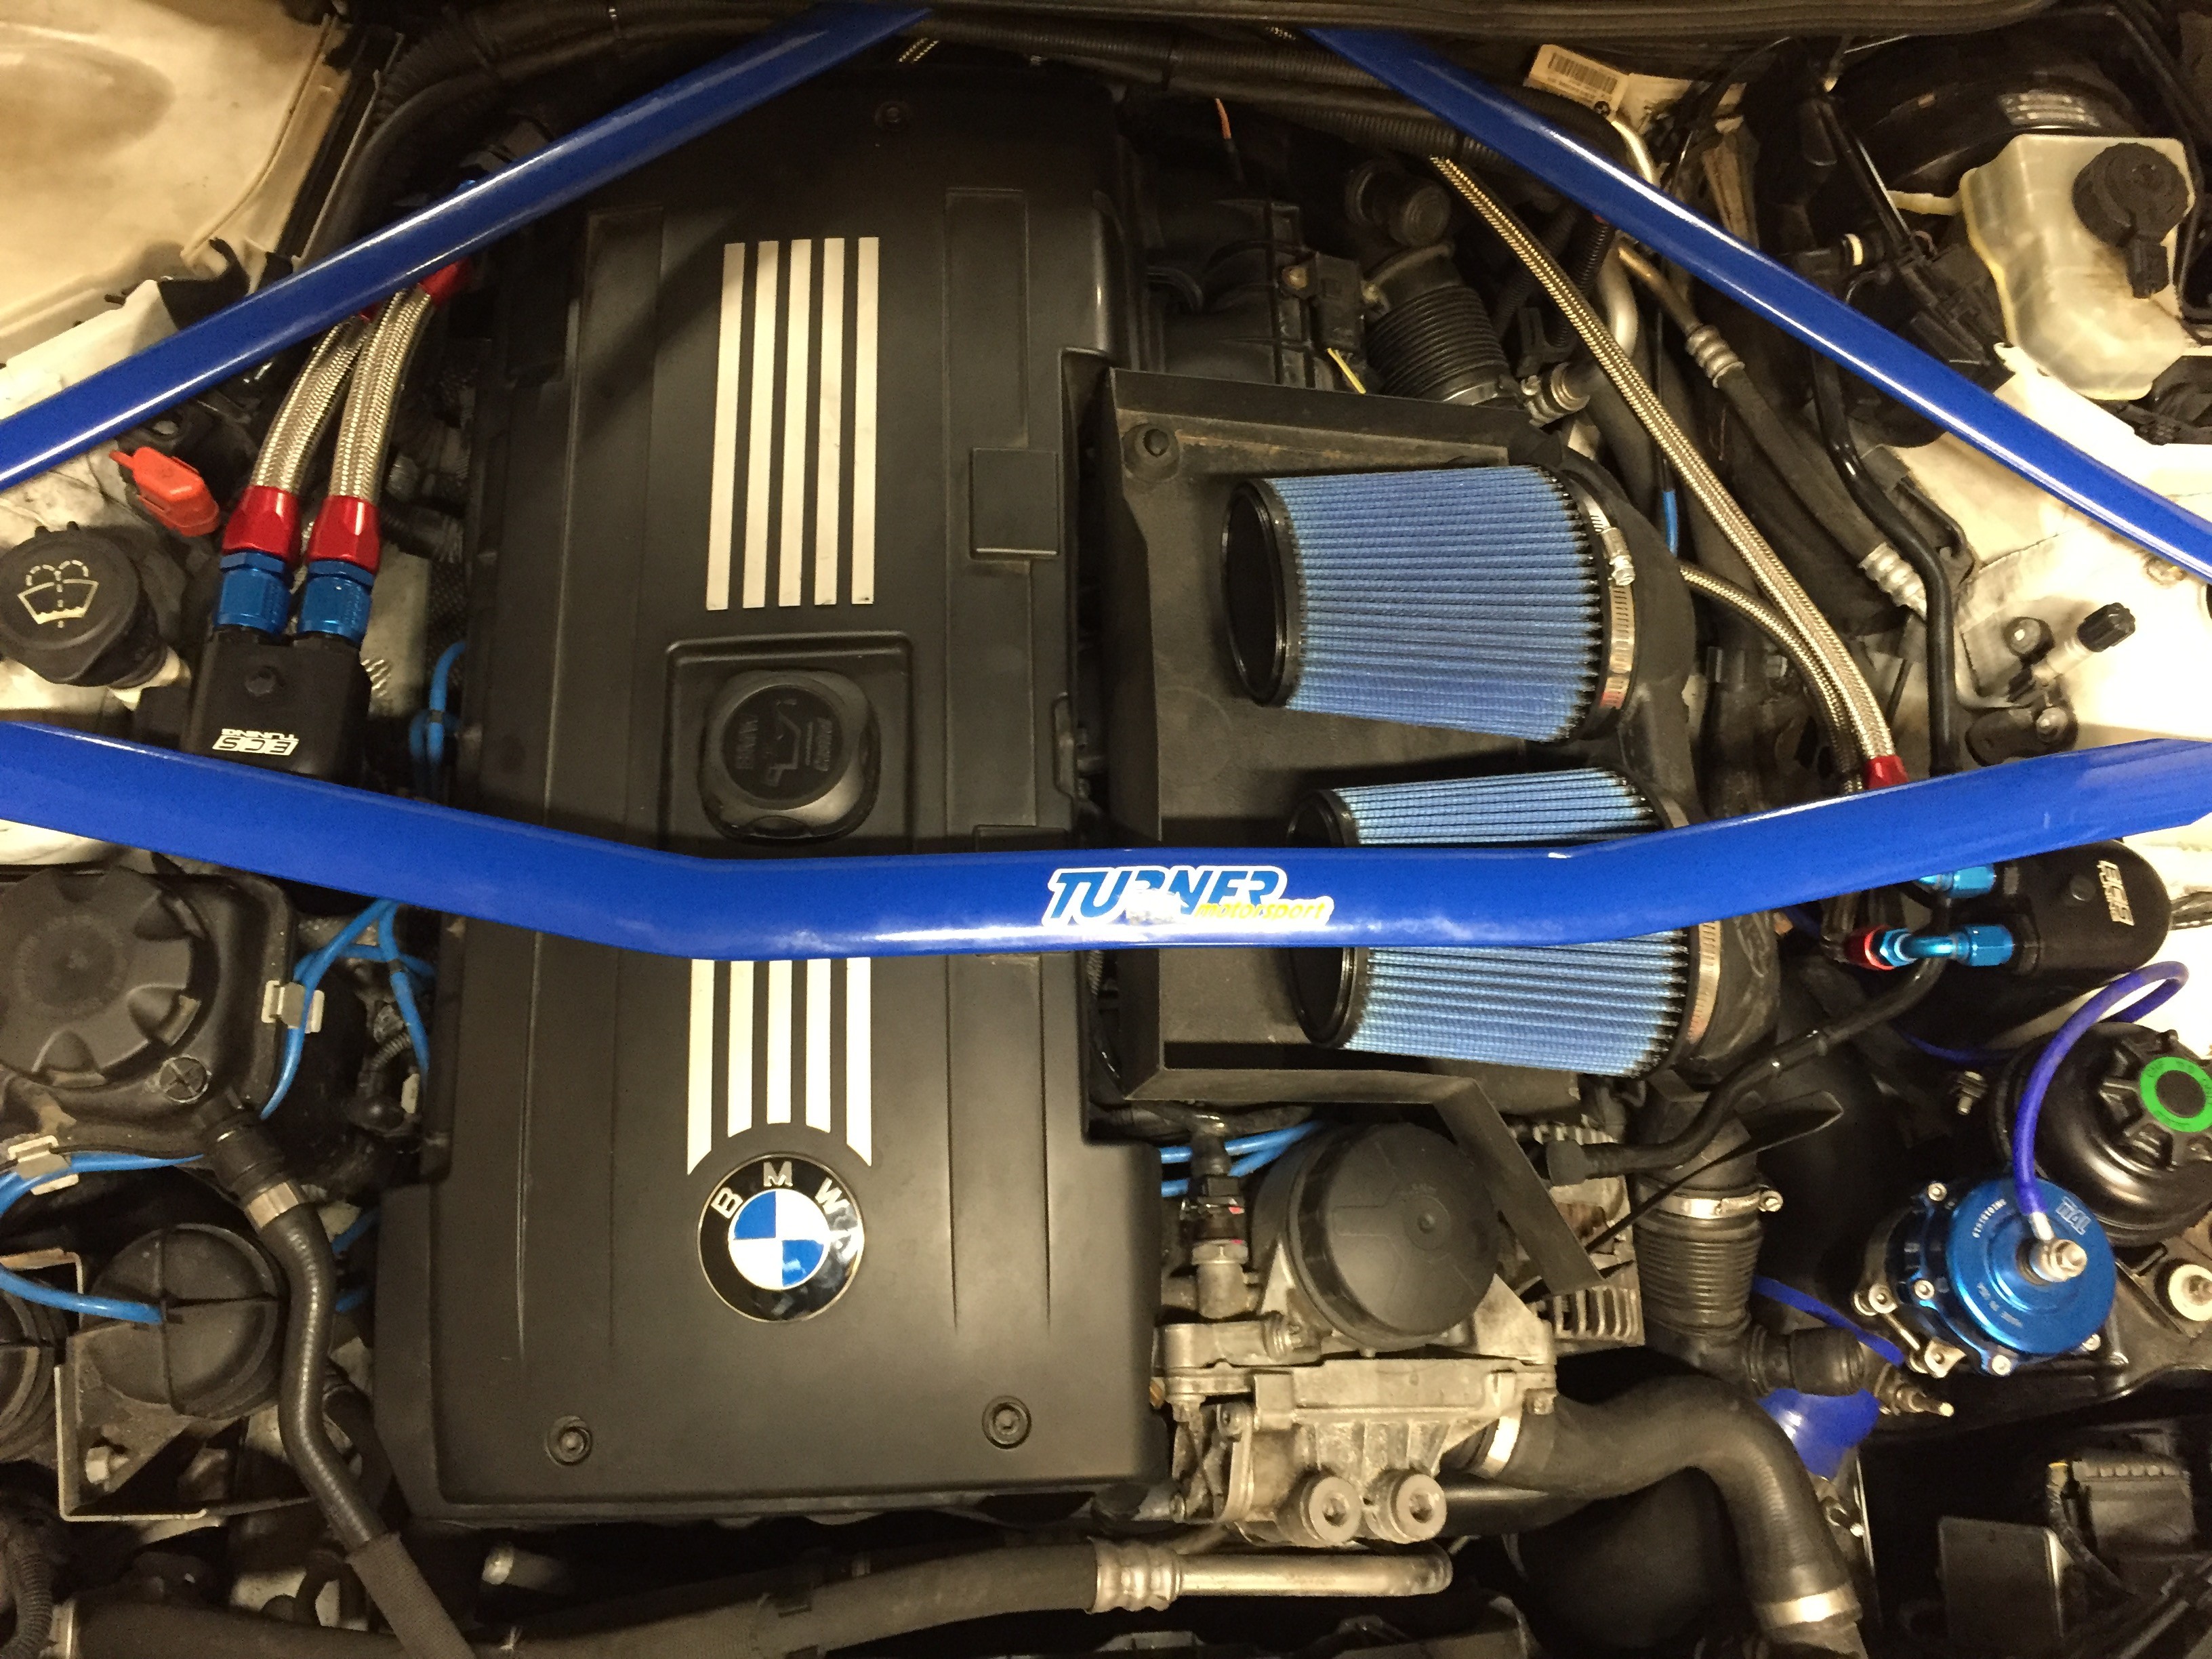 Hood removal and install. (when she looks better without the hood on )  Next up!! WMI.... I will chip away at this parts pile sooner or later 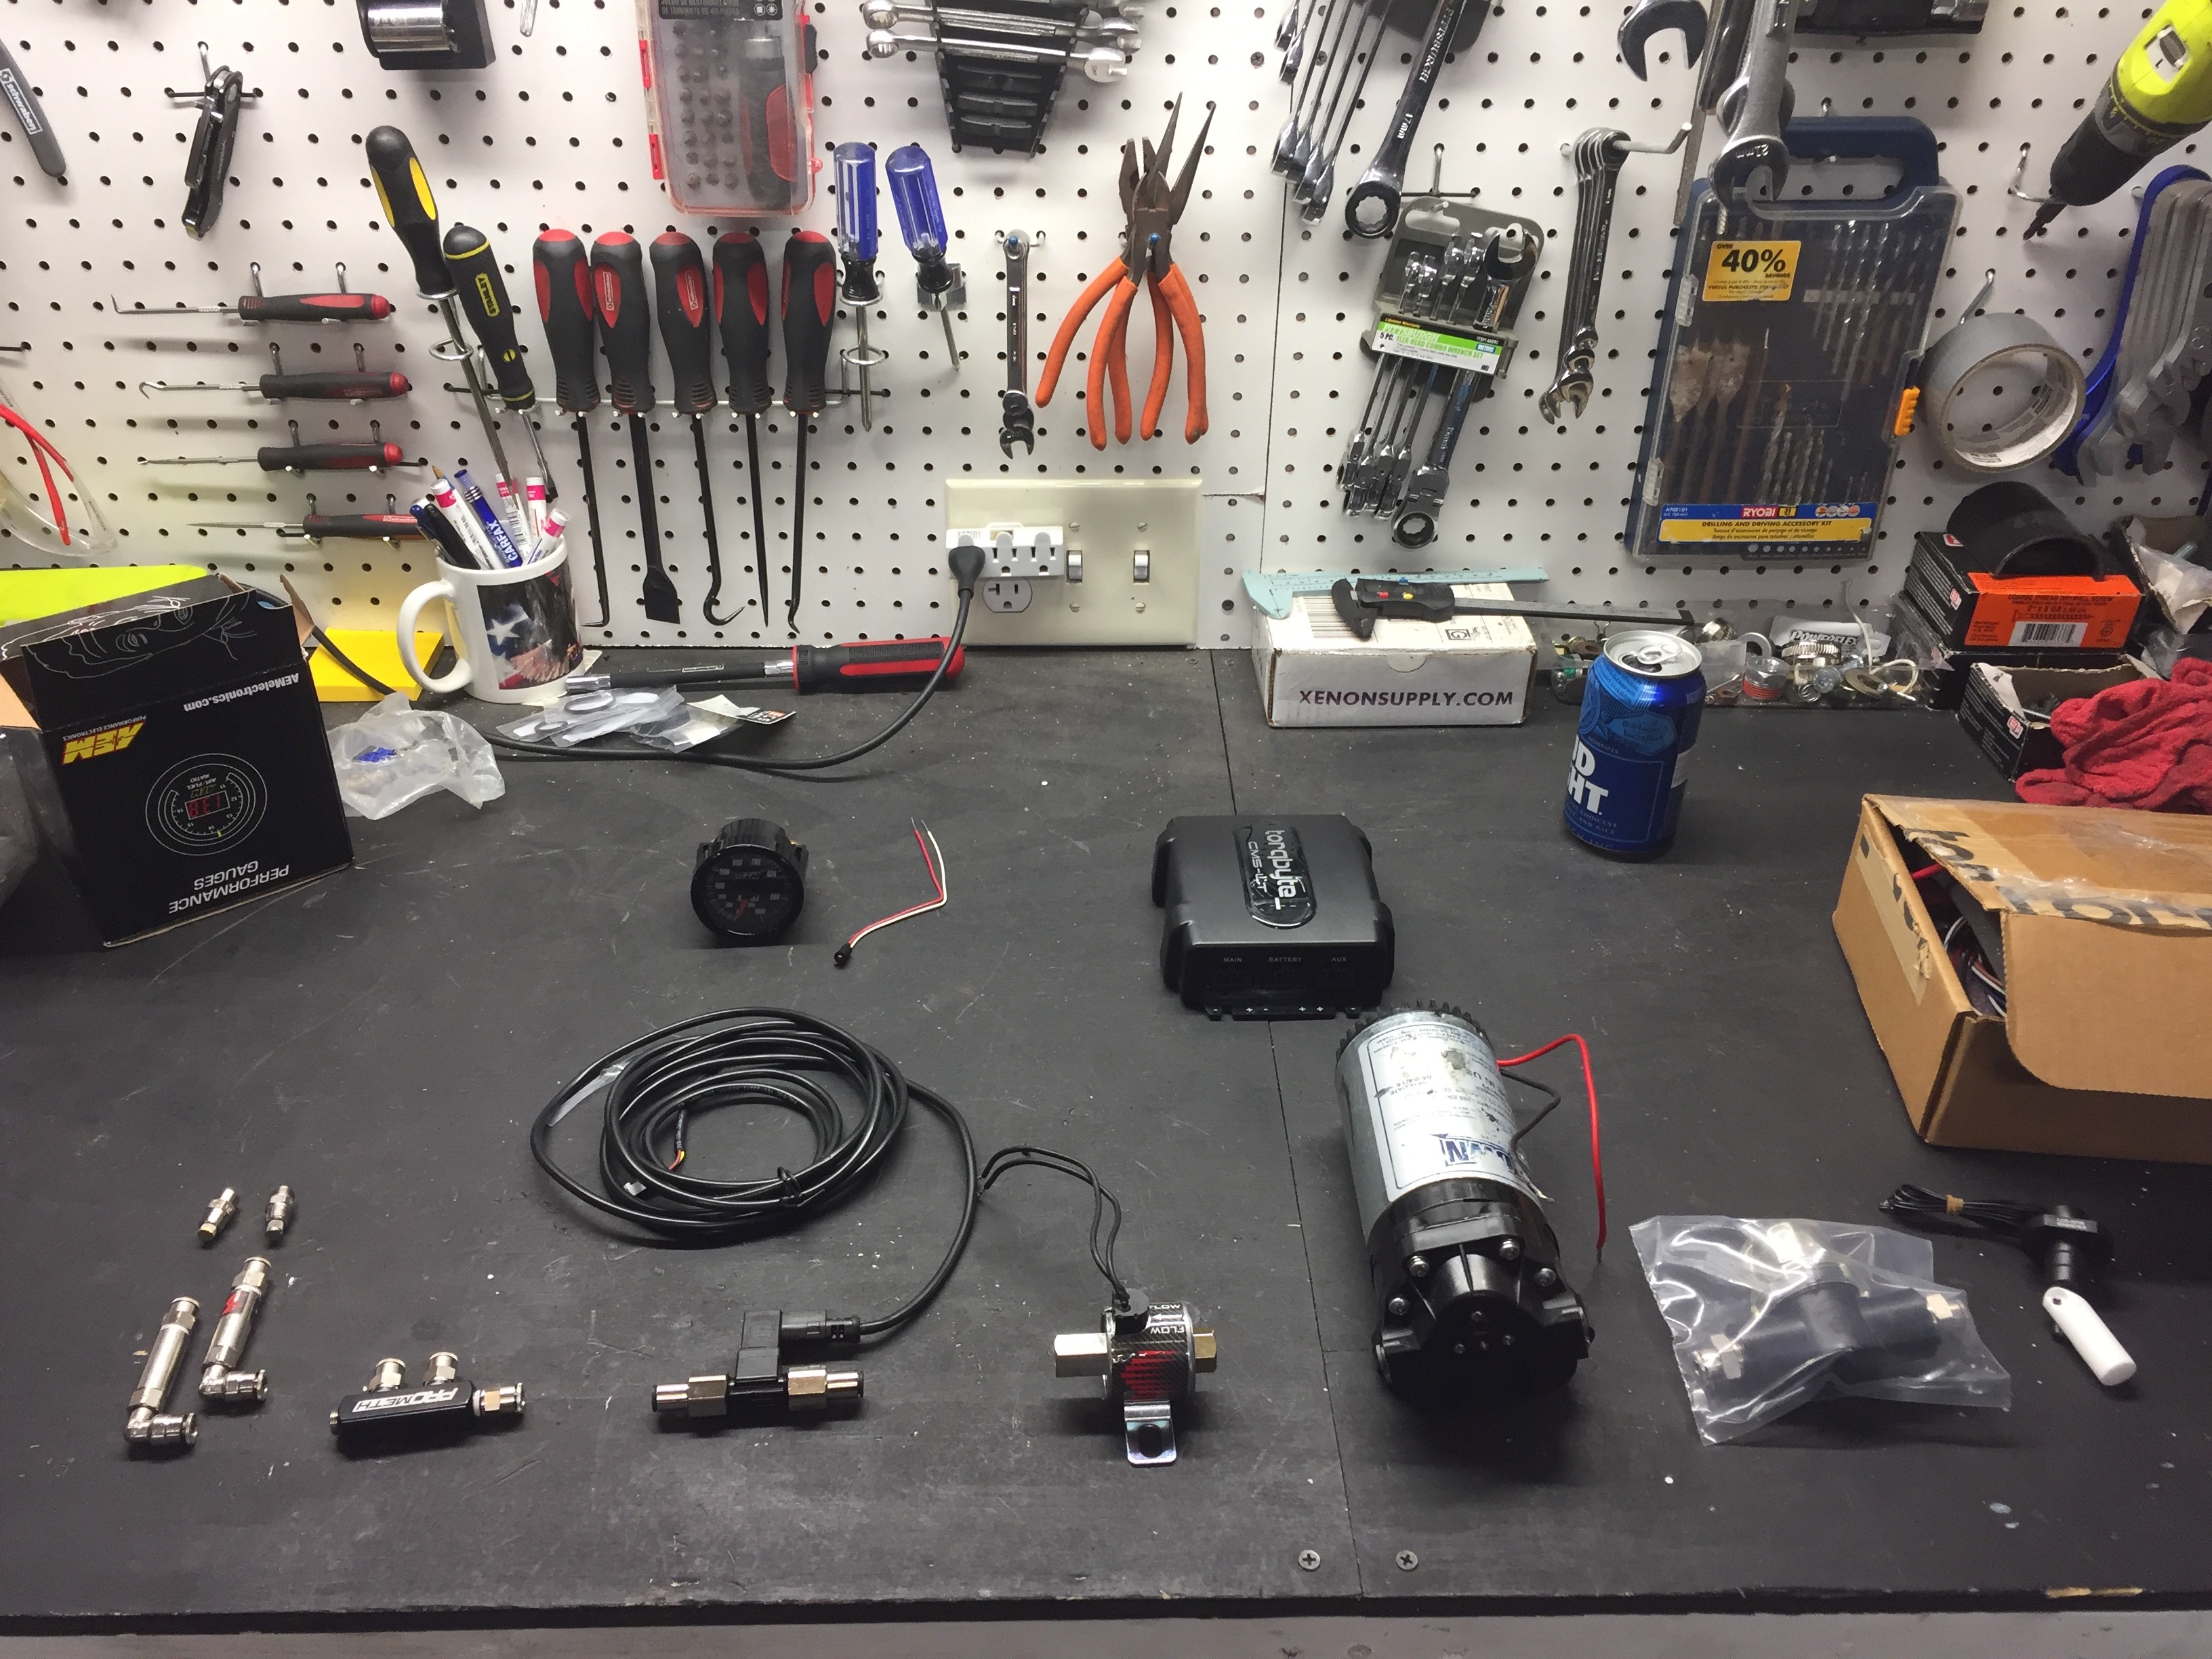 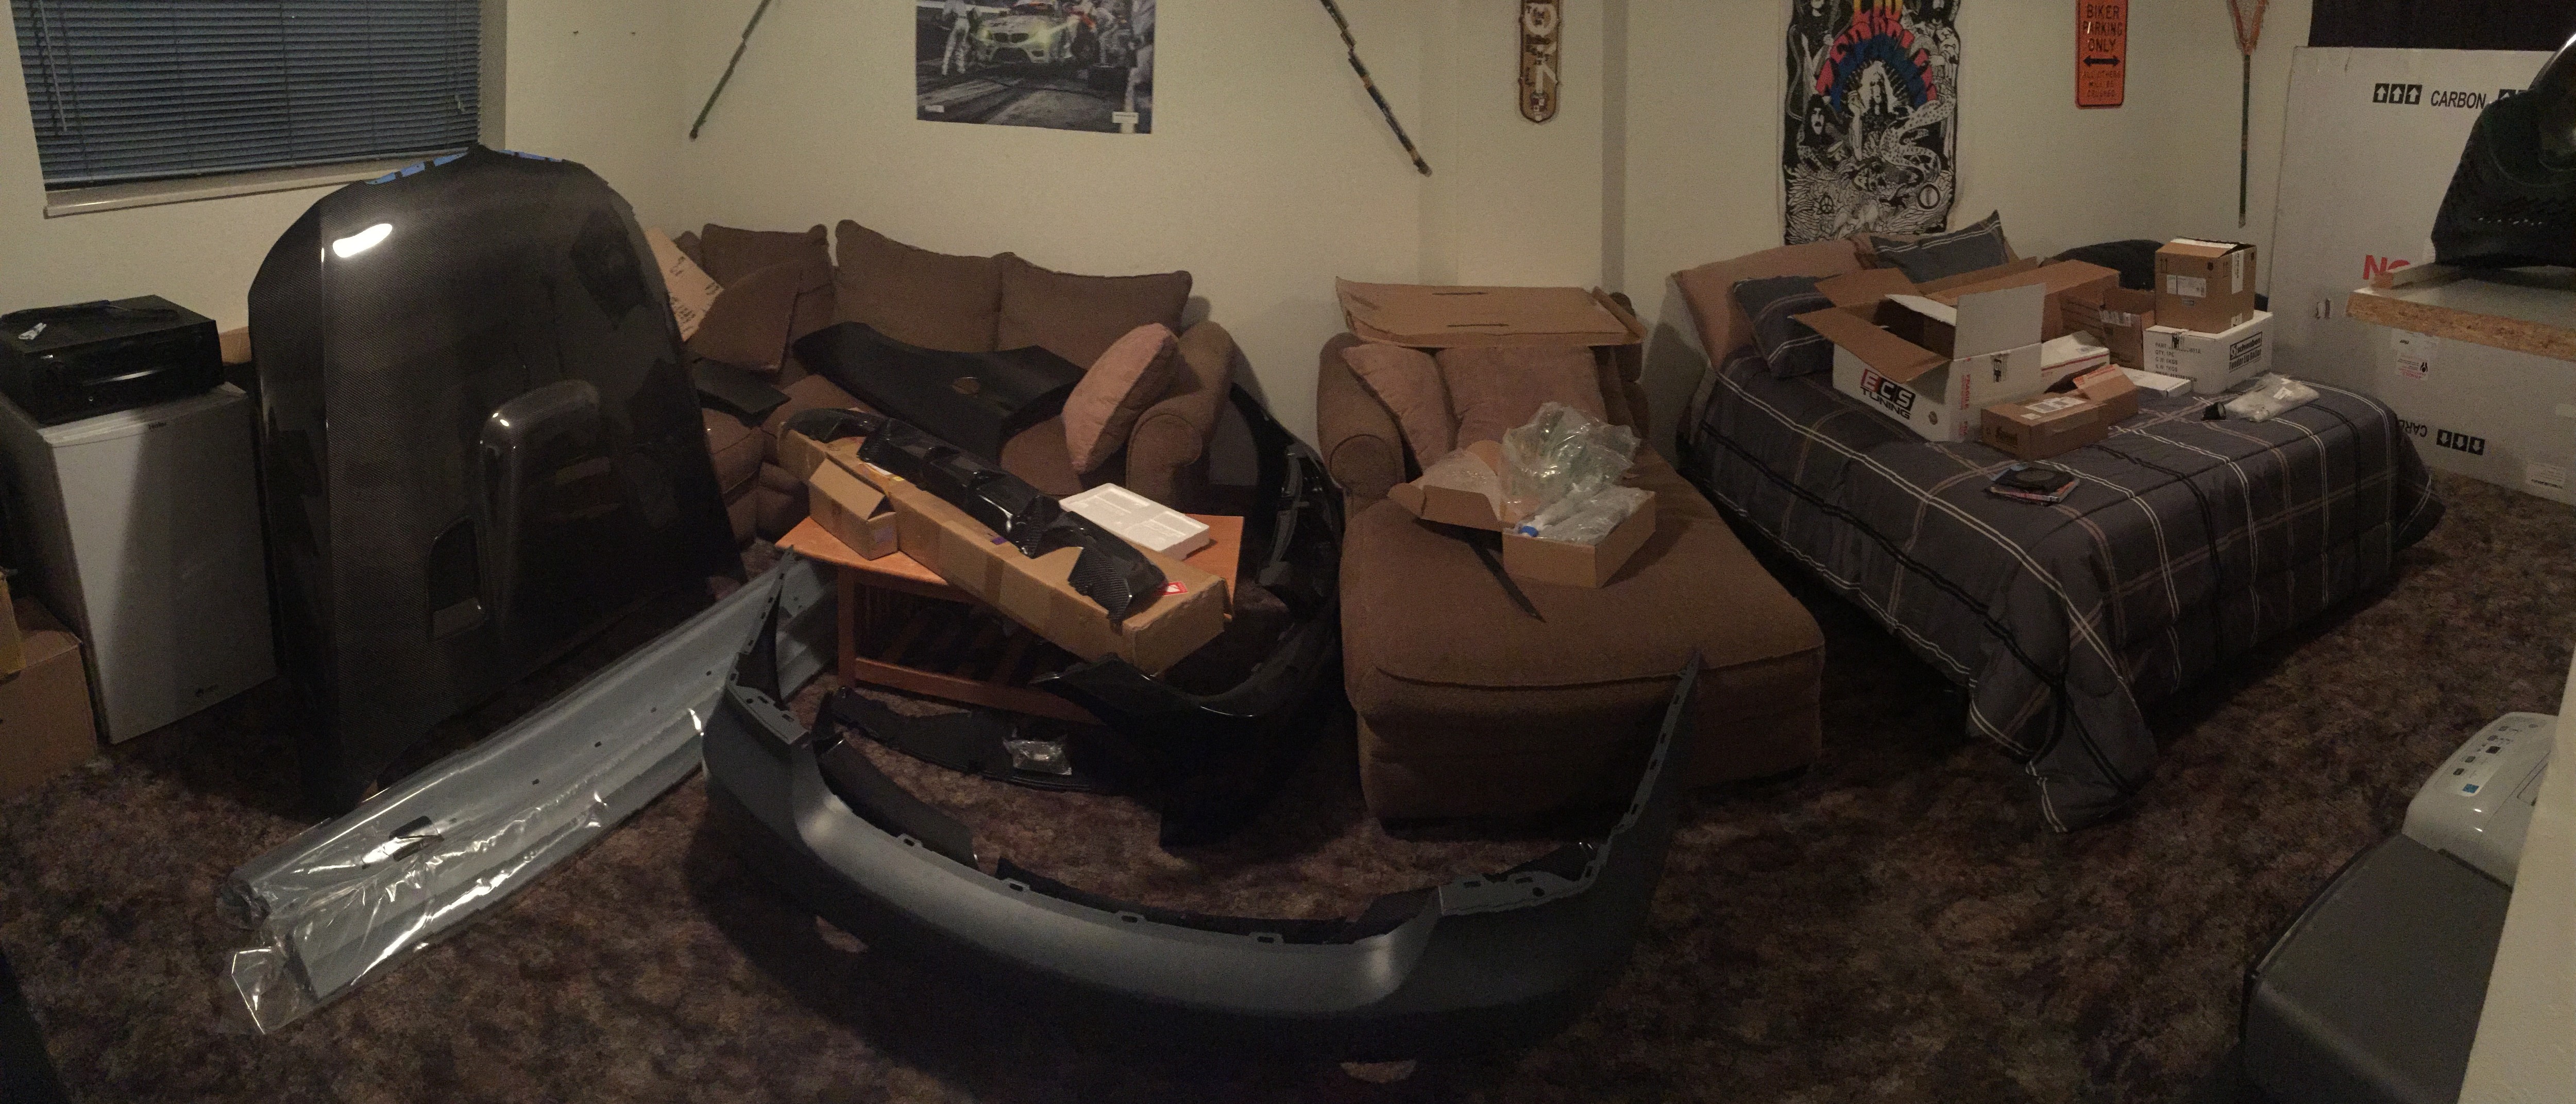 ------ Comments ------ 12/1 SEMA Ignited 2017 I finally finished editing my footage from SEMA so I hope you all enjoy! As far as the build goes, the first dyno was as flop. JB4 kept going into overboost mode. I was targeting 20psi and it kept peaking to 21 which is the limit of the factory MAP sensor and the boost safety I had set on the JB4. That and my octane is junk so my car keeps pulling tons of timing, even with a revised flash with barely any advance. Needless to say I have upgraded my MAP sensor to the 3.5bar and have switched gas stations (http://www.toptiergas.com/licensedbrands/) to a more reputable one. I did some logs and things are looking better! Unfortunately the summer/fall season is now over so my testing has concluded for this year. Once spring hits I will head back to the Dyno, get a nice clean run, then back to upgrades. I really want to hit 600whp on my local mustang dyno so I will have my work cut out for me. Anyways, enjoy the video!! I will also put some pics below of some cars you that don't make an appearance in it. 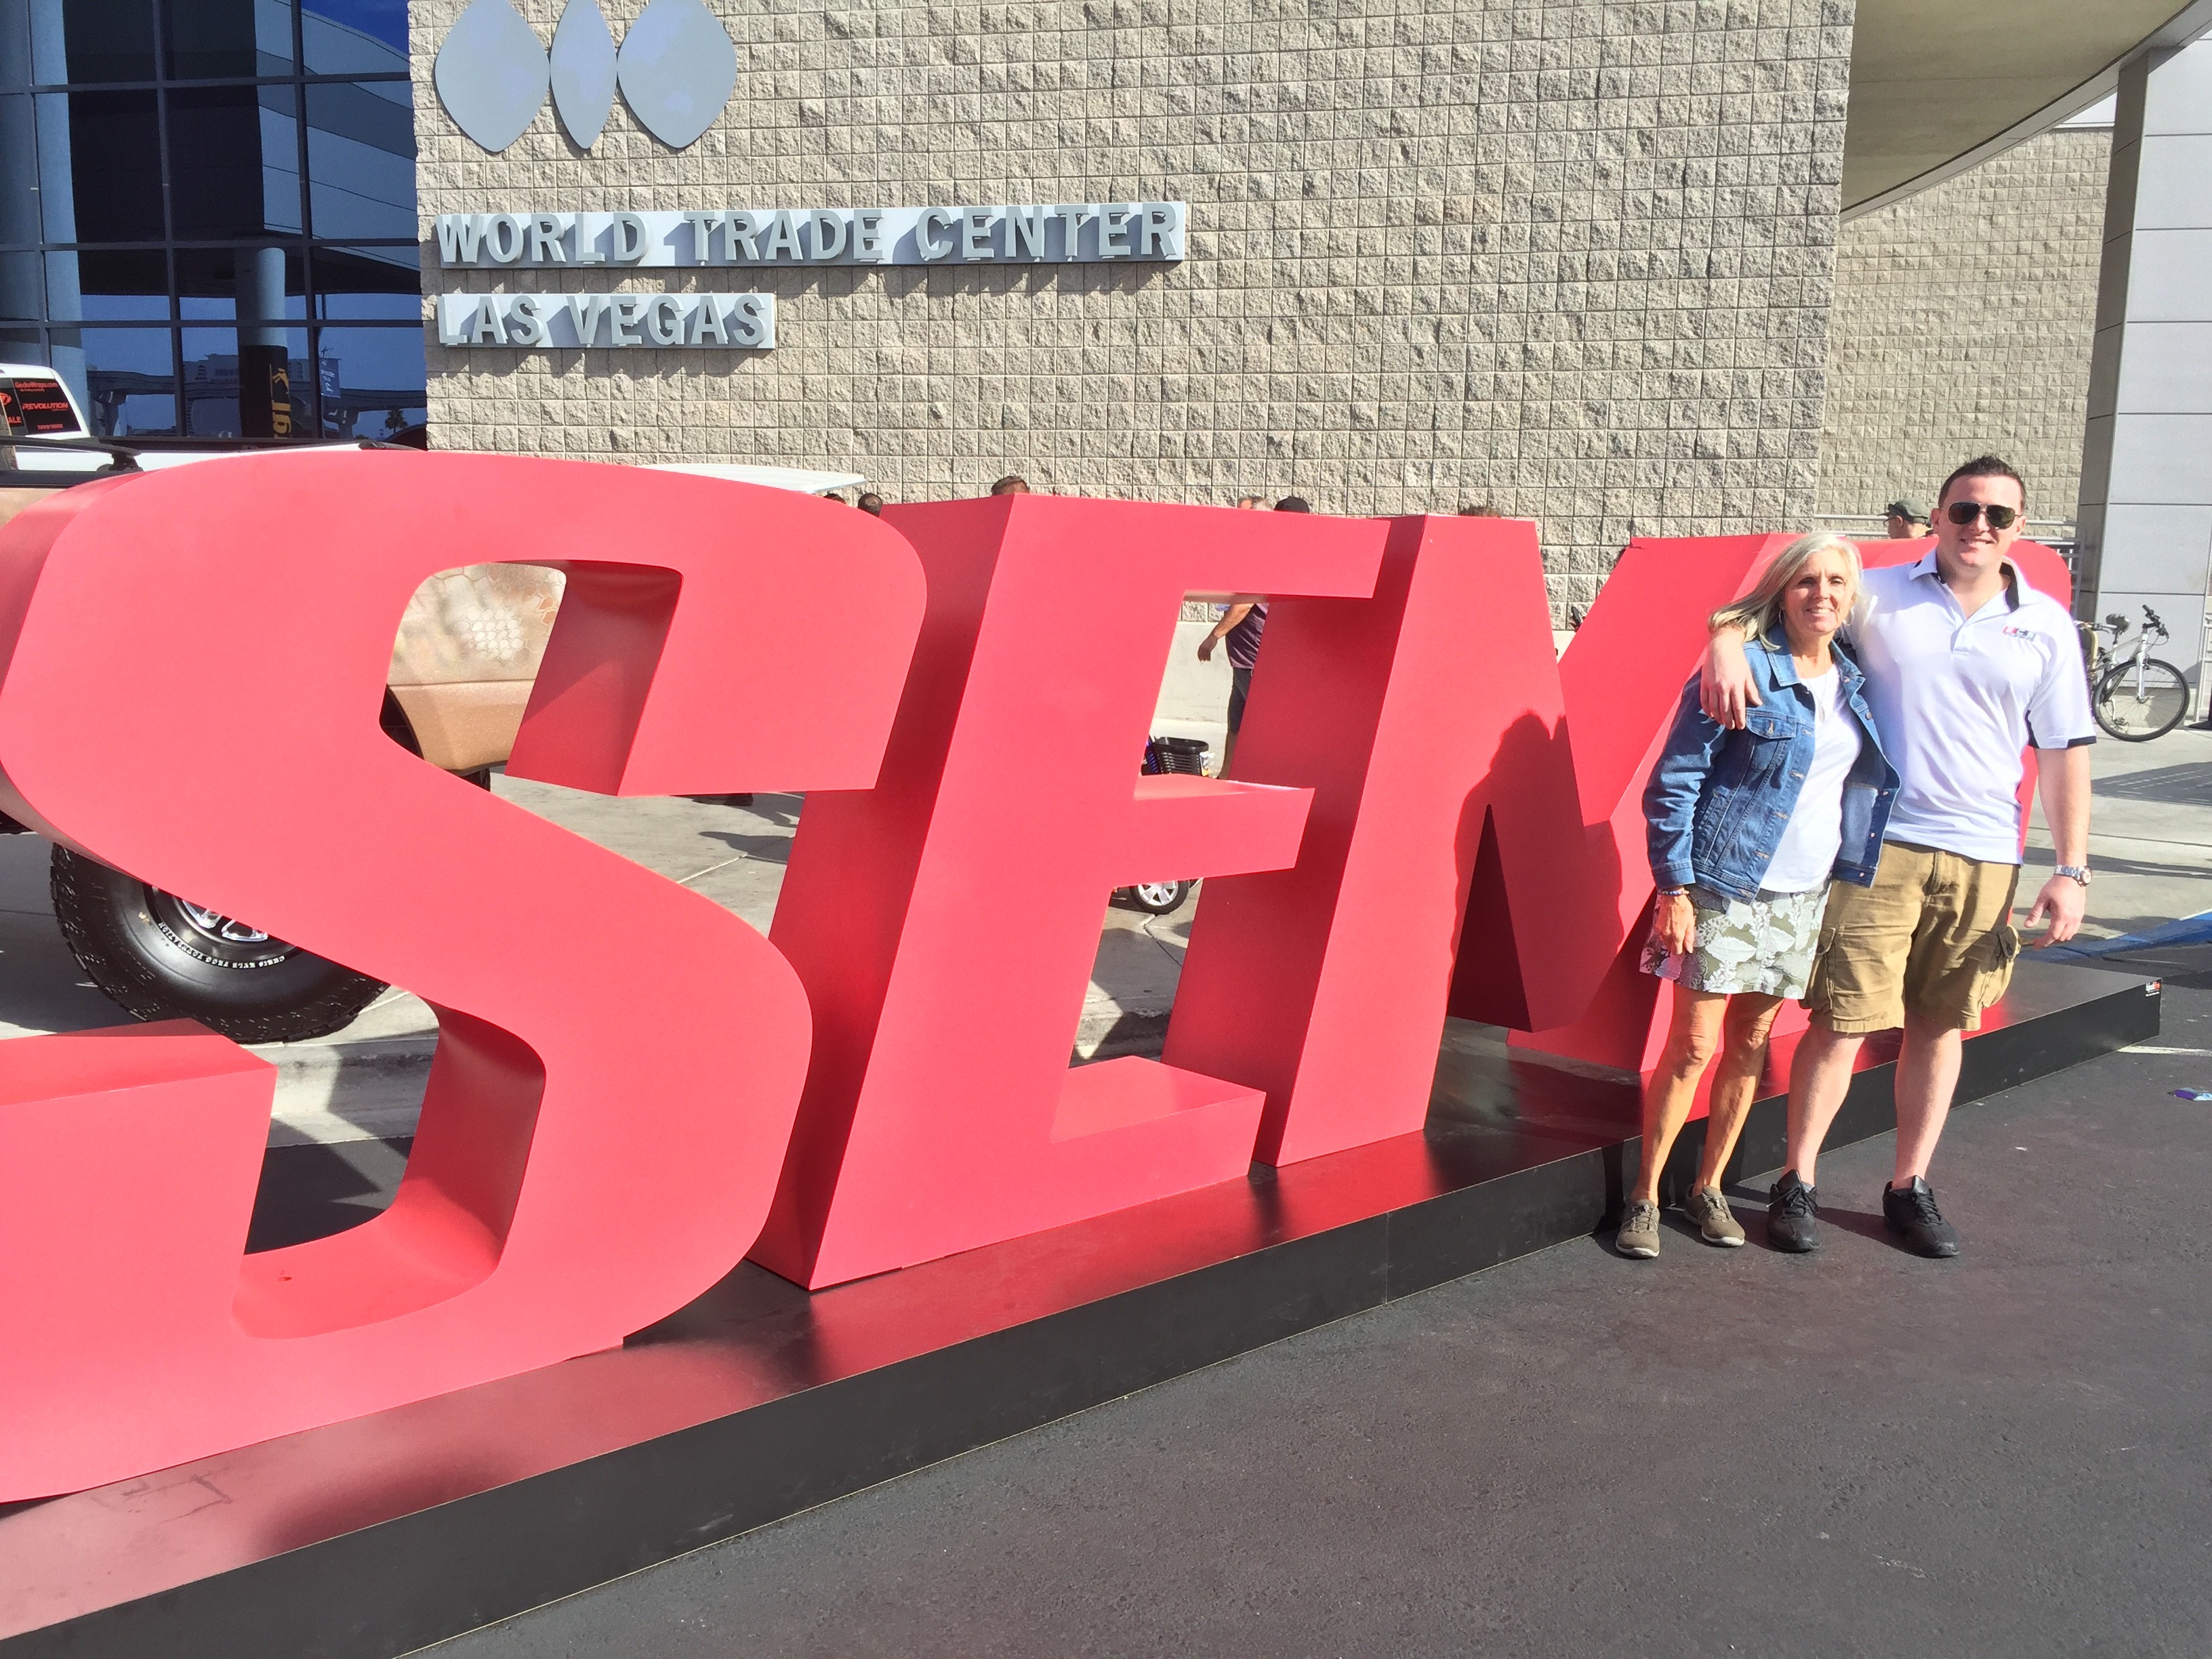                             ------ Comments ------ 10/15 Frankenturbo F21Bi - The Latest More tests and changes are going to take place before the beta testing is all said and done but here is my first vlog episode of how things are progressing so far. I will upload some more videos of the car in action but this is a good intro. Enjoy! 12.9 @ 110mph! Not bad for my first time at this track on just 93 octane.   ------ Comments ------ 7/28 Just a quick update in-between some of my bigger projects. Anyone who has been following saw that I picked up a turner strut bar on clearance a little while back and planned to get that and the OE strut braces powdercoated blue to match the theme in my engine bay. This is how they turned out! 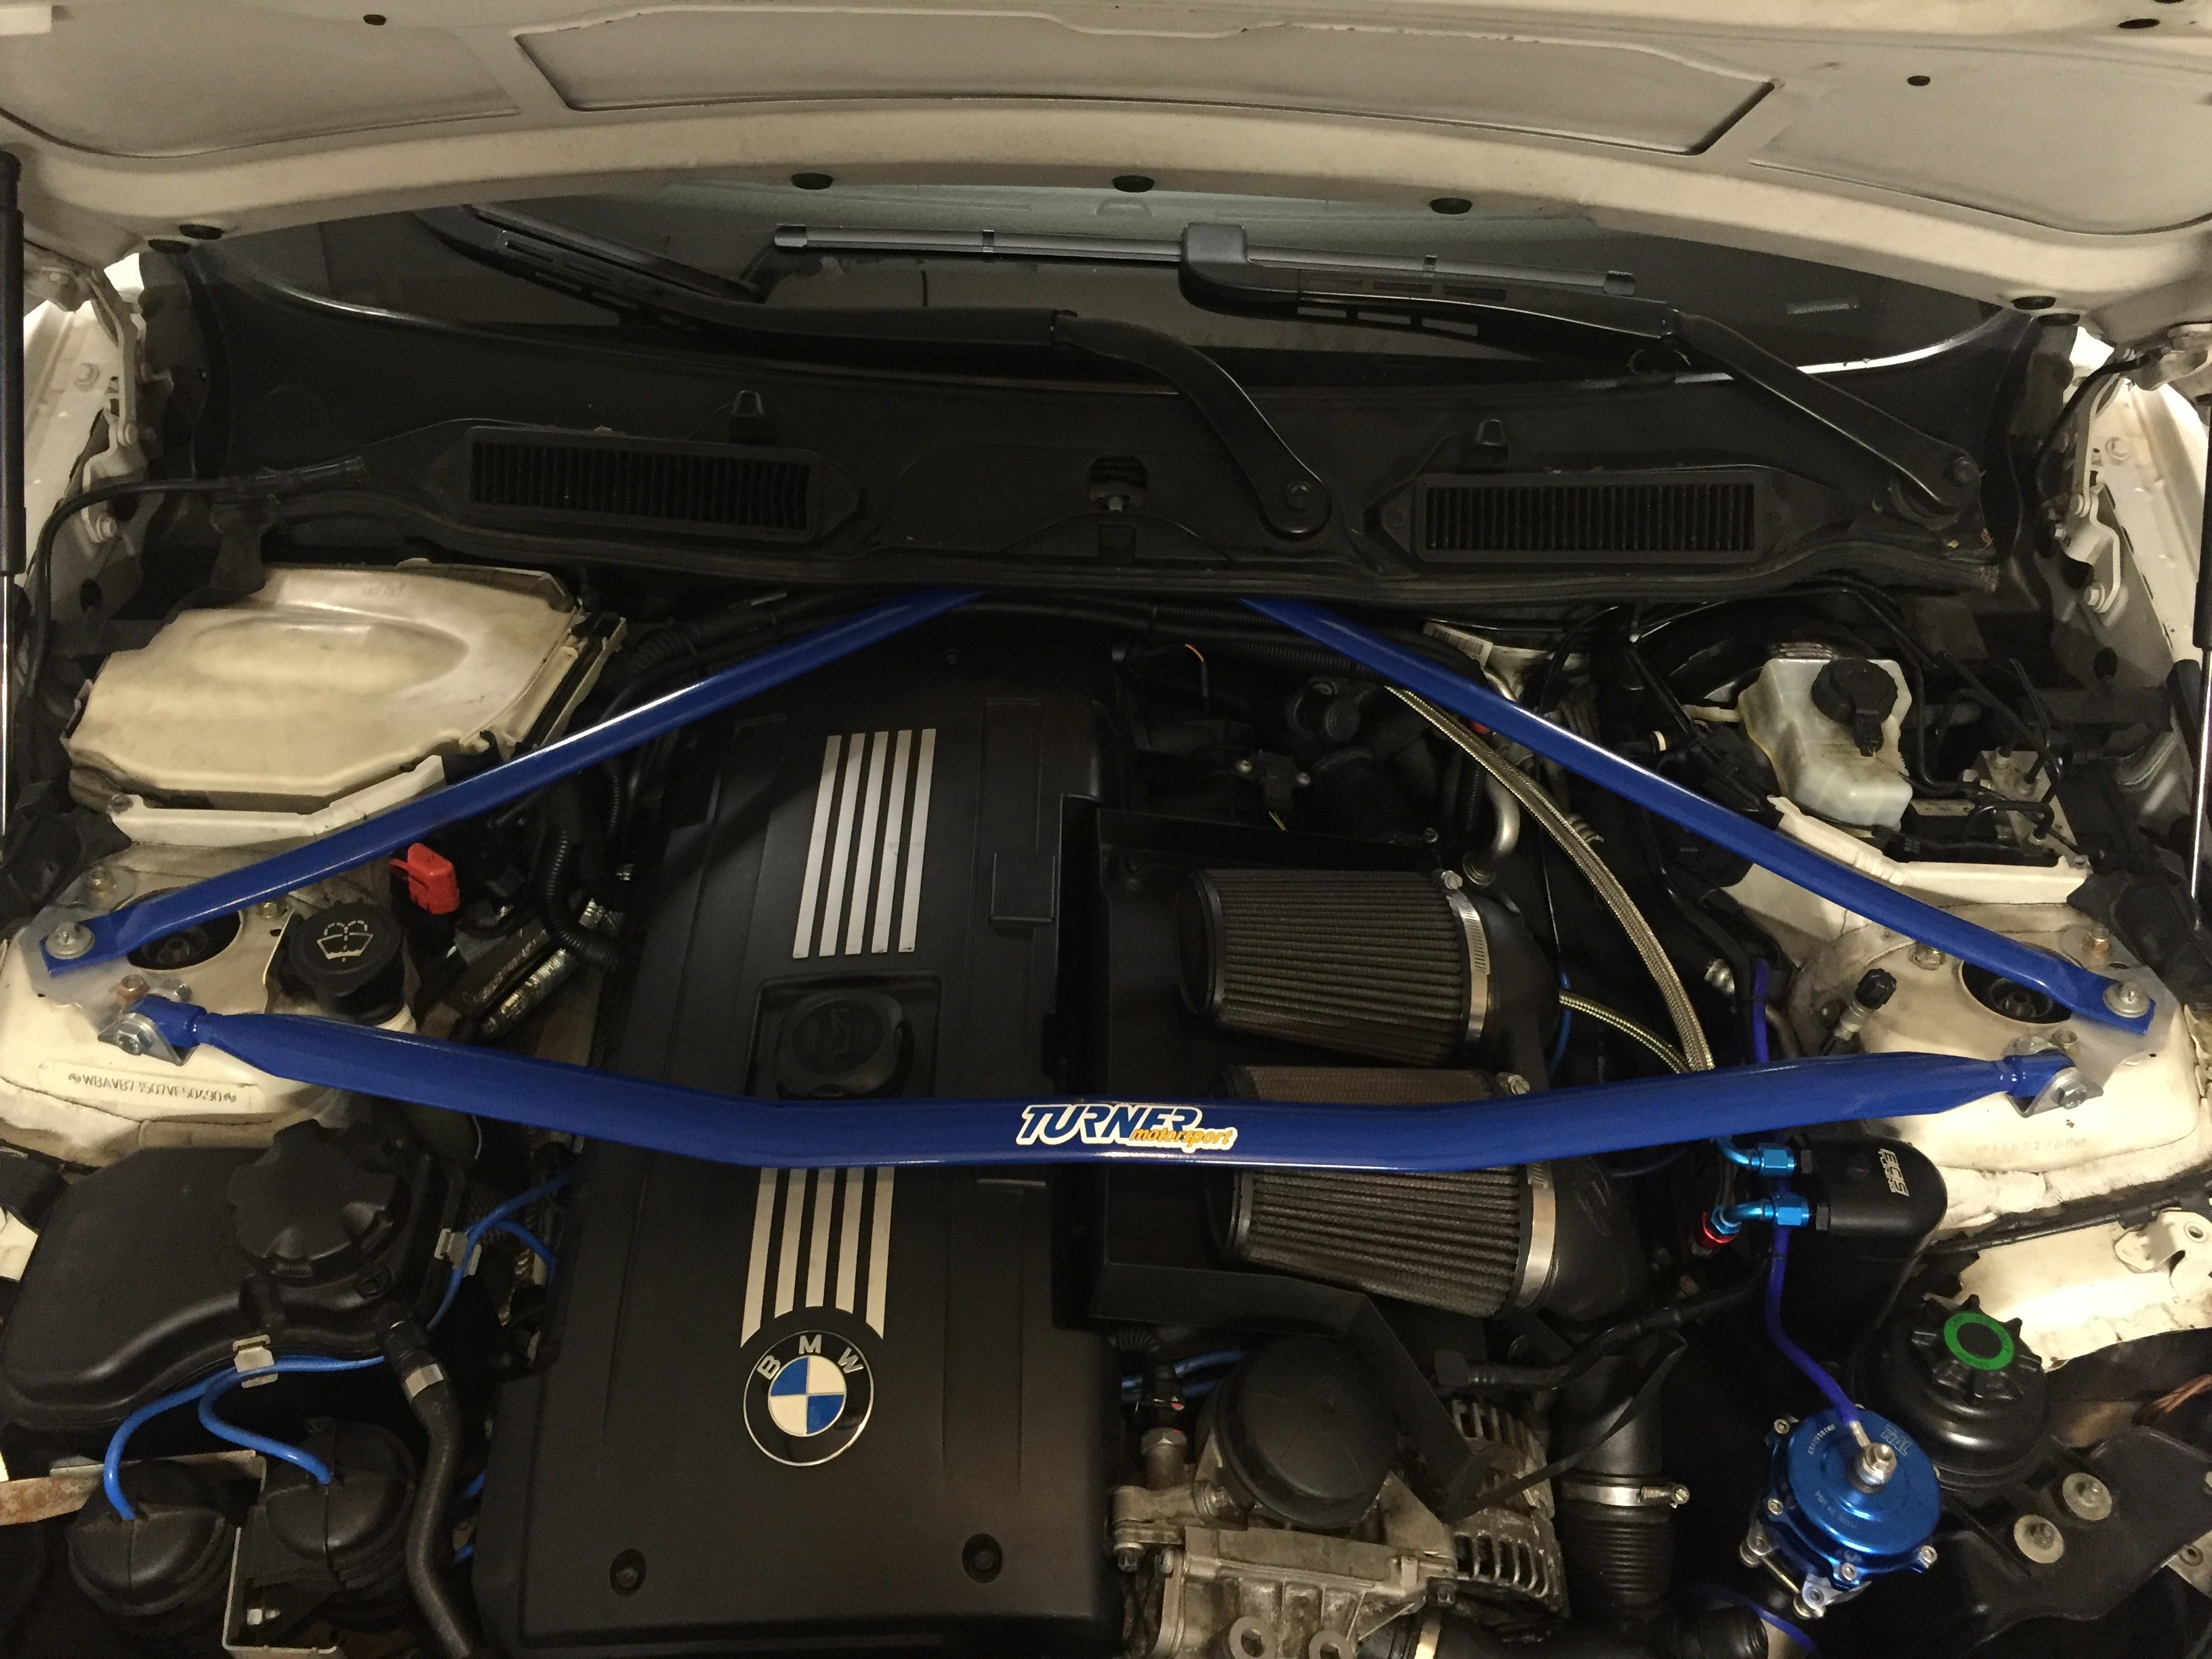 Here is a link to the bar I picked up, it was on clearance because it was missing hardware and was kinda scratched up. https://www.turnermotorsport.com/p-1...e82-128i-135i/ 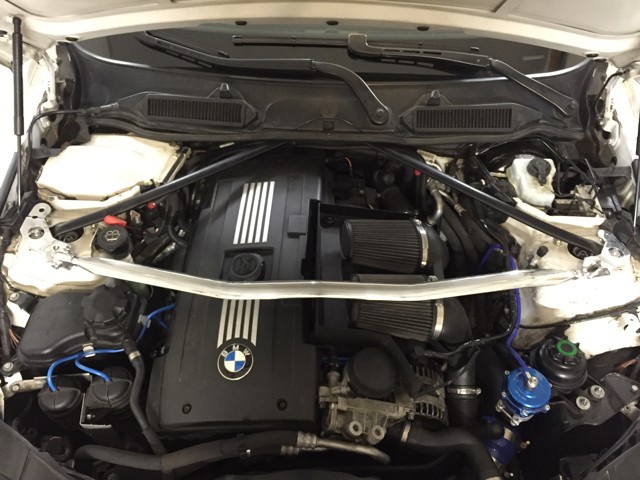 Found a guy pretty local to me who runs the business Capital Powder Coating and he did an excellent job, took him 2 days and he only charged me $40  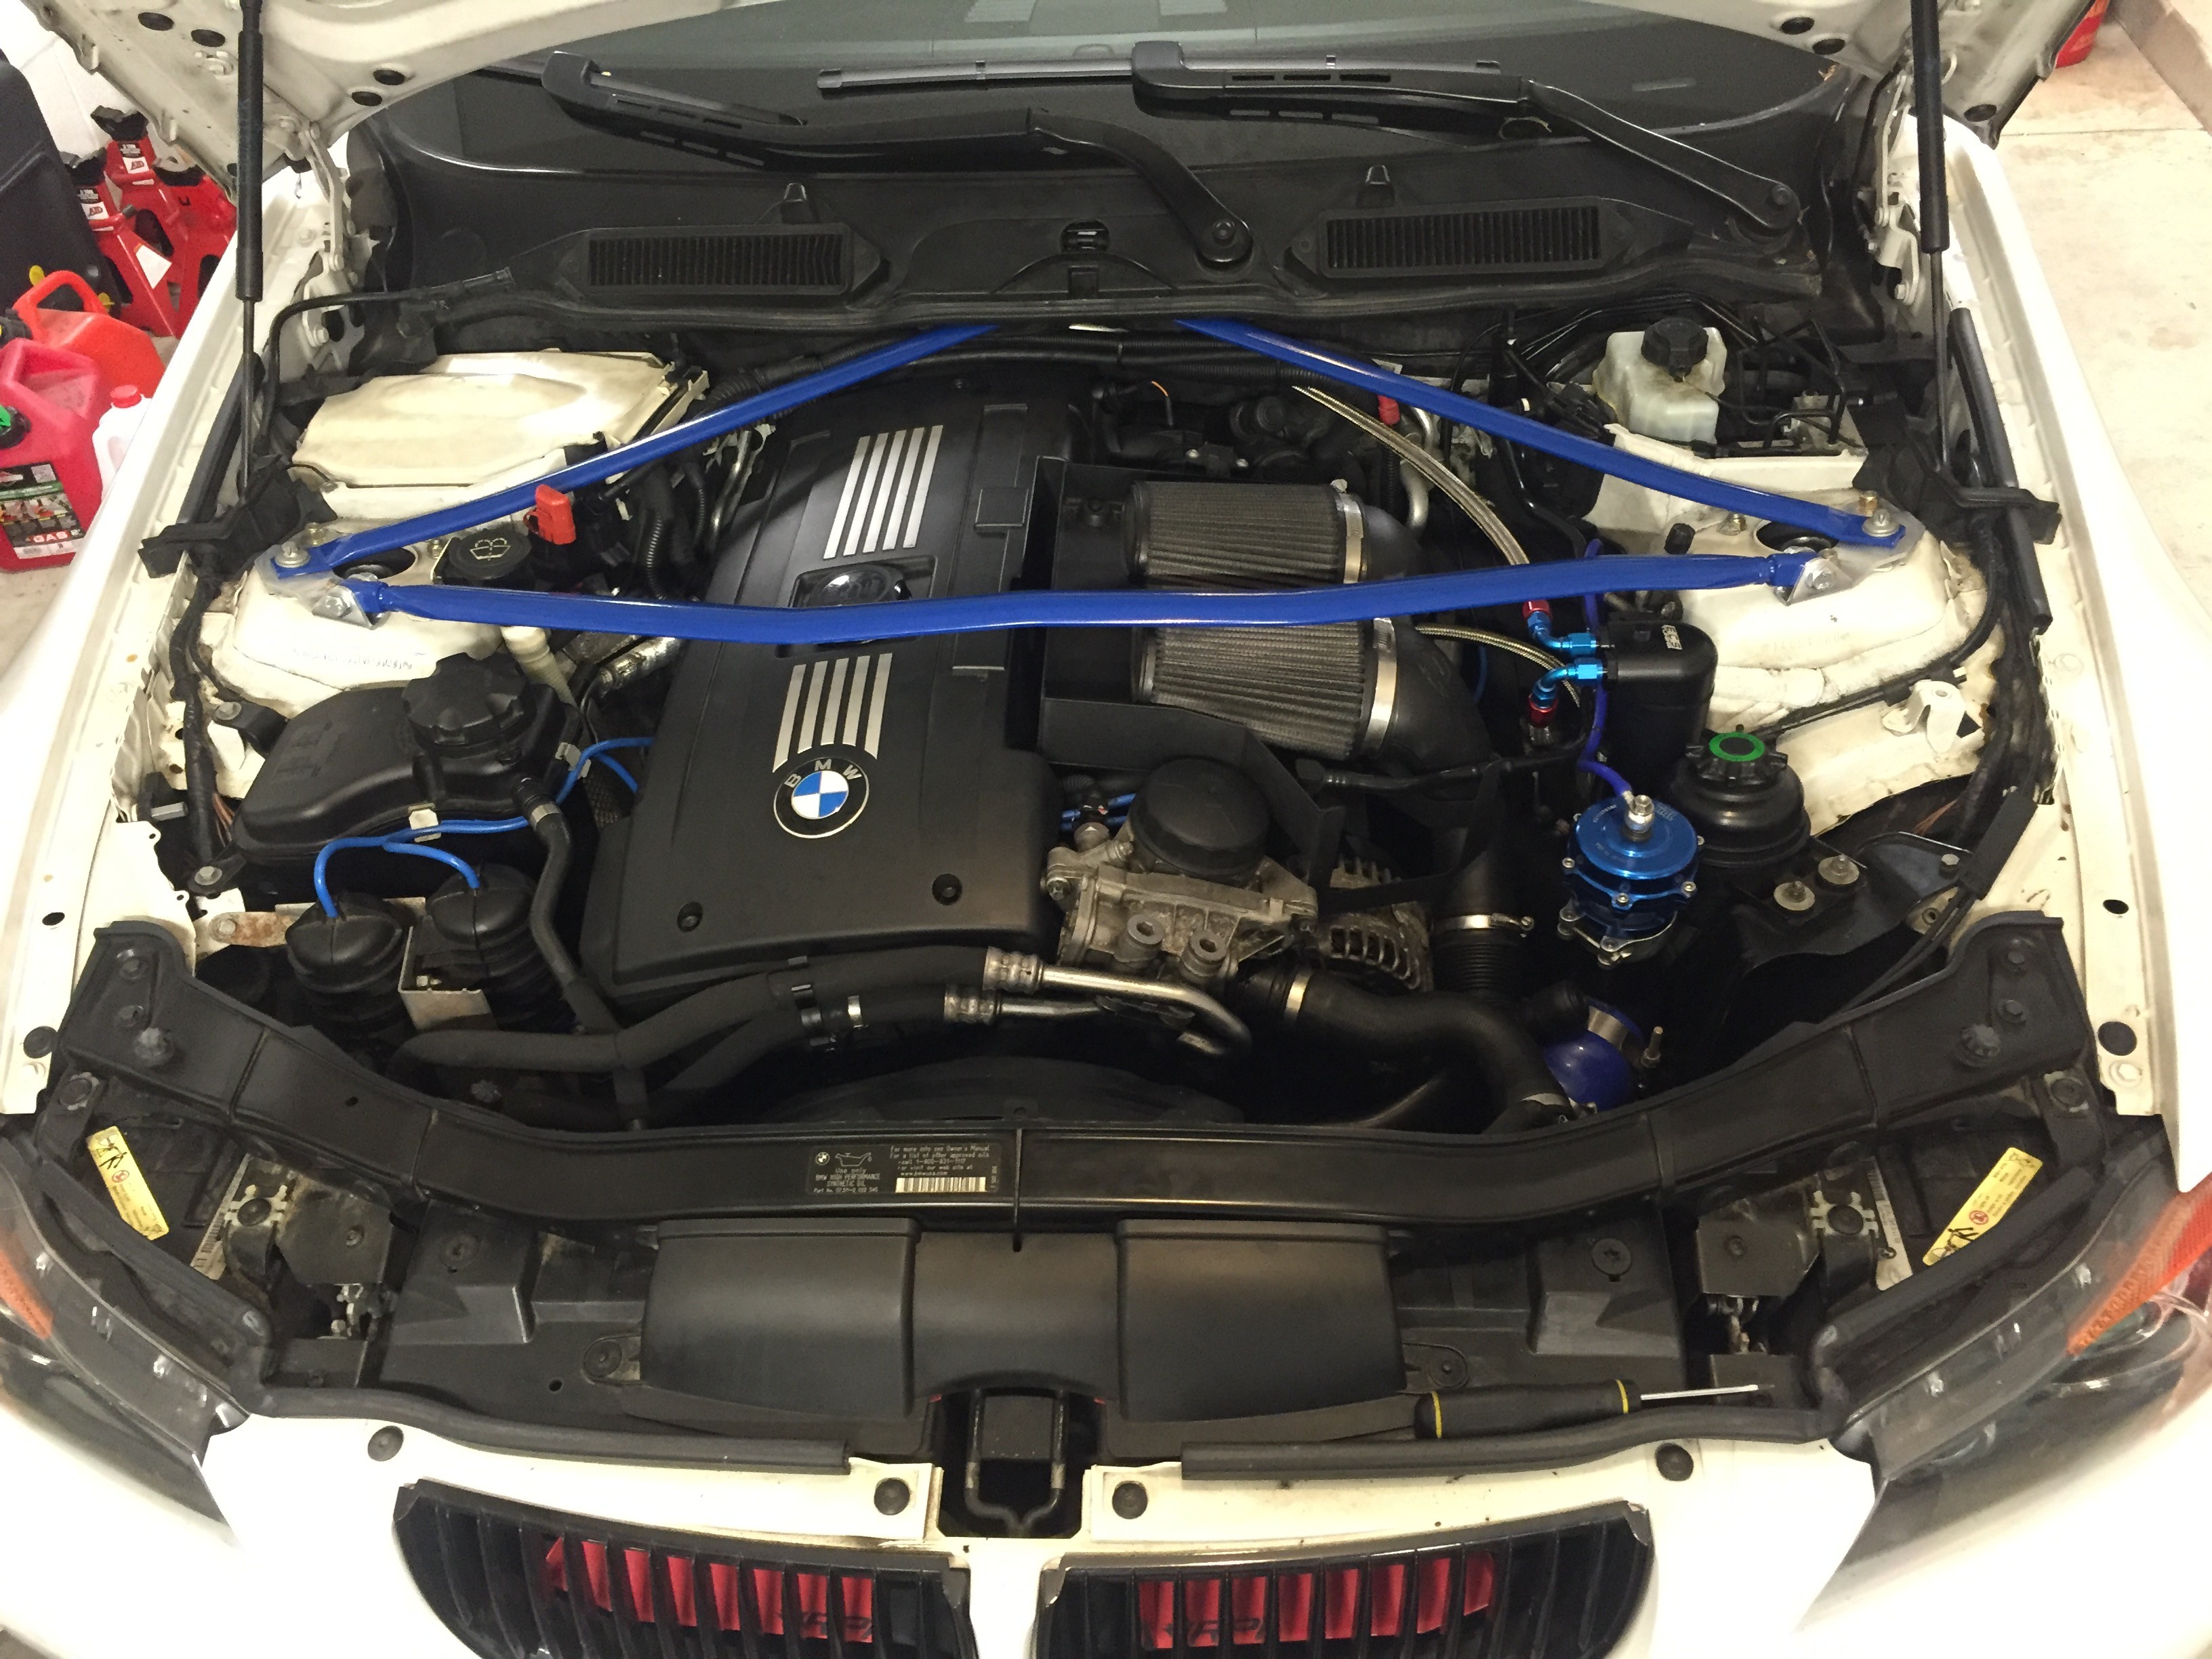 Once installed I had a few options of stickers to choose from but ended up going with this one (1 of the three stickers on the larger white sheet)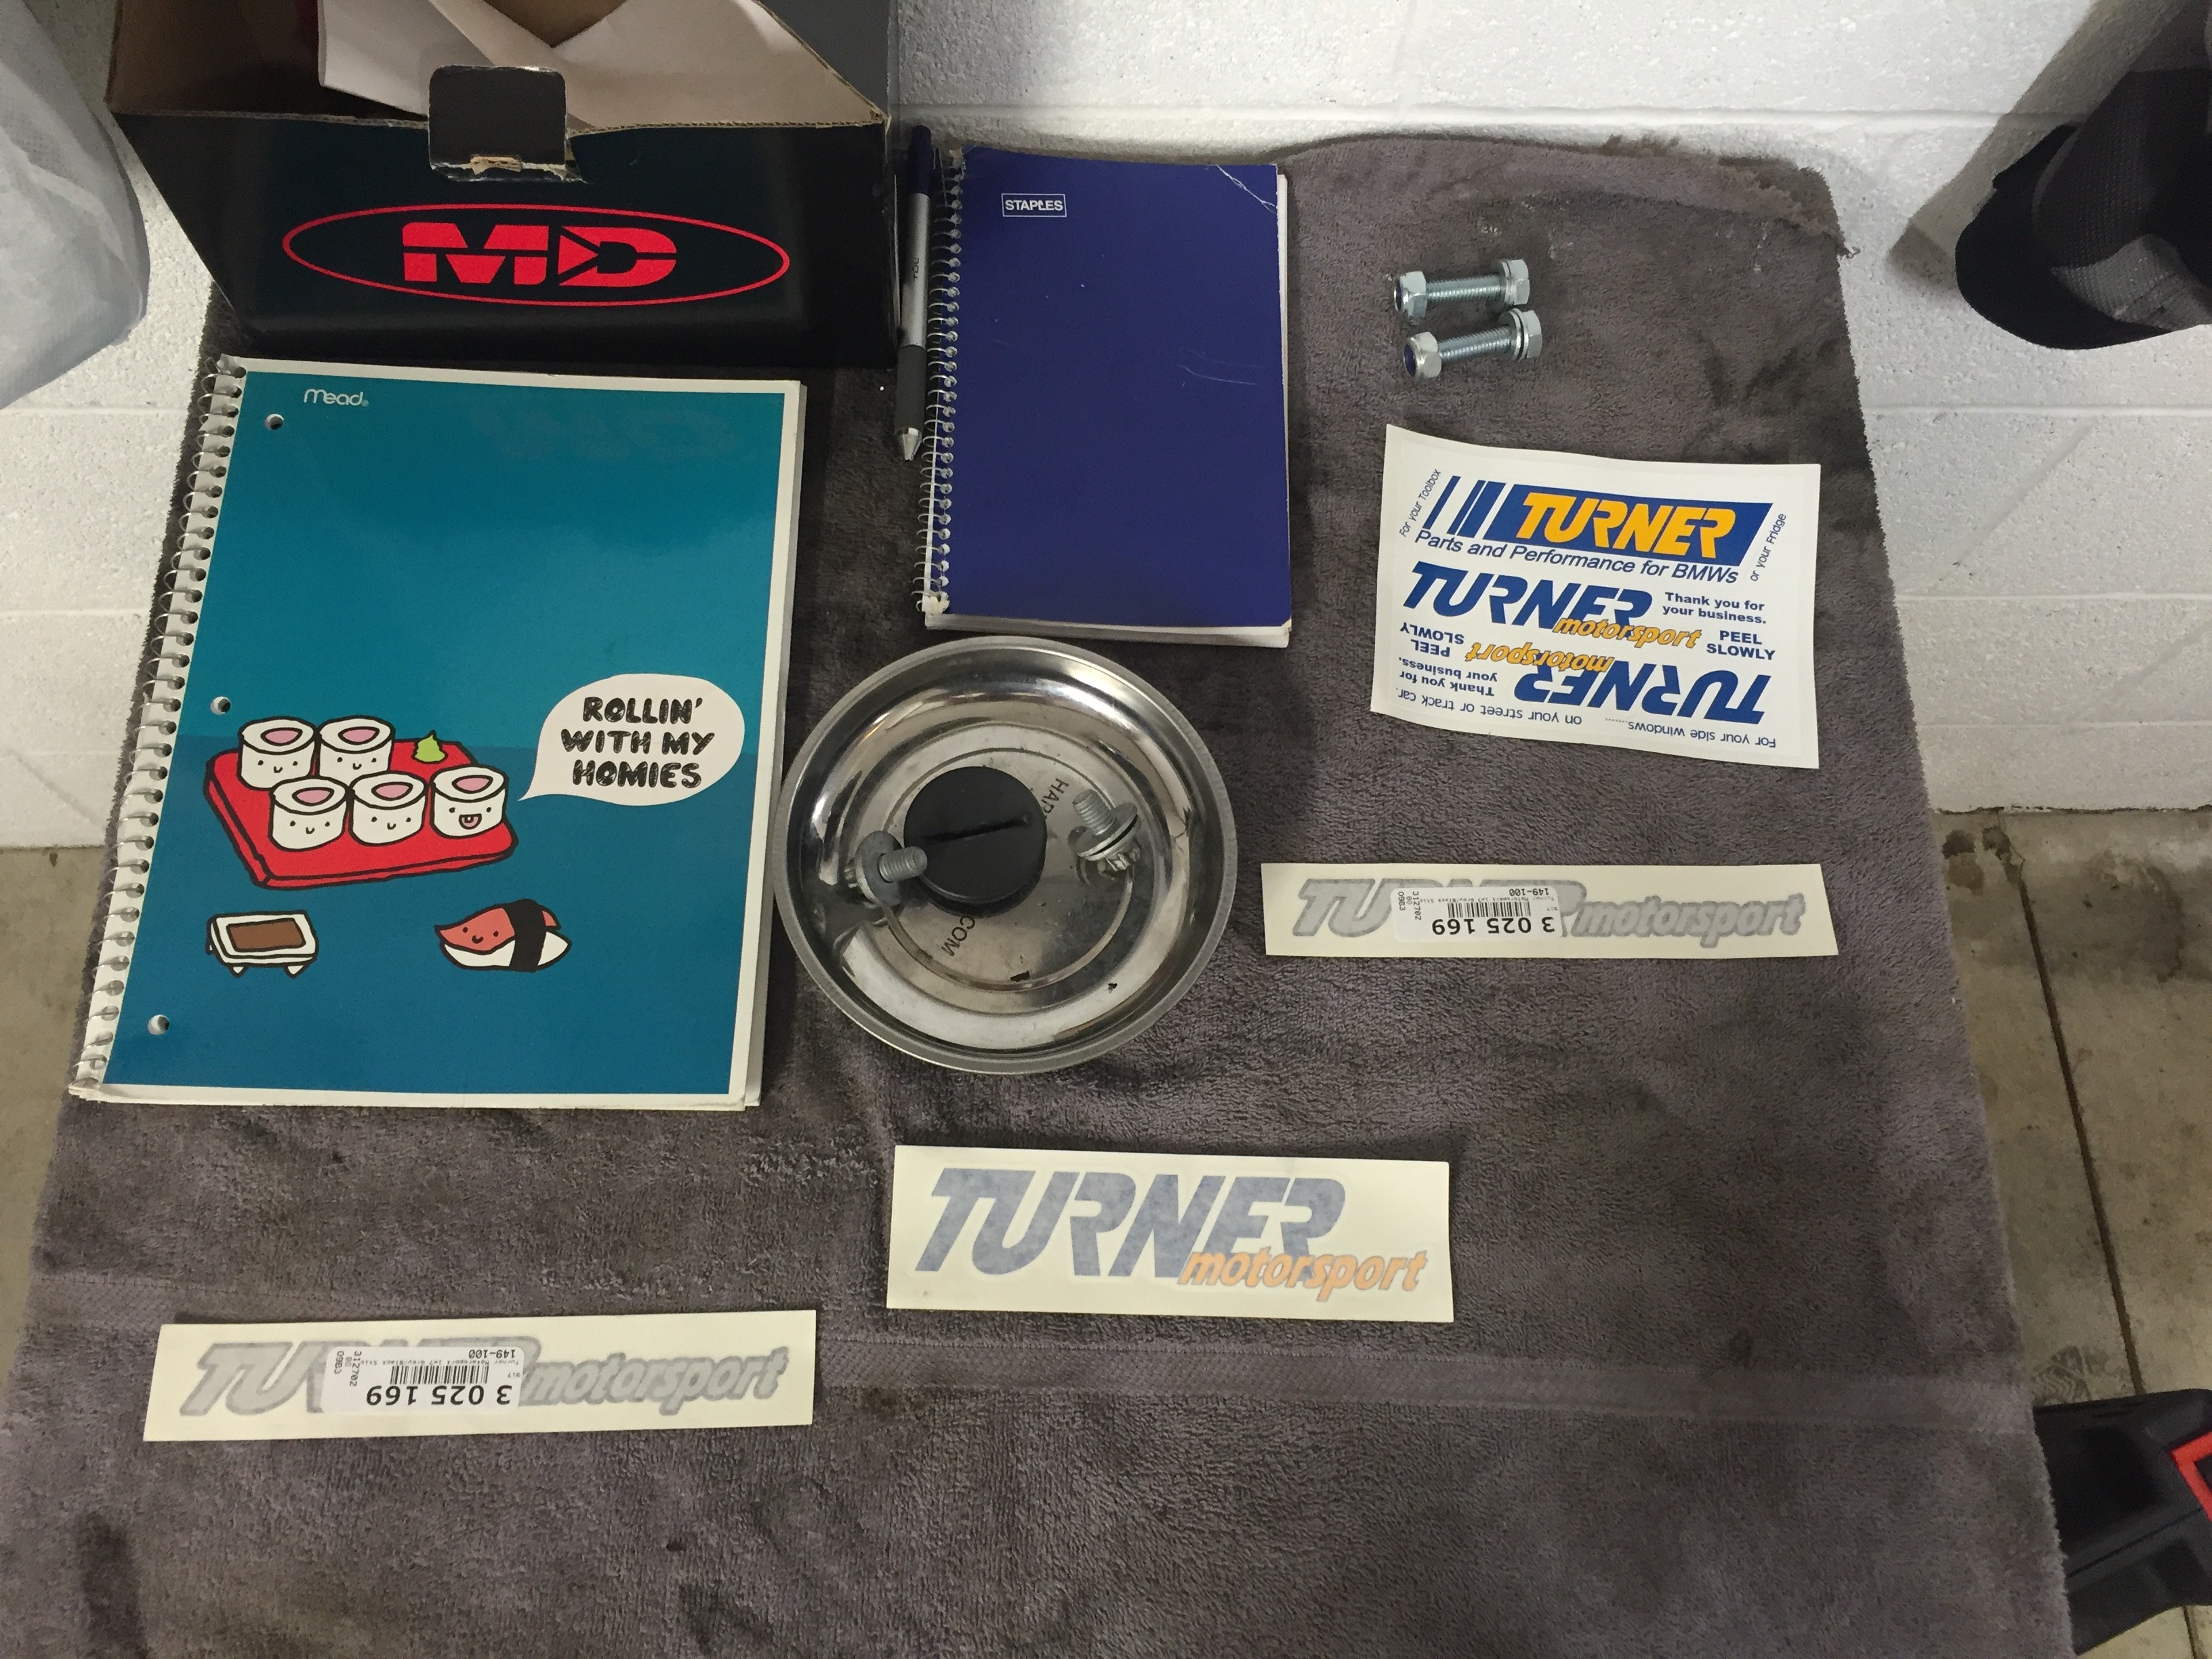 Everything is installed and looks great! However...(why does there always have to be a however with cars) turns out part of the reason it was on clearance was it is slightly bent on the drivers side, which you can tell from the pic. Structurally it seems fine and it shouldn't affect performance but it is affecting how my hood closes and rubs on one of the support braces After checking the seibon cf hood I bought it does not have those support brackets so it should work just fine once I get the hood installed but it is definitely frustrating. 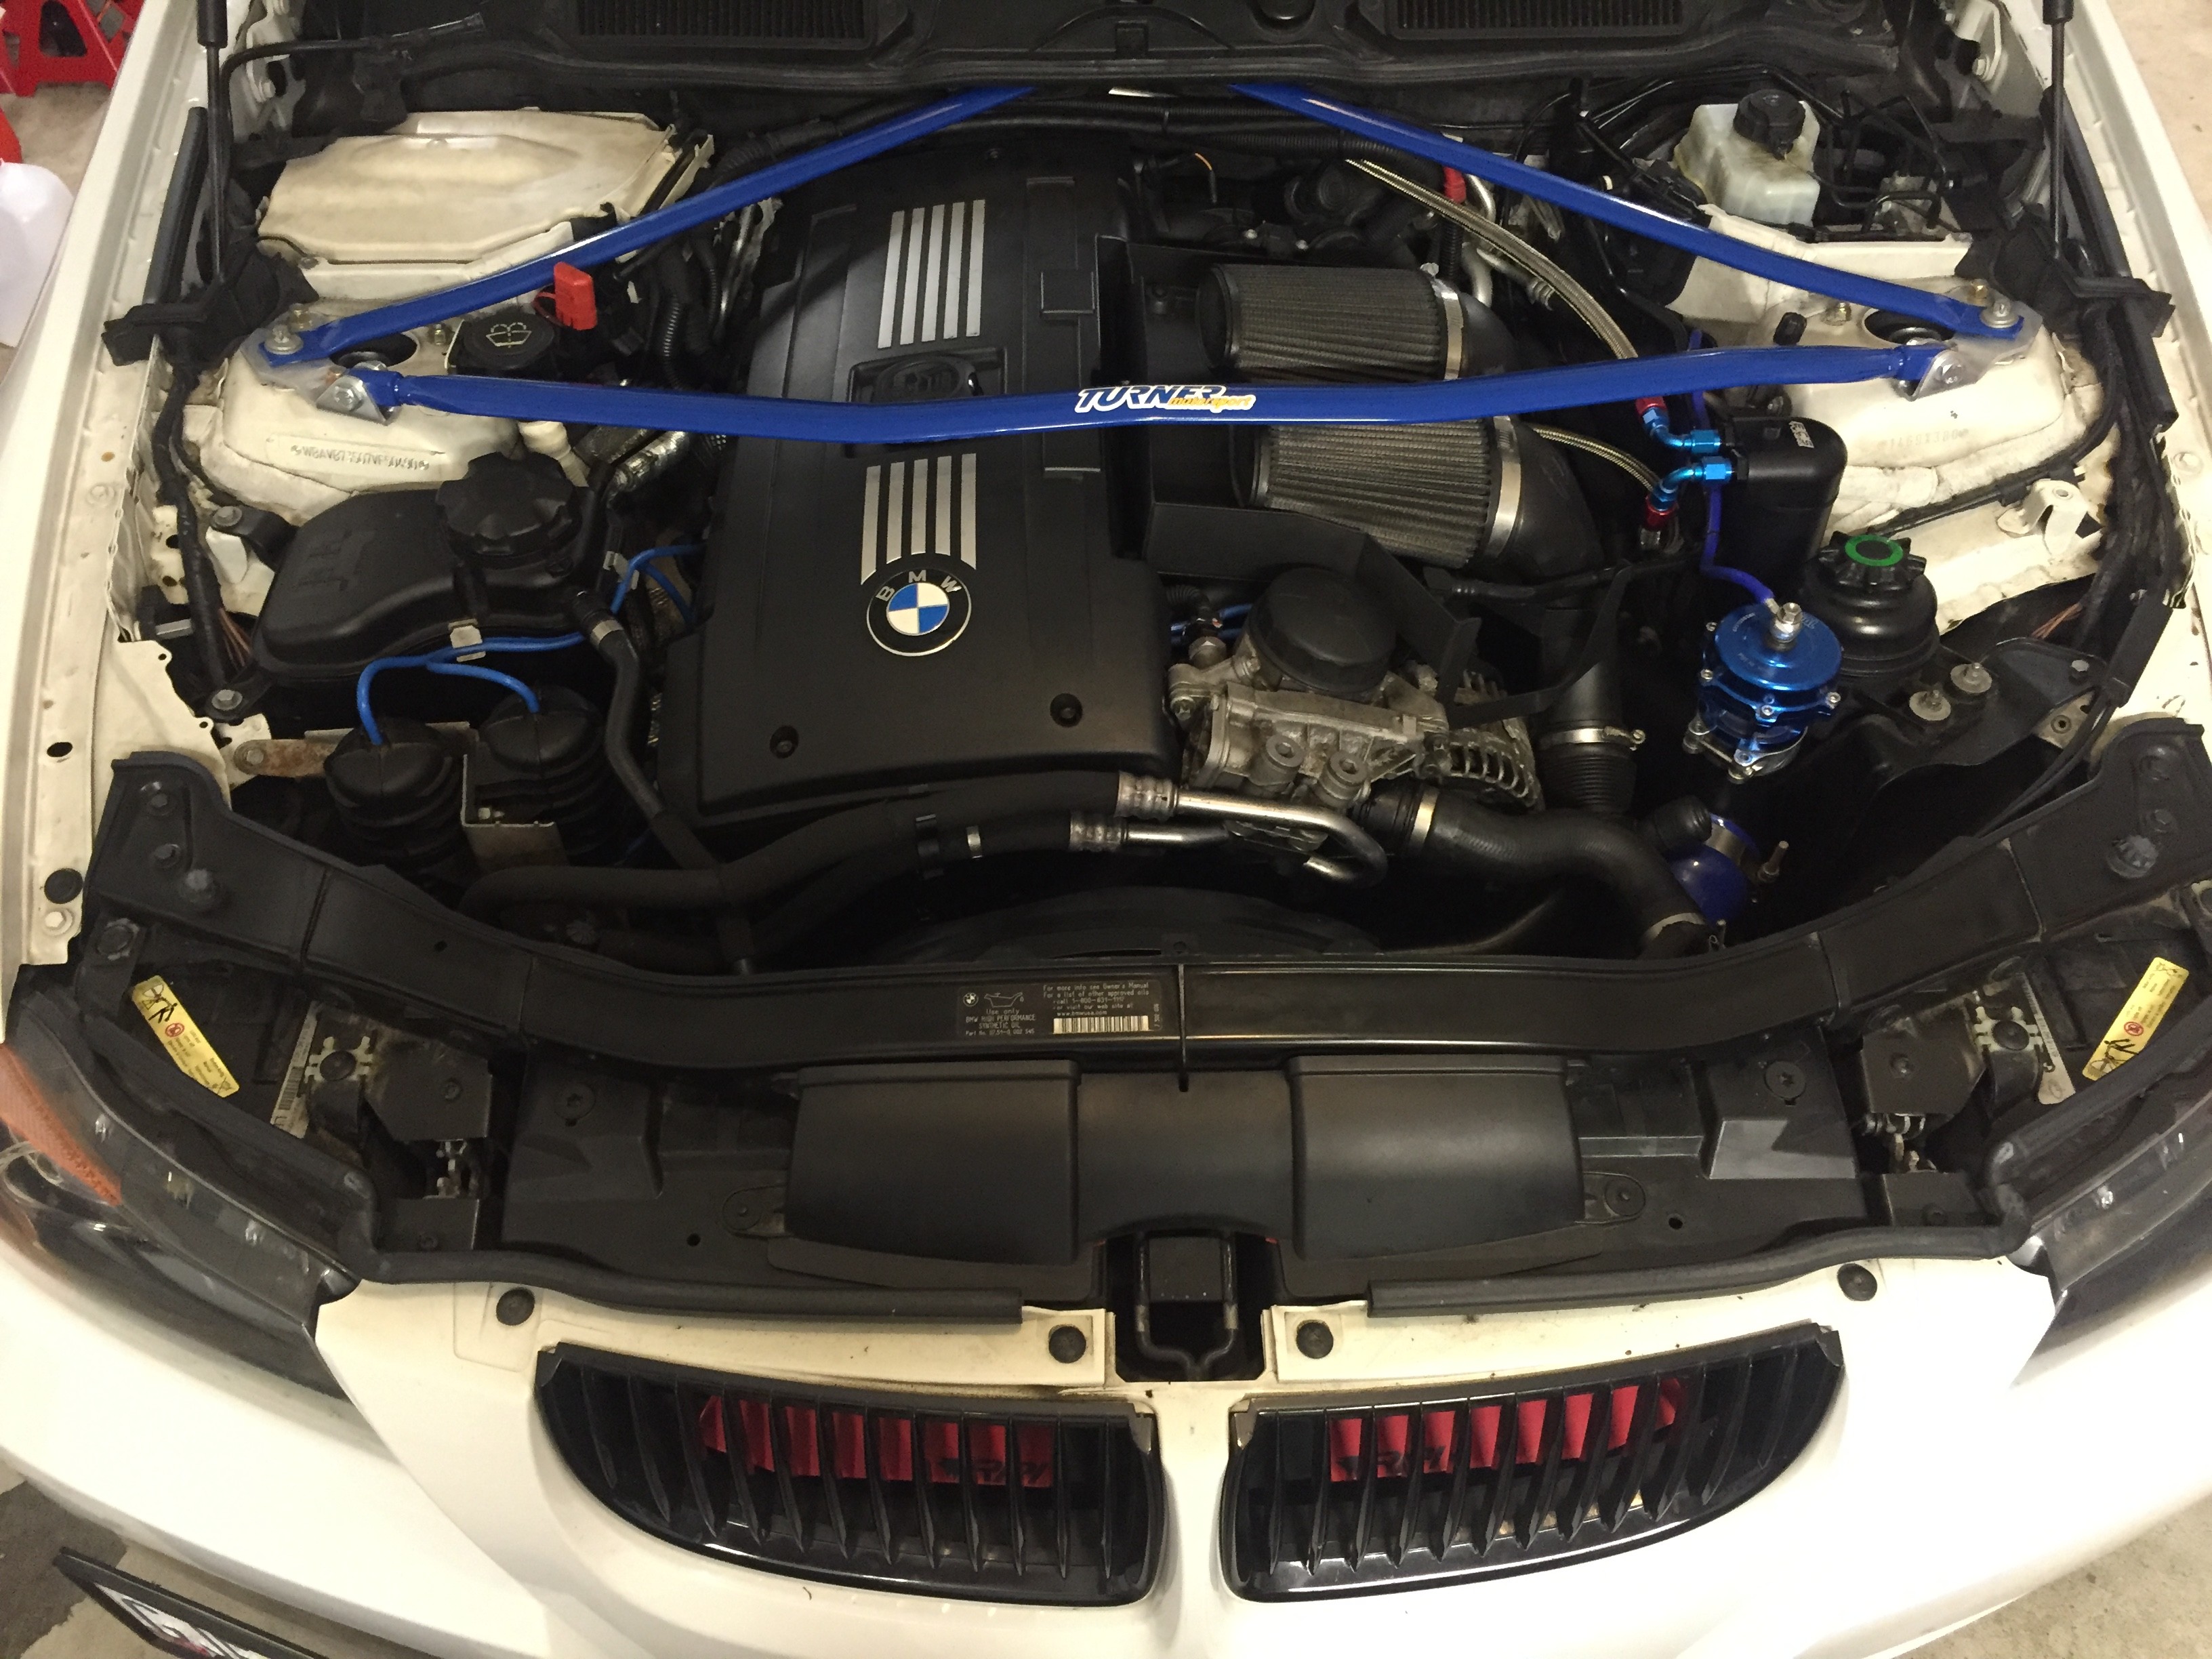 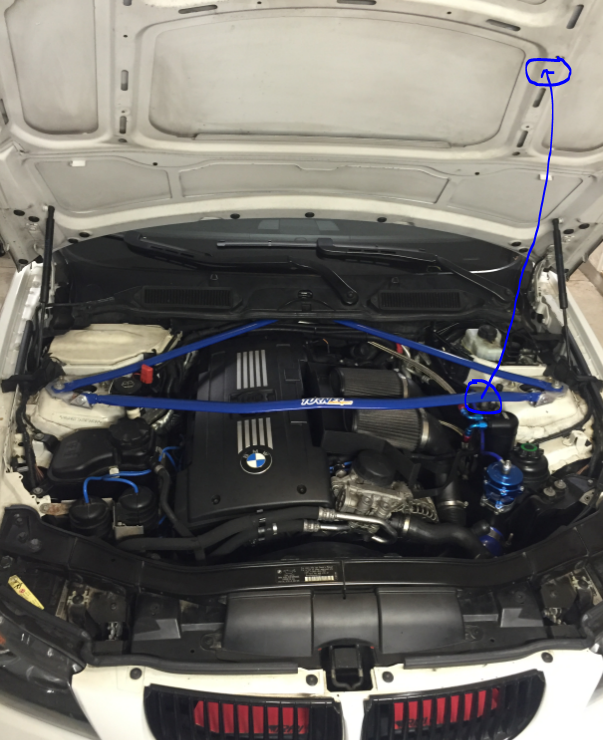 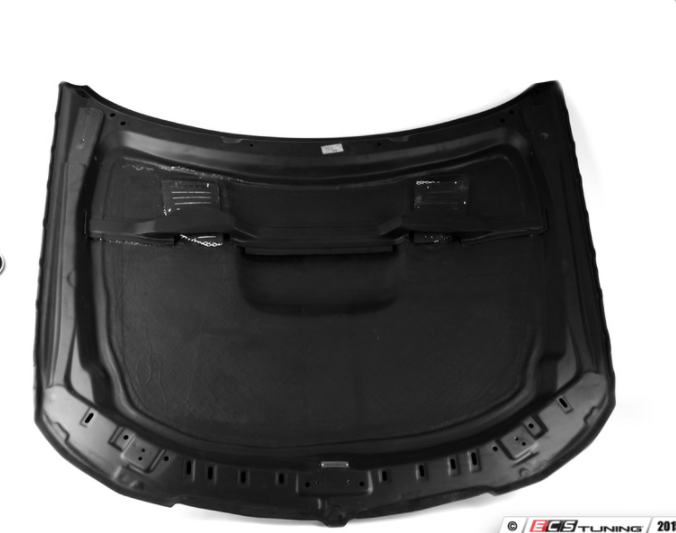 On a final note, I am waiting on a couple more body panels to show up and my car will be ready for a makeover! My CF Diffuser I bought arrived (review thread) so I am just waiting on my M-Tech Rear, BMW Performance Side Skirts and a CF Front lip (for my Pre-Lci M-Tech Front bumper). Stay tuned! 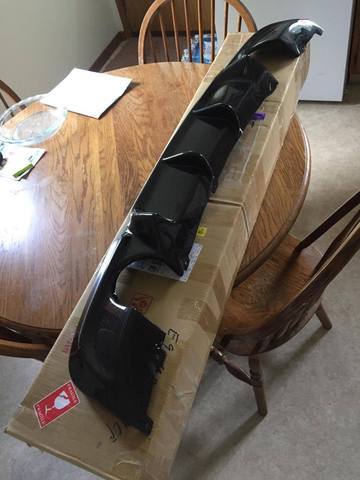  ------ Comments ------ 7/19 All the photos have been switched over to imageshack, photobucket can suck it. Imageshack actually has a reasonable annual fee for joining and they have no ads. 7/18 Photobucket continues to screw me. I am really developing a hate for that site. Sorry for the broken links guys, I will have to go through and switch them all over to imageshack which is SUPERIOR if anyone was wondering 6/22 Low Side ECS Tuning Catch Can Install I've been wanting to add a catch can for some time now and I decided to go a different way than most and install the low side catch can before the high side. Thanks Rob at RB Turbo for the Low Side External PCV Kit, thanks ECS Tuning for the catch can and bracket and thanks Summit Racing for the AN fittings and line!  Also I am making progress on gathering body components to overhaul the exterior of my car.  This install consisted of the following: -Low Side External PCV Conversion -New Injectors -New VCG Per usual I also picked up some more tools for the job  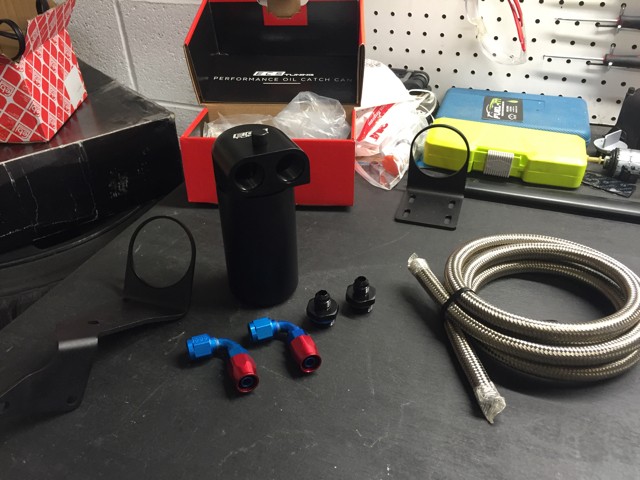 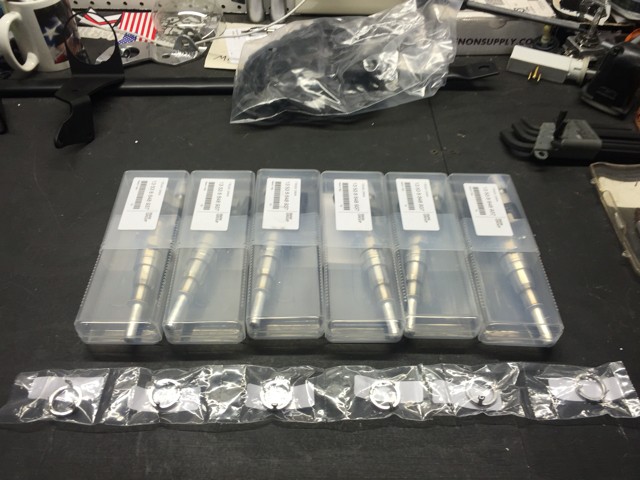 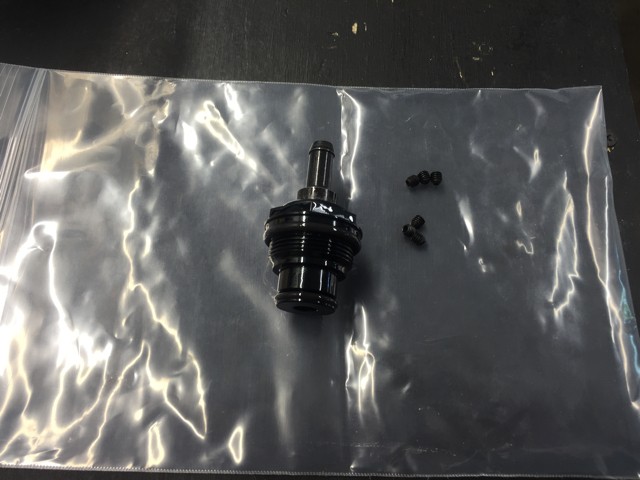  And so the disassembly begins... (pdogg - helper of the year) 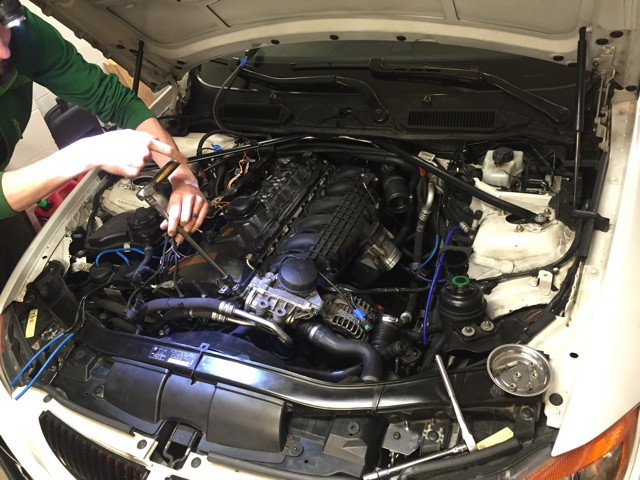 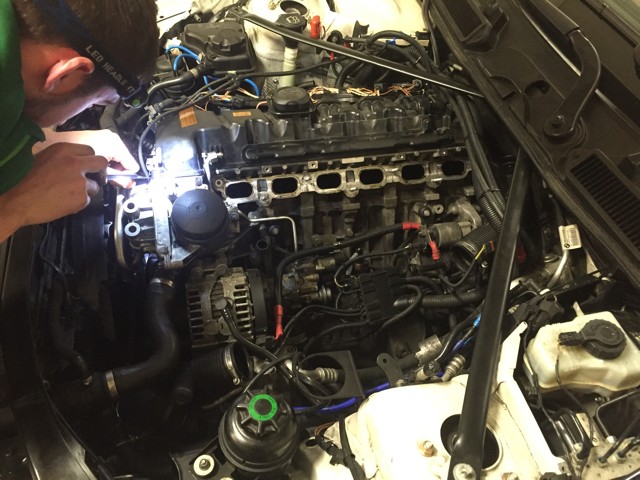   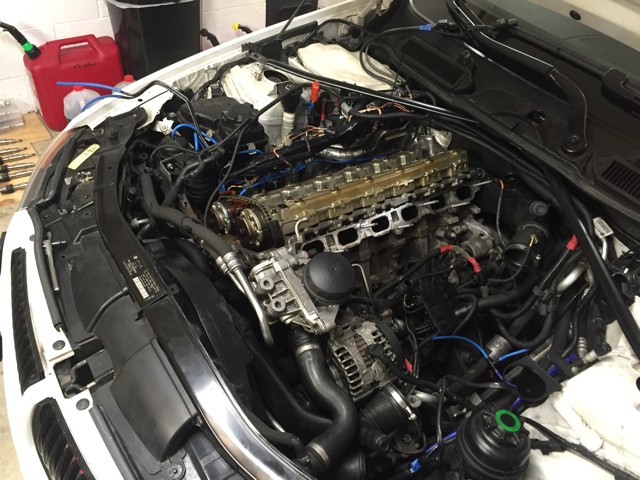 While everything was out I decided to vacuum up everything including the spark plug holes with this sweet shop vac attachment I just got. 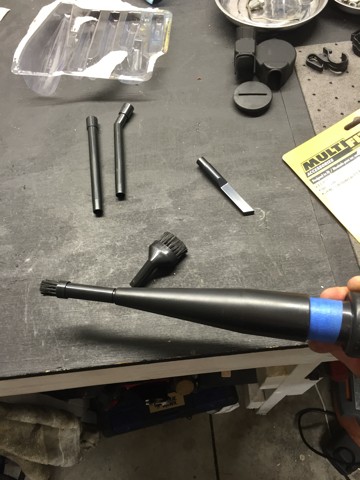 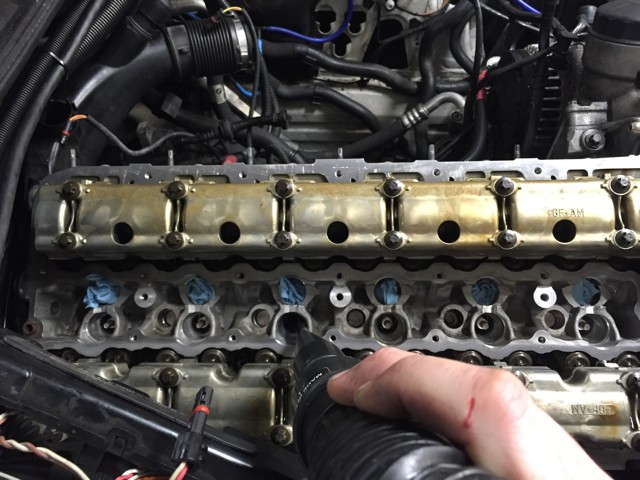  My new plugs already got fried from the leaking injectors Looks like I will have to replace these again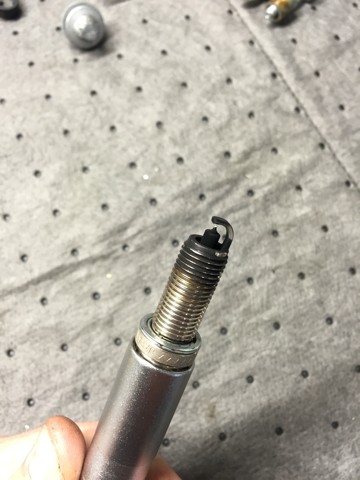 Now thats done, time to get things prepped for plugging the low side pcv holes in the cyl head 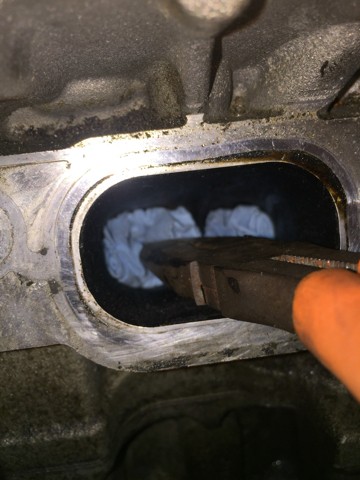 These could use some cleaning....too bad I don't have the tools for that while I'm in here. 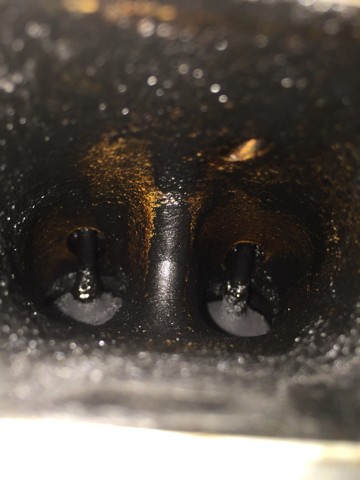  The tapping is coming right along  Now that is done, time to clean the surface and prep the valve cover for re-install. Here is a pic of the RB valve hooked up to the valve cover as well as the intake manifold.   AN lines getting prepped!  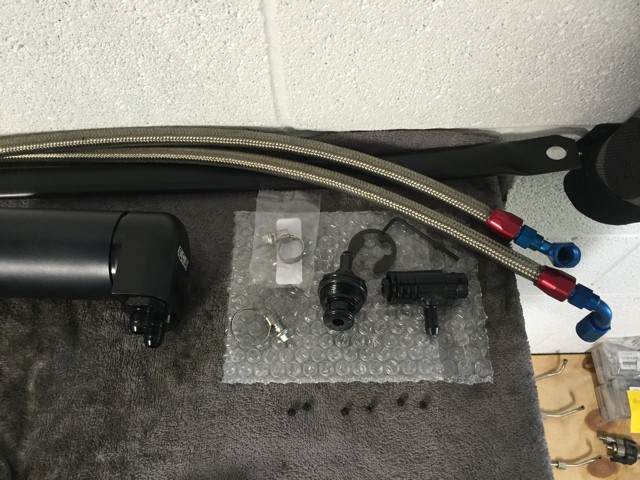 Valve cover back on, now time to install these little golden injectors 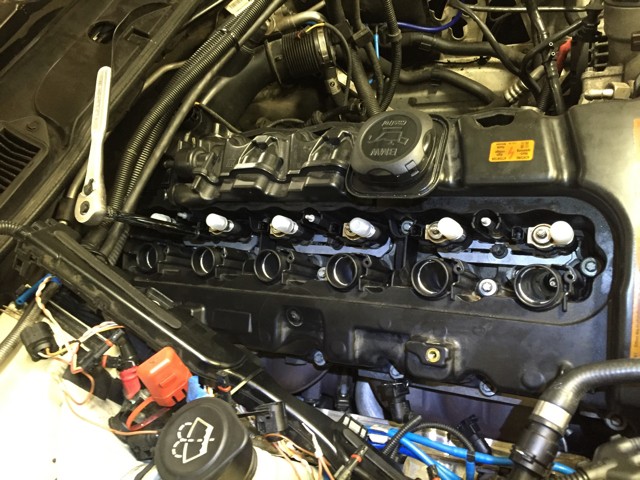 Last but not least, catch can getting installed! 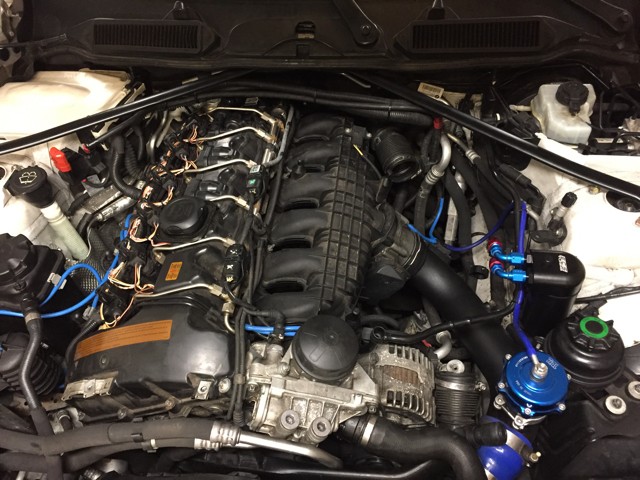   Came out nice if you ask me 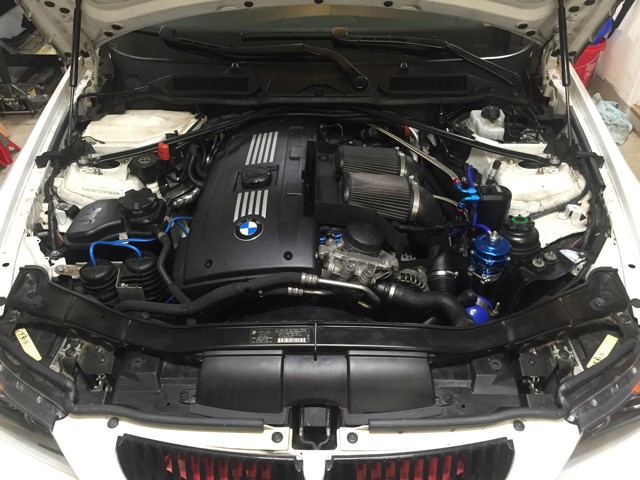 Coded the injectors and this project is a wrap! 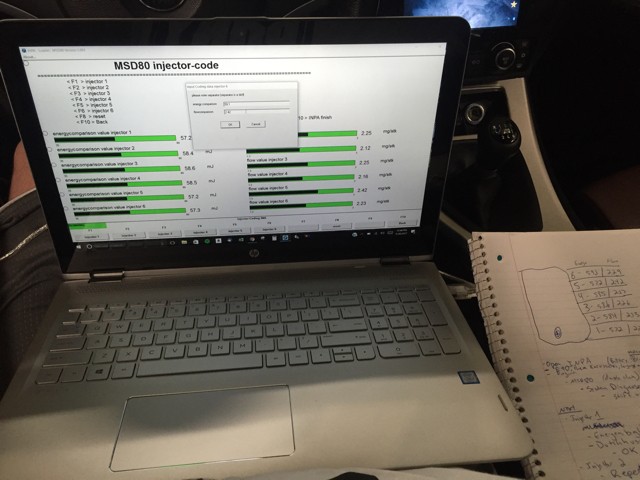 Also, continuing my collection of body mods. A few more things left then transformation time! Thanks ECS for the parts and Greg for the stickers! 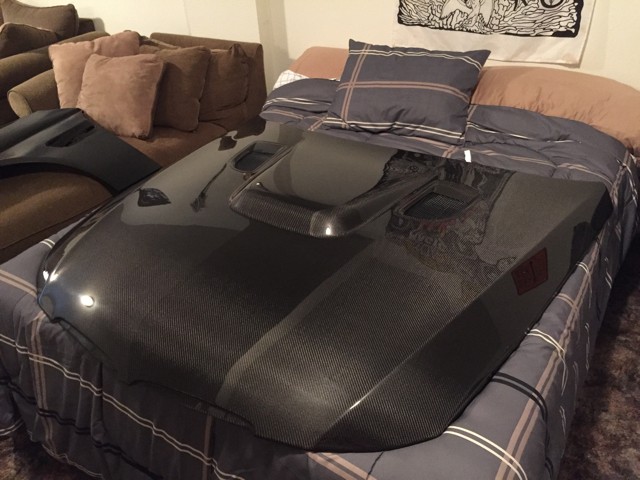 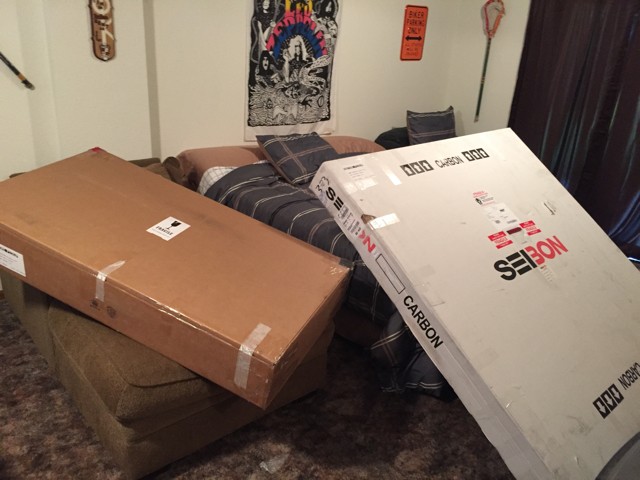 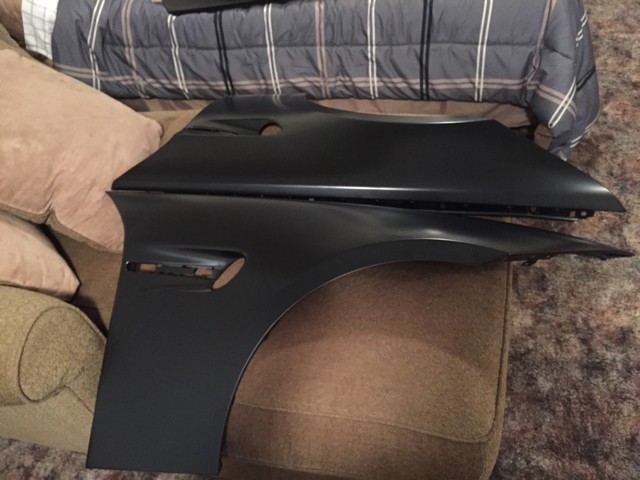 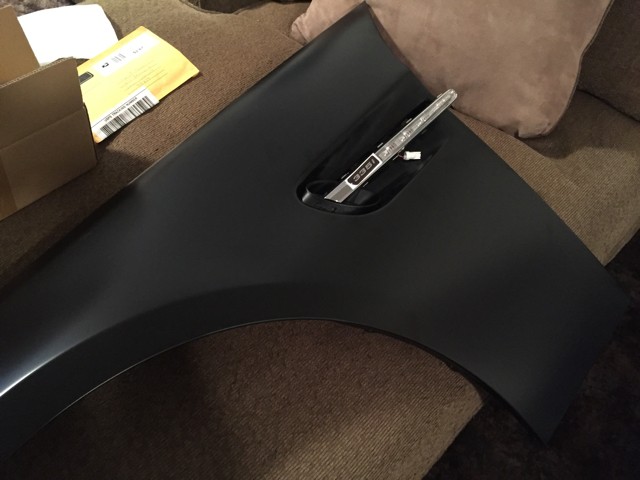 For any of you motorcycle fans out there, I ditched the rear blinkers on my bike in favor of an integrated tail light. This allowed me to move the plate further in and give the tail a clean look. 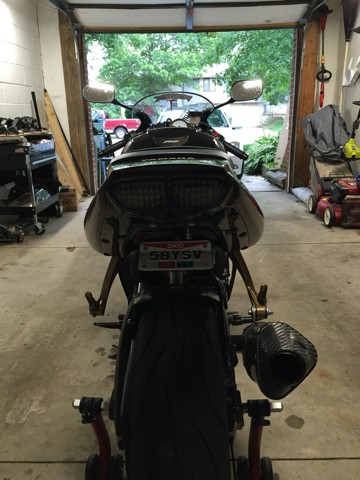 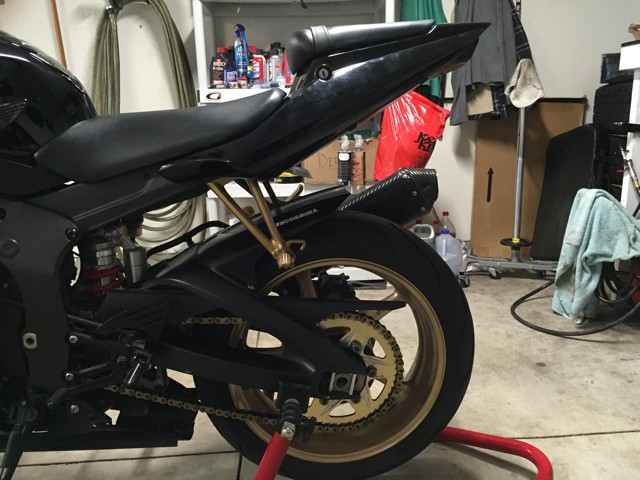 ------ Comments ------ 4/28 Audio System Overhaul So I have spent a good amount of time gathering parts and it is time to finally do the install. This is the plan! -Pioneer Head Unit (avh-x8500BHS) -Rewire Alpine Sub Amp -Add JL 600/6 six channel amp for speakers -Run all wiring for RCAs, Speakers, Remotes, Bluetooth Mic, Sat Radio, Steering Wheel Control Module, HDMI, USB, Etc -Add 0 Gauge Wire to 4 Gauge distro block -Tap into Technik harness for speakers -Wire a ground switch to use DVD function -Hard Wire Passport Radar -Hard Wire old iPhone 5s for dedicated Jb4 gauges 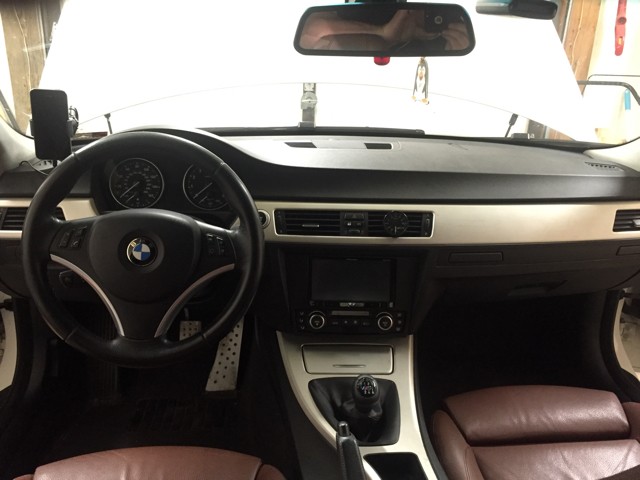 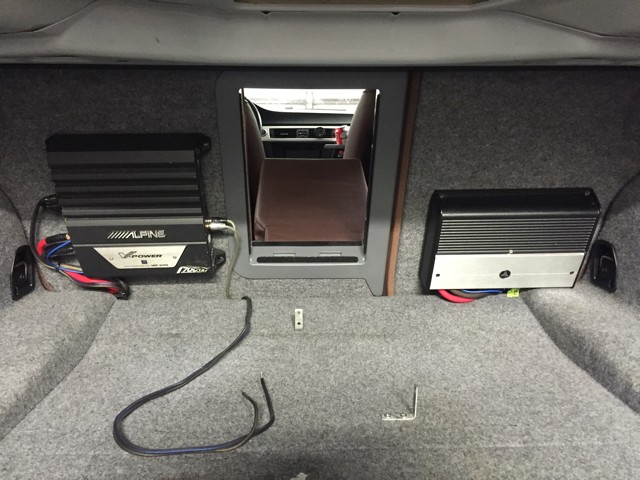 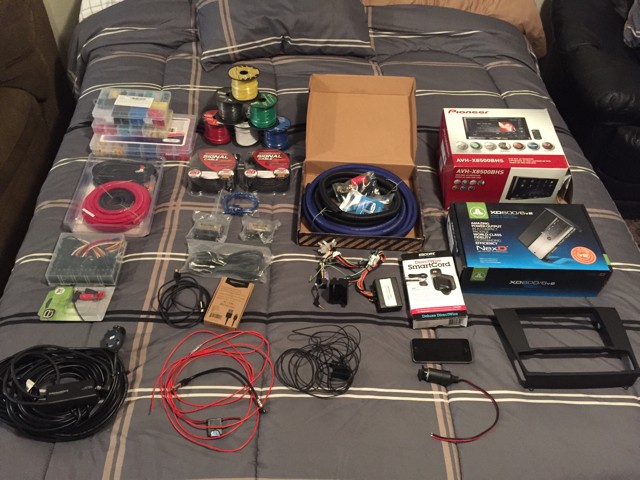 Let the disassembly begin... (big thanks to my boy Mike for all the help) 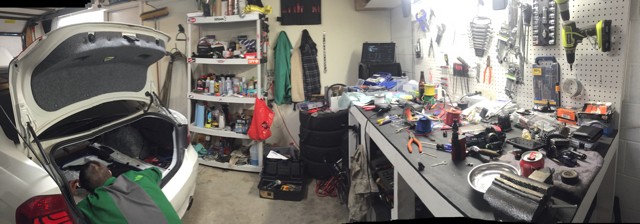 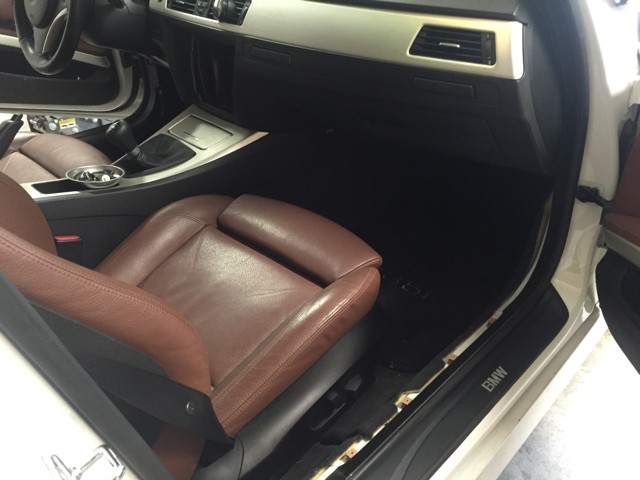 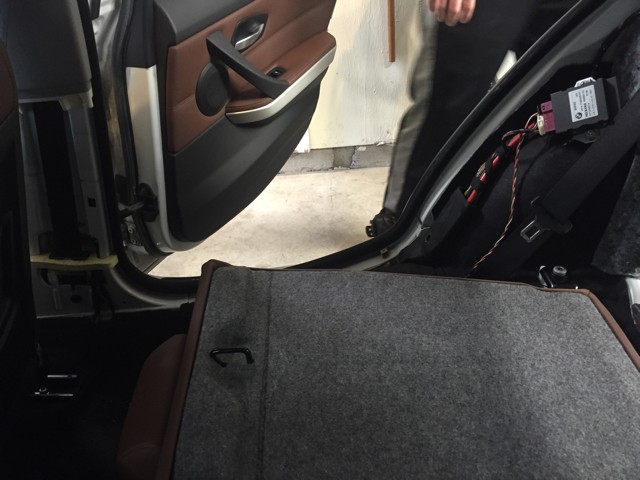 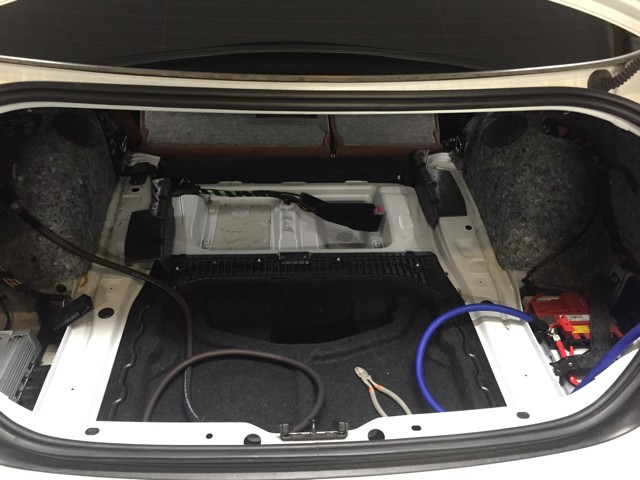 Trunk Wiring has begun 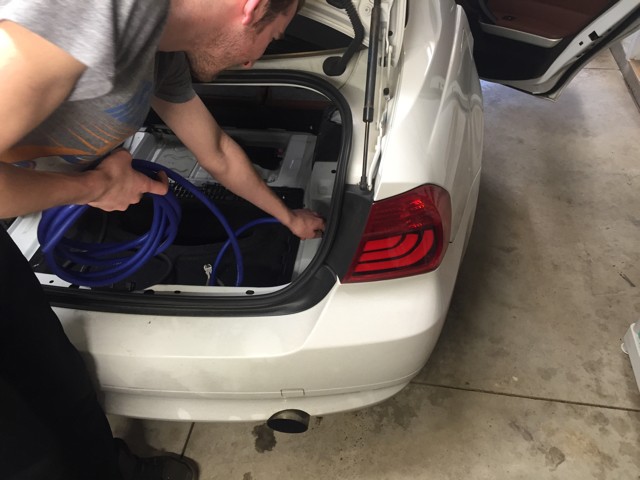 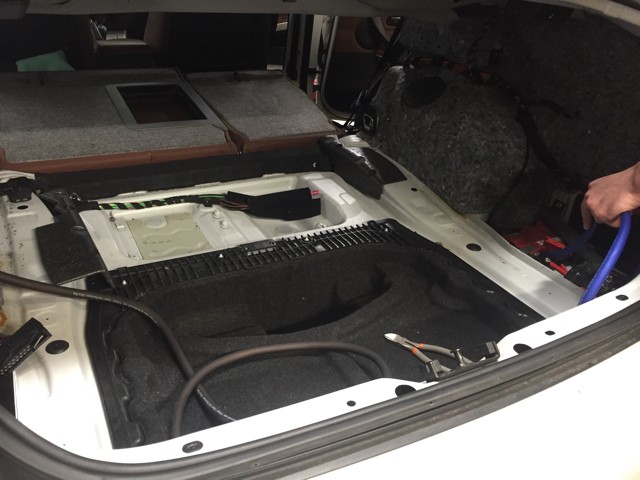 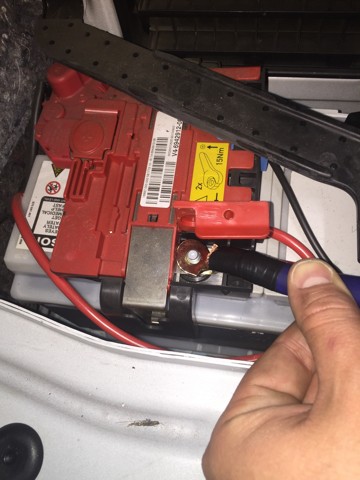 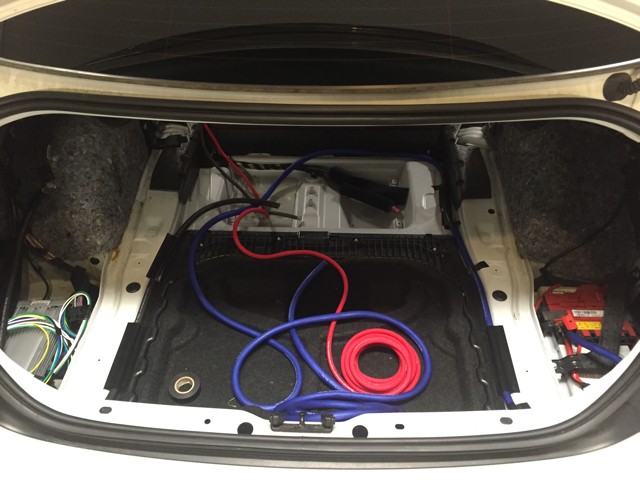 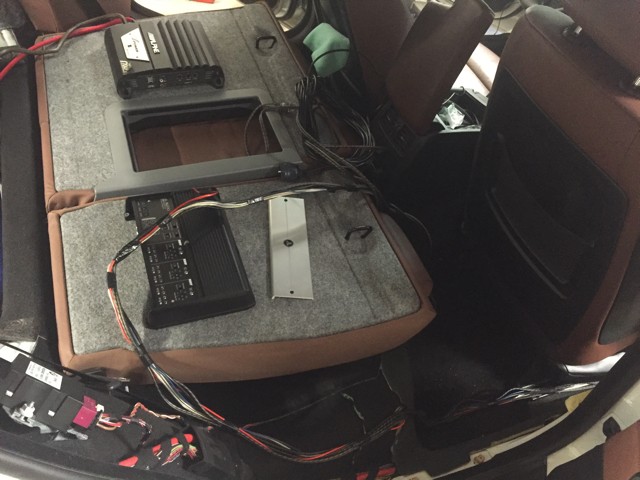 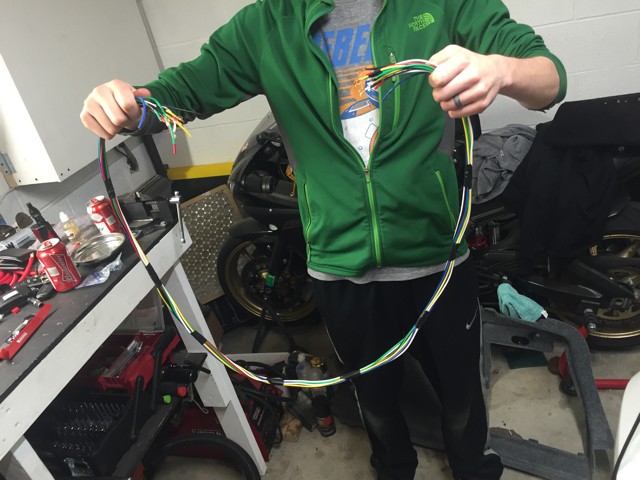 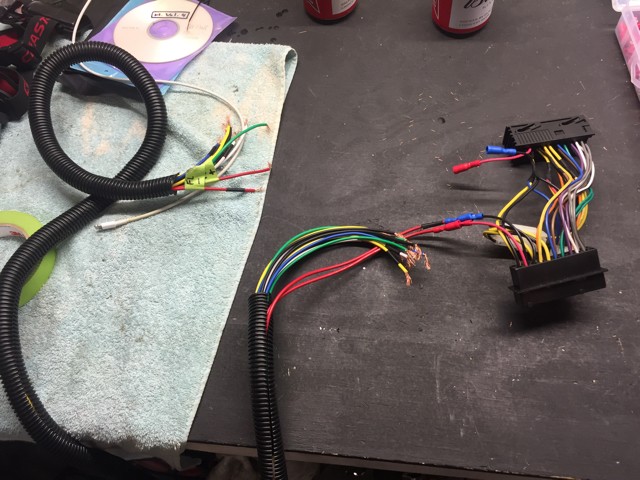  Everything is wired in the trunk, distribution blocks 0 gauge to 4 gauge hooked up, time for reassembly. 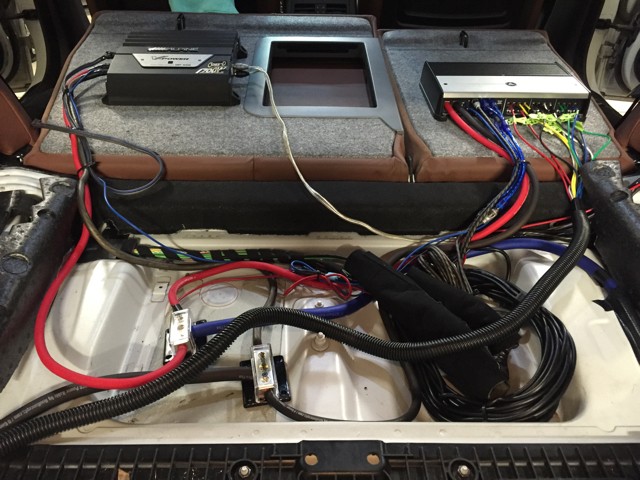 Some of the trunk panels wouldn't go back on due to the massive 0 gauge wire so had to do some trimming 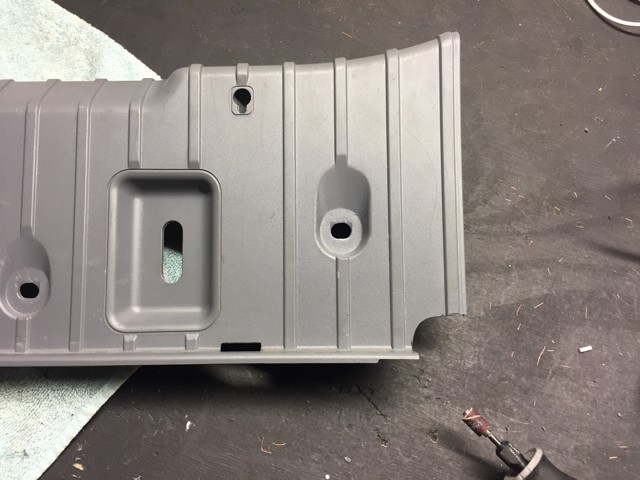 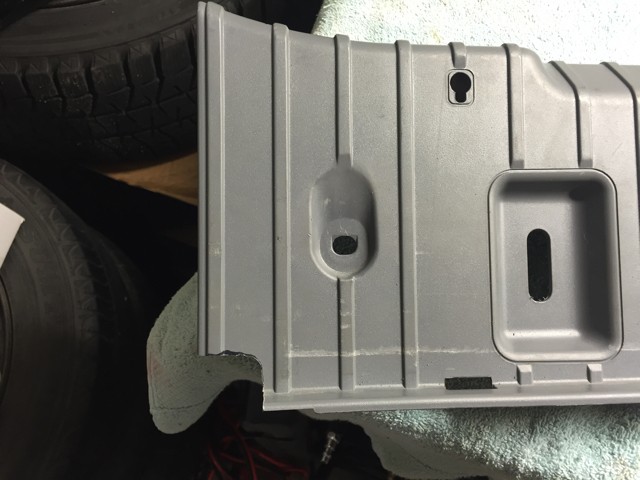 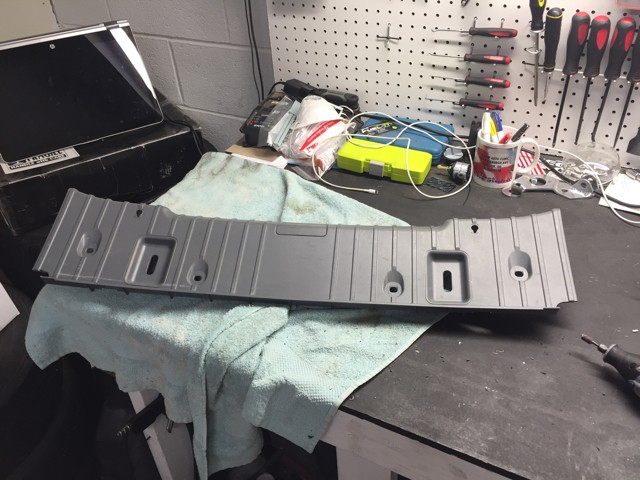 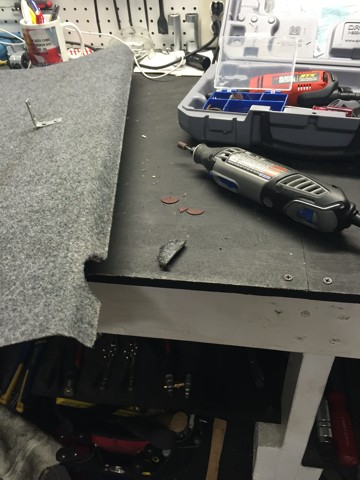 Now everything fits snug! 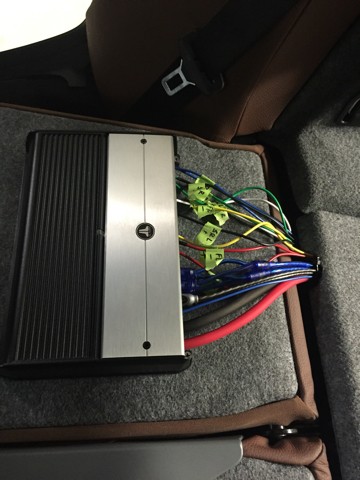 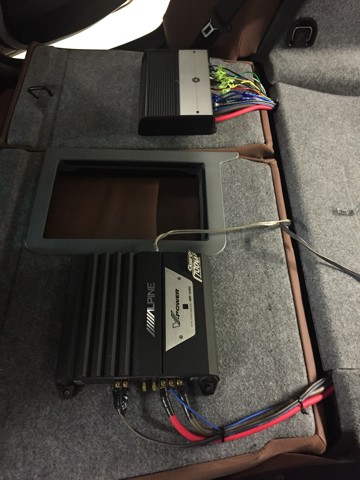 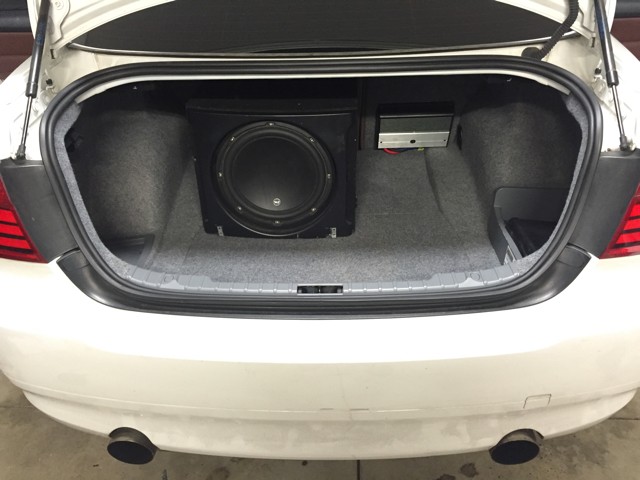 Now on to the front of the car... I first started with hard wiring the Radar  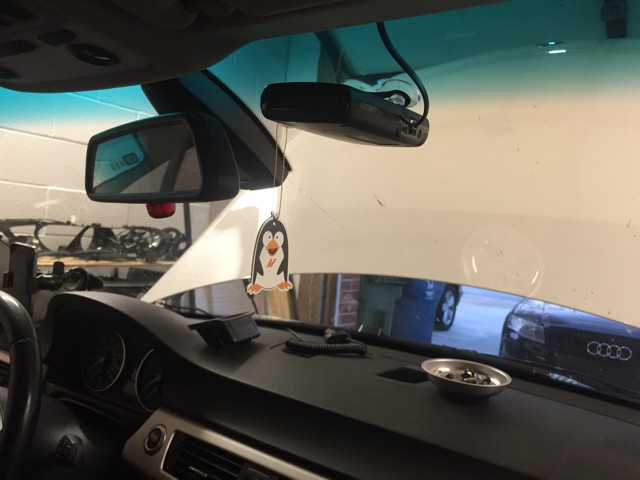 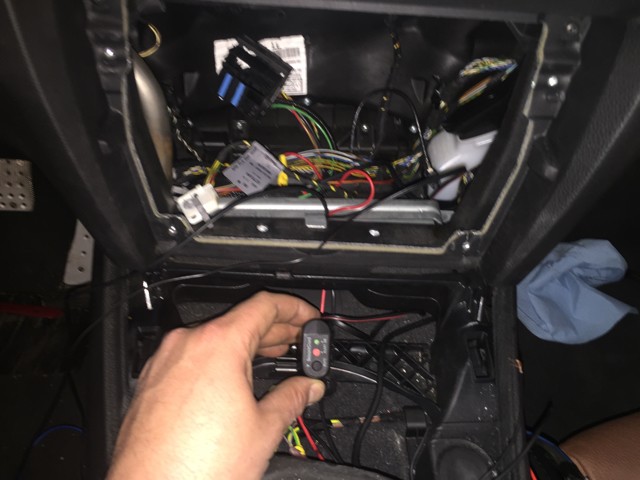 Then onto the bluetooth mic and iPhone! 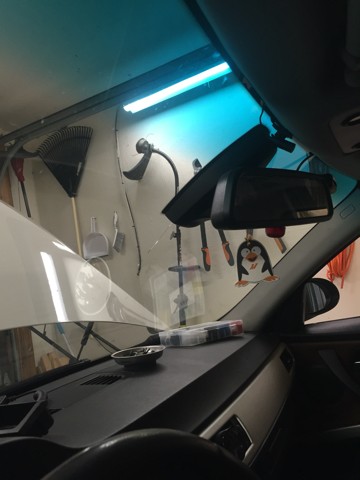 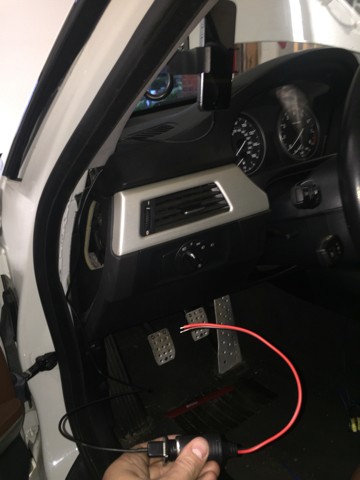 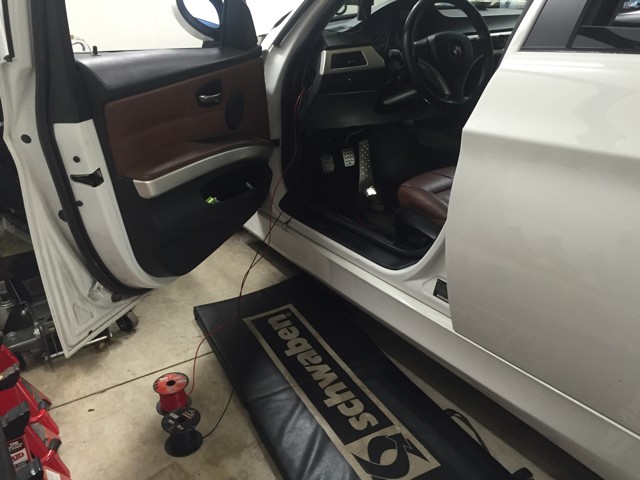 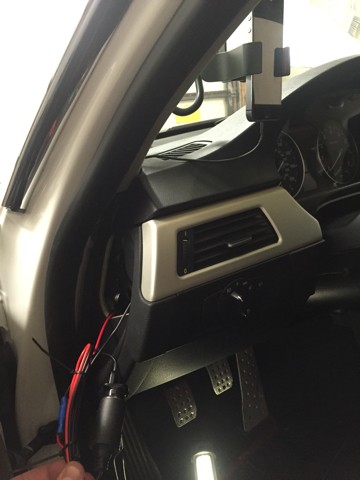 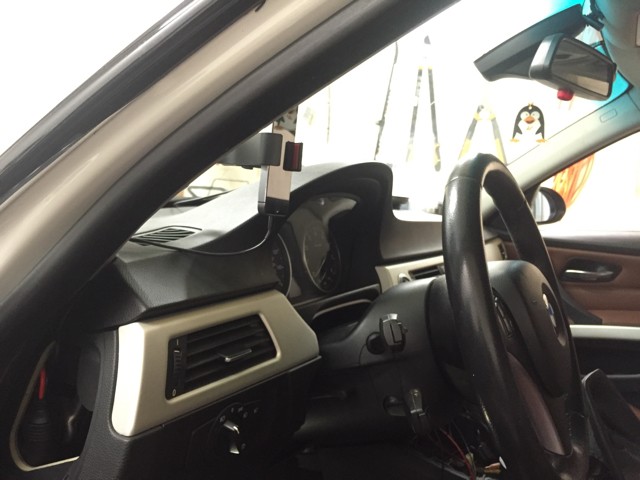 I then tried to wire a relay to allow DVD function on the car (so I don't have to tap into ebrake) but it didn't work sadly. The remote wire turns the relay on too soon, so it is grounded while the head unit is still booting up. The ground needs to happen AFTER the head unit boots up and the relay was simply activating too fast. Switched to just a ground switch and have to switch it every time I turn on the car if I want to use the DVD function. 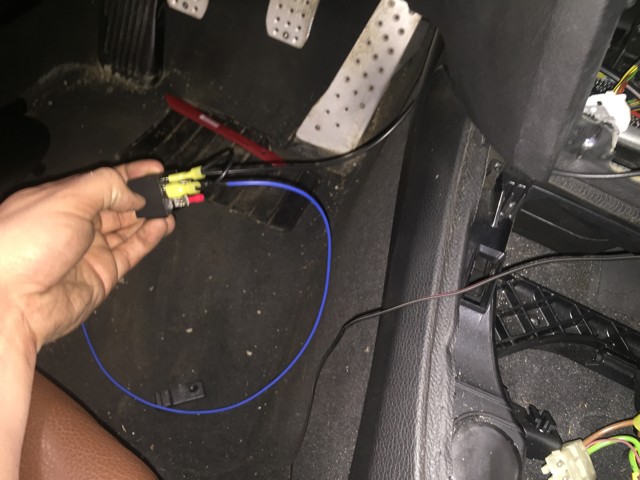 Now that that's done, time to wire up the head unit and iPhone connection! Talk about a big wiring harness... 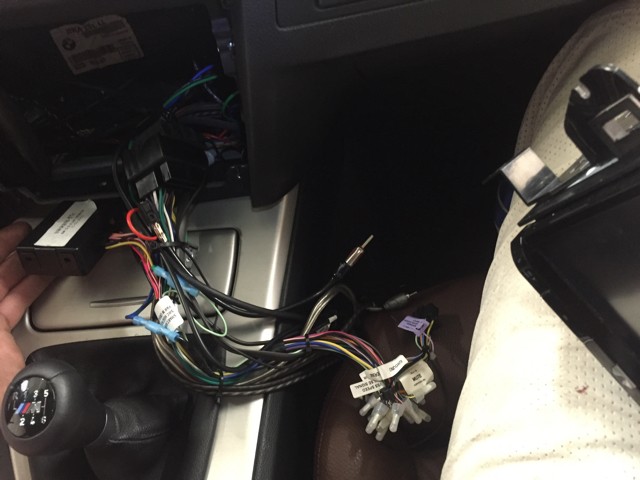 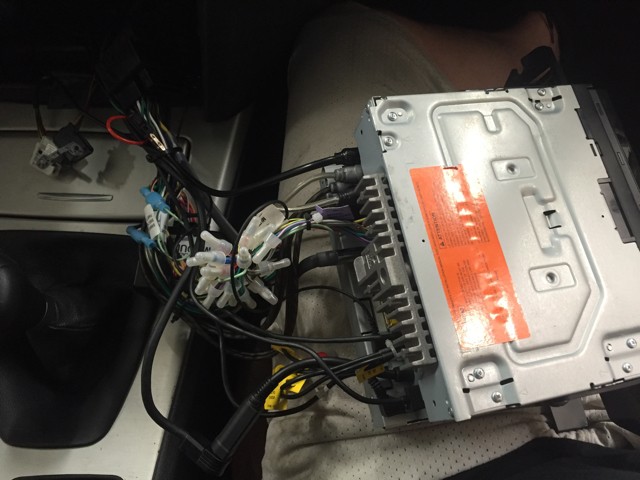 iPhone wire (HDMI and USB) so it allows mirroring to the head unit. I can put waze up on the screen for Navi 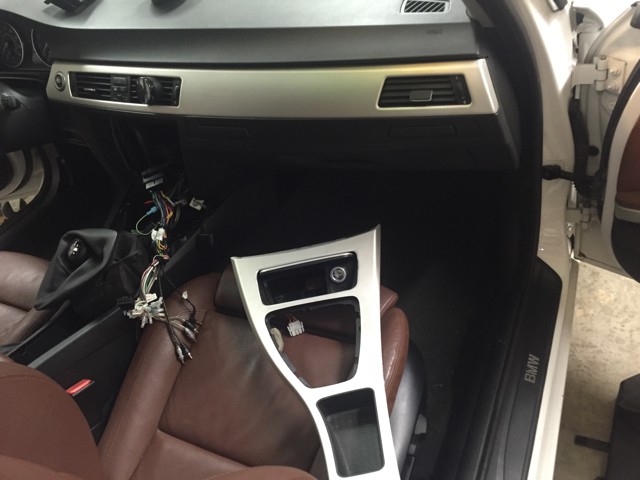 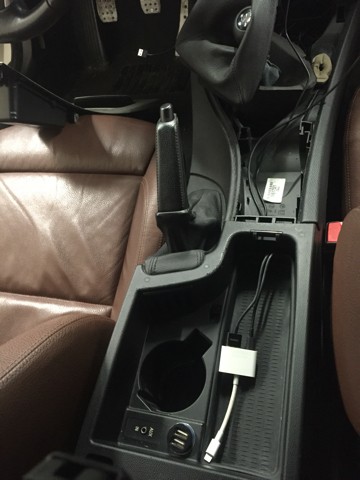 All assembled and looking nice. The placement for the Radar Detector mute switch is perfect 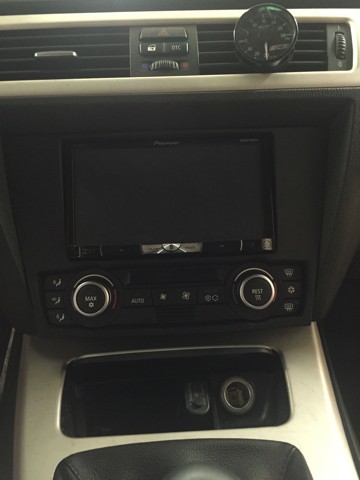 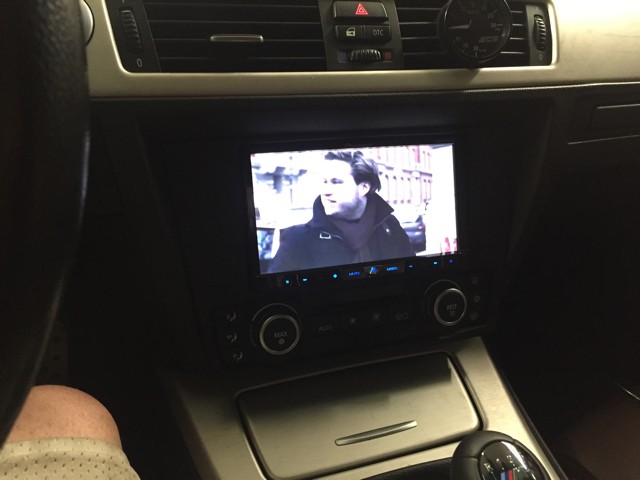 Now that THATS all done, time to do the stage 2 LPFP from Fuel-it! so I can get these turbos running strong. 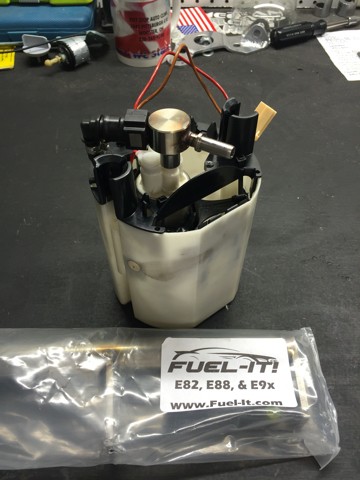 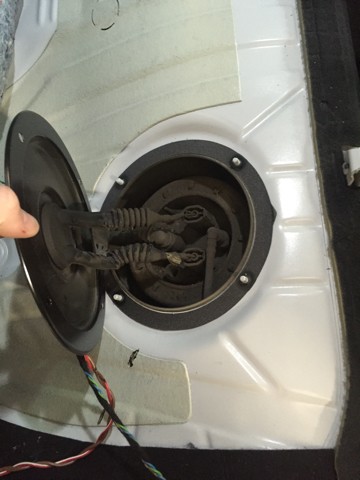 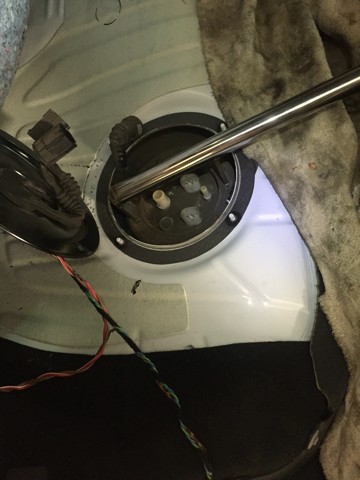 A little dirty, worth a quick vac  Swapped in new one and good to go! BTW this little c clip is a PIAAA. If you do this....You will hate it...it will hate you....there will be some mutual hate....but you will get through it.  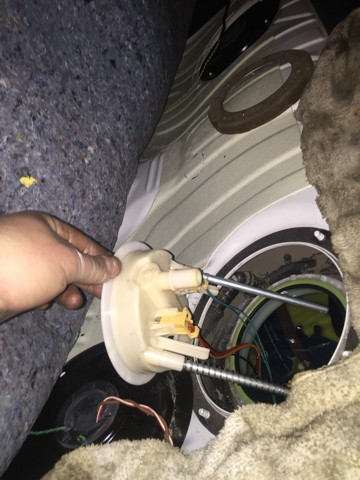 Up Next.... new TPMS and balance wheels, PCV parts replacement, new flash tune and more data logging! ------ Comments ------ 4/21 Fender Mods and Summer Wheels Spring is finally breaking so time to put the summer wheels on! But before I do that I need mod the bumper bracket to stop the tire rubbing. 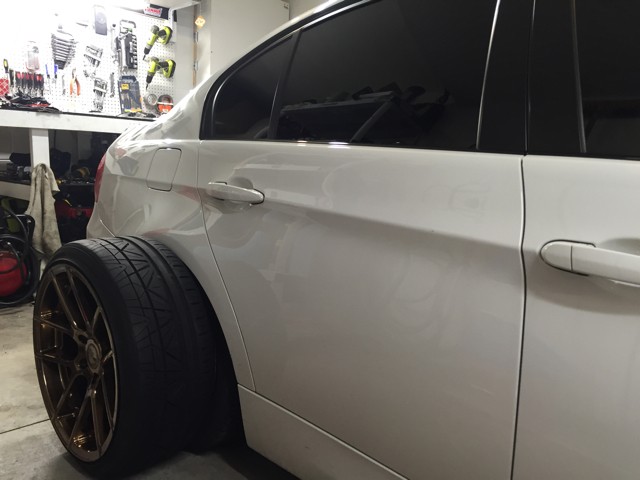 Bumper is off and marking the spots to cut out with my lovely dremel. 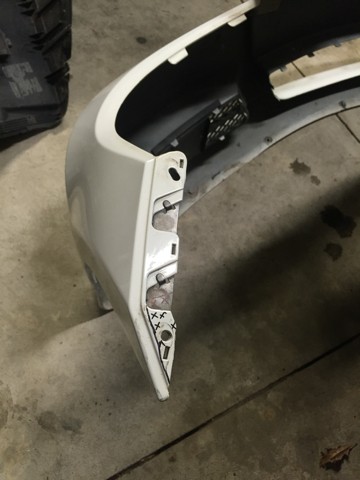 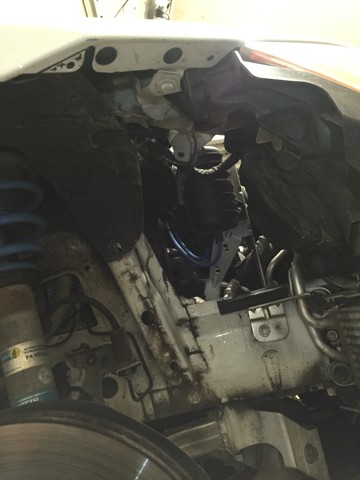 Let the cutting commence 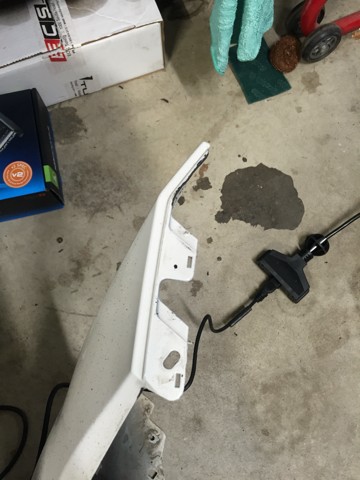 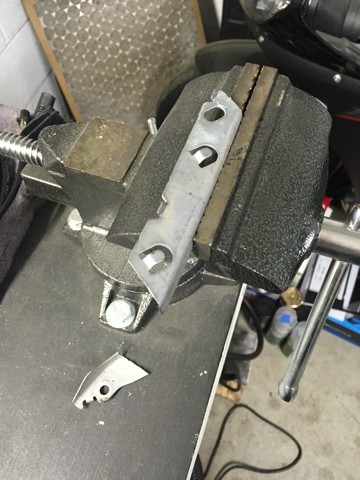 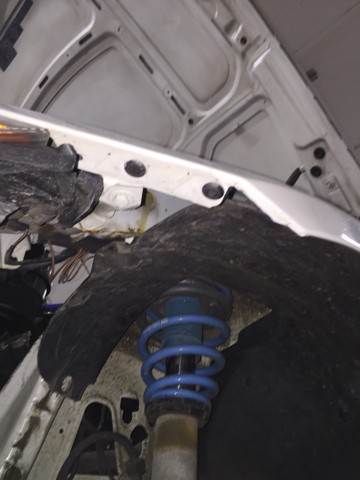  Now time to mark the bracket and bumper for a new hole 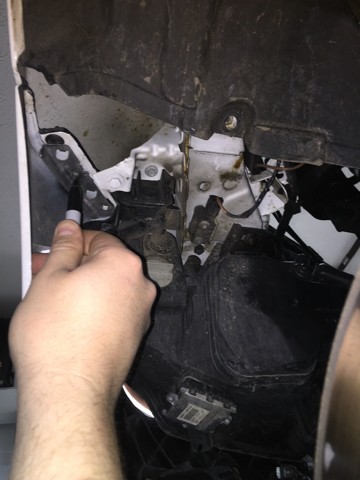 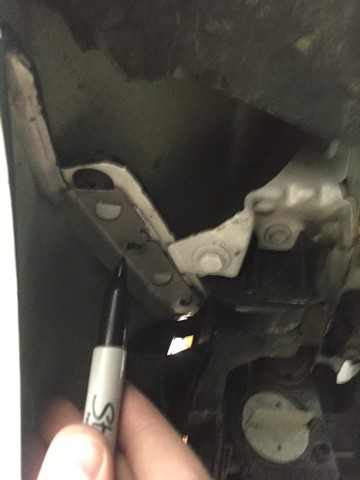 Everything looks good, time to bolt the bumper back up! 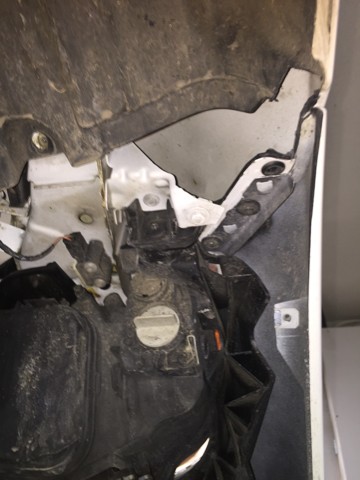 Now that thats done, I can finally put my summer wheels back on  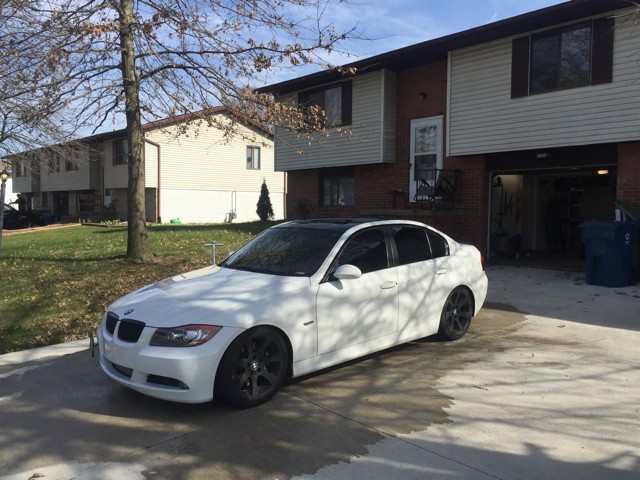 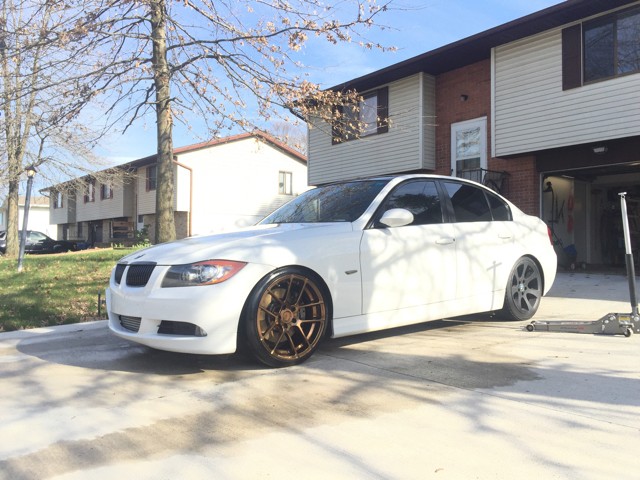 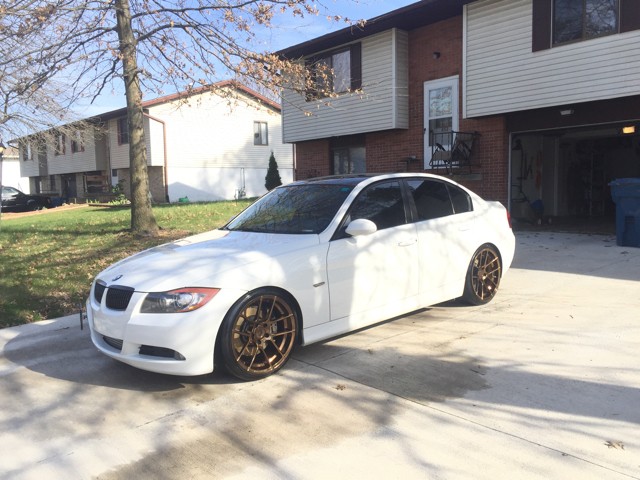 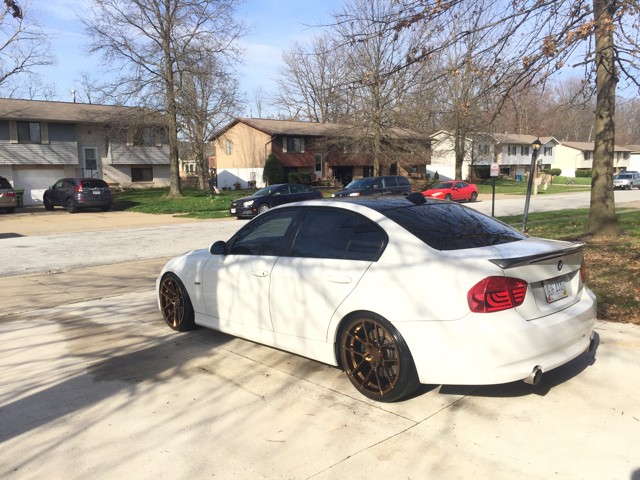 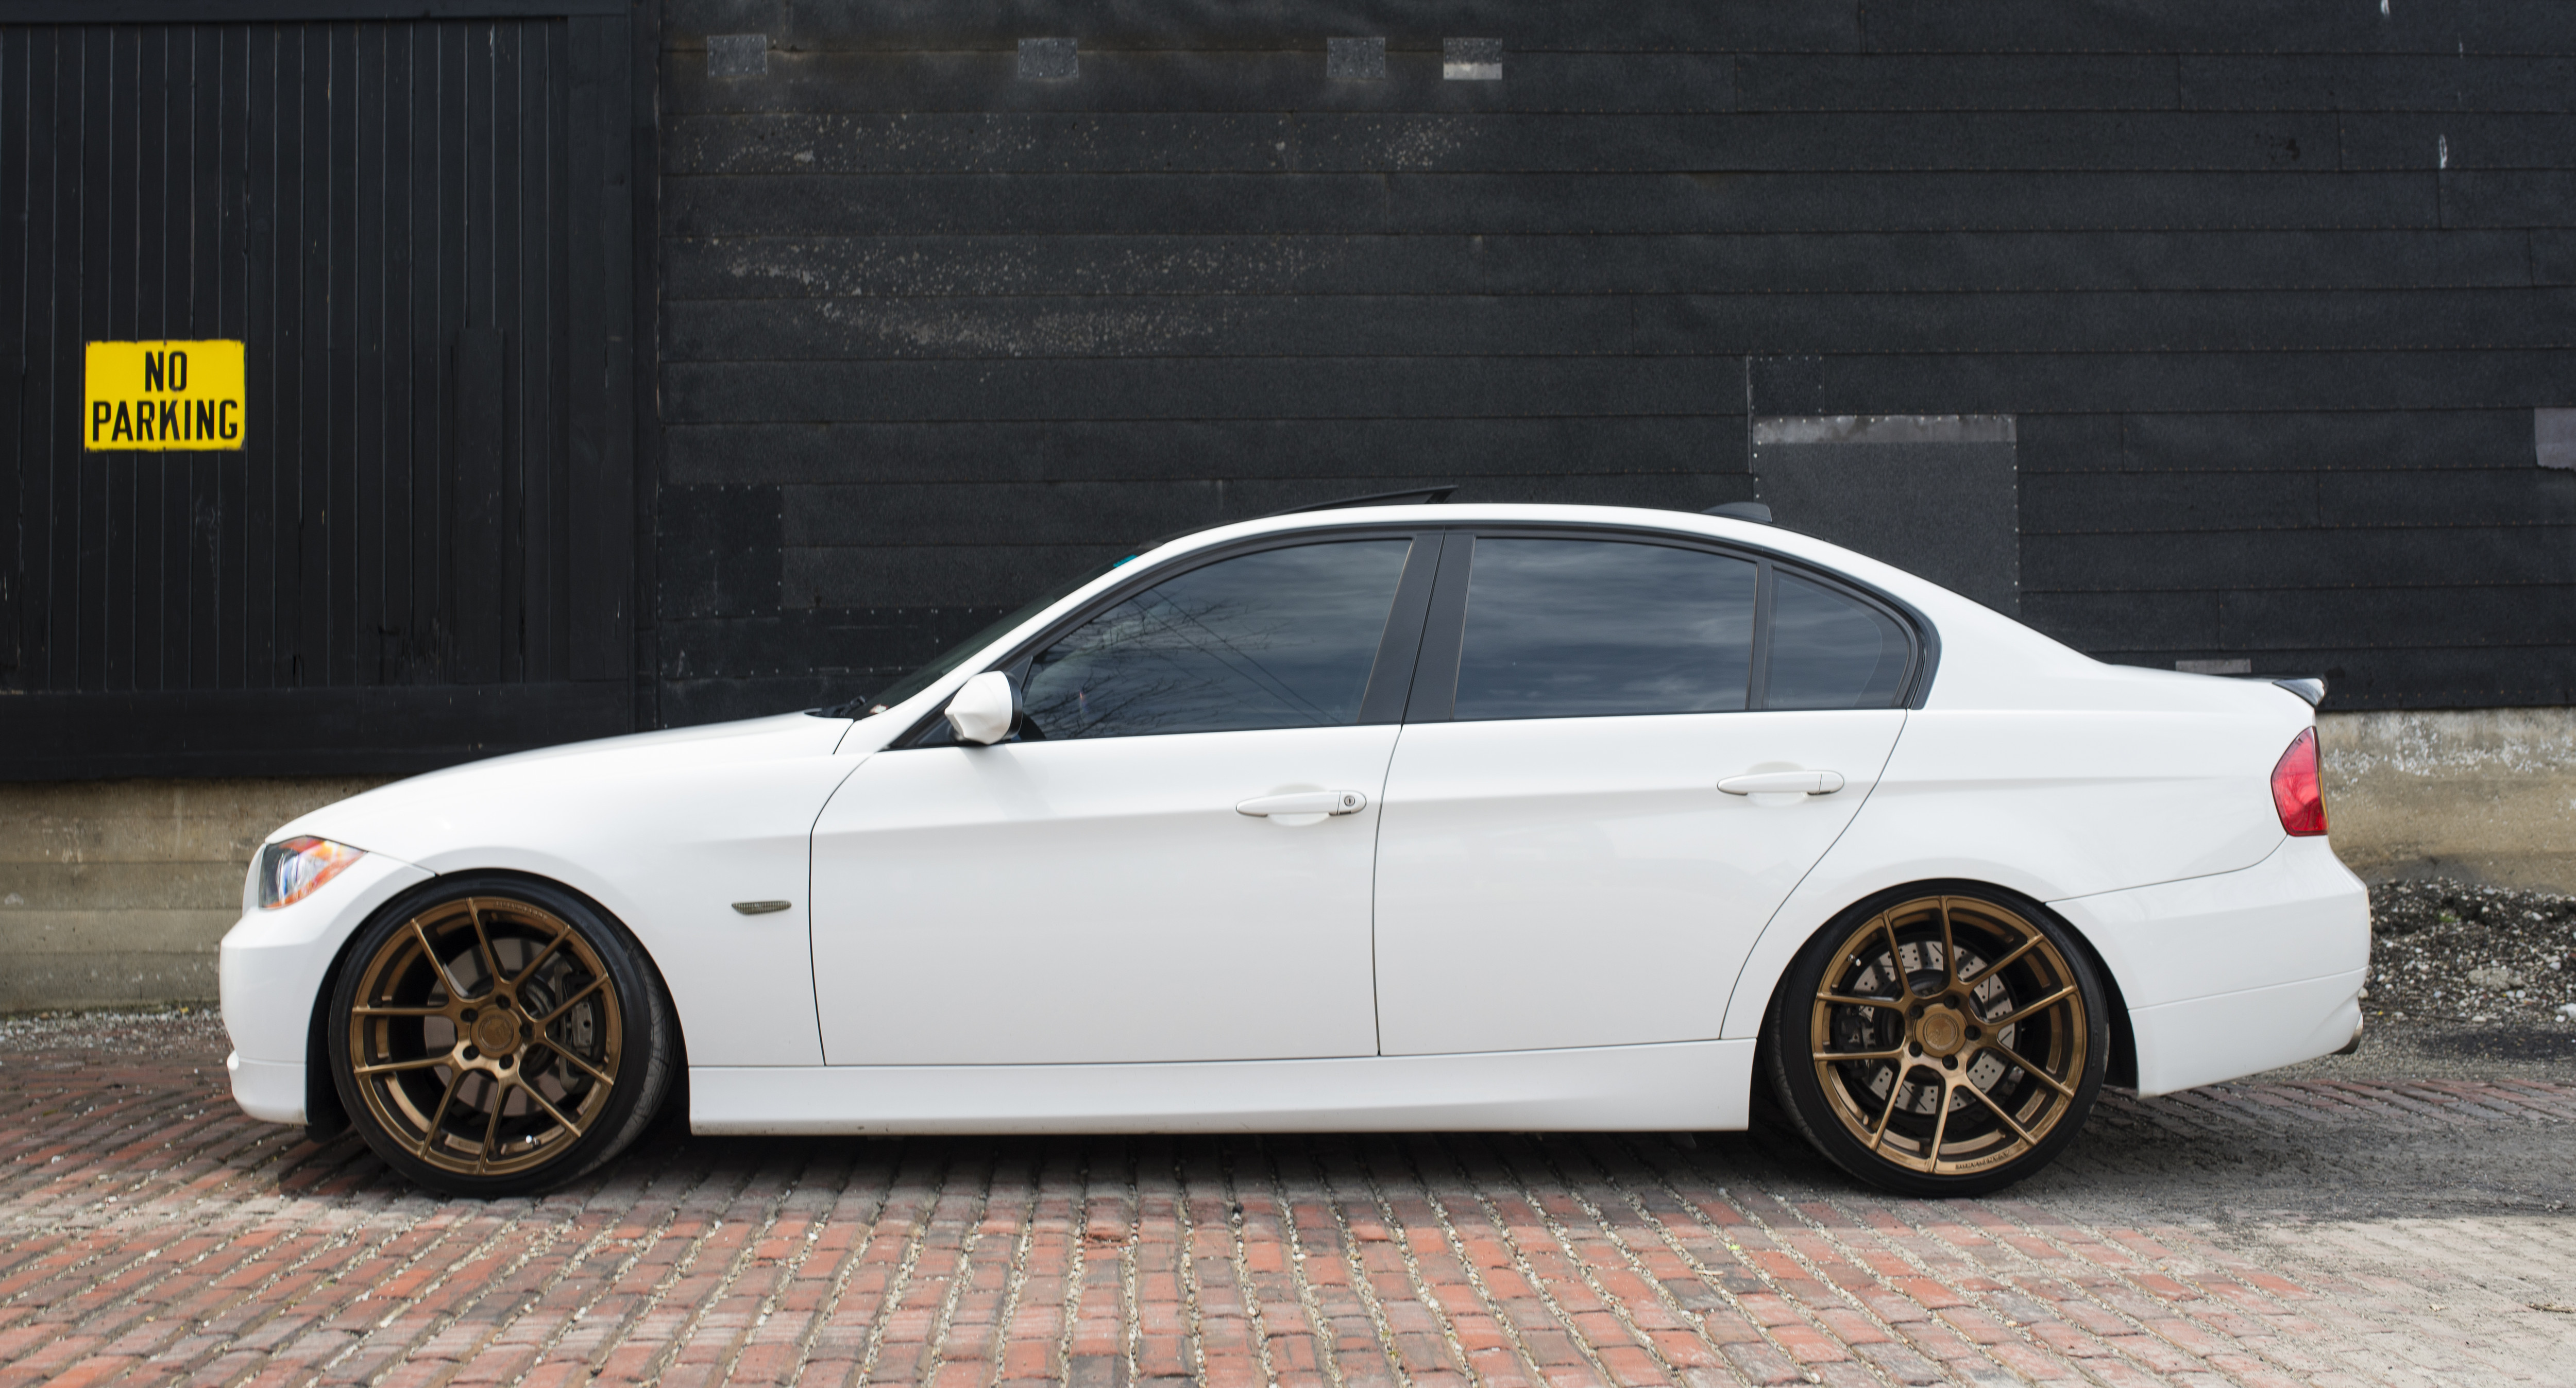 Now back to the projects... 500 mile break in done, time for a fresh 500 mile oil change! I have also been getting some weird exhaust popping at idle. I made this thread and after investigating, my cly 4 injector is starting to leak so that plug is all fouled. I replaced the plugs for now with NGK 95770 (formerly 5992) that are one step colder, gapped to .022. The exhaust popping has been band-aided for now until I can buy new injectors. 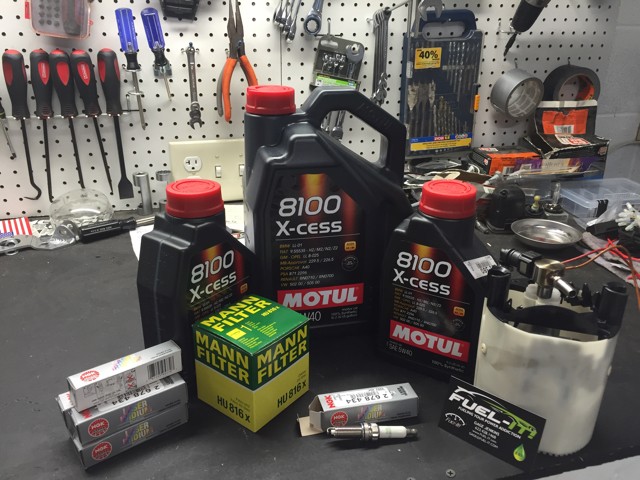 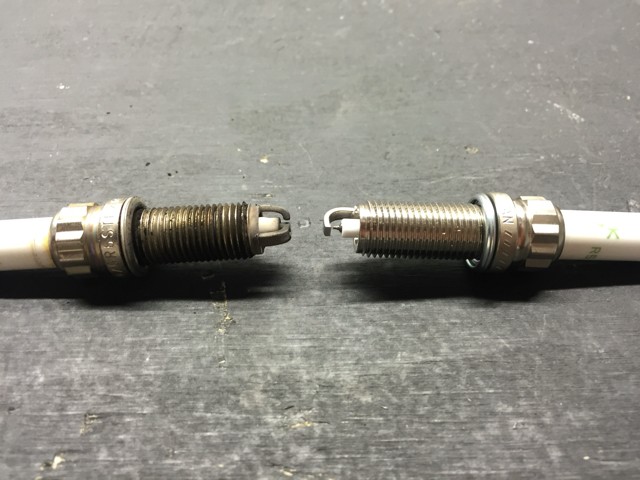 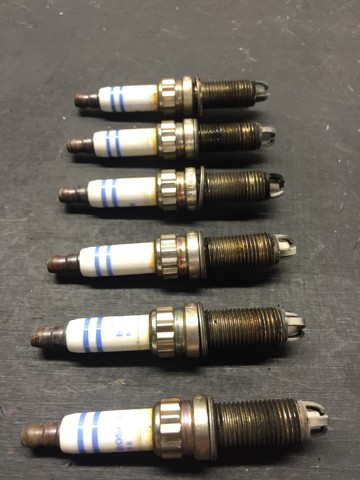 The Frankenturbo project is moving right along. I have been making adjustment to my Map 6 on the JB4 (I also have a back end PUMP flash for now) and doing some logs. Logs showed my lpfp falling on its face so time to upgrade! Stage 2 LPFP from Fuel-It! ready to install this weekend.  I also finished gathering the remaining car audio parts needed for installing my head unit and new JL 600/6 amp. Hopefully I will get to both of these things this weekend!  The current audio setup....for now 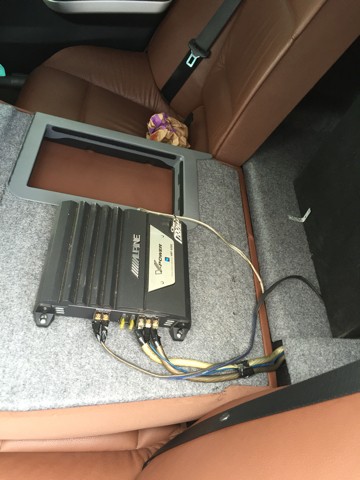 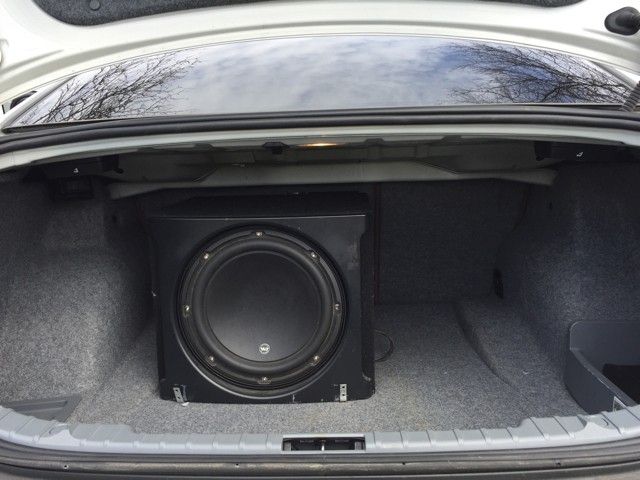 ------ Comments ------ 4/3 Turbo Time.... Turbos are in! Now I just gotta get through this 500 mile clutch break in period. Here is a quick teaser video Well after waiting patiently and gathering a heap of parts it is finally time to get the install going. I will be dropping my car off Monday night to do the following: -Turbo Install (Frankenturbo F21Bi) -Clutch Install (Spec Stage3+ w/ SMF) -Rear Main Seal -Oil Cooler Gasket -Accessory Belt and Tensioner -034 Engine and Trans Mounts Its going to be a fun summer! 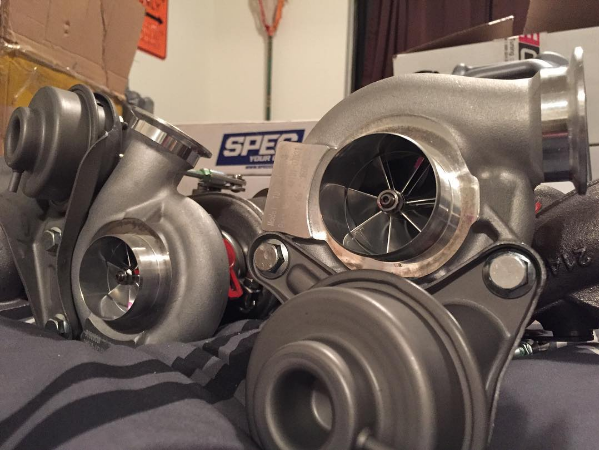 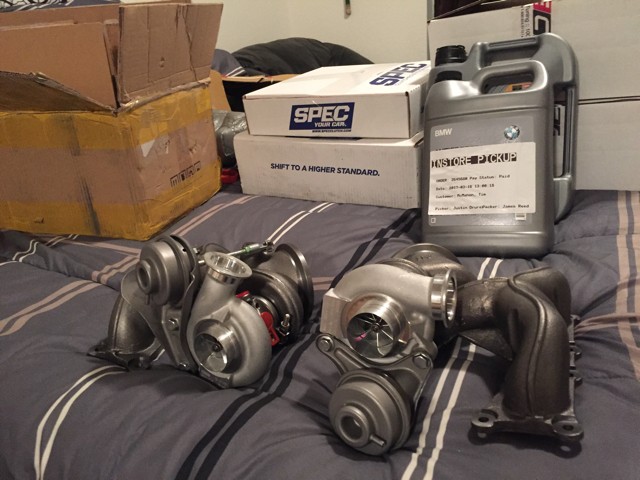 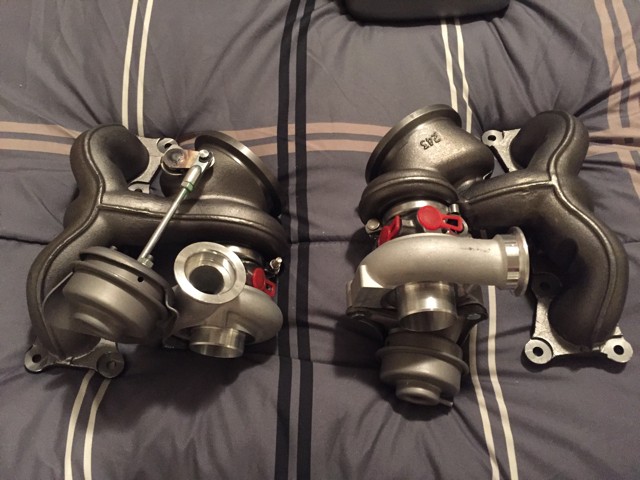 ------ Comments ------ 3/17 My Winter Projects After trying the Carly tool and being unsatisfied I decided to learn how to code. I finally got a new laptop and was ready to make it happen. I followed some excellent threads on this forum and after setting up my environment (downloading and installing programs, linking them together, all in the instructions) it was actually quite simple. This thread was the building blocks of my learning process http://www.e90post.com/forums/showthread.php?t=1222277 After getting my laptop setup, I hooked up the batter charger and off to the races. I referred to this youtube video for the actual coding process Some things that I coded! -AHL Disable (what prompted this whole thing) since my modules failed -Bulb Check and Voltage Monitors turned off (All) since I have all LEDs for everything. -Corner Delete Mod -Seatbelt Chime disable -Window/Sunroof close via key fob -Fogs w/ high beams -Cluster Backlight always on 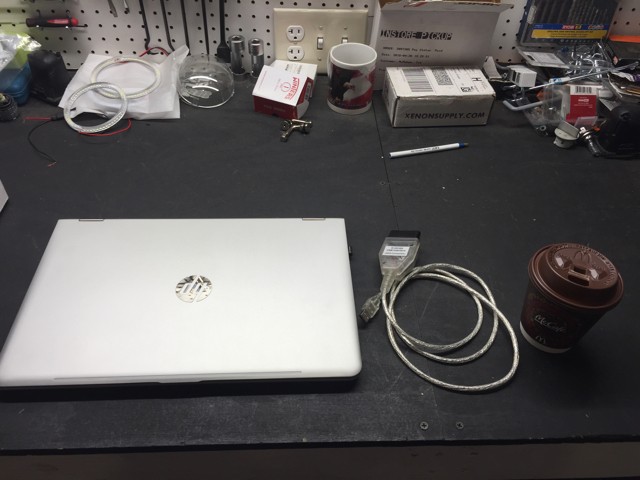 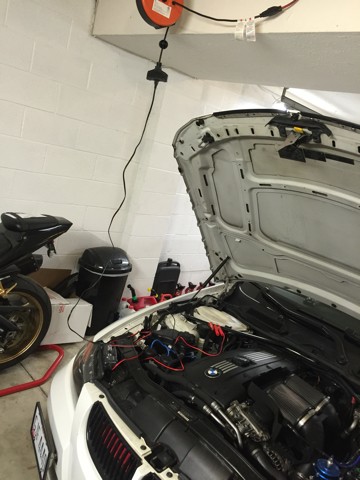 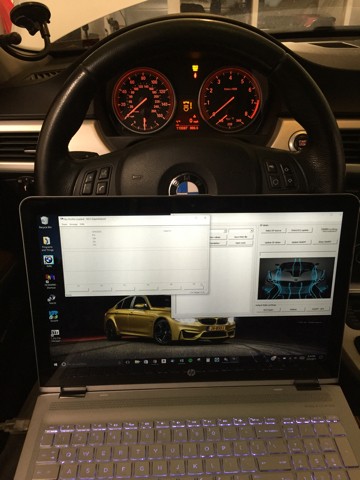 Next I decided to install some parts I got for Christmas The tuner motorsports pedals look and feel great and the zhp shift knob, well that just speaks for itself. 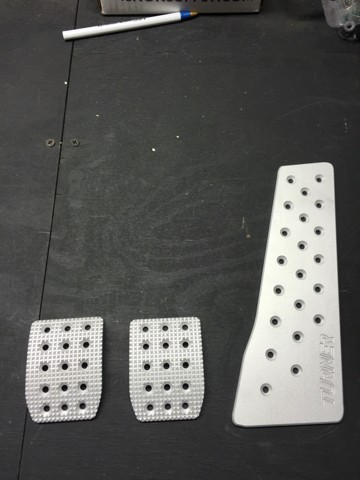 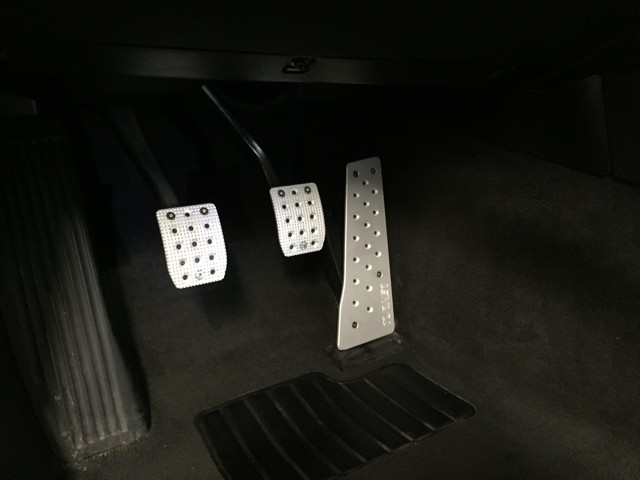  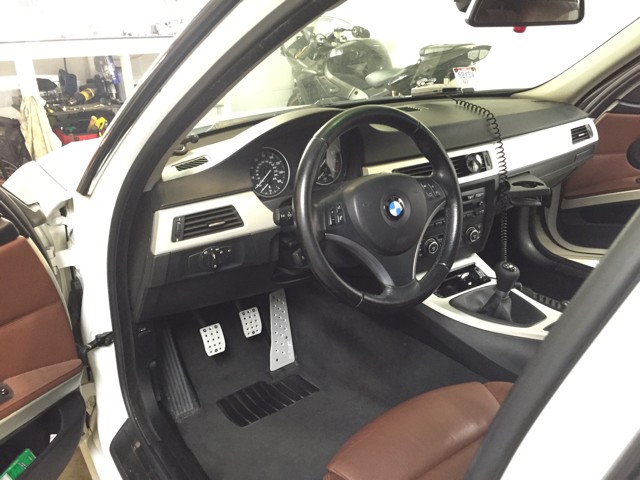 Next I needed to do some MORE suspension work...Like I haven't done enough in the past 6 months. New powerflex rear upper shock mounts, which are a fantastic improvement. My oem ones, even though new when I put the coilovers in, got shredded and the washer was hitting the metal lip on the trunk side making a clicking sound Needless to say, the powerflex mounts solved the problem and the rear end feels and sounds much better. 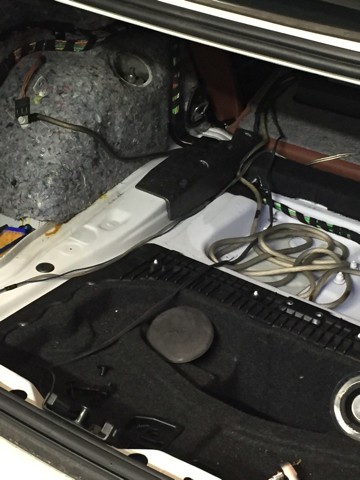 Next was to do my drivers side front thrust arm as the ball joint boot ripped. Put a new OEM one in and off to the alignment shop!  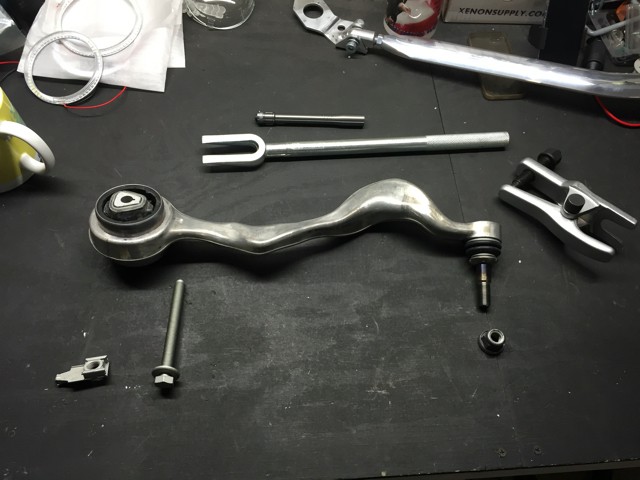  Unfortunately during the removal process I broke my torx bit, so off to SEARS I went. Warrantied out the torx bits and couldn't help myself so I bought some much needed gear wrenches and some additional sockets I also got a sweet ceramic space heater so my garage was a nice temp for working 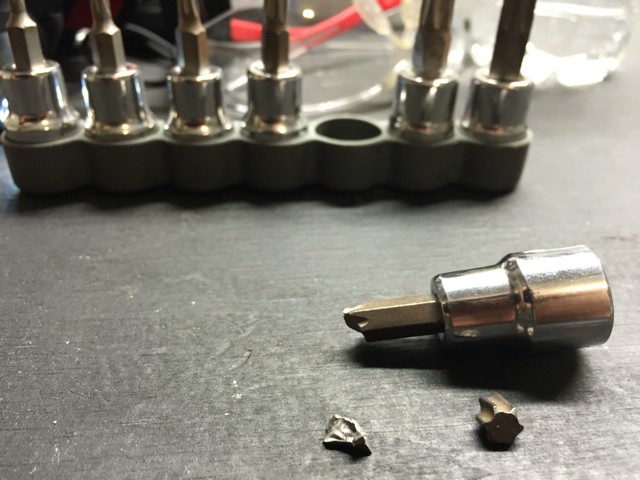 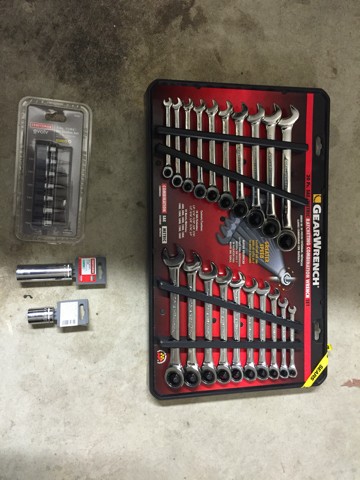 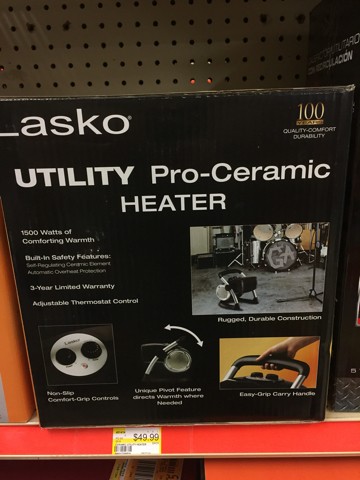 As you can see from my last update, I replaced my solenoids and all vaccum lines except for the solenoid to turbo. Well that fixed my no boost issue but then I started to get a 30FE overboost code After doing some research people say the lines from solenoids to turbos can get cracked and the minute changes in pressure due to those cracks can cause the 30FE code. So I went back in there and replaced the solenoid to turbo lines with the silicone lines. I also noticed a small boost leak AGAIN (I could feel it and hear it) so I figured it was good time to pressure test my intake system and vacuum lines again to make sure everything was holding up. After making some sweet and much more effective tools (2nd time around...) the testing went great! 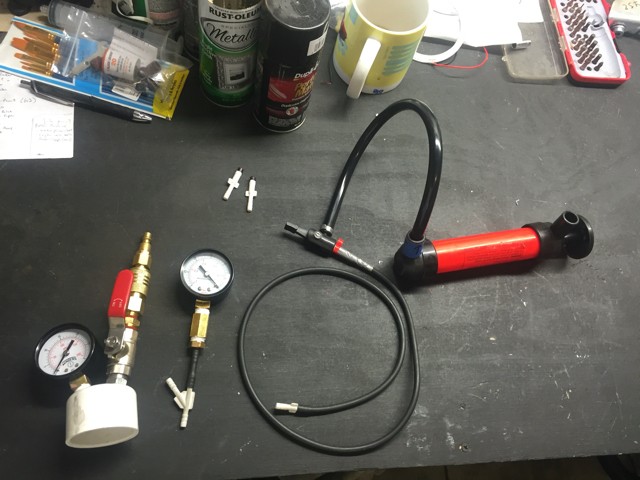 Turns out my charge pipe o-ring was bad and the fitment on the ECS charge pipe to throttle body isnt the greatest. I got a new o-ring and use a little red rtv and it sealed up perfectly! I still get a 30FE overboost code every now and again but I'm gonna table that for now so I don't go crazy. NEXT UP! Clutch and Turbos. Spec Stage 3+ w/ SMF 034 Engine Mounts and Trans Mounts New Oil Feed and Return Lines Gaskets and Hardware for days Accessory Belt and Tensioner Kit Turbos.....Stay Tuned 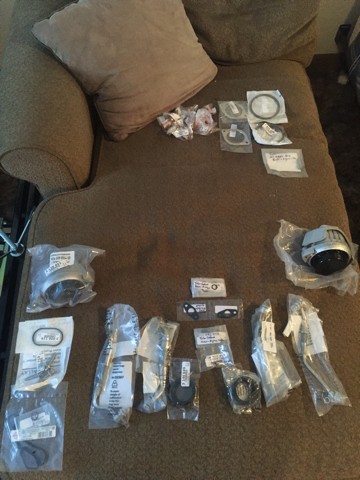 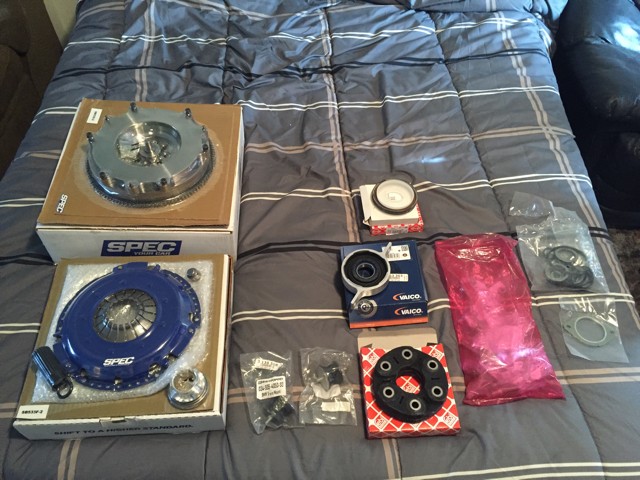  I also picked up a Turner Motorsports Strut Bar. Since I am going with the blue/black/polished theme in my engine bay I am thinking of getting the three strut bars (triangle) powder coated in blue to match the TiAl. I will keep the hardware and bracket polished I think.  Oh and I will get to this eventually... 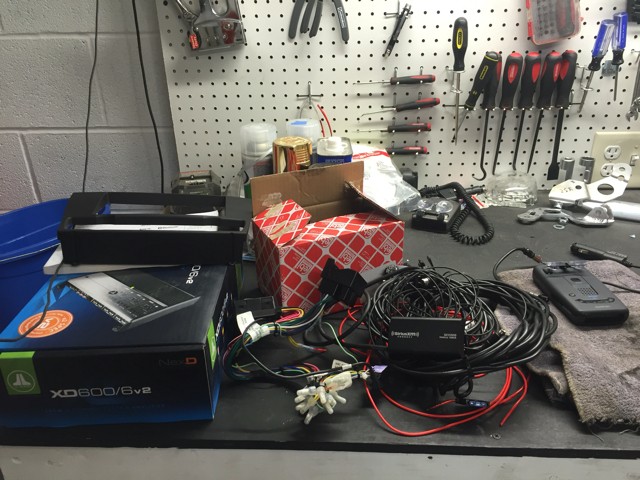 P.S. Imageshack.us is wayyyy better than photobucket (<-- they got some serious tech issues right now). I think I may have to pay for imageshack though ------ Comments ------ 11/8 So after I got my suspension all dialed in I stopped modding it and just enjoyed it for a while. Eventually my solenoids stopped working so my boost went out and I parked my car. I did some vacuum testing (how i found out my solenoids were bad), did some boost pressure testing (found a large leak at my charge pipe due to no o-ring at throttle body ) and figured out what I needed to do to get it back on the road. Here is my friend and I replacing the solenoids and changing out all the vac lines to silicone. 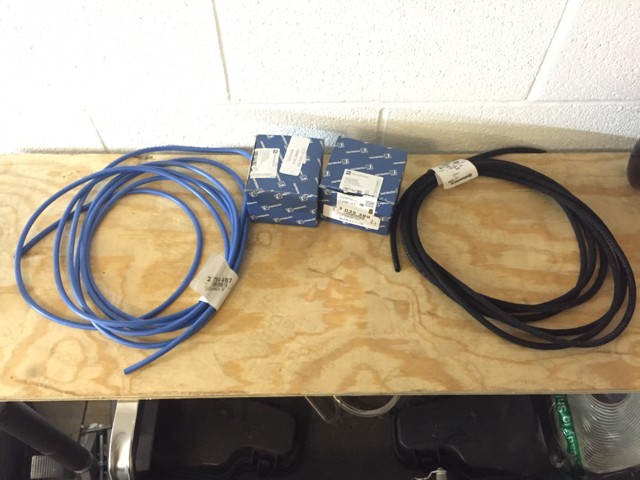 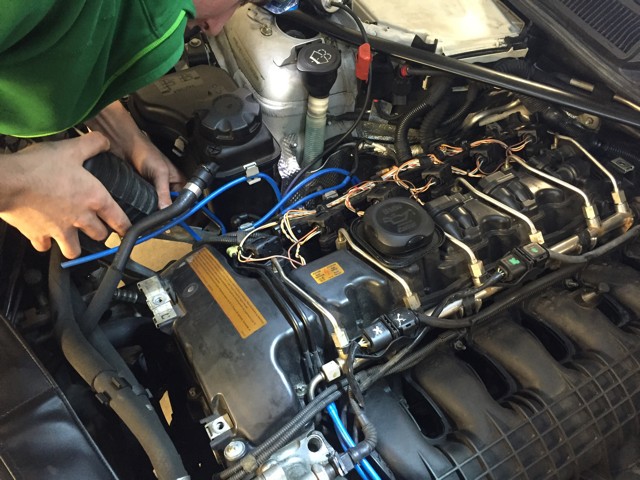  All Done   Before this I finally pulled the trigger on a 7" VRSF Intercooler and did the install with my friend. Did some trimming and installed it with the optional upper charge pipes VRSF sells. Also removed my front bumper grille and trimmed the bottom tabs off for aesthetics   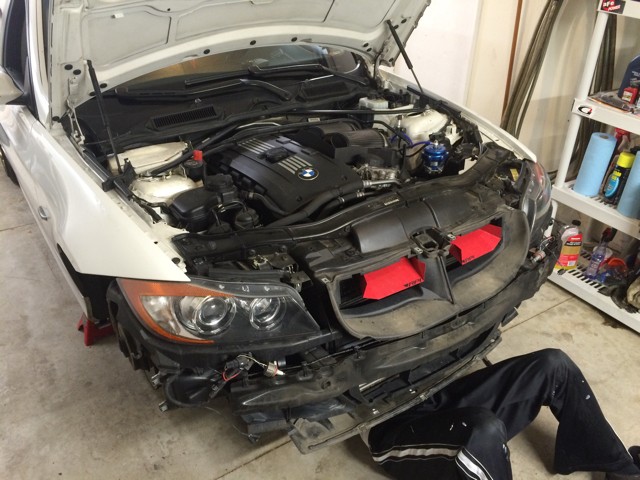 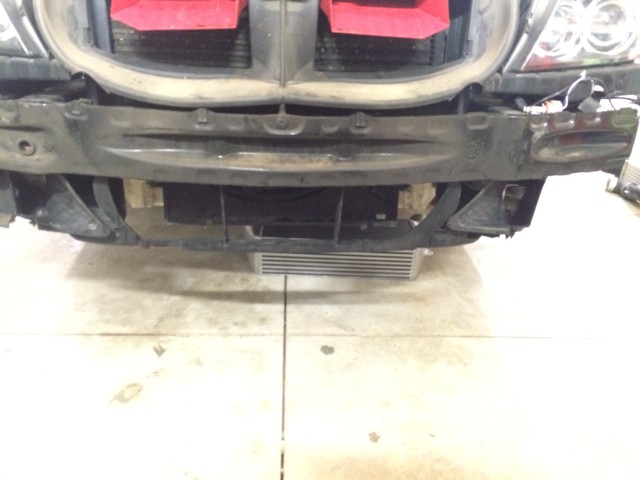    Now that that is done, it was time to make some serious progress on my headlights. My first dremel broke so I went out and bought the real thing! Dremel 4000 is awesome for anyone looking to buy one. Soon after, black and decker sent me a replacement which I will keep as a backup.  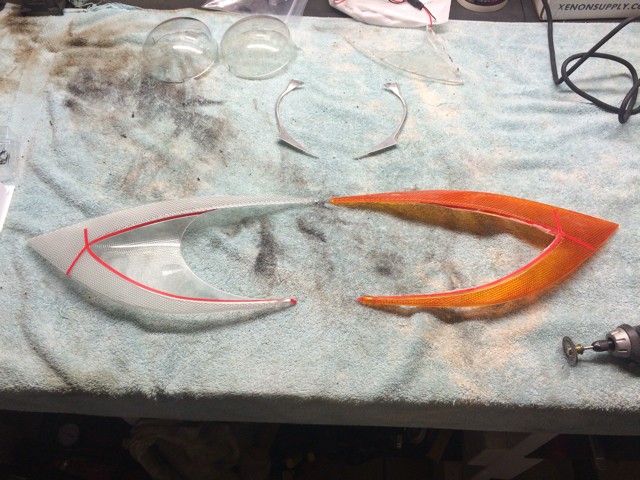 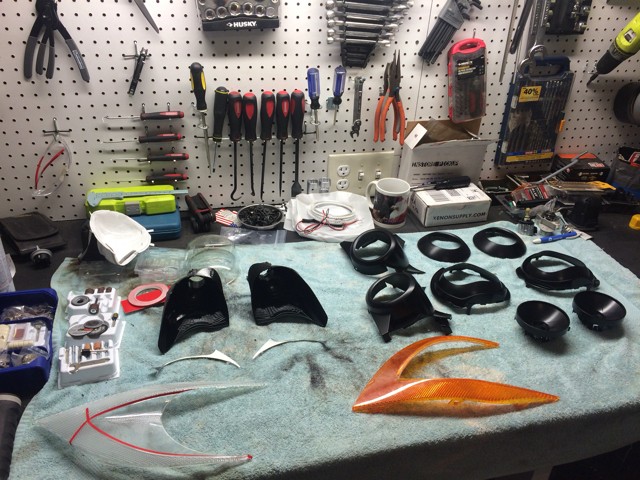 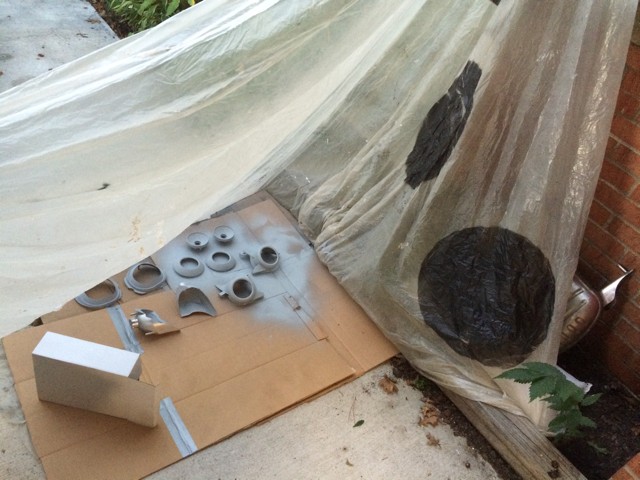  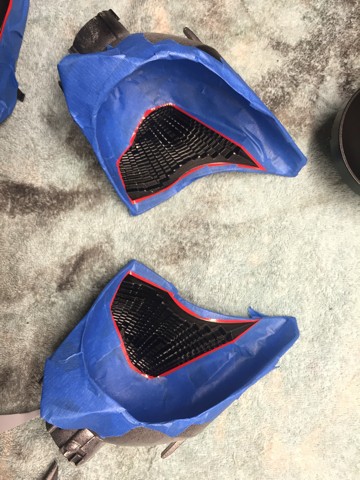 The last few that are still taped off, I will be doing some gold accents to match my wheels. Should turn out nice! 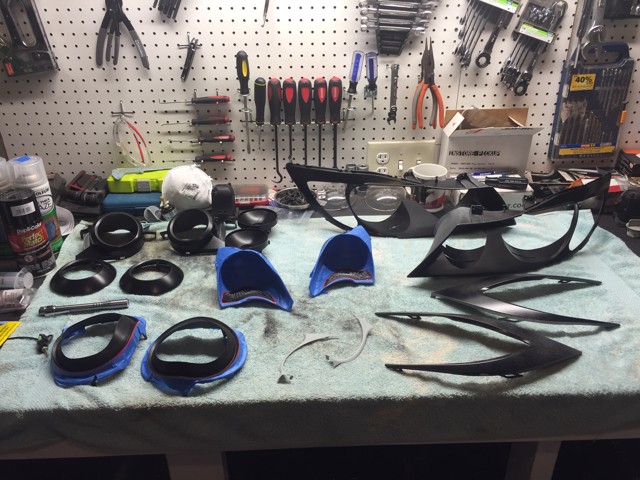 My makeshift paintbooth has evolved... 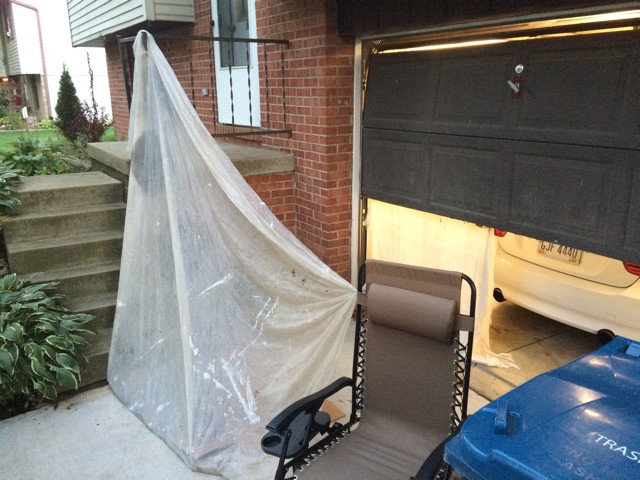 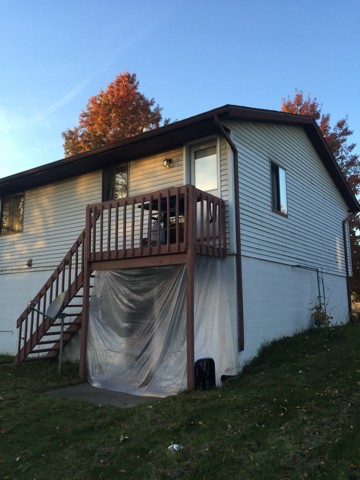 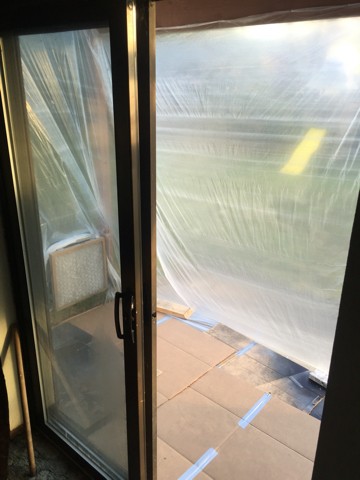  A little sneak peak for next season... 1st piece of my body upgrade... 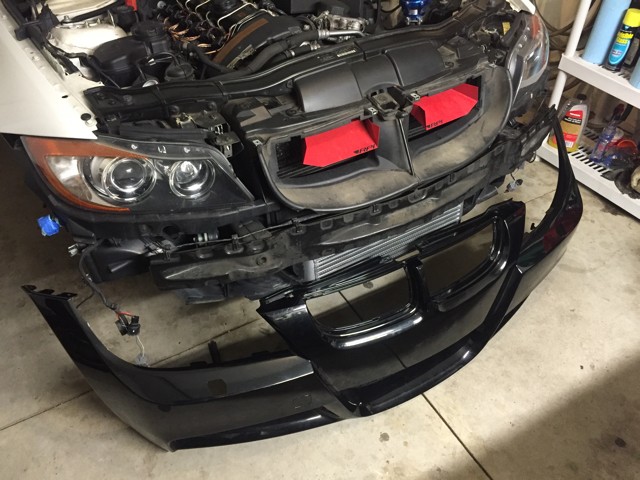 More to come.... 5/26 Almost done dialing in my suspension....end links were too short so my h&r sway bar was hitting my subframe added adjustable turner links, raised it up a little bit and now its good! 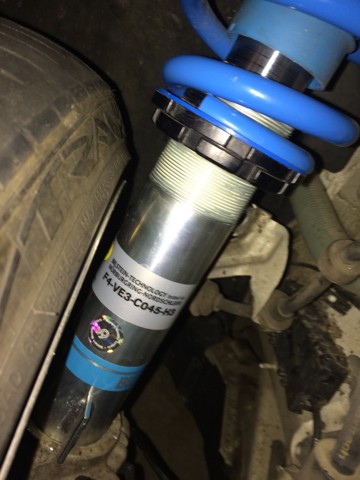 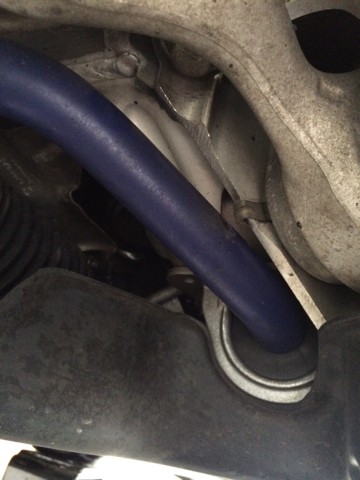  Headlight project is finally commencing! Used a heat gun on the first headlight (sucked), tried the dremel method on the second one and wayyyy easier. Getting there.... 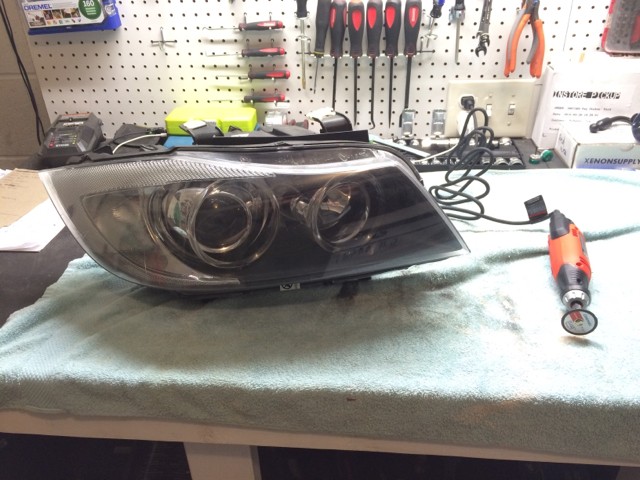 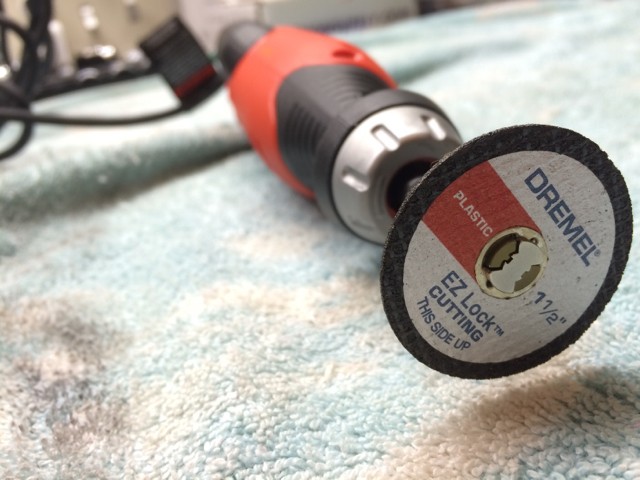 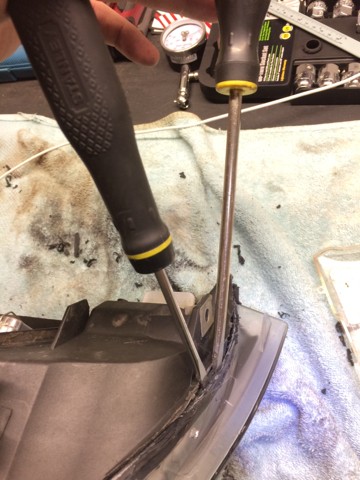 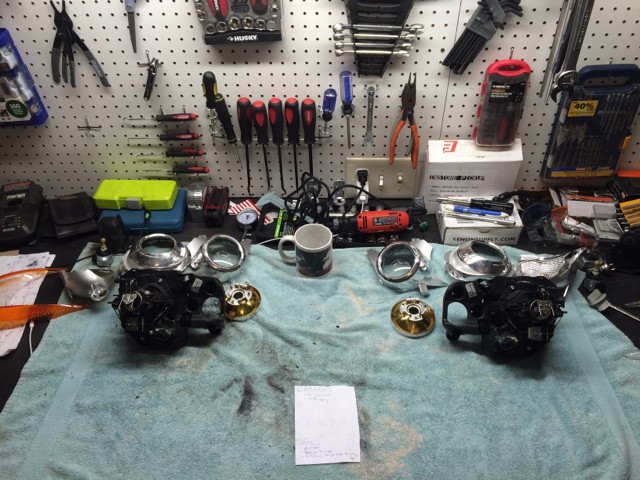 Car audio soon to come... Currently have a single 12" JL W3v3 but time to get the head unit and and give my speakers some real power and adjust ability 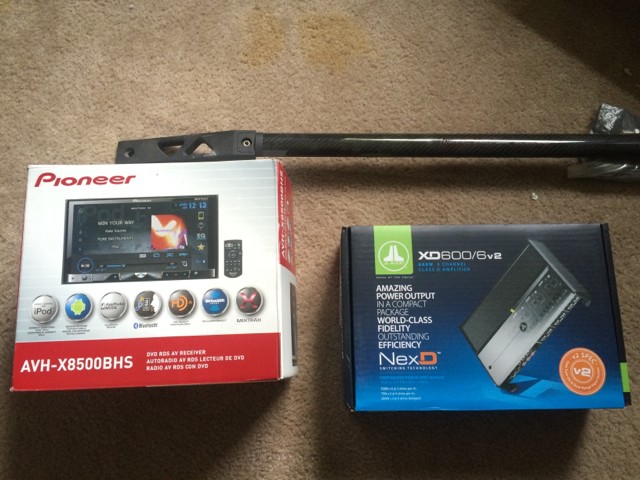 New revision on JB4 had my throttle acting weird so did a back end PUMP flash. Back in order and hitting some respectable boost levels at 17lbs 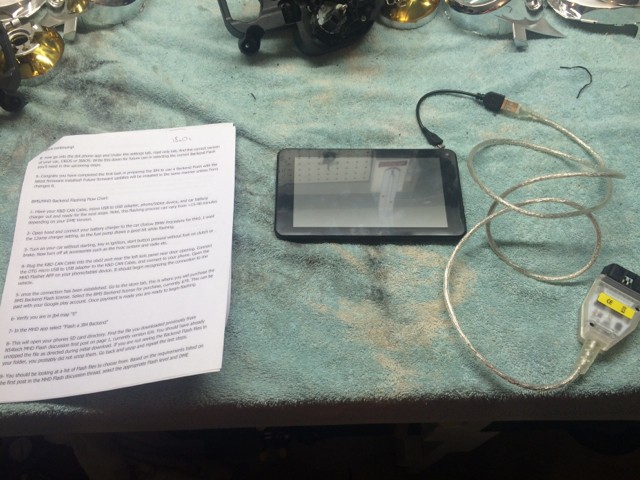 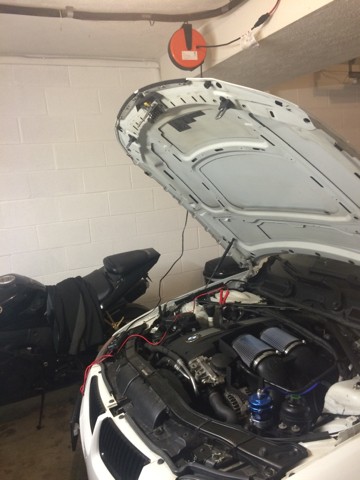 5/13 First car show of the year, Superfly Akron! A couple shots from my photographer friend don xu Go to pg2 for a bunch of shots of the show and my crew's cars 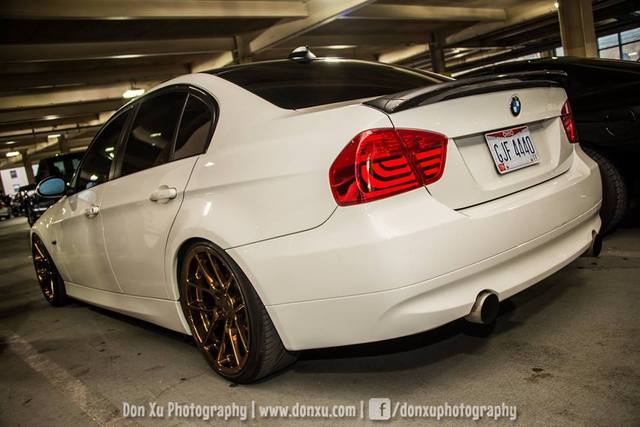  5/5/16 Well decided to ditch the Megan coilovers as I was having some issues and went with Bilstein PSS B14 Coilovers and the quality is second to none (coming from KWs on my last car). I wound it down all the way leaving one thread on each corner. Gonna put a small spacer in the rear and it should sit perfect Will do some before and afters once I detail my car this weekend. 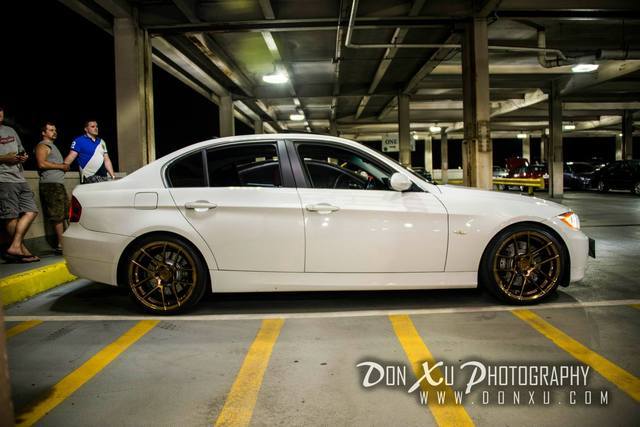 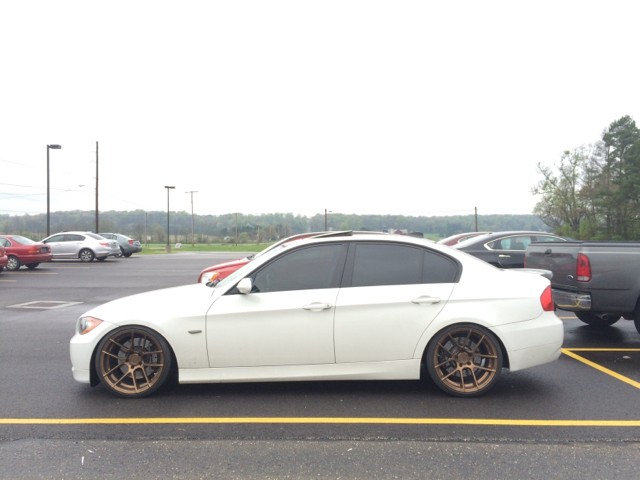    Megan Racing Crap... don't even get me started on their customer service.  4/11/16 This may peak a little more interest Summer wheel mode engaged. Avant Garde M510 (Bespoke 3 - Liquid Polished Bronze) 19x9.5 ET30 Square Set Vredstein Ultrac Sessanta 235/35R19 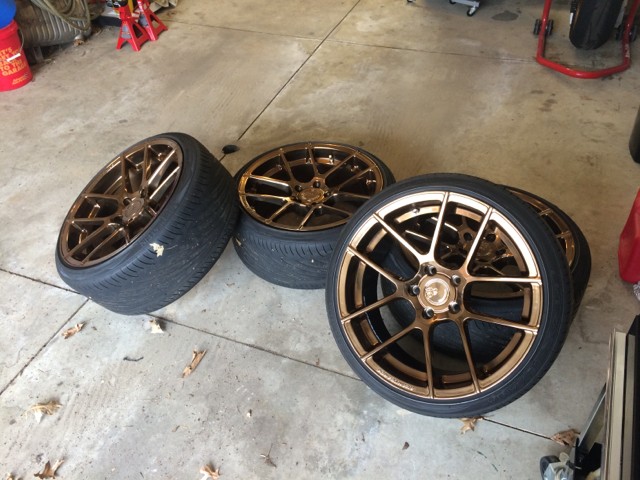  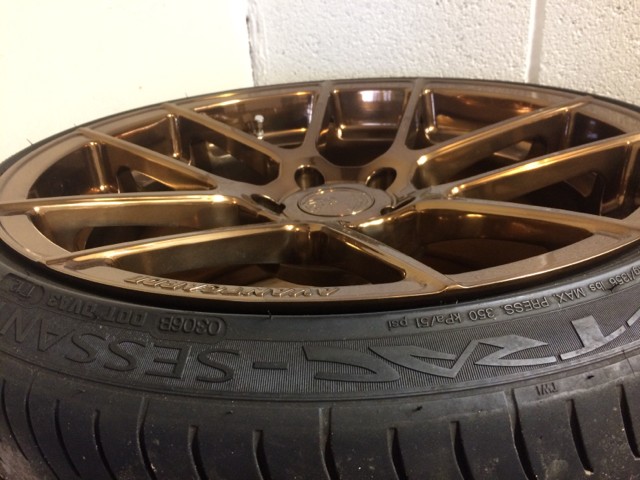 Winter to Summer mode  Sorry the car is all washed out, you cant see the wheels that well with reg exposure 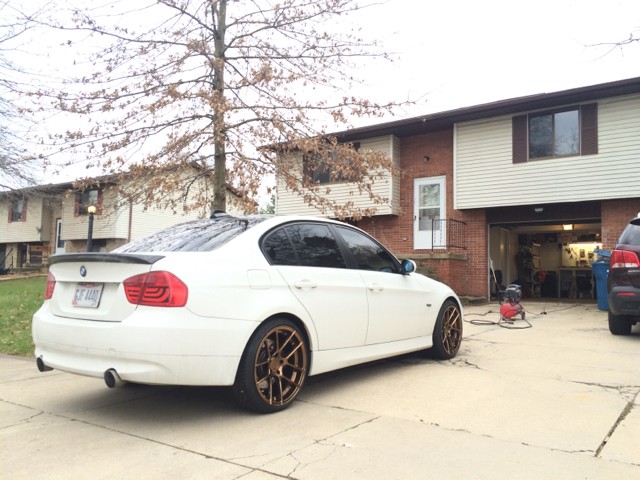 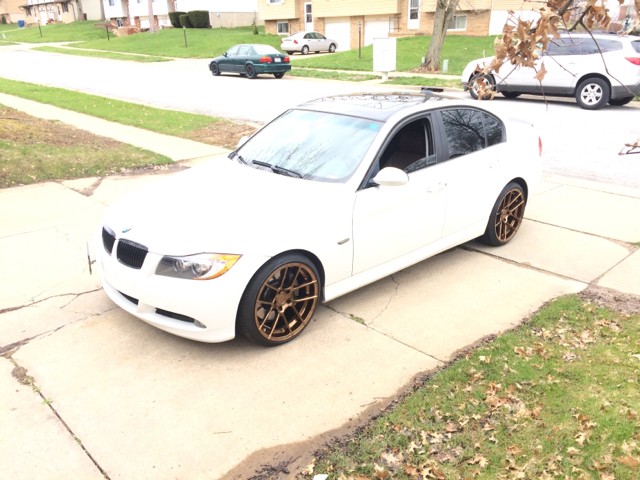 Also installed my 2-step, dp fix and JB4 bluetooth module. I bought the Speed Limit Defeat but cant figure out the install, the instructions are super vague. 4/3/16 Cowl delete done (waiting on conversion, seeing how I like this first) and new intake filters 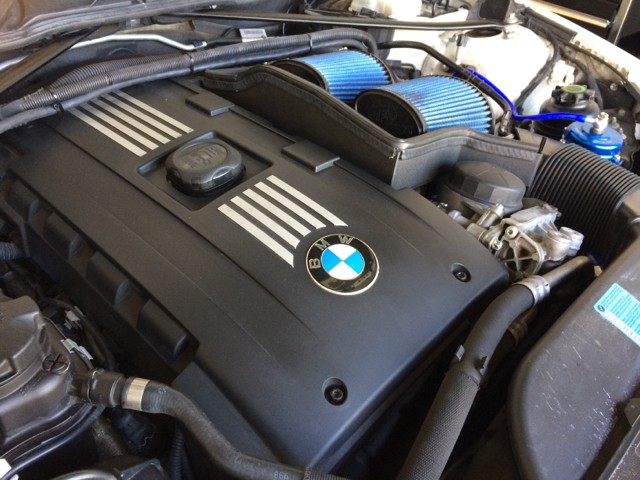  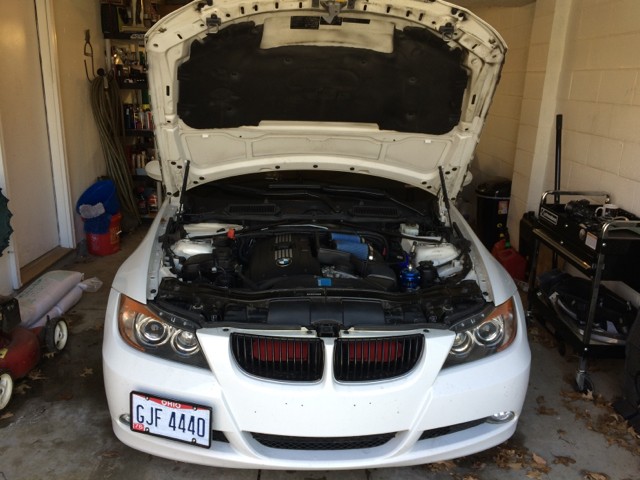 3/26/16 Still waiting on parts for the cowl conversion so next up, 100k maintenance and vrsf downpipes! Did manual trans fluid, diff fluid and coolant. The downpipes sound amazing with my muffler delete... 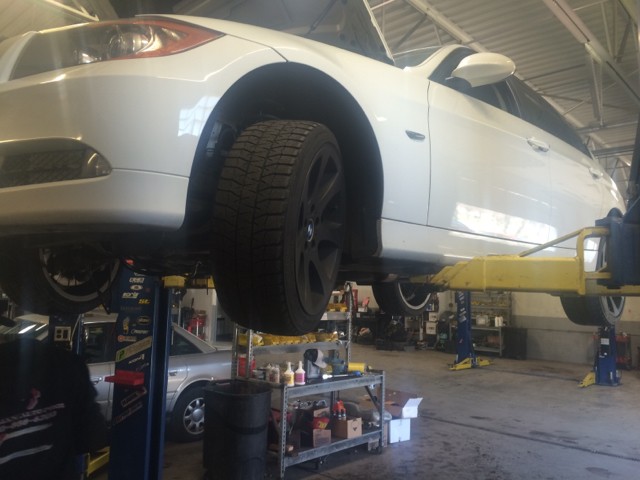 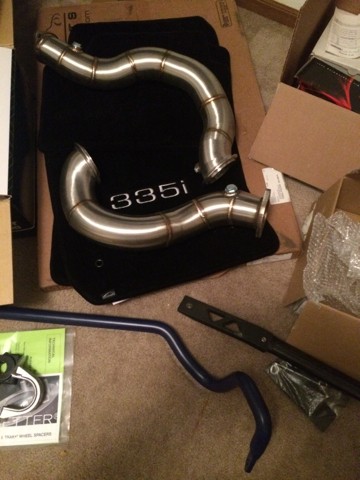 First step, installed my ECS CP w/ Tial BOV... Last edited by Tim603; 09-19-2019 at 12:47 PM.. |
|
Appreciate
0
|
| 05-26-2016, 01:33 PM | #32 | |
|
Colonel
815
Rep 2,869
Posts |
Quote:
http://www.ebay.com/itm/Red-Clear-LE...5ToPyX&vxp=mtr That is a good idea about using laminx to make them all red like the LCI lights. I can't believe there aren't a cheaper "LCI Style" taillight in all red for the pre lci sedans.... MARS makes an all red LCI style, but they are like $350!!
__________________
2019 X3 m40i:Carbon Black:Executive:Premium:Adaptive:Vernasca:699M:HK: Ambient:IND trim:M Mirrors:15mm spacers:Maxton lip:20% tint windows/pano:dsg paddles:TLG mudflaps
2008 328i E90 Jet Black:6MT:RWD:Premium:Sport:Xenon:MTEC V3 AEs:Front Splitters:CF spoiler:19" VMR FF v710 |
|
|
Appreciate
0
|
| 05-26-2016, 01:47 PM | #33 | |
|
Colonel
483
Rep 2,283
Posts |
Quote:
Those look like them! Here is my thread i mentioned. http://www.e90post.com/forums/showthread.php?t=1060227 Yeah the laminx worked out pretty well and yea I hear you, still way cheaper than going to LCI lol
__________________
|
|
|
Appreciate
0
|
| 11-08-2016, 11:56 AM | #34 |
|
Colonel
483
Rep 2,283
Posts |
.
__________________
Last edited by Tim603; 07-28-2017 at 11:34 AM.. |
|
Appreciate
0
|
| 11-08-2016, 01:15 PM | #35 |
|
Colonel
483
Rep 2,283
Posts |
.
__________________
Last edited by Tim603; 07-28-2017 at 11:34 AM.. |
|
Appreciate
0
|
| 11-08-2016, 01:29 PM | #36 |
|
Colonel
483
Rep 2,283
Posts |
.
__________________
Last edited by Tim603; 07-28-2017 at 11:34 AM.. |
|
Appreciate
0
|
| 11-08-2016, 01:45 PM | #37 |
|
Colonel
483
Rep 2,283
Posts |
.
__________________
Last edited by Tim603; 07-28-2017 at 11:35 AM.. |
|
Appreciate
0
|
| 11-08-2016, 02:07 PM | #38 |
|
Colonel
483
Rep 2,283
Posts |
.
__________________
Last edited by Tim603; 07-28-2017 at 11:35 AM.. |
|
Appreciate
0
|
| 03-16-2017, 02:28 PM | #39 |
|
Colonel
483
Rep 2,283
Posts |
Technical Difficulties
__________________
Last edited by Tim603; 03-16-2017 at 03:04 PM.. |
|
Appreciate
0
|
| 03-16-2017, 02:29 PM | #40 |
|
Colonel
483
Rep 2,283
Posts |
Technical Difficulties 2
__________________
Last edited by Tim603; 03-16-2017 at 03:05 PM.. |
|
Appreciate
0
|
| 03-16-2017, 02:52 PM | #41 |
|
Colonel
483
Rep 2,283
Posts |
.
__________________
Last edited by Tim603; 07-28-2017 at 11:35 AM.. |
|
Appreciate
0
|
| 03-16-2017, 02:59 PM | #42 |
|
Colonel
483
Rep 2,283
Posts |
More technical difficulties
__________________
Last edited by Tim603; 03-16-2017 at 03:05 PM.. |
|
Appreciate
0
|
| 03-16-2017, 03:03 PM | #43 |
|
Colonel
483
Rep 2,283
Posts |
.....tf
__________________
|
|
Appreciate
0
|
 |
| Bookmarks |
|
|


